Installing Manjaro on Parallels with Apple Silicon

Yusuke Izumi
Posted on January 25, 2024
I recently purchased a Mac Mini 2023 (M2 chip) and tried to run Manjaro using Parallels, but realized that installing Manjaro ARM was not as straightforward as Manjaro (x86_64). I discovered a great blog post by Andreas Gerlach, through a Japanese article, but their approach used UTM instead of Parallels and had a limitation around kernel upgrades. I found no document on the internet explained how to install Manjaro ARM on Parallels, so I sorted out the installation steps on my own.
Before You Start
Manjaro ARM looks to be tuned for low-end computers, such as Pinebook and Raspberry Pi. It comes with less packages initially installed and some settings sub-optimal for desktop use. You should expect to install additional packages and tweak config to set up Manjaro ARM as a desktop. This is particularly true with the GNOME edition: Firefox is not installed by default; windows are maximized without an unmaximize button; Light color mode doesn't seem to work; possibly other caveats. I'd personally recommend you avoid the GNOME edition.
Overview
There are two factors that make the installation tricky:
- Manjaro ARM is provided as raw disk images, not installer ISO images.
- The Setup Program doesn't seem to update the bootloader.
The first point means that we have to “install” the image to the target disk by ourselves. Manjaro Wiki expects users to write the image to an SD card, presumably using another device (PC or Mac), then insert it to the target device. We take essentially the same steps but slightly cleverer: we run Live Linux on the target virtual machine to write the Manjaro image to its hard disk directly, instead of setting up another virtual machine serving as “PC.”
The second point is rather a trap. It's puzzling to see that the virtual machine fails to boot after a successful initial setup. This is less a problem once we are aware; we can update the bootloader with a relatively simple command.
Step-by-step Instructions
-
Obtain a Live ISO of Fedora Workstation.
Open fedoraproject.org on your browser. Scroll down the page to find the editions, then click the Download Now link of Workstation.
Download the Live ISO for ARM® aarch64 systems.
-
Create a virtual machine as if you were to install Fedora from the Live ISO.
Start the Create New wizard. Select Install Windows, Linux, or macOS from an image file.
Select the ISO image file downloaded in the previous step.
Change the name to something that makes sense to you. Optionally you can customize settings before installation, e.g. to set the guest OS type to Other Linux to change the VM icon from the Fedora logo.
-
Start Fedora Workstation Live.
-
Click Not Now to close the installer. We aren't going to install Fedora.
-
Obtain the download URL of a Manjaro ARM Linux image.
Click the Activities button at the upper-left corner of the screen, then click Firefox in the Dock.
Open manjaro.org from the address bar, then navigate to the Download page. Choose ARM for the architecture and Generic EFI for the device option.
Warning: Make sure to choose Generic EFI. Generic (non-EFI) doesn't work with this installation method.
Note: Alternatively you can pick an image from GitHub Releases, where you can also find older releases and dev builds.
Click Download of the edition of your choice, then right click the Image button and click Copy Link.
Warning: Do not download the image using browser. It will fail for out of disk space or, in the worst case, hang the system. Remember that we are using Live Linux and that the local storage exists on memory.
-
Download the image and write it to the VM's hard disk.
Click the Activities button, then click Show Apps (the icon with nine dots). Find Terminal from the app list and click it.
Run the command below to download the image and write it to the hard disk on the fly. Substitute
<PASTE_LINK_HERE>with the link you copied in the previous step.wget -O - <PASTE_LINK_HERE> | xzcat | sudo dd of=/dev/sda bs=4M
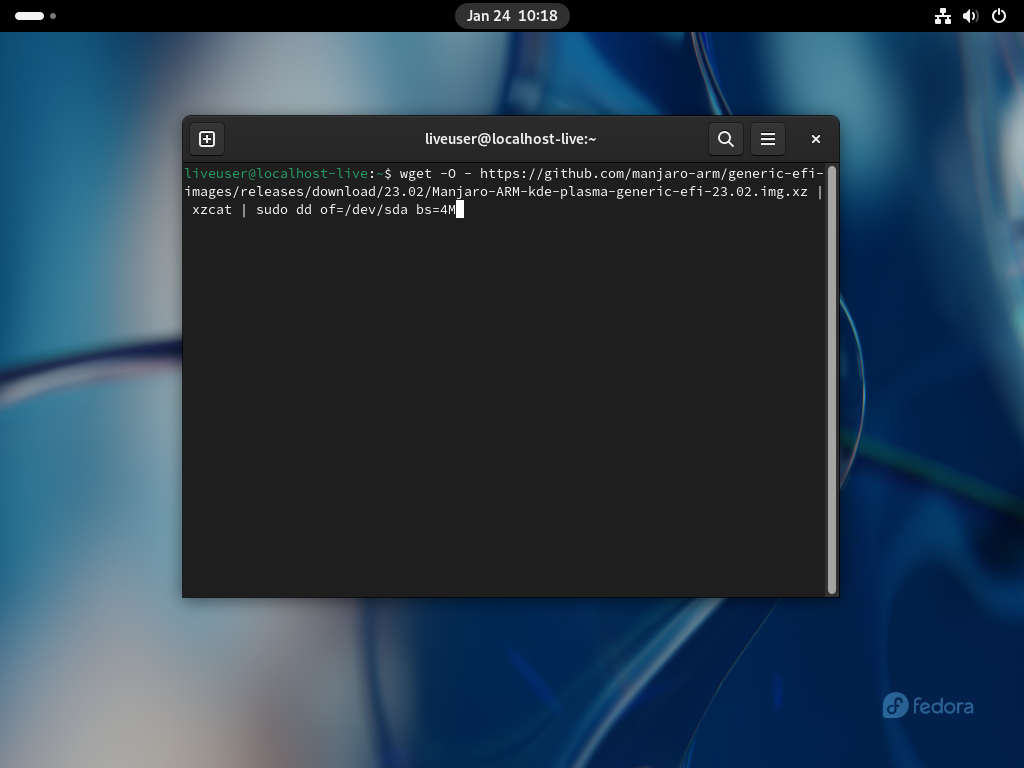
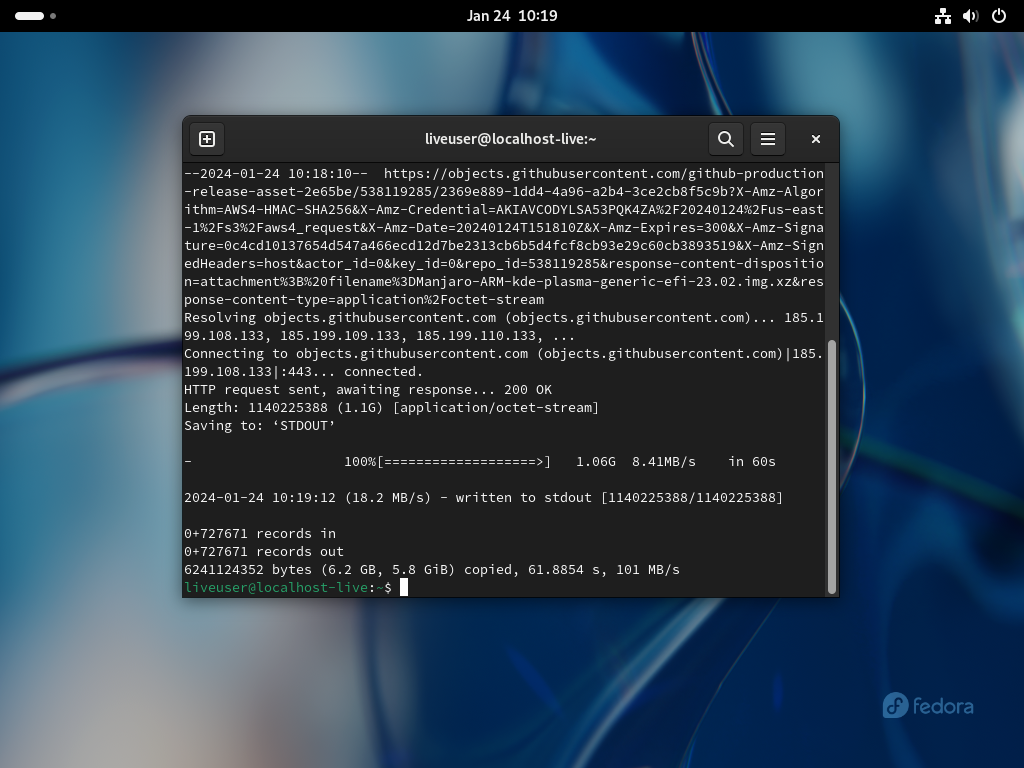
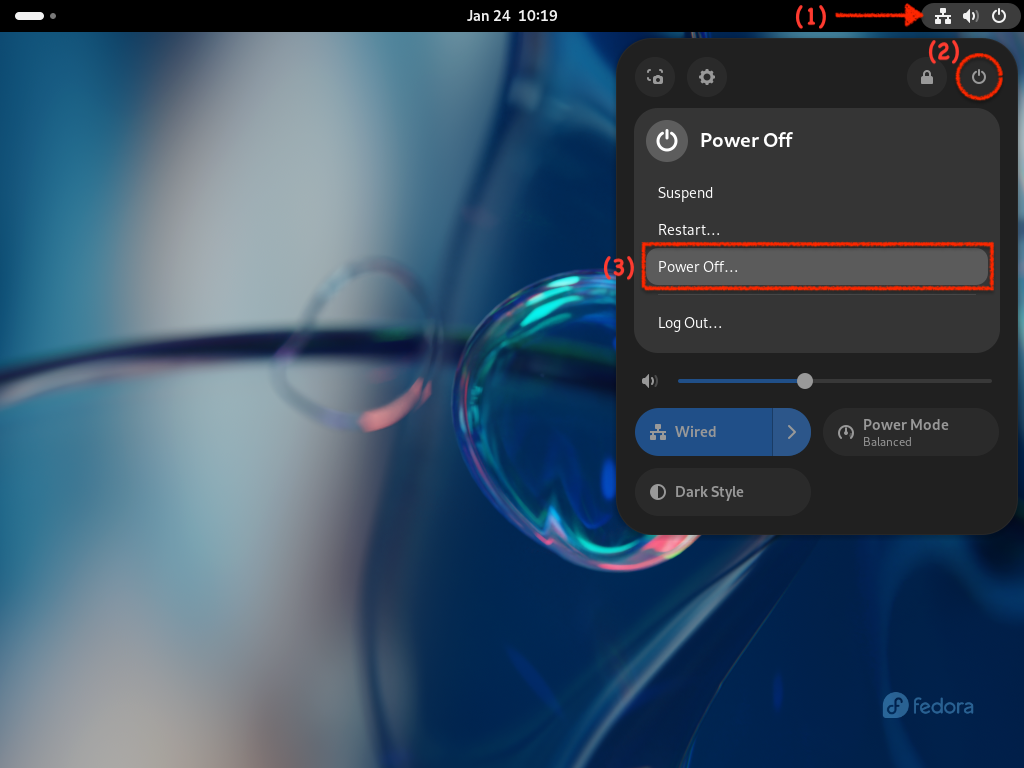
7. Now the image has been installed to the VM's hard disk; we don't need Fedora anymore. Click the power icon at the upper-right corner of the screen. Then click the power icon inside the popup and click **Power off...** to shut down the virtual machine.
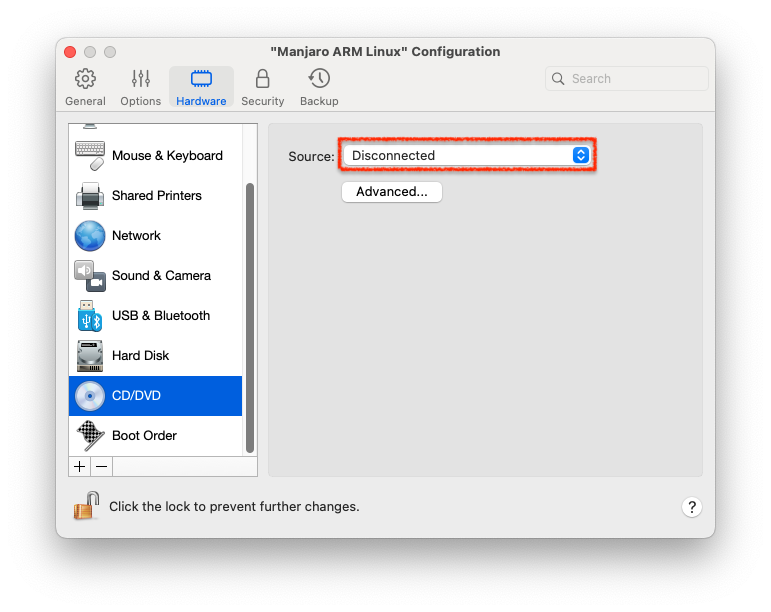
Open the configuration dialog ([details][kb/117287]). Open the **Hardware** tab, choose **CD/DVD** on the left pane, and change **Source** to **Disconnected**.
8. Start the virtual machine again. Proceed to **Manjaro ARM Setup**.
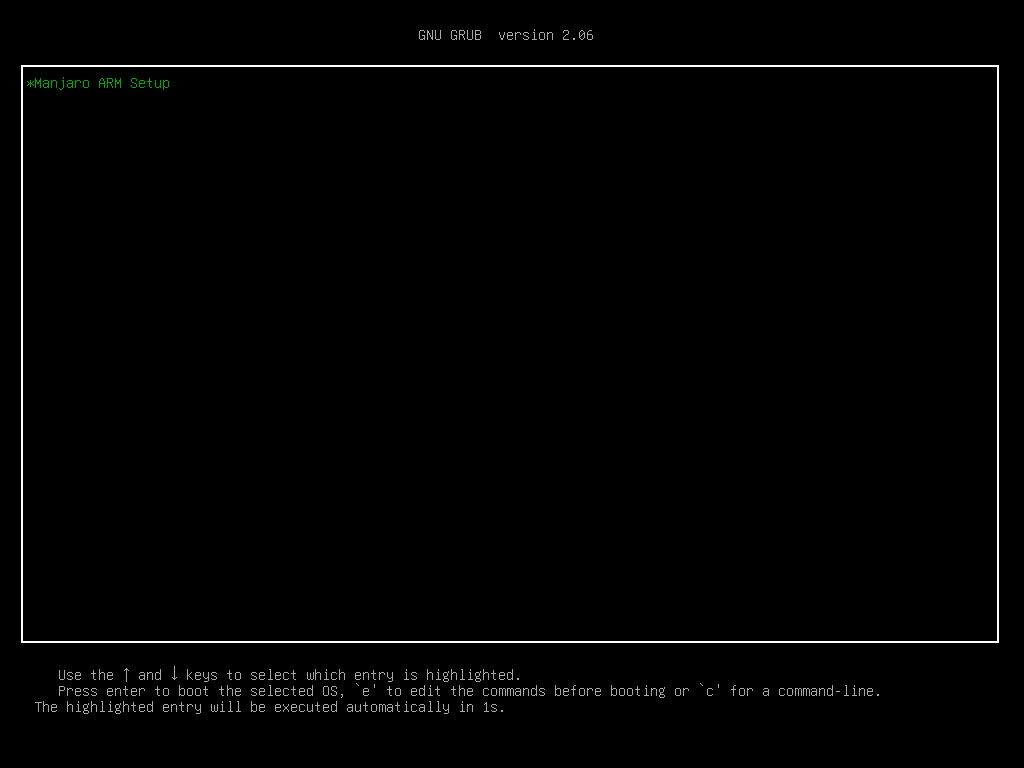

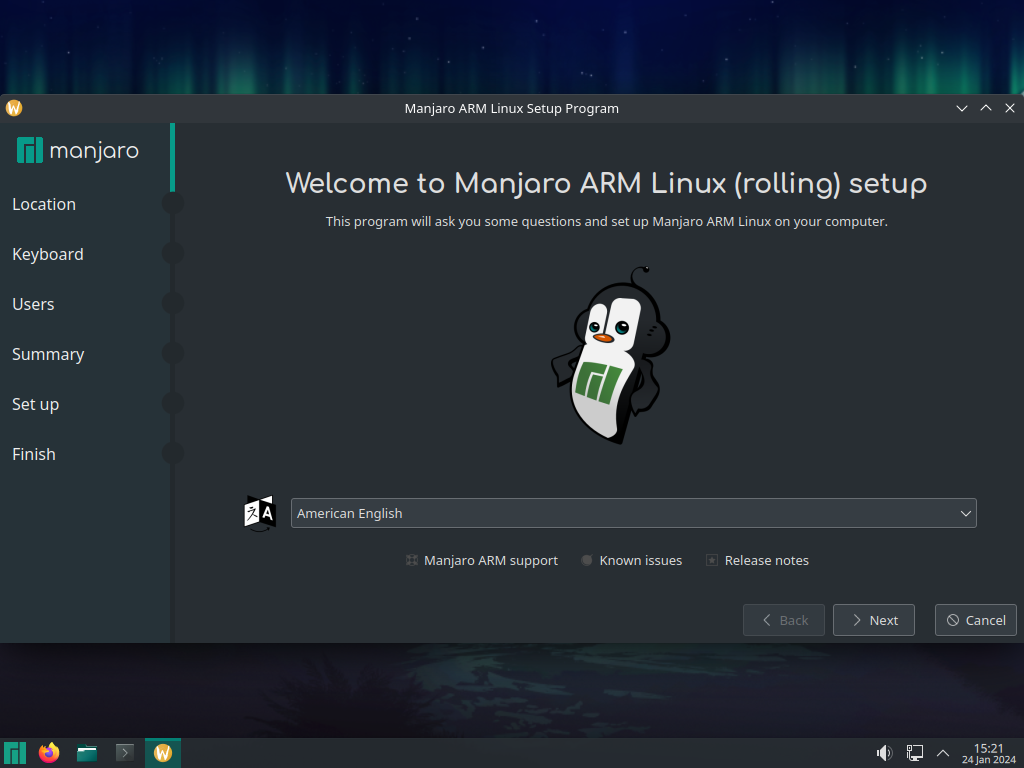
9. Go over the Setup Program process to set your locale, timezone, keyboard layout, username, hostname, and password(s) …
… up to the **All done** screen. _DO NOT RESTART_ your system yet!
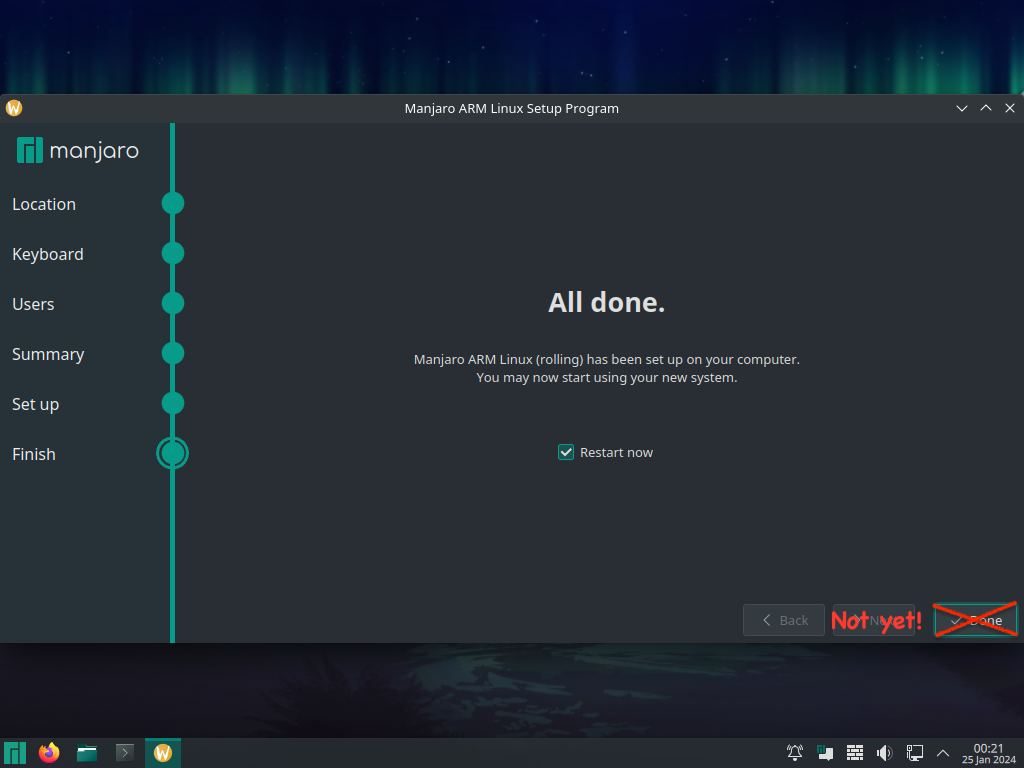
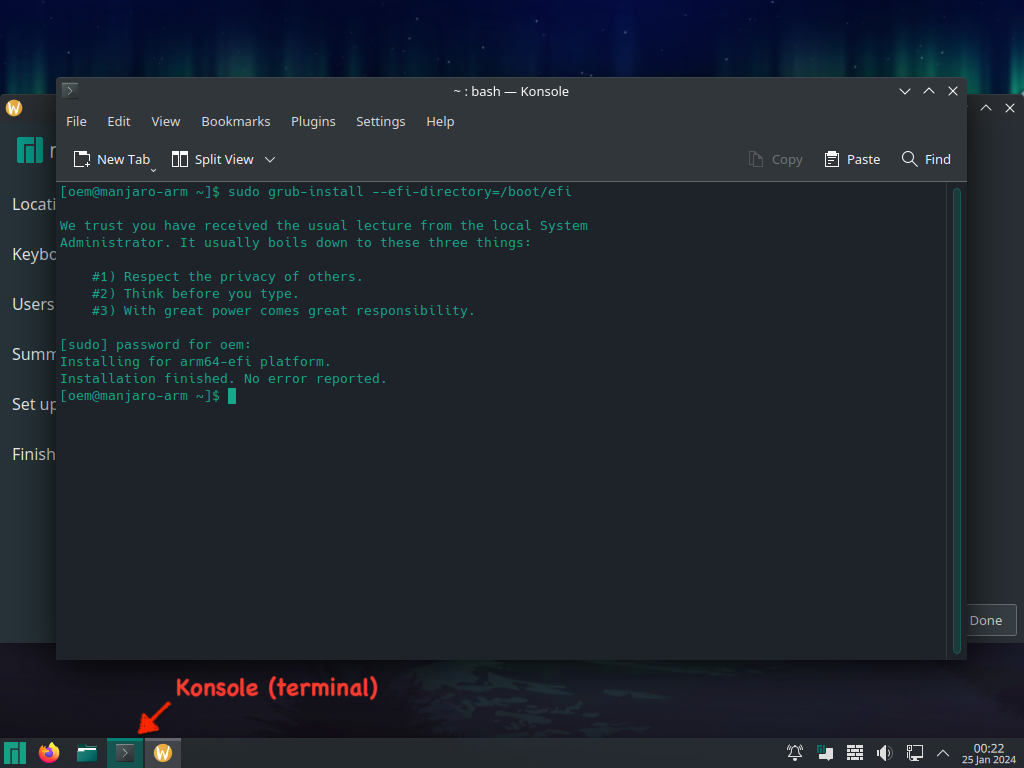
10. Update the bootloader config.
Open a terminal and run the command below. When asked for a password, type `oem` (same as the username).
```
sudo grub-install --efi-directory=/boot/efi
-
It's safe to restart the system now.
-
Congratulations, your system is ready for use! Start Manjaro ARM Linux.
Log in to the system with your account.
Note: The installation of Parallels Tools is not different from that on x86_64, or other Linux distributions in general. If you want detailed instructions, try Google or any other search engine (example query).

Posted on January 25, 2024
Join Our Newsletter. No Spam, Only the good stuff.
Sign up to receive the latest update from our blog.


