GraphQL & Distributed SQL Tips and Tricks – Aug 10, 2020

Jimmy Guerrero
Posted on August 12, 2020

Welcome to this week’s tips and tricks blog where we explore both beginner and advanced topics on how to combine GraphQL and YugabyteDB to develop scalable APIs and services.
First things first, for those of you who might be new to either GraphQL or distributed SQL.
What’s GraphQL?
GraphQL is a query language for your API, and a server-side runtime for executing queries by using a type system you define for your data. GraphQL allows for fetching, modifying, and subscribing to real-time data updates. Although GraphQL isn’t tied to any specific database or storage engine and is instead backed by your existing code and data, YugabyteDB is a perfect complement to GraphQL, giving you horizontal scalability and global data distribution in a single system. Use cases for GraphQL include microservices and mobile apps. Popular open source GraphQL projects include Hasura and Apollo.
What’s YugabyteDB?
YugabyteDB is an open source, high-performance distributed SQL database built on a scalable and fault-tolerant design inspired by Google Spanner. YugabyteDB is PostgreSQL wire compatible and supports GraphQL along with advanced RDBMS features like stored procedures, triggers and UDFs.
Got questions? Make sure to ask them in our YugabyteDB Slack channel. Ok, let’s dive in…
Can I use Hasura’s scalar computed fields with YugabyteDB?
Yes. A computed field in Hasura that has an associated SQL function and returns a base type is considered a scalar computed field. To illustrate how this can be done in a distributed SQL database, we’ll be using the Northwind sample database running on YugabyteDB in our example. The employees table has two varchar columns: first_name and last_name.
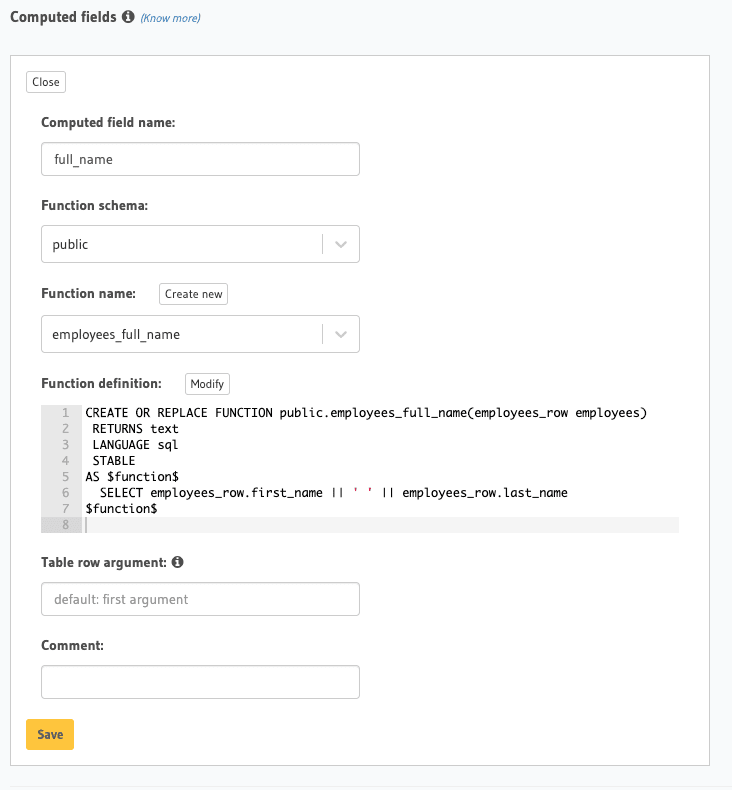
Let’s define an SQL function called employees_full_name:
CREATE FUNCTION employees_full_name(employees_row employees)
RETURNS TEXT AS $
  SELECT employees_row.first_name || ' ' || employees_row.last_name
$ LANGUAGE sql STABLE;
Next, in the Hasura console let’s add a computed field called full_name to the employees table using the employees_full_name function.
In the Hasura console let’s add a computed field called full_name to the employees table
Now we can query the employees table and retrieve the values for full_name.
Does YugabyteDB support Hasura’s Event Triggers so I can be alerted when new data is inserted into a table?
Yes. Hasura has built in support for event triggers which work with YugabyteDB. In this example we’ll trigger an alert to Slack via Zapier whenever a new product is inserted into the products table of the Northwind sample database.
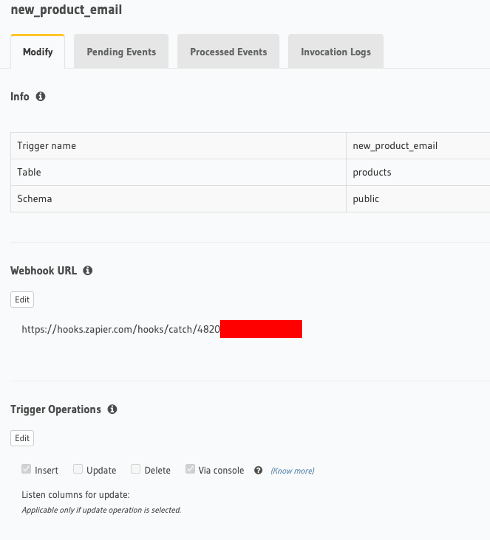
The first thing to do is within the Hasura console, navigate to the Events tab and click on the Create Trigger button. Name the trigger new_product_email and make sure it will go off when inserts are made to the products table.
Note that in the example above, I am using a Zapier catch webhook that ultimately posts the raw body of the message to Slack. You can obviously have different types of webhooks that do things like send email, post to a spreadsheet, and more. For other options, check out Hasura’s “Create Event Trigger” tutorial.
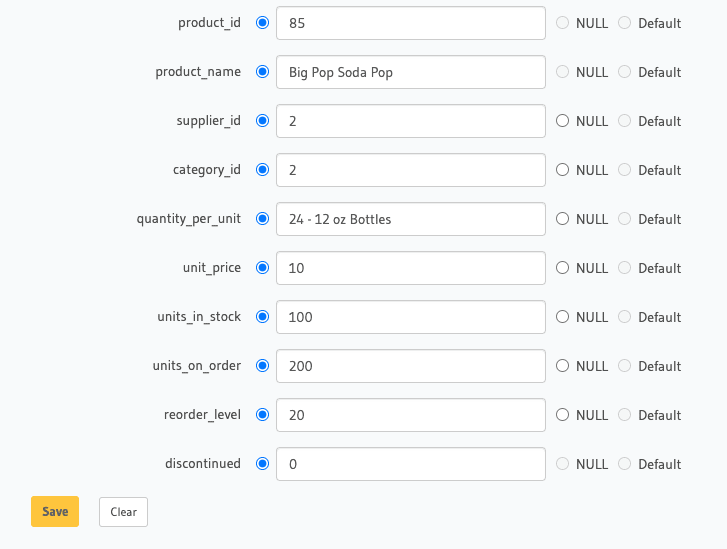
Next, insert a row into the products table.
We should soon see a message like the one shown below post to Slack.
And if we go to Events > Processed Events in the Hasura console, we should see a record of the event trigger.
How can I convert a SQL CONCAT into a GraphQL query that Hasura can use?
In the Northwind sample database we have a table called territories with the following snippet of data.
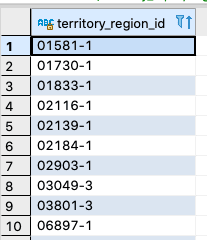
Let’s say we want to create a new identifier that concantcates territory_id and region_id. For example:
select
    CONCAT(territory_id, '-', region_id) as territory_region_id
from
    territories;
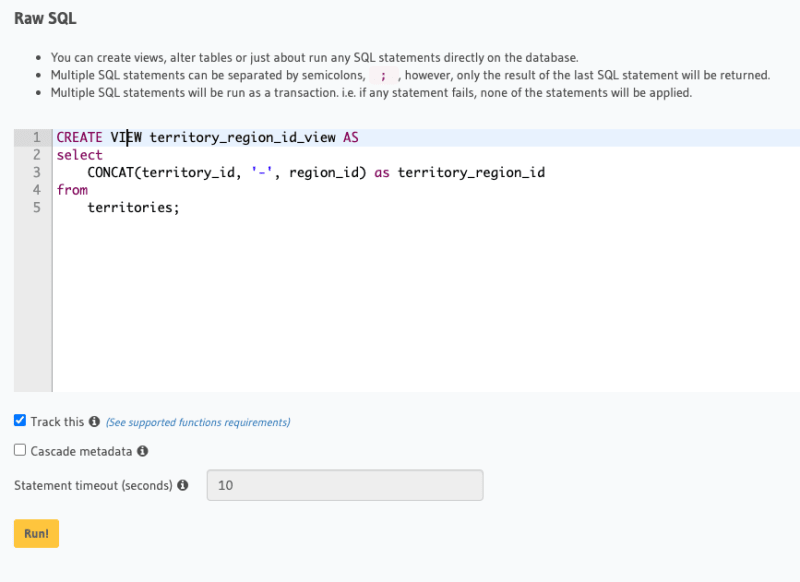
Unfortunately, in GraphQL you can’t natively CONCAT strings. What we can do however is create a view in YugabyteDB and have Hasura track it. For example, within the Hasura console go to Data > SQL and create the following view. (Make sure you check the “Track this” option.)
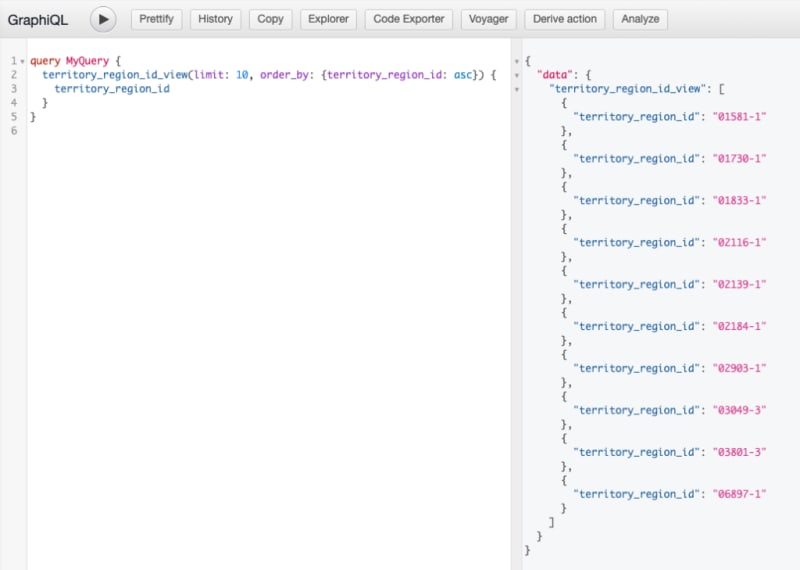
Now we can perform a simple select on the territory_region_id_view with the Hasura console and retrieve the concatenated results.
How can I configure row-level permissions in YugabyteDB using Hasura?
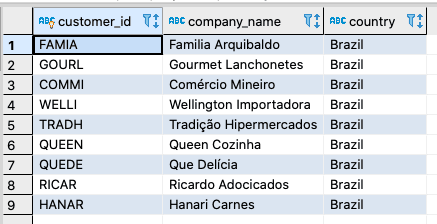
Let’s say we want to limit the access of a given employee so they can only view rows in the customers table where the country column equals ‘Brazil’. For example:
In Hasura, to limit the access to this subset of the rows in the customers table we can use it’s row-level permissions functionality. Row-level permissions are essentially boolean expressions that, when evaluated against any row, determine access to it. These permissions are constructed from the values in columns, session variables and static values to build this boolean expression.
The first thing we need to do is define our access control rules on customers. In the Hasura console navigate to the Data > Customers > Permissions tab. Set up the permissions as shown below.
Notice that our role has been named brazil_sales_rep, our select permissions have a custom check that equals {"country":{"_eq":"Brazil"}}, and we’ve gone ahead and permitted access to all the columns in the customers table.
Now, let’s return to the GraphQL tab and set the following Keys:
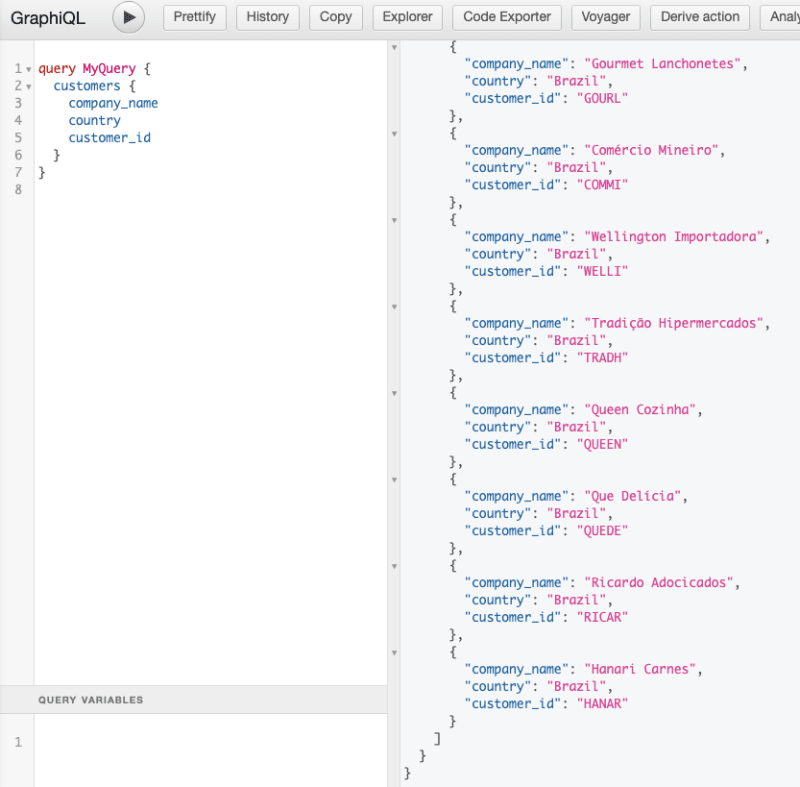
Finally, let’s execute a query against the customers table as brazil_sales_rep.
Notice that the result set is limited to those companies whose country equals "Brazil".

Posted on August 12, 2020
Join Our Newsletter. No Spam, Only the good stuff.
Sign up to receive the latest update from our blog.
