Team Process Customization with Azure Boards

Yemisi Oyesainu
Posted on January 2, 2024

As part of my various blogs on Agile Planning and Portfolio management, I would like to delve into customizing Team process with Azure Boards here.
In Azure DevOps, there are two types of processes. One is read only while the other is inherited processes. The Read only processes are core system processes which can not be customized. They are Scrum, Agile and CMMI. Inherited processes are created based on core system processes but they can be customized. Several team projects can reference a single customized process such that any updates or changes made to such process will also be updated on all the team projects that referenced the process. Both new and existing projects can reference a newly created inherited process.
The following steps will demonstrate how to create an inherited process from Scrum (a core system process) and customize it.
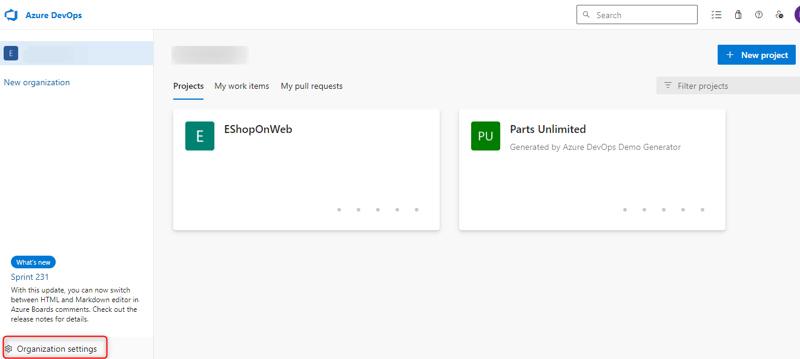
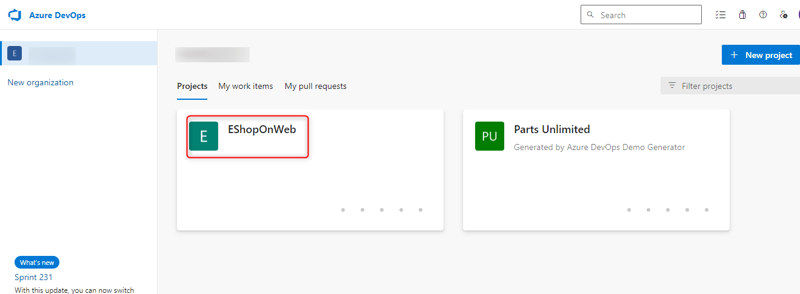
(1)Log in to Azure DevOps and click on the Azure DevOps logo. This will lead to the account root page.
Click on Organization settings
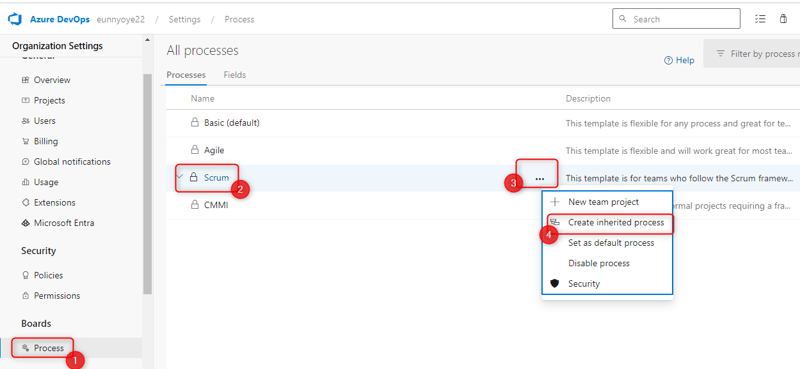
(2)On the Organization settings menu, under Boards, click on Process.
On All processes pane, by the right side of Scrum, click on the ellipsis, and from the ellipsis dropdown menu, select Create inherited process
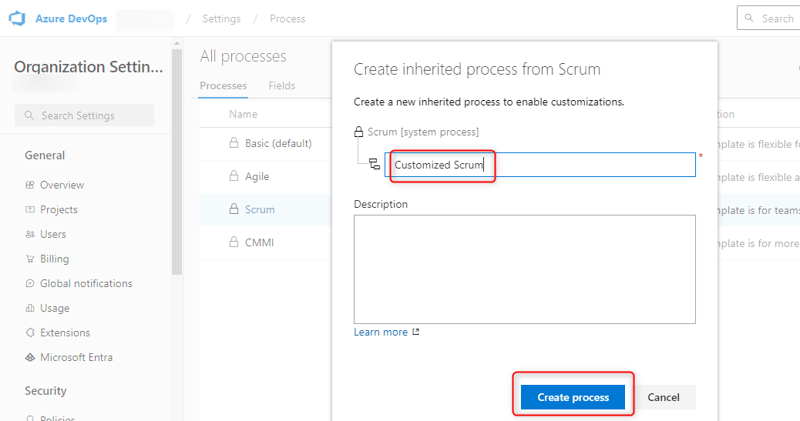
Under the Process name (required) textbox, type Customized Scrum and click on Create process
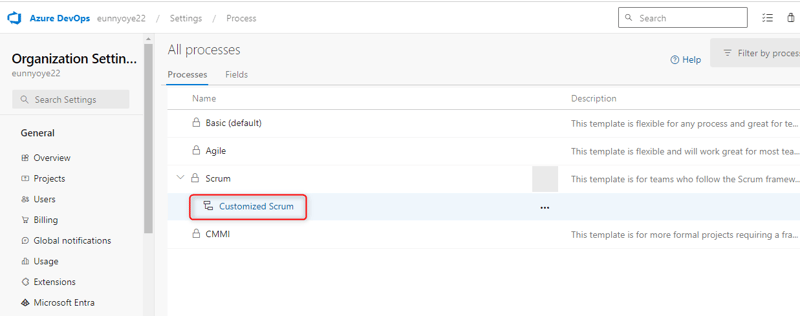
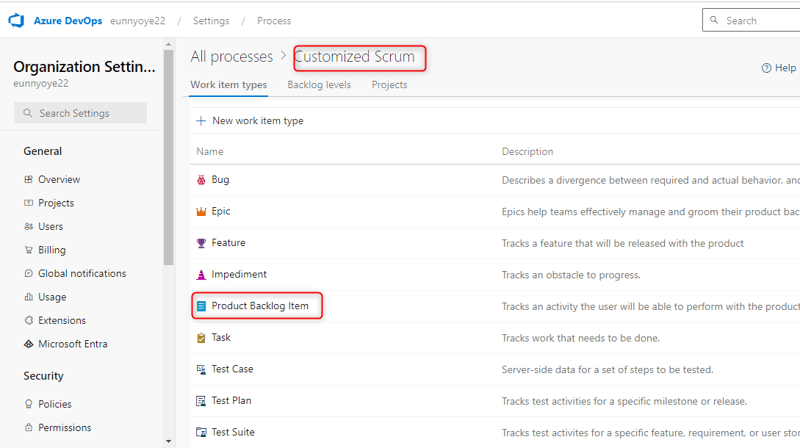
(3)On the All processes pane, click on Customized Scrum entry
Select Product Backlog Item
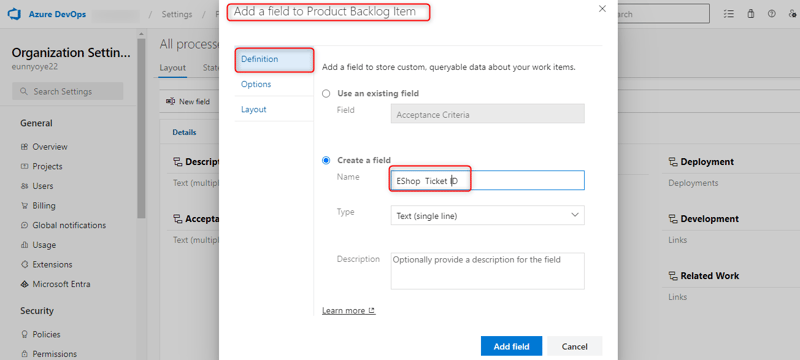
Next, on the Product Backlog Item pane, select New Field
A panel for Add a field to Product Backlog Item will come up. Under Definition, in the Name textbox for Create a field, type EShop Ticket ID
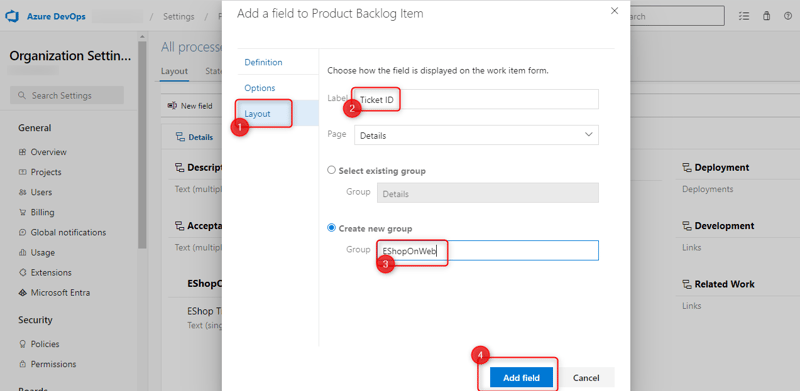
Click Layout on the Add a field to Product Backlog Item panel, in the Label textbox, type Ticket ID,
on the Group textbox, type EShopOnWeb,
then click Add field
(4)Return back to the All processes pane, and select Scrum

The current project, EShopOnWeb, is using Scrum but now we want to change the project process to Customized Scrum.
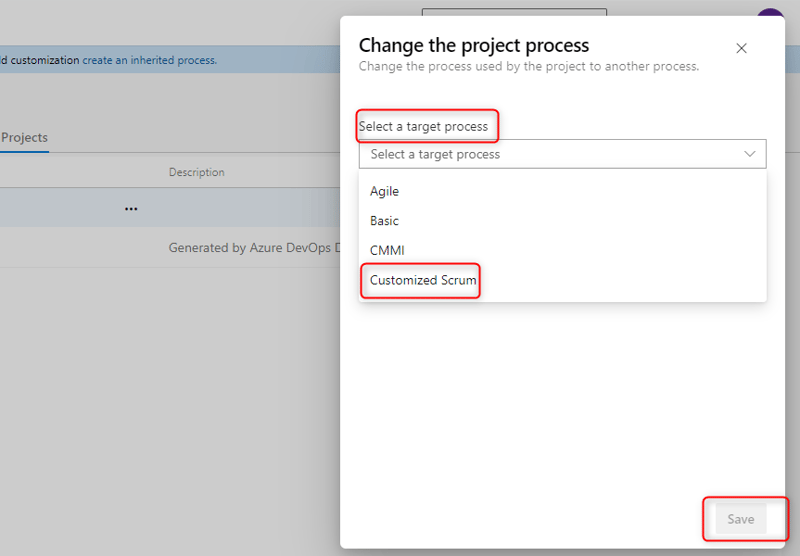
On the Scrum pane, select the Projects tab and on the row having EShopOnWeb, click on the ellipsis and select Change process from the dropdown
In the Select a target process dropdown menu on the Change the project process pane, select Customized Scrum and click on Save as shown in the image below
.
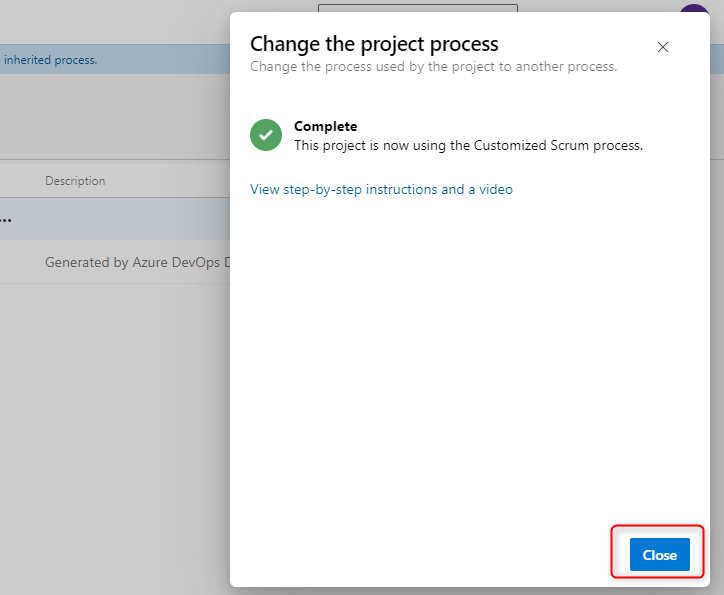
Then click Close when the change is complete
(5)Return back to the account root page by clicking on the Azure DevOps logo and select the EShopOnWeb project
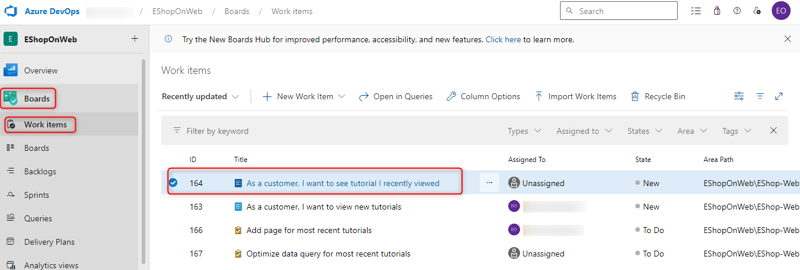
On the page that come up, on the left side vertical pane, under Boards select Work items and click on the first backlog item
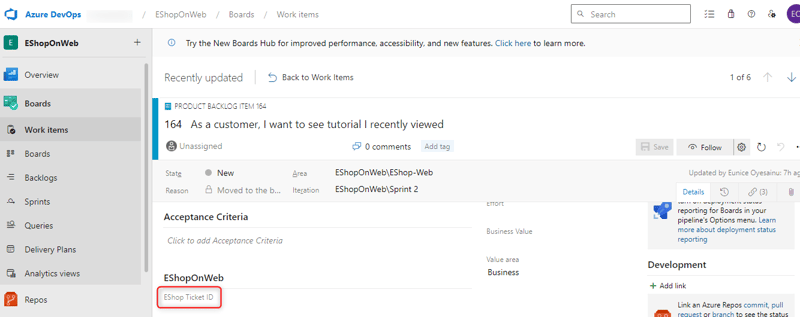
There it is! The Ticket ID that we defined earlier
Hope this is helpful and easy to understand. Please give your feedbacks in the comment section below.

Posted on January 2, 2024
Join Our Newsletter. No Spam, Only the good stuff.
Sign up to receive the latest update from our blog.

