Enhance your Customers' Experience with Sanity's Structure Builder API.

William Iommi
Posted on February 1, 2024

This article assumes a basic familiarity with Sanity Studio and document creation process. Prior knowledge of basic Sanity concepts is recommended for optimal comprehension.
One of the things that makes Sanity so flexible is the ability to have extensive freedom in organizing your content model according to your specific needs.
Through the Structure Tool (formerly known as Desk Tool), you have the possibility to define nested levels within the same document, allowing you to organize the view of your entries as you prefer.
The first example that comes to my mind (and which we will explore in this article) is the management of links, specifically dealing with various types of links.
Introducing the content model
Let's begin by defining our content model.
Imagine we need to manage an e-commerce website.
In our content model, we will have the following document types:
- Product
- Category/Collection
- Editorial Page
All these documents, in addition to their specific attributes, share one attribute that we'll call 'slug,' containing the relative path. This attribute is used to identify the page on our website.
(We're limiting ourselves to these three types, but nothing prevents us from having others based on a slug. For example, a recipe or a blog post...)
We could have, within our slugs, paths like these:
- c/men-shoes → Category
- p/12345 → Product
- /company/our-story → Editorial Page
How do we access these pages? Well, either we have knowledge of the entire product catalog (and its codes) and the entire site map (kudos to those who have this skill 😁), or in most cases, it's the website itself that provides us with a way to access various pages. This can be through a navigation menu or through an editorial banner promoting a specific product.
In all these cases, we are using links that contain the information to redirect to the desired page.
Returning to our content model, let's define a document, which we'll call 'Link,' to manage these redirects.
Defining the Link document
Now, let's identify the fields necessary for our case.
- Label - The label of our link
- Type - Defines the type of link. Possible values are: 'external', 'product', 'category', 'page'
- External Url - Contains the link to an external resource
- Product - Contains a reference to a 'Product' document
- Category - Contains a reference to a 'Category' document
- Page - Contains a reference to an 'Editorial Page' document
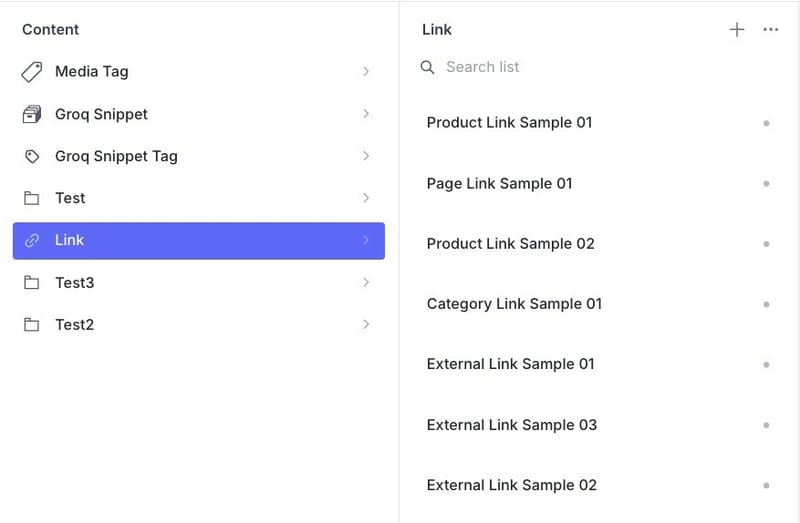
Without specific customizations, the default view of our document is the following:
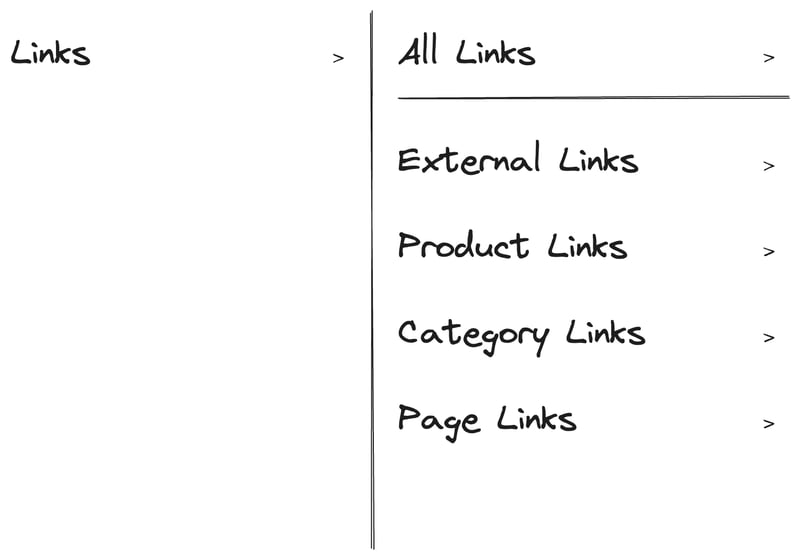
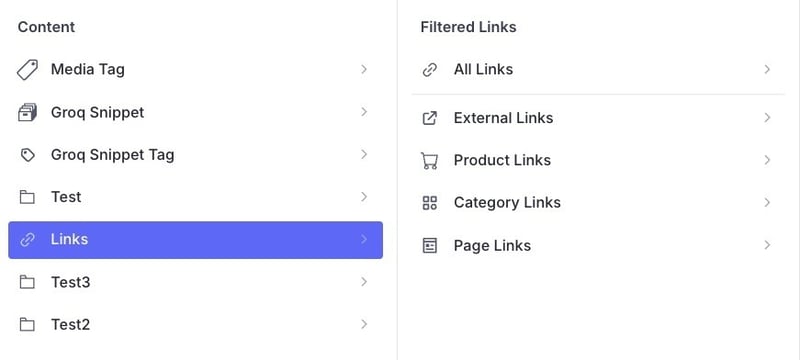
What we want to achieve is a nested view that can differentiate between the possible link types. This solution will allow the content editor to access a particular type of link more easily.
Graphically, we want to achieve something like this:
Customizing the Structure Tool
To customize our view, we need to extend the Structure Tool using the Structure Builder API. We will override the 'structure' attribute, as we can see below:
// sanity.config.ts
import {structureTool} from 'sanity/structure'
import CustomStructure from '...customStructurePath...'

export default defineConfig({
  // ...
  plugins: [
    structureTool({
      structure: CustomStructure,
    }),
  ],
  // ...
})
We are only interested in customizing the view of our Link document; all the other documents present will behave by default. Before seeing our customization, let's ensure that all the other documents are not modified.
// custom-structure.ts
import {StructureBuilder, StructureResolverContext} from 'sanity/structure'
import CustomLinkItem from '...customLinkItemPath...'

export default function CustomStructure(S: StructureBuilder){
  return S.list()
    .title('Content')
    .items([
      ...S.documentTypeListItems().map((item) => {
        if (item.getId() === 'link') return CustomLinkItem
        return item
      }),
    ])
}
By leveraging the documentTypeListItems method, we obtain all the documents registered in our schema. Through the map method, we return all the default items, and if the document's ID is link, we return our custom view. Now, let's take a look at what CustomLinkItem contains.
Custom Link Item
As mentioned earlier, what we want to achieve is that when clicking on our document, before seeing the various entries, we want to have an intermediate view that groups the entries by type (external, product, category, page).
For the sake of the article, we will only look at a couple of these; at the end of the article, you can find the link to the repository with the full example.
Okay, in the previous snippet, we are returning the CustomLinkItem object. Let's start by looking at the basic definition, which is the first level:
// custom-link-item.ts
import {AiOutlineLink} from 'react-icons/ai'
import {StructureBuilder} from 'sanity/structure'

export default function CustomLinkItem(S: StructureBuilder) {
  return S.listItem().icon(AiOutlineLink).title('Links')
}
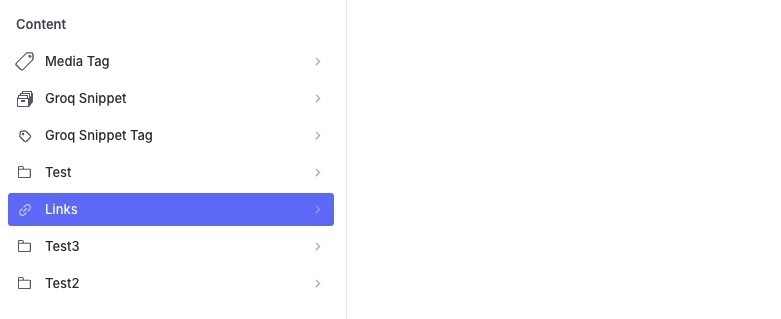
So, we are returning a listItem with an icon and a title. This is what we get:
On the right side, there is nothing, and the browser console complains that there is no child. Let's define this child. In our case, it will contain a list of items that will identify our filters.
All Links Item
The first item we define is the one that groups all the types. We want to give the user the option to view all the links regardless of type.
// custom-link-item.ts

import {AiOutlineLink} from 'react-icons/ai'
import {StructureBuilder} from 'sanity/structure'

const AllLinksItem = (S: StructureBuilder) => {
  return S.listItem()
    .icon(AiOutlineLink)
    .title('All Links')
    .child(
      S.documentTypeList('link').title('All Links'),
    );
};

// rest of the file
We define again a listItem with an icon and a title.
As a child, we use the documentTypeList method, passing the name of our document as a parameter. This method allows rendering the default view and displaying the entries of our document.
Product Links Item
The next item we create is the first real filter, and it concerns all the links of type 'product.' The definition will be similar to what we saw earlier, but we will add a filter function to achieve the desired result.
// custom-link-item.ts

import {BsCart} from 'react-icons/bs'
import {StructureBuilder} from 'sanity/structure'

const AllProductLinksItem = (S: StructureBuilder) => {
  return S.listItem()
    .icon(BsCart)
    .title('Product Links')
    .child(
      S.documentTypeList('link')
       .title('All Product Links')
       .filter(`linkType == $linkType`)
       .params({ linkType: 'product' }),
    );
};

// rest of the file
By forcing the linkType filter to 'product,' we get that the list of displayed entries will contain only the links that interest us.
The other filters
Continuing with this logic, we will define the other filters by changing only the title, icon, and the value of the linkType parameter.
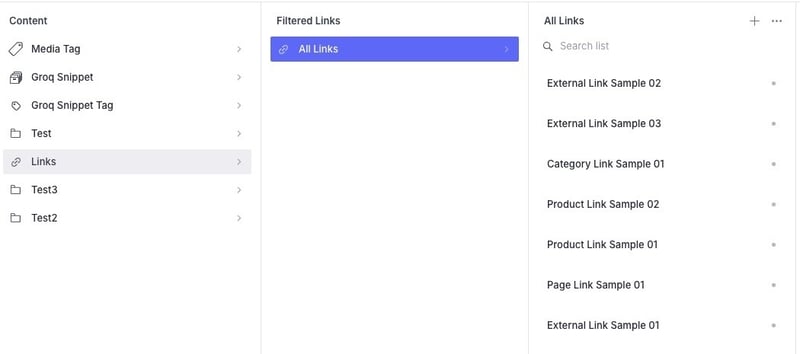
What we will achieve is a filtered view, just as we imagined with the initial sketch.
On the code side, we added all the filters within the initial child of our CustomLinkItem.
// custom-link-item.ts

export default function CustomLinkItem(S: StructureBuilder) {
  return S.listItem()
    .icon(AiOutlineLink)
    .title('Links')
    .child(
      S.list()
       .title('Filtered Links')
       .items([
         AllLinksItem(S),
         S.divider(),
         AllExternalLinksItem(S),
         AllProductLinksItem(S),
         AllCategoryLinksItem(S),
         AllPageLinksItem(S),
       ])
    )
}
Bonus: Templates
From an organizational perspective, having this freedom to structure content based on your needs is a game-changer. But we can do even better...
Currently, we have separated our links based on type. However, if, for example, within the 'Product Links' filter, we add a new link, the Type field does not auto-populate with the product type. Thus, we are forced to select it manually.
By using the Initial Value Templates API, we can define an initial value for our document so that the user does not have to manually select the value.
Let's define the initial template for our product filter (the others will be similar):
// link template for product
{
  id: 'tpl-productLink',
  title: 'Product Link',
  schemaType: 'link',
  value: {
    linkType: 'product'
  }
}
The templates need to be declared first within our schema, inside the sanity.config.ts file, to be utilized and prevent Studio crashes.
// sanity.config.ts

export default defineConfig({
  // ...
  schema: {
    types: [/* your documents/objects */]
    templates: [{
      id: 'tpl-productLink',
      title: 'Product Link',
      schemaType: 'link',
      value: {
        linkType: 'product'
      }
    },
    // other templates
    ]
  }
  // ...
})
Once declared, we can use them within our filter. Let's take our Product filter as an example and update its declaration:
// custom-link-item.ts

import {BsCart} from 'react-icons/bs'
import {StructureBuilder} from 'sanity/structure'

const AllProductLinksItem = (S: StructureBuilder) => {
  return S.listItem()
    .icon(BsCart)
    .title('Product Links')
    .child(
      S.documentTypeList('link')
       .title('All Product Links')
       .filter(`linkType == $linkType`)
       .params({ linkType: 'product' })
       .initialValueTemplates([
         S.initialValueTemplateItem(`tpl-productLink`)
       ]),
    );
};

// rest of the file
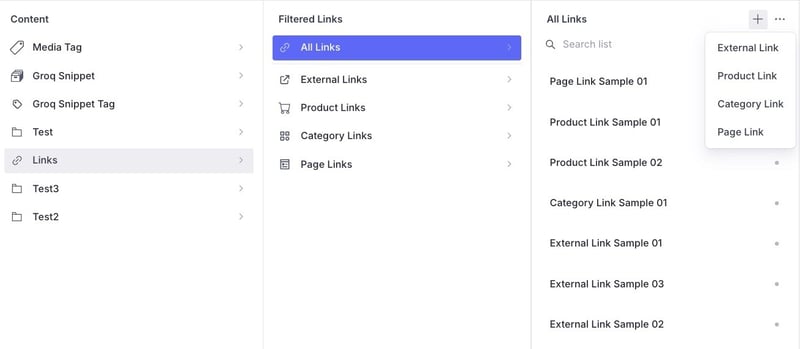
Now, when we are within the 'Product Links' filter and click on the + icon, the draft of the created document will already have the desired value selected in the Type field.
Expanding the logic to the 'All Links' item as well, we have the opportunity to guide the link creation by providing the desired options:
// custom-link-item.ts

import {AiOutlineLink} from 'react-icons/ai'
import {StructureBuilder} from 'sanity/structure'

const AllLinksItem = (S: StructureBuilder) => {
  return S.listItem()
    .icon(AiOutlineLink)
    .title('All Links')
    .child(
      S.documentTypeList('link')
       .title('All Links')
       .initialValueTemplates([
         S.initialValueTemplateItem('tpl-externalLink'),
         S.initialValueTemplateItem('tpl-productLink'),
         S.initialValueTemplateItem('tpl-categoryLink'),
         S.initialValueTemplateItem('tpl-pageLink'),
       ]),
    );
};
Conclusion
Today, we've explored the power of the Structure Builder API in customizing our content model. The ability to filter results according to our preferences through GROQ filters opens up virtually infinite solutions.
You can find the complete code in the following repository.
Thanks for reading!
See ya 🤙

Posted on February 1, 2024
Join Our Newsletter. No Spam, Only the good stuff.
Sign up to receive the latest update from our blog.
