AutoPublish on GitHub Pages with Github actions

Pankaj Patel
Posted on August 11, 2020

GitHub pages are a great place to host the Demos and Personal Sites. But, often, you need to publish it by yourself.
Github Actions is a new Continuous Integration and Deployment solution from Github.
You can use GitHub Actions to deploy to GitHub pages on different events like
- Push to the main branch
- New Release created
- etc
Let's take React app for an example.
Let's make a simple app with Create React App to list latest posts from dev.to
The main idea is of having a GitHub Action to build the app and deploy on GitHub pages.
Let's initialize new app with CRA and add a new component named Posts and Post
npx create-react-app dev-news

cd dev-news # change dir to dev-news

mkdir src/components # create components dir in src

touch src/components/Posts.js \
 src/components/Post.js # create Posts.js & Post.js Files

code . # open VSCode
And following are the components to show the list of the posts; I’m putting some barebones of the Component code
import React, { useEffect, useState } from 'react'
const devTo = 'https://dev.to/api/articles'

const Post = ({post}) => (
  <a href={post.url} key={post.id} className="post">
    <article>
      <img src={post.social_image} alt={post.title} />
      <div>
        <h1>{post.title}</h1>
        <p>{post.description}</p>
      </div>
    </article>
  </a>
)

const Posts = () => {
  const [posts, setPosts] = useState([])
  useEffect(() => {
    fetch(devTo).then(r=> r.json()).then(setPosts)
  }, [])

  return posts.map(post => <Post post={post} />)
}

export default Posts
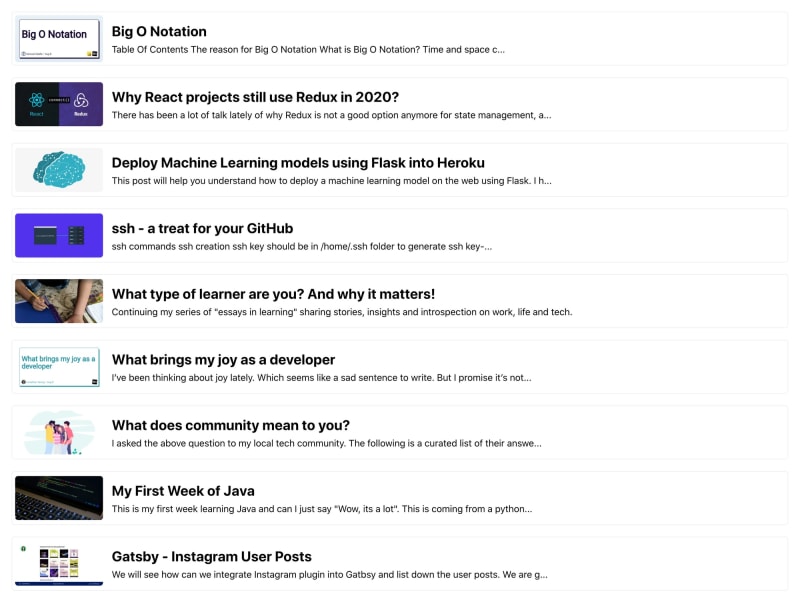
And it will look like the following
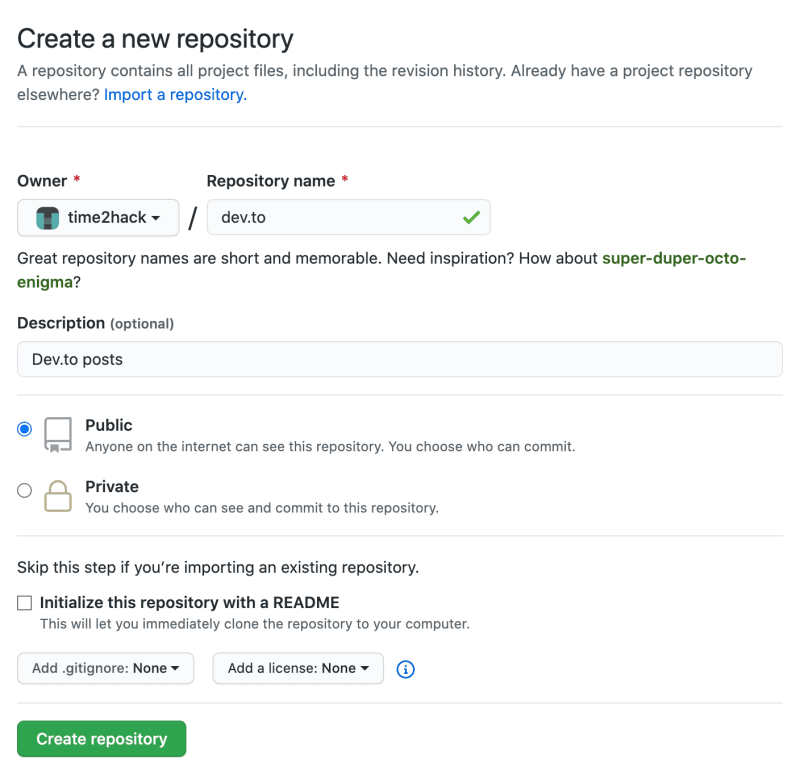
Now, we will deploy above on the GitHub pages. But, first, let’s make a new repository and push our new project to the repository.
And now will commit all the changes to the above repo with following git commands.
git init # initialize the repo
git add . # stage all changes
git commit -m "🚀 init" # commit the staged changes
# add GitHub origin remote of the new repo
git remote add origin git@github.com:time2hack/dev.to.git
git push -u origin master # push master to the origin
Now let’s make a directory with the name .github and workflows inside .github.
Inside the workflows directory, we can create workflows which will run the GitHub actions.
As we want to publish to GitHub pages, we will name our workflow file publish.yaml
Now in this file, we need to write some actions/commands that need to run in specific order to publish on the GitHub pages
Following will be the contents of our publish.yaml file:
name: github-pages

on:
  push:
    branches:
      - master

jobs:
  deploy:
    runs-on: ubuntu-18.04
    steps:
      - uses: actions/checkout@v2

      - name: Setup Node
        uses: actions/setup-node@v1
        with:
          node-version: "12.x"

      - name: Get yarn cache
        id: yarn-cache
        run: echo "::set-output name=dir::$(yarn cache dir)"

      - name: Cache dependencies
        uses: actions/cache@v1
        with:
          path: ${{ steps.yarn-cache.outputs.dir }}
          key: ${{ runner.os }}-yarn-${{ hashFiles('**/yarn.lock') }}
          restore-keys: |
            ${{ runner.os }}-yarn-

      - name: Installing Dependencies
        run: yarn install

      - name: Building App
        run: yarn build

      - name: Deploy
        uses: peaceiris/actions-gh-pages@v3
        with:
          github_token: ${{ secrets.GITHUB_TOKEN }}
          publish_dir: ./build
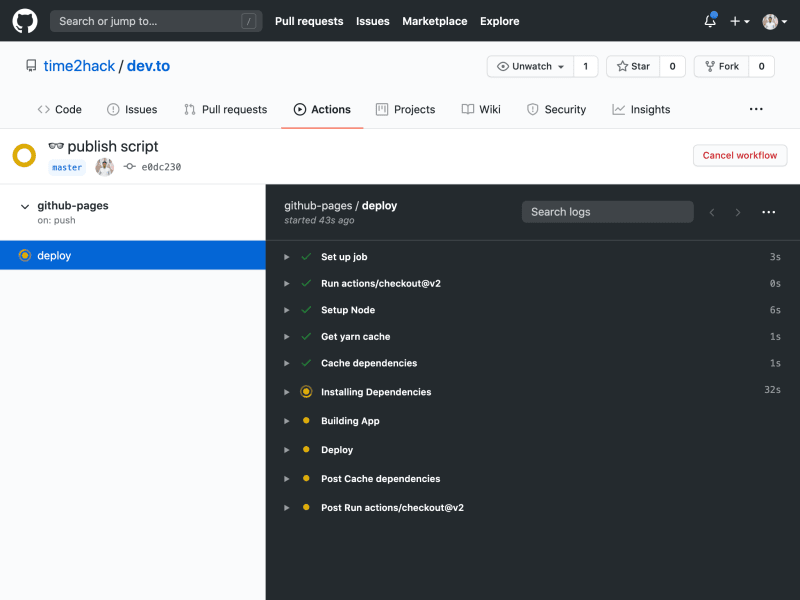
Now we will commit the above file and push it to the master.
Now let’s take a look at what this YAML file has as Jargon:
-
namespecifies the name for the script or action.nameused anywhere in the above file is to display helpful labels on the GH Actions UI instead of commands -
onis the event listener specification, here we want to react only on thepushtomasterbranch -
jobsspecify the tasks related to this workflow file. There can be more than one and will be running one by one -
deployis the job name -
stepsdescribes the steps that need to run for the job -
uses: actions/checkout@v2specifies to execute another action. In this case, it is thev2of GitHub - actions/checkout: Action for checking out a repo -
withsets up named parameters for actions or commands -
runexecutes the command on the shell -
idgives a unique identifier to the step, so that we can access the output of this step in other steps
/As the YAML keywords are out of the way, let's see what this workflow’s YAML is doing:/
- Uses
ubuntu-18.04as OS/execution environment - Uses
actions/checkout@v2checks out the repo for the workflow - Setup node
12.xwith actionactions/setup-node@v1 - Setting environment variable for the Yarn cache
- Caching the Yarn cache directory with cache key
${{ runner.os }}-yarn-${{ hashFiles('**/yarn.lock') }}. HerehashFiles('**/yarn.lock')is generating a hash of yarn.lock file. If this file has not changed, cache with similar hash exists, it will be restored by therestore-keys - Install dependencies with
yarn install - Build the project with
yarn build - Using action
peaceiris/actions-gh-pages@v3, deploy the./builddirectory to Github Pages
An important thing to note here is that Create React App’s build depends on the
homepagekey inpackage.json
So make your build work with the GitHub pages, you need to set the homepage in package.json.
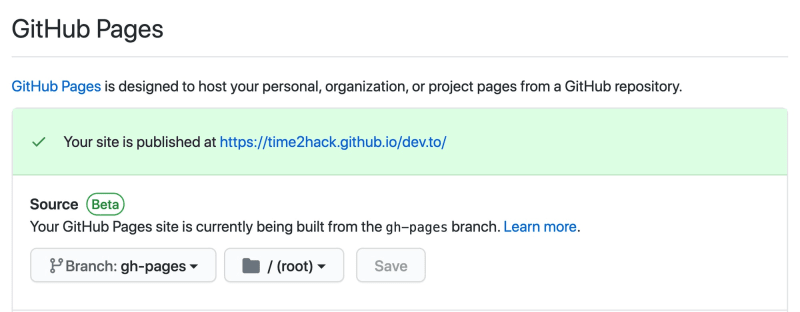
For this example, the repository is https://github.com/time2hack/dev.to/; the Github Pages’ URL or homepage will be https://time2hack.github.io/dev.to/. This URL is in the homepage key in package.json
And yes, Don’t forget to enable GitHub pages for your repository
Conclusion
We saw how the Github Actions are super easy to deploy the website on Github Pages.
We also saw what are basic parts of Github Actions’ Workflow File & used these parts to write deploy job.
Let me know through comments 💬 or on Twitter at @patel_pankaj_ and @time2hack
If you find this article helpful, please share it with others 🗣
Subscribe to the blog to receive new posts right to your inbox.
Credits
Originally published at https://time2hack.com on Aug 10, 2020.

Posted on August 11, 2020
Join Our Newsletter. No Spam, Only the good stuff.
Sign up to receive the latest update from our blog.


