How to customize email notifications in TalkJS

Tawanda
Posted on January 19, 2022
TalkJS is a chat API that supports all types of notifications, including email, desktop, SMS, and push notifications. In this guide, we will look into customizing the email body of the TalkJS email notifications.
Customizing TalkJS Email Notifications
TalkJS supports email notifications as a method to notify users of missing conversations when they are offline. The only requirement to facilitate this functionality is to have at least a single email associated with the user and enable the email notification option for the assigned role. According to TalkJS, these emails will get dispatched only if the following conditions are met.
- The user is offline.
- The user is online but has selected a different conversation in the UI.
- The user is online and has selected the current conversation in the UI, but the browser tab/window is not focused.
Users can create an unlimited number of roles with customized emails and use those roles to send different types of emails to different user groups. The only limitation is the styles of legacy themes automatically getting applied for email notifications when they are used as the theme of the chat.
How to Change the Email Body
Now let's look at how to customize the email body. First, we need to create a role, modify the email body and then assign the created role to a user. Let's assume that we are customizing email notifications for a group chat in an educational platform that connects students and teachers.
How to create a Role
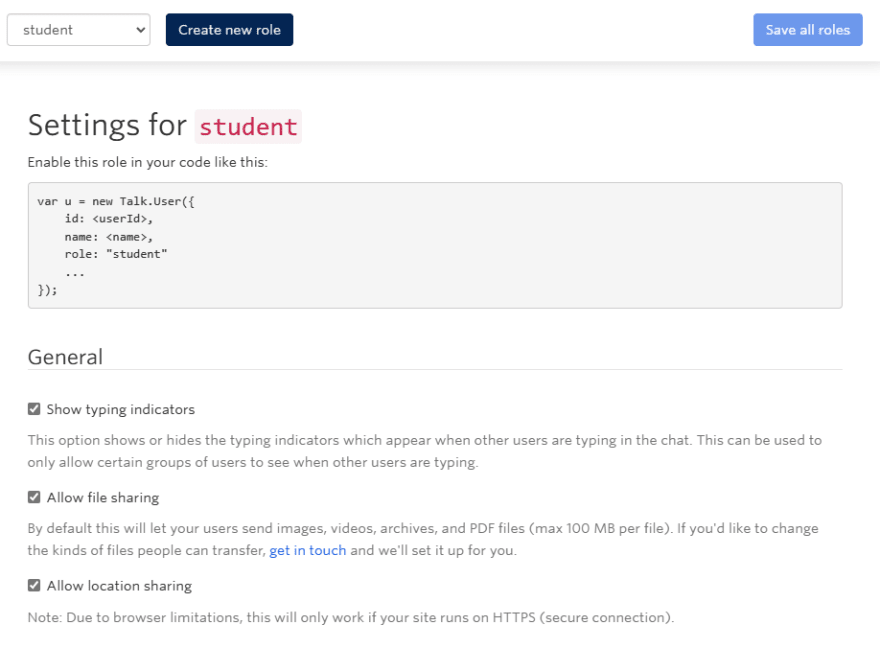
Roles allow developers to change the behavior of TalkJS to different users. These roles can be created in the Roles section of the TalkJS dashboard. Simply go to the Roles section and click on the “Create new role” button to create a new role.
Then these roles can be assigned to each user as shown below;
var student1 = new Talk.User({
    id: '555551',
    name: 'Dean',
    email: 'dean@gmail.com',
    photoUrl: 'https://i.ibb.co/rGHFSqL/D.png',
    role: 'student'
});

var student2 = new Talk.User({
    id: '555552',
    name: 'Mary',
    email: 'mary@gmail.com',
    photoUrl: 'https://i.ibb.co/cxwVNLW/M.png',
    role: 'student'
});
Changing Email Body
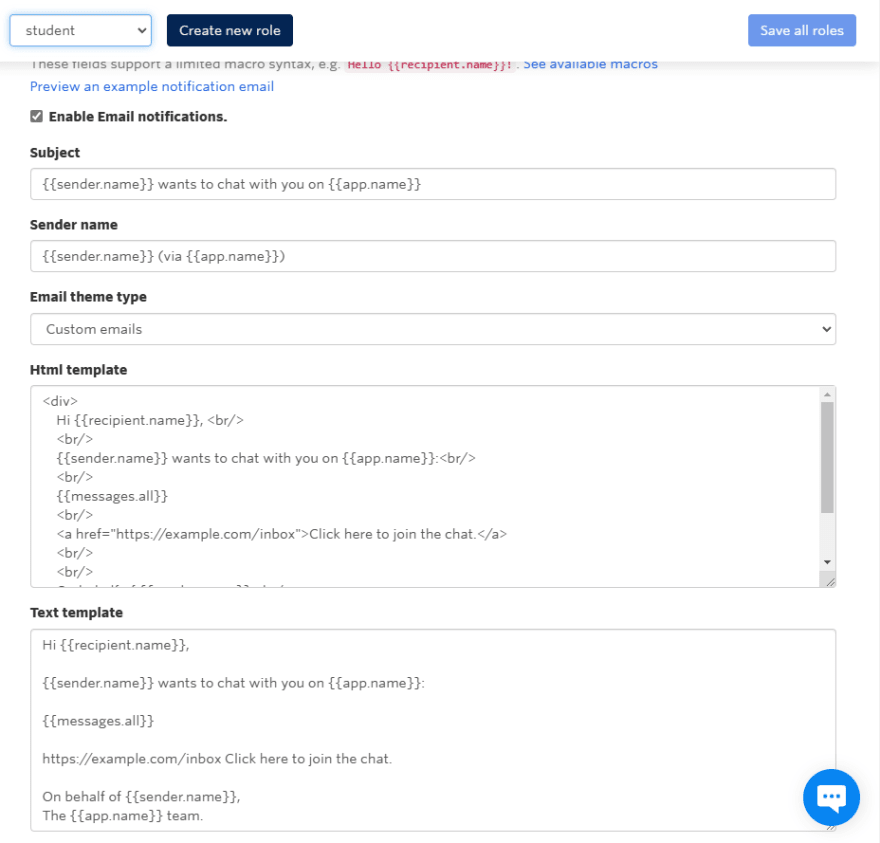
Within the role configurations, you can find the Email settings section, which contains all the available options to customize email notifications. Here, the HTML and Text templates are used to change the email body. HTML template will only appear to email clients with full HTML support. Otherwise, it will default to the Text template.
Before changing the email body, let’s see how the default HTML template appears to a user.
In the Email settings section, you can get the available fields from TalkJS that can be included in the email body using a limited Marco syntax.
Next, let’s do some simple modifications to see if the changes will get applied to the template. We will change the message content by adding a heading and two horizontal lines to separate the message.
<div>
    <h3>Student Message Room</h3>
    Hi <i>{{recipient.name}}</i>, <br/>
    <br/>
    {{sender.name}} has messaged you on {{conversation.subject}}:<br/>
    <br/>
    <p><h5>Messages</h5></p>
    <hr/>
    {{messages.all}}
    <br/>
    <hr/>
    <br/>
    <a href="https://example.com/inbox">Click here to join the chat.</a>
    <br/>
    <br/>
    On behalf of {{sender.name}},<br/>
    <br/>
</div>
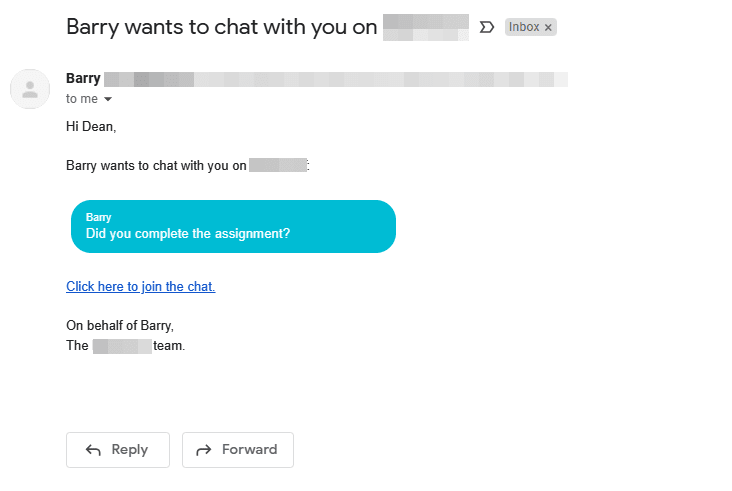
Now the students will receive email notifications in the new format whenever they are offline.
Customized Email Format:
Advanced Email Body Customization
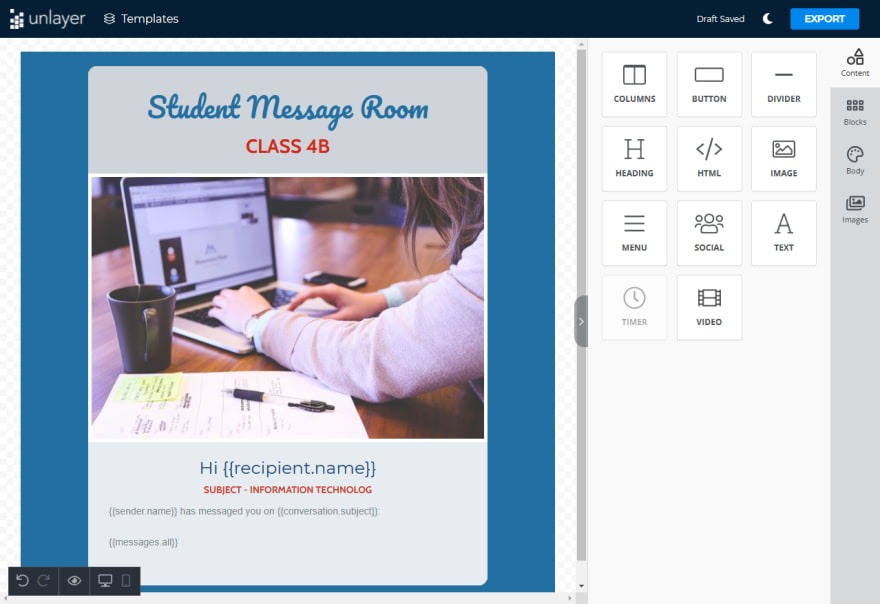
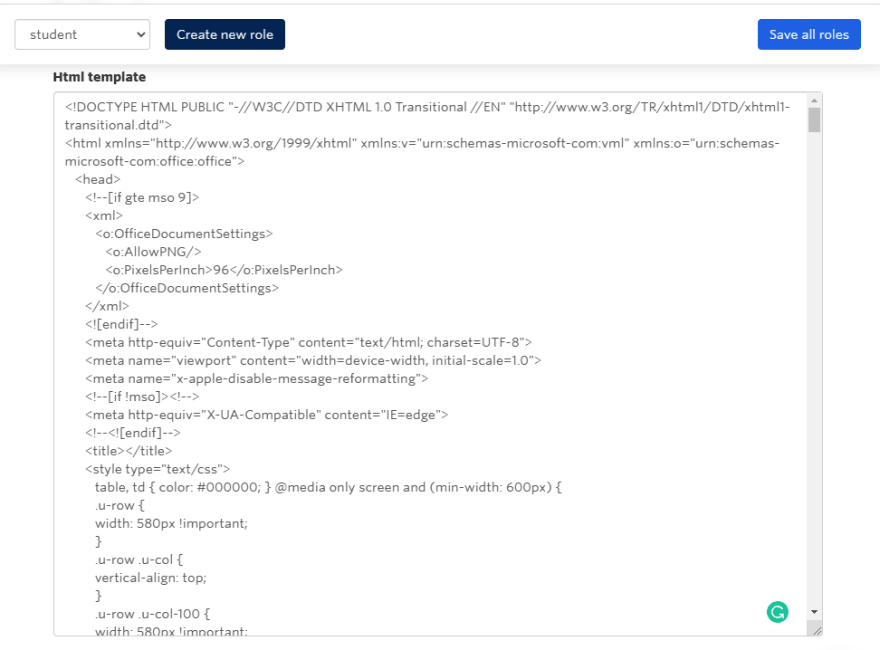
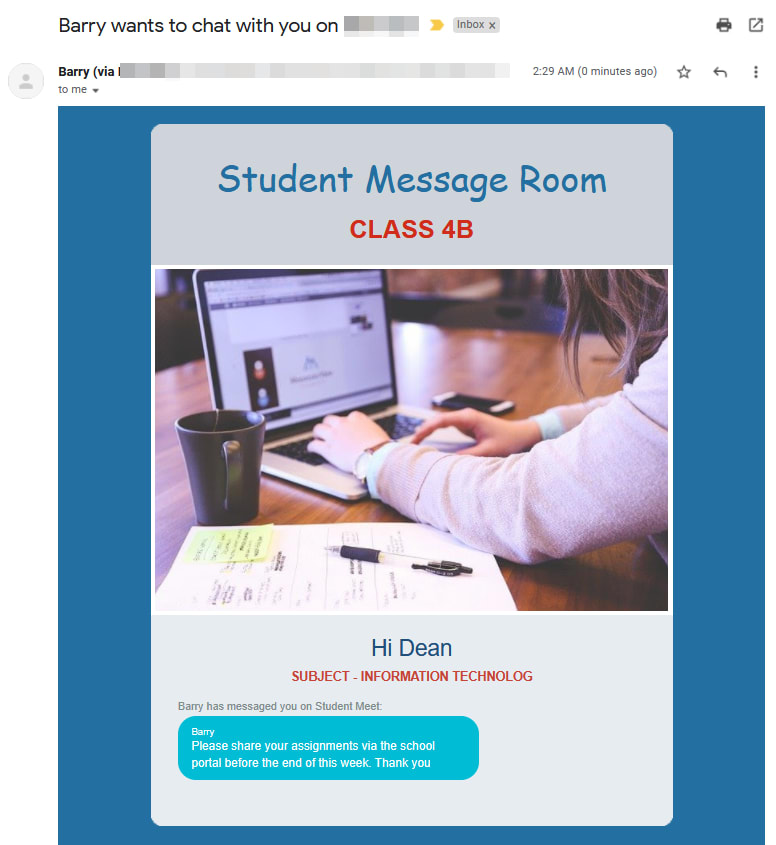
Now let's customize the email body. The easiest way to create a custom email template is to utilize a tool such as Unlayer. It enables users to quickly create an email template that will be fully compatible with all email clients and browsers. Let's create an email template using Unlayer as shown below and add the generated code to the HTML template section.
Unlayer Email Template:
Now we can simply add this temple to the HTML template section and save the role.
Now, the user will be shown the newly customized format when an email is triggered. That’s it, and you have successfully customized the email body of the notification email.

Posted on January 19, 2022
Join Our Newsletter. No Spam, Only the good stuff.
Sign up to receive the latest update from our blog.

