Status Hero Editorial Staff
Posted on January 27, 2022

Organizing, maintaining, and managing an agile team can be huge, complicated work. Learn how you can use Jira with your team to more easily and continuously deliver quality software to customers and clients.
Agile teams implement the Scrum methodology to improve collaboration, communication, and organization over short, defined work periods called sprints. While teams can achieve this goal without using project management tools, the added boost they provide can make a huge difference.
One such tool is Jira, used for planning and tracking software releases in sprints. Jira offers multiple benefits, but it’s most useful for simple workflows, issues reporting, and configuring different processes.
In this article, you will learn about the advantages of Jira and how best to use it to manage the workload of a scrum team.
What Is Jira?
Jira is a software development tool from Atlassian that helps scrum teams plan, manage, and report the work carried out for a project. The Jira scrum board is used by software developers, project managers, scrum masters, QA engineers, product owners, DevOps teams, and technical managers. Jira can help scrum teams achieve continuous integration/continuous delivery (CI/CD) by managing and delivering software iteratively.
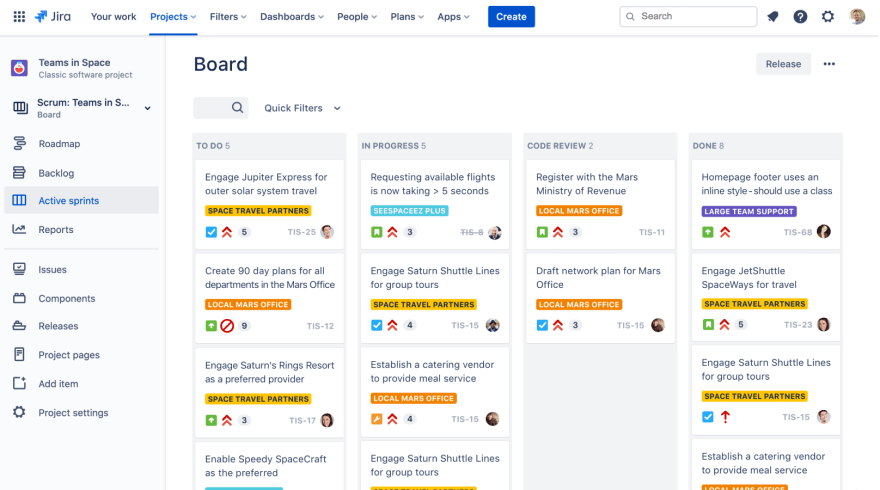
The Jira scrum board provides a simple visual display of a project with tasks and impediments to implementing the Scrum framework. Team members can easily see what tasks have been assigned to them. Jira can also generate reports for discussion during the retrospective meeting analyzing how the work went.
The project work is divided into sprints after careful planning and consideration of various factors like time off, vacation, and deadlines. Tasks are estimated and then assigned to different team members. Jira monitors these tasks and reports issues related to the software. It can help prioritize issues as they are reported, as well as organize the entire project.
How Can Jira Help Scrum Teams?
During software development, teams need a one-stop project management tool that can help manage, plan, capture, report, and track stories and bugs during a release cycle. This is where Jira can help, since its features support prioritization, estimation, planning, insights generation, and bug reporting.
Here are some of the benefits of using Jira:
Jira is highly flexible and configurable with a variety of options to help a project team function smoothly. For example, developers can use the GitHub integration to keep track of commits to branches.
Version management is done with a single click. It’s easy to track different versions for tickets, which helps project managers prevent versioning issues.
The high levels of transparency enable better collaboration and communication across the team. Since the sprint board displays the tasks assigned to every team member, teams can see who has bandwidth and who is overloaded during a particular sprint.
Jira allows teams to set different priority levels for tickets, which enables better prioritization of tasks in a more visible way.
Reports and insights help teams quantify the work performed over a specific period or for a specific software release. Burndown charts, burnup charts, velocity charts, and bug reports give teams insight into a project’s progress.
Implementing Jira for Scrum Teams
If you’d like to give Jira a try, follow this guide on how to implement it into your scrum project.
First, sign up for a free Jira account if you haven’t already. Make sure you have the right permissions to start and complete a sprint.
Step 1: Create a Scrum Project
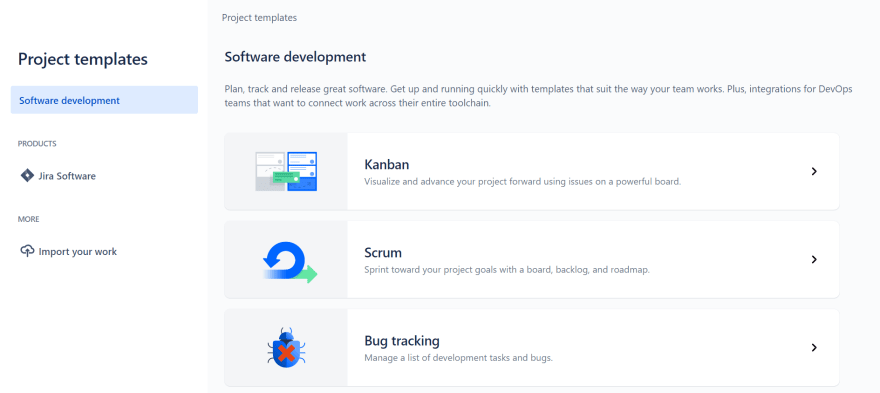
Once you’ve logged in, select a template from the library. Select Scrum from the list.
Most agile teams use the Scrum framework, which is useful for teams that can work independently and need to control their own processes.
After you’ve created your project, you’ll see an empty backlog.
Step 2: Add User Stories to the Backlog
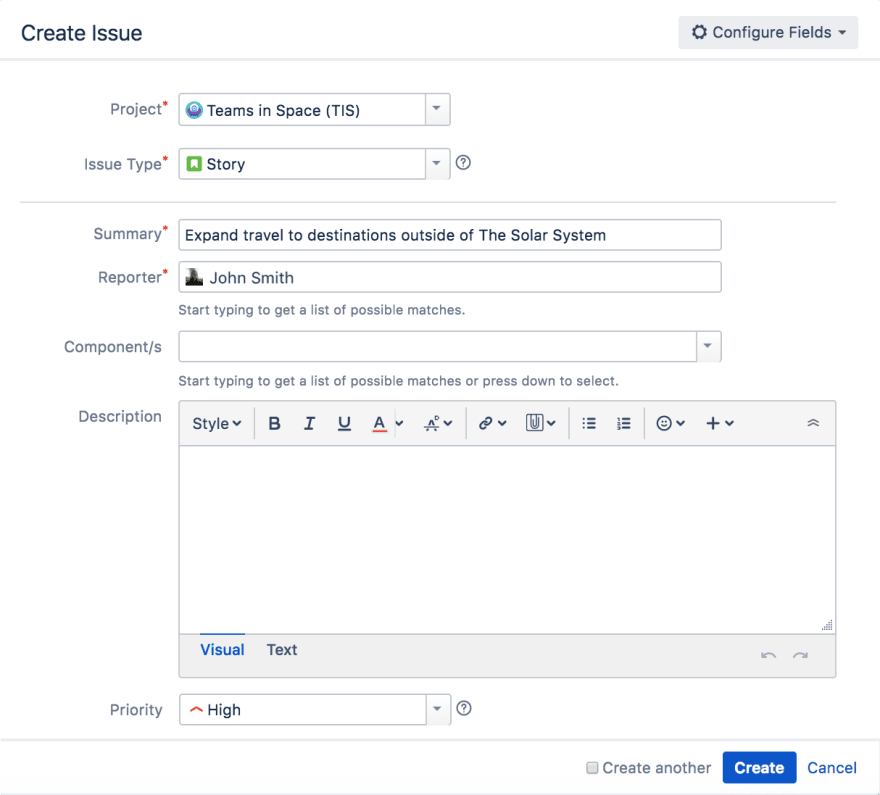
User stories are work items assigned to the developer during a sprint and are designed from the user’s perspective.
You’ll add tasks, stories, and bugs to the backlog, which will become the list the team will potentially work on for the project. Create a handful of user stories based on the requirements and the project plan.
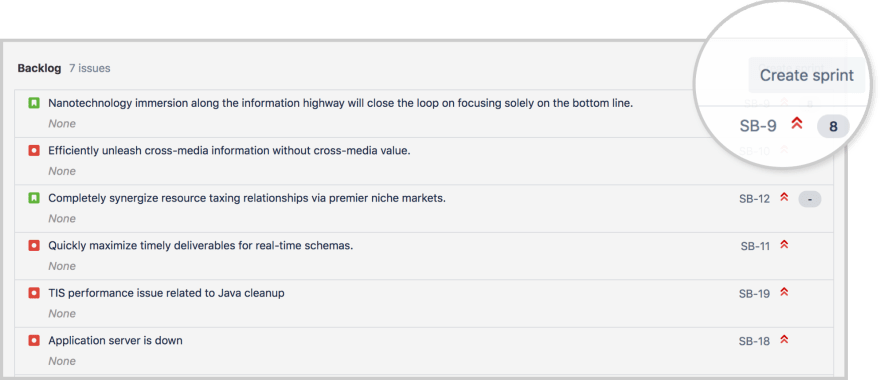
After adding stories, you’ll need to prioritize them by rank or priority type. Jira allows you to change the priority by dragging and dropping the stories in the order they should be worked on.
Adding stories and ranking them in the order of priority will make it easier to plan future sprint sessions/meetings, thereby improving efficiency.
Step 3: Create a Sprint in the Backlog
Most organizations choose a two- or three-week sprint of work to be completed. Click on the Create Sprint button to create the first sprint from the backlog.
Your team’s speed and productivity should be taken into account when you decide the length of the sprint. You can change the length if the work allotted is not completed by the end of the sprint.
Before a sprint begins, the entire team holds a sprint planning meeting to discuss the goal and tasks that need to be accomplished. The team may even change the priority of stories in the backlog. Tasks are created and estimates are provided for each story. Those stories are moved from the backlog to the current sprint after the planning meeting.
Step 4: Start the Sprint in Jira
Enter a name for the sprint. Add start and end dates and the sprint goal chosen in the planning meeting. On the day the sprint begins, click on the Start Sprint button. Team members can now pick up stories from the to-do lane and move them to the in-progress lane.
This scrum board is now active and visible. The above steps can be used to manage the team’s work and the project’s overall progress, and the board offers much-needed visibility.
Daily standup meetings should be held to keep track of any blockers and of overall progress. Tickets/stories will be moved across the board as they are being worked on. A typical user story moves from the to-do lane to in progress, to in QA, and finally to the done lane.
Step 5: Check the Burndown Chart
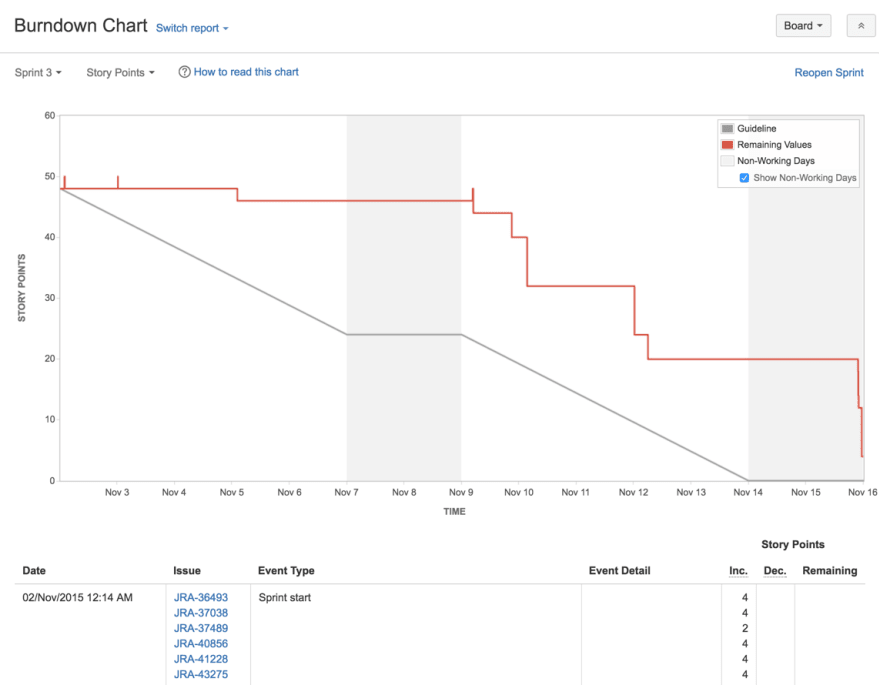
A burndown chart shows the actual versus estimated work to be done in a sprint. The total remaining work for the sprint can be tracked by this chart. In order to view it, click on reports from the sidebar in Jira and select the burndown chart from the dropdown.
This helps the team to visualize and adjust their time accordingly to complete the work estimated for the sprint. The scope of the sprint can be affected mid-sprint in the agile world, which is why it’s important to monitor the burndown chart.
Step 6: Check the Sprint Report
Jira’s sprint report includes the burndown chart, work completed, work not completed, and any work added after the sprint began. At the end of the sprint, analyze the sprint report to discuss the work that was completed.
The team can hold a sprint review, demo, and retrospective meetings to discuss the work that was done, work that was not done, and tasks that could be done better for the next sprint.
Step 7: Complete the Sprint in Jira
To complete a sprint, click on the Complete Sprint button on the top right corner.
Move incomplete issues to the backlog or to a future sprint.
Conclusion
Organizing, maintaining, and managing an agile project team can be huge, complicated work. With Jira as your project management tool, though, you can more easily and continuously deliver quality software to your clients. Using it to configure your project sets up your scrum team for success, because Jira enhances productivity and promotes collaboration.
If you follow the above steps, you should be able to more easily create, manage, conclude, and analyze your team’s next scrum project.
By Sheekha Singh. Sheekha has been in the IT/tech industry for 7+ years, working in the US and Canada as a software engineer. Sheekha is also the author of the bestselling book 'The IT Girl: 3 Steps to Find Career Options for Young Women in Tech'.

Posted on January 27, 2022
Join Our Newsletter. No Spam, Only the good stuff.
Sign up to receive the latest update from our blog.
