SCADE for Developers
Posted on June 10, 2022
Introduction
Hello everyone 👋
My name is Vedant, and today’s article is a bit different from previous ones. Instead of making apps, we will take a look into how we deal with the UI widgets kinds of stuff which are compatible with both Android and iOS. One such instance is the calculation of SafeArea constants.
I am sure, you must have come across the SafeaArea concept in mobile app development. A UI widget that insets its child with sufficient padding to avoid intrusions by the operating system is called SafeArea. But why are we discussing SafeArea now? There were a few issues reported by the SCADE community related to the SafeArea where the UI views were getting out of the visible region.
In this article (exclusively for SCADE enthusiasts), we will discuss in detail how we implemented the SafeArea constants to avoid any intrusion of the UI views with the targeted device display.
So let’s start 😎.
Prerequisite
If you haven’t installed the SCADE IDE, download the SCADE IDE and install it on your macOS system. The only prerequisite for SCADE is the Swift language (at least basics). Also, please make sure the Android emulator or physical device is running if you want to run SCADE apps on an android device.
Getting Started
To keep it simple, let’s understand the concepts by creating a new SCADE project, File -> New -> New Project. Then select the SCADE option, enter the name of the project and click Create.
We will add the iOS and Android-specific code to determine the safe area insets top, and bottom heights. For now, let’s add a label to the main.page which will display the numerical value of the top and bottom heights.
Code for iOS
To calculate for iOS devices, we can use the exact same native swift codebase for finding the top-bottom notch constants. Using the safeAreaInsets codebase attribute of the UIApplication.window parameter, we can easily find the top and bottom padding for the given iOS device.
import ScadeKit

let window = UIApplication.shared.windows.first
let topPadding = window?.safeAreaInsets.top ?? 0
let bottomPadding = window?.safeAreaInsets.bottom ?? 0

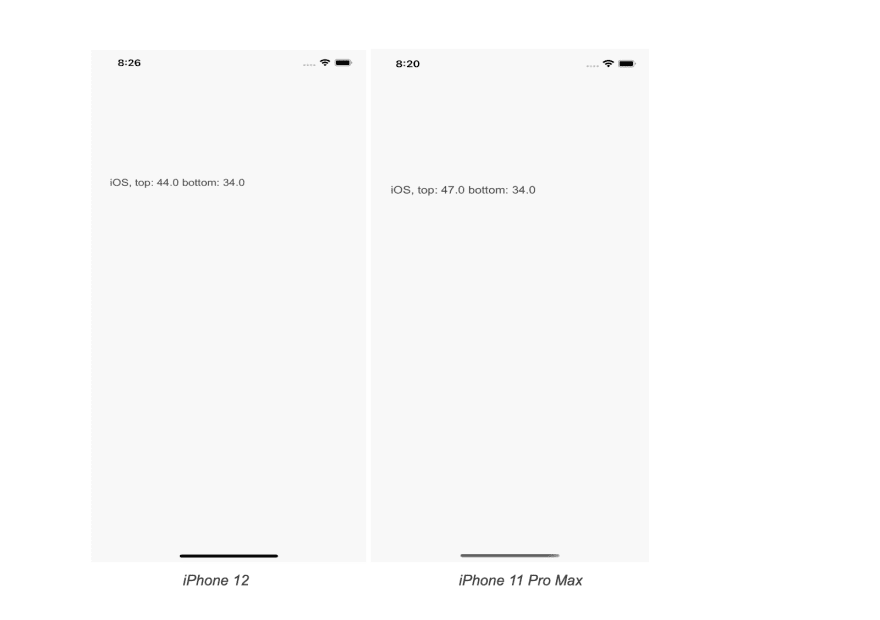
self.label.text = "iOS, top: \(topPadding) bottom: \(bottomPadding)"
You can test the above code snippet. Yes, it works 😀! You can target a range of iOS devices and can easily get the SafeArea constants for those devices.
Let’s calculate for Android
Before getting started with the SafeArea constants for Android screens, let us briefly discuss the swift-android compiler. SCADE developers have developed internally the swift compiler for the Android SDK(currently it is supporting API 24). The repository is now open source and anyone can use the existing Swift classes to develop various Android use cases.
https://github.com/scade-platform/swift-android/tree/android/24
We use getDimensionPixelSize() method and pass the resource ID containing the status_bar_height identifier.
int resourceId = getResources().getIdentifier("status_bar_height", "dimen", "android");
int topPadding = getResources().getDimensionPixelSize(resourceId);
Similarly, to get the bottom notch value, we will use the same method again, but pass the resource ID containing the navigation_bar_height identifier.
int resourceId = getResources().getIdentifier("navigation_bar_height", "dimen", "android");
int topPadding = getResources().getDimensionPixelSize(resourceId);
That’s all we need to do for Android. But wait, we can’t directly Java code to our SCADE app. We will now need to convert the given Java snippet to the equivalent swift code using the swift-android compiler.
Swift compiler for Android code
The swift-android repository contains the swift classes which are generated from the Android SDK. We will inject the required classes into our SCADE app and achieve similar functionality accordingly. It uses SPM a lot to inject the necessary dependencies into the SCADE app.
For the Android code snippet above, we require the applicationContext and resources instance to call the necessary methods. We will add the below Android packages into Package.swift.
// swift-tools-version:5.3
import PackageDescription
import Foundation

let SCADE_SDK = ProcessInfo.processInfo.environment["SCADE_SDK"] ?? ""

let package = Package(
    name: "StatusBarMarginCalc",
    platforms: [
        .macOS(.v10_14)
    ],
    products: [
        .library(
            name: "StatusBarMarginCalc",
            type: .static,
            targets: [
                "StatusBarMarginCalc"
            ]
        )
    ],
    dependencies: [
      .package(name: "Android", url: "https://github.com/scade-platform/swift-android.git", .branch("android/24"))
    ],
    targets: [
        .target(
            name: "StatusBarMarginCalc",
            dependencies: [
                .product(name: "Android", package: "Android", condition: .when(platforms: [.android])),
                 .product(name: "AndroidOS", package: "Android", condition: .when(platforms: [.android])),
                  .product(name: "AndroidApp", package: "Android", condition: .when(platforms: [.android])),
                   .product(name: "AndroidContent", package: "Android", condition: .when(platforms: [.android])),
            ],
            exclude: ["main.page"],
            swiftSettings: [
                .unsafeFlags(["-F", SCADE_SDK], .when(platforms: [.macOS, .iOS])),
                .unsafeFlags(["-I", "\(SCADE_SDK)/include"], .when(platforms: [.android])),
            ]
        )
    ]
)
As the next step, we will now import these packages for the Android:
import ScadeKit

#if os(Android)
  import Android
  import AndroidApp
  import AndroidContent
#endif
We are now ready to call the respective swift methods for the given above java methods.
    #if os(Android)

      var res: Resources? = Application.currentActivity?.getResources()

    // calling top notch method
      var resID: Int32 =
        res?.getIdentifier(name: "status_bar_height", defType: "dimen", defPackage: "android") ?? 0
      var topPadding:Int32 = res?.getDimensionPixelSize(id: resID) ?? 0

    // calling bottom notch method
      var resBottomID: Int32 =
        res?.getIdentifier(name: "navigation_bar_height", defType: "dimen", defPackage: "android")
        ?? 0
      var bottomPadding: Int32 = res?.getDimensionPixelSize(id: resBottomID) ?? 0


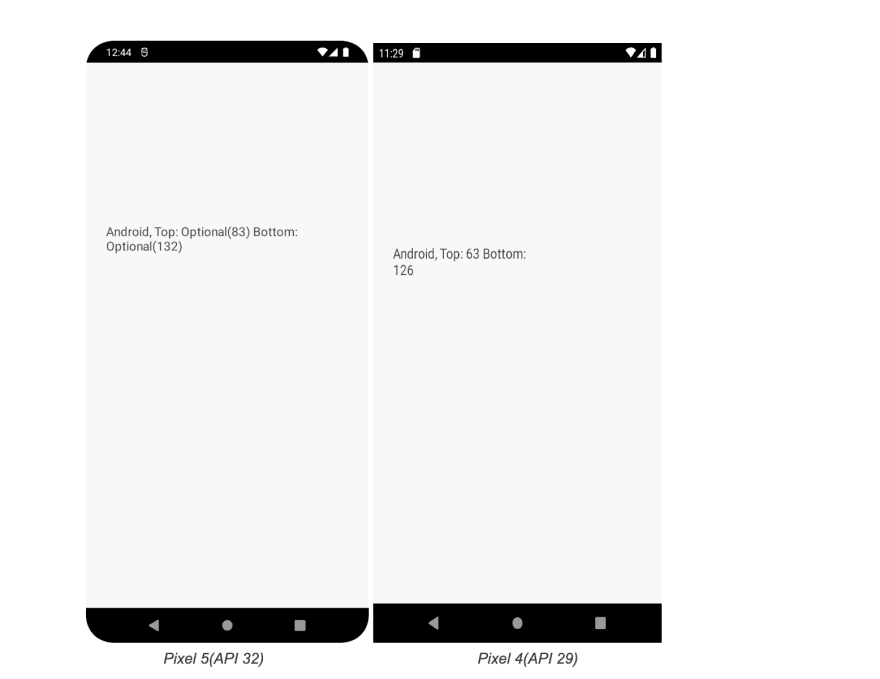
      self.label.text = "Android, Top: \(topPadding) Bottom: \(bottomPadding)"

    #endif
Let us understand the above code snippet and what it does basically. In order to access the Application’s resource, we use the currentActivity instance which returns the context. Using this context, we call getResources to access the resource globally.
The resource instance will call the getIdentifier method and pass the ID as status_bar_height _for the top-notch constant, and _navigation_bar_height for the bottom notch constant.
👉Please note that we can also set the default value if in an unexpected case it returns nil.
Now we are good to test the code on Android devices. Set the target to any Android device you like and test if it is working as expected.
Voila🎊! We have successfully integrated the SafeArea constants into our SCADE app. Integrating any Android-specific feature is very easy into the SCADE app using the swif-android library. You should definitely try the swift-android to build some of the useful components to build cross-platform apps.
We will be releasing a series of articles related to the swift-android compiler. Thank you for reading and see you in the next article!
Happy Coding 😊

Posted on June 10, 2022
Join Our Newsletter. No Spam, Only the good stuff.
Sign up to receive the latest update from our blog.


