Prepare AWS Security Groups for WordPress project

Salman Sohail
Posted on February 7, 2020
This article is the continuation of WordPress with Docker, AWS (ECS, Code Pipeline, Load Balancer, RDS, EFS) Complete Series. For better understating, please start from the beginning of the series.
Disclaimer: We will do a lot of configuration in this article. It may look time consuming but it will lay the foundation for all the communication such as WordPress website with MYSQL and Plugins storage.
We will prepare our security groups for AWS Services such as Load Balancer, RDS (MYSQL database), EFS (for plugins storage) and EC2 instances.
I have created these Groups having security in mind, we should not open any unnecessary port on any service.
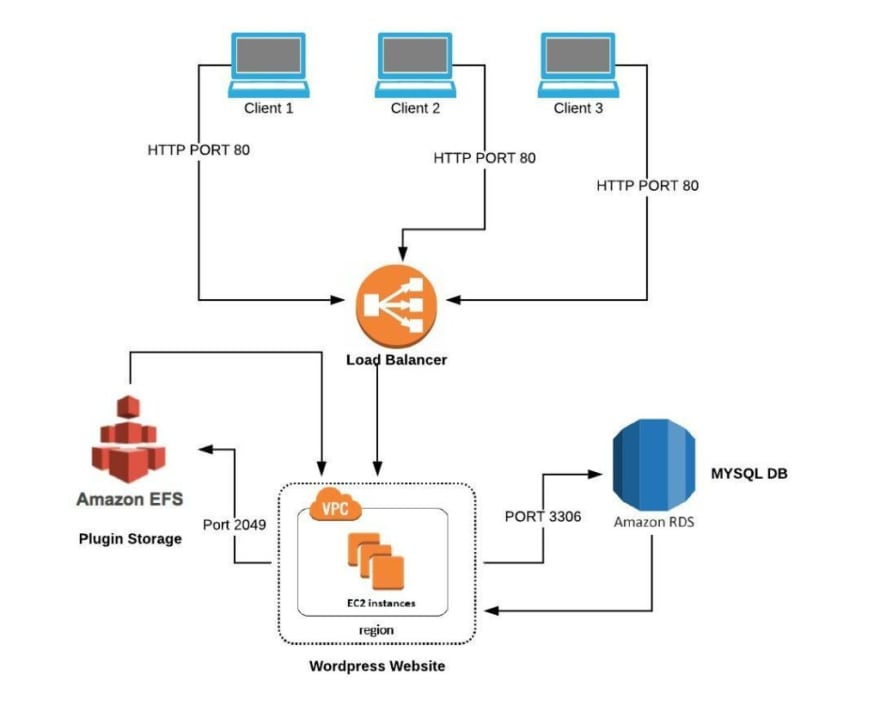
Our main agenda is to Place Load Balancer on top to face the outside world (people who want to access our wordpress website), Load Balancer will then send that request to any of the instances hosting the WordPress website and respond with content received from the WordPress EC2 instance.
Other than that, WordPress EC2 instance can talk to RDS (MYSQL), EFS (plugins storage) as per required. Please take a look at the following diagram for better understanding of this kind of architecture.
Create Security Groups
We will create the SGs (security groups) for our services so they can talk to each other on the same VPC.
- SG for Load Balancer
- SG for EC2 instance
- SG for RDS (MYSQL)
- SG for EFS (storage for plugins)
- SG for Bastian host
Login to your AWS console and click on EC2 from the Services menu, we will take notes of the security groups IDS while you create them.
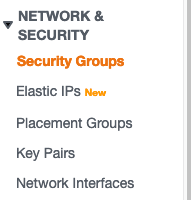
From EC2 console, click on Security groups
Click on Create Security Group
Please make sure all the Security Groups you are creating use the same VPC.
Security Group for Load Balancer
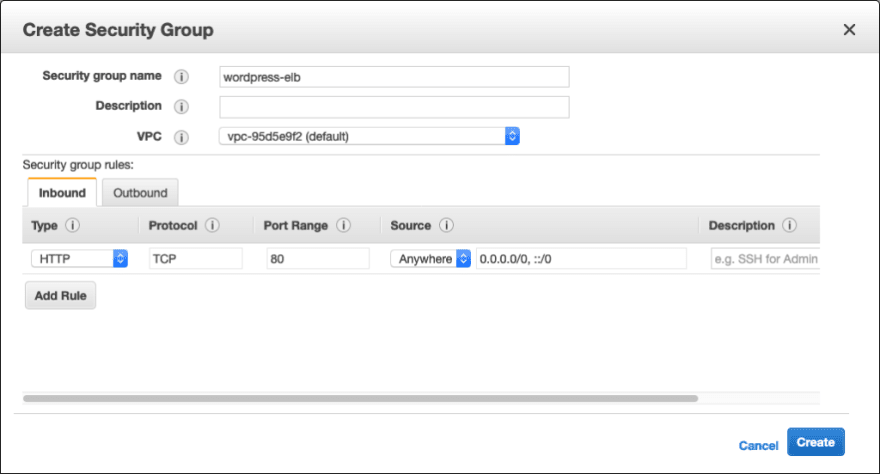
The first Security Group is for the Load Balancer. For outside world, it will enable HTTP (Port 80) in the Inbound Rules. Please select the Inbound tab and click on Add Rule.
Once this SG is created, we will note down its Group ID. which will be used while creating the EC2 instance (WordPress host) SG.
Security Group for WordPress instance
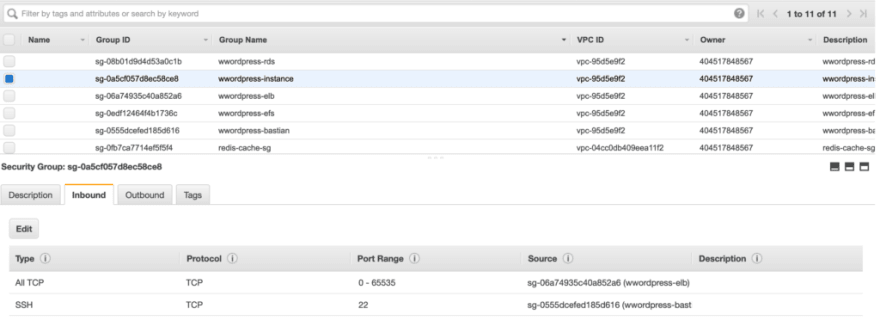
Click on Create Security Group again, we will now create a security group for our EC2 instance where our WordPress project will be deployed. We’ll add an Inbound Rule which will open all the ports for our Load Balancer ONLY.
For that, Add a rule to Inbound with All TCP as type and Custom as the source. Paste the Group ID of the Load Balancer Security group we have created earlier. This will ensure that no one else can access this instance except the Load Balancer.
Hit Create and take a note of Group ID of this SG.
Security Group for Bastian host
We will create an EC2 instance (Bastian host) which we can connect from our local computer to test RDS and EFS or in some cases if we need to connect and troubleshoot our WordPress EC2 instance. This can come in very handy.
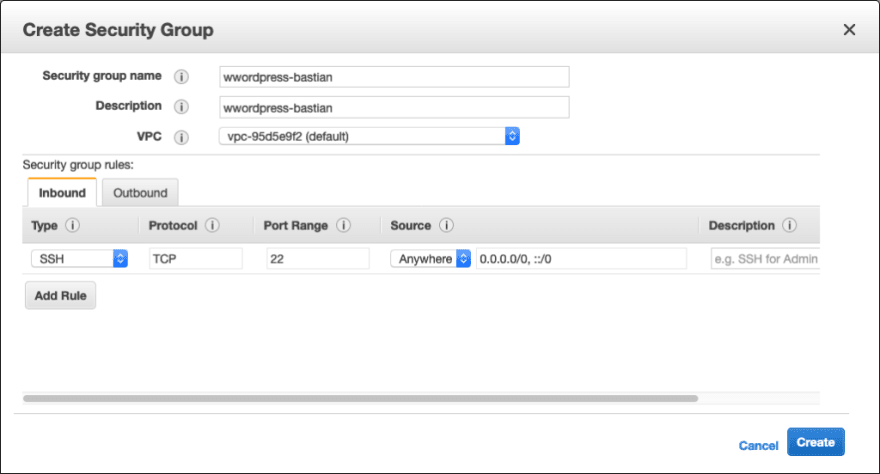
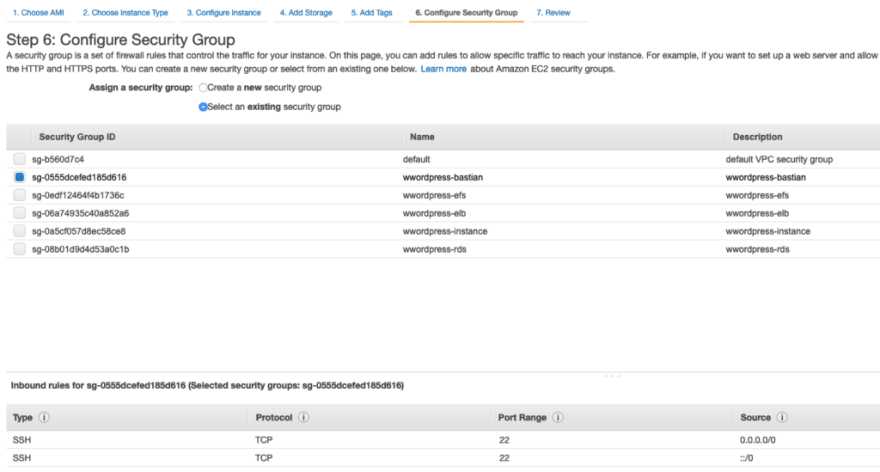
This time we will Create a New Security Group with SSH (Port 22) enabled so we can connect to this instance over SSH.
Please create a take a note of Bastian Security Group, we will reference in EFS and RDS SGs
Security Group for EFS and RDS
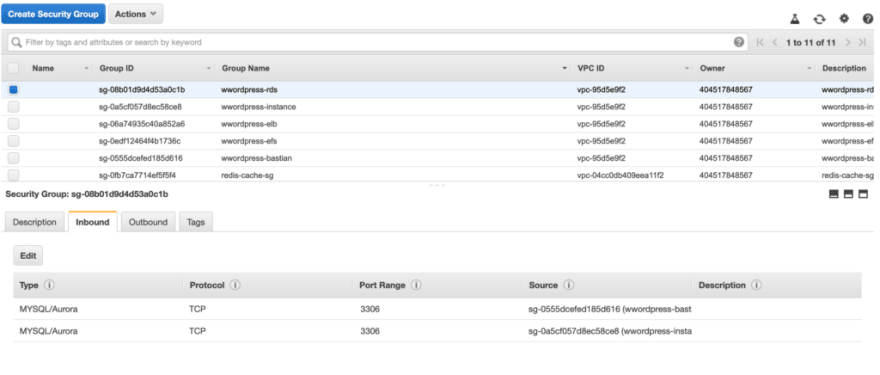
Now we will create Security Groups for RDS and EFS (enabling Port 3306 and 2049 respectively) and put Group ID of our WordPress and Bastian as a Custom source.
Note: By adding Group ID of Bastian into the Inbound rules of EFS and RDS Security Groups will allow us to configure EFS from Bastian and will also let us connect to RDS (MYSQL) database via Bastian if required.
Most of our work with Security Groups is done here except one more step which is also a good practice for security.
One more tweak and we’re done with SGs I PROMISE.
Please copy the Group ID of the Bastian SG we just created and select the Security Group of our WordPress instance and click on Inbound tab at the bottom. Click Edit to add a new Inbound Rule
Select SSH as type and Custom as Source, now past the Group ID of the Bastian Security Group we created earlier.
By doing this, we add an exception for our Bastian instance so it can connect to our WordPress instance if we want to.
Create Bastian Instance
In the EC2 console, Click on Key pairs and select Create Key Pair.
Give it a and Download the .PEM file on your computer
It is very important to keep this file safe and secure. There is no backup of this file on AWS.
Let’s create our Bastian instance.
Click on Instances from the EC2 console and select Launch instance.
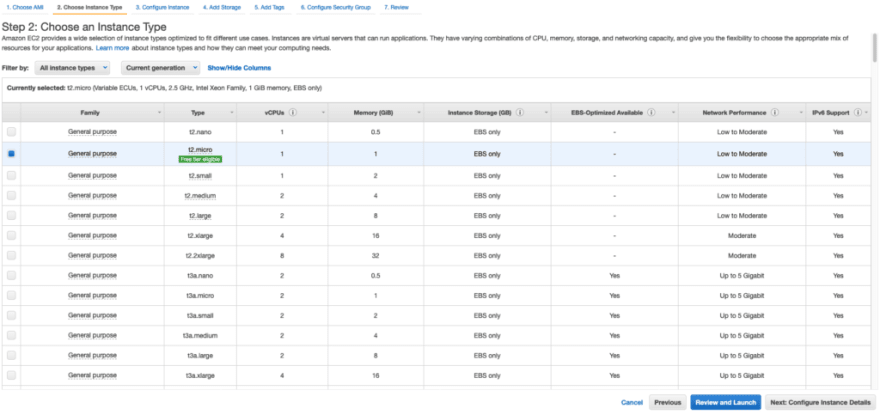
We are using ubuntu 18 with Free tier. Because it is the bastian host and not doing much except enabling us to connect to it from our local machine and to let us connect to the wordpress instance for troubleshooting or testing services.
Select free Tier in instance type section and hit configure instance details at the bottom
In the configure Instance section, make sure you select the same VPC you have used while creating all the Security groups earlier.
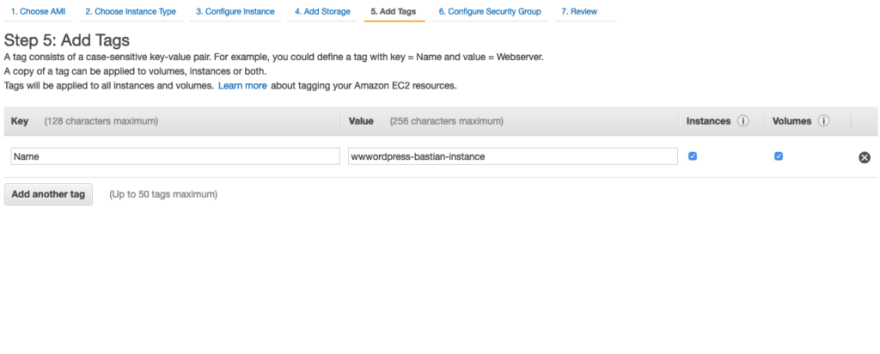
Go to next step i.e Add tags and give your instance a name.
In the section below, use the Bastian Security Group you have created earlier which enables port 22 in Inbound rules.
Click on Review and you will see the following screen. Select the Key Pair you have created and it will create the instance for us.
If you will go to instances, you will see that your bastian instance has been created.
Connect to Bastian Instance
Now FINALLY we are about to do something exciting after all this configuration. It’ll only get better from this point TRUST me !!
We have done most of the heavy lifting
Now open your terminal and go the directory where you have downloaded the Key Pair PEM file. Run the following commands
# To protect a file against accidental overwriting.
chmod 400 wwordpress-key.pem
Once we’re done with the chmod 400. Time to connect to our bastian instance YASSSS !!!!
Click on your bastian EC2 intance and copy the public DNS.
Run the following command from your directory where your PEM file is located.
ssh -i wwordpress-key.pem ubuntu@ec2-3-106-167-129.ap-southeast-2.compute.amazonaws.com
Replace wwordpress-key.pem and ec2-3-106-167-129.ap-southeast-2.compute.amazonaws.com with your Key Pair PEM file name and instance public DNS. You should see the following output on your terminal.
We are now connected to our Bastian Instance via SSH.
Previous
Dockerize WordPress with themes, plugins and common configuration
Next

Posted on February 7, 2020
Join Our Newsletter. No Spam, Only the good stuff.
Sign up to receive the latest update from our blog.
