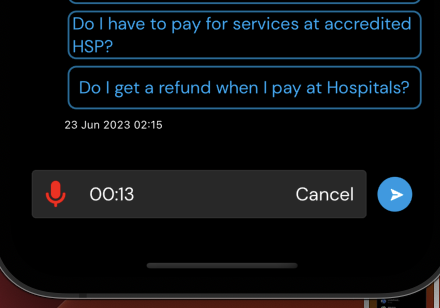
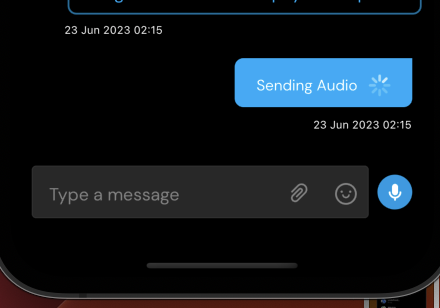
Voicenotes in React Native App

Oluwaseyi Komolafe
Posted on June 23, 2023

Hey there, fellow React Native enthusiast! Are you ready to add some voice recording and playback magic to your app? Well, you're in luck because I'm about to spill the beans on how to do it. So buckle up and let's dive into the wild world of voice notes!
Step 1: Dependencies, the BFFs of React Native
First things first, we need to gather our squad of dependencies. Think of them as your app's best friends forever. Open up your terminal and type in the following command:
npm install react-native-audio-recorder-player react-native-fs react-native-sound-player --save
These buddies will handle all the heavy lifting when it comes to recording and playing audio in your app. They've got your back!
Step 2: Bring in the A-Team
Alright, now that we've got our crew assembled, let's import them into our React Native component. At the top of your component file, add the following lines:
import React, { useState } from 'react';
import { View, Button } from 'react-native';
import {
  AudioEncoderAndroidType,
  AudioSourceAndroidType,
  AVModeIOSOption,
  AVEncoderAudioQualityIOSType,
  AVEncodingOption,
} from 'react-native-audio-recorder-player';
import RNFS from 'react-native-fs';
import SoundPlayer from 'react-native-sound-player';
These imports are like the secret sauce that makes everything work smoothly. We couldn't do it without them!
Step 3: Get in the Zone, State of Mind
Now it's time to set up the stage for our audio adventure. Inside your functional component, declare the states we'll need for recording and playback. Let's keep it simple and sassy:
const VoiceNoteRecorder = () => {
  const [isRecording, setIsRecording] = useState(false);
  const [audioPath, setAudioPath] = useState('');
  const [isPlaying, setIsPlaying] = useState(false);
  // Feel free to add more states if you want to party!
};
These states will keep track of whether we're recording, the path to the recorded audio, and if we're playing any audio. State management, baby!
Step 4: Let the Show Begin!
Now, here's where the real fun starts. We're going to implement the functions for starting, stopping, and sending our amazing voice recordings. Prepare to be amazed!
const startRecording = async () => {
  // Let's get creative and generate a unique audio name!
  const generateAudioName = () => {
    // Come up with a funky way to generate a name here!
  };

  const path = `${generateAudioName()}.aac`;
  // Set up the audio settings for our recording adventure
  const audioSet = {
    AudioEncoderAndroid: AudioEncoderAndroidType.AAC,
    AudioSourceAndroid: AudioSourceAndroidType.MIC,
    AVModeIOS: AVModeIOSOption.measurement,
    AVEncoderAudioQualityKeyIOS: AVEncoderAudioQualityIOSType.high,
    AVNumberOfChannelsKeyIOS: 2,
    AVFormatIDKeyIOS: AVEncodingOption.aac,
  };
  const meteringEnabled = false;

  // Let the countdown begin...or not!
  await setCountdown(0);
  await setSeconds(0);
  await setMinutes(0);
  setStartCountdown(true);

  try {
    // Start the recording and get the audio URI
    const uri = await audioRecorderPlayer?.current?.startRecorder(
      path,
      audioSet,
      meteringEnabled,
    );
    setIsRecording(true);
    setAudio
    setAudioPath(uri);
  } catch (error) {
    console.log('Uh-oh! Failed to start recording:', error);
  }
};
Let's say we get distracted by a barking dog and have the voicenotes ruined and we need to start all over, the user should be able to cancel and start all over.
const stopRecording = async () => {
  setStartCountdown(false);
  try {
    // Stop the recording and see what we've got
    const result = await audioRecorderPlayer?.current?.stopRecorder();
    setIsRecording(false);
  } catch (error) {
    console.log('Oops! Failed to stop recording:', error);
  }
};
But in the case where we have recorded successfully and need to send out the voice note. we call the prepRecording function:
const prepRecording = async () => {
  setStartCountdown(false);
  try {
    // Stop the recording (for real this time)
    const result = await audioRecorderPlayer?.current?.stopRecorder();
    const fileContent = await RNFS.readFile(audioPath, 'base64');
    const fileInfo = await RNFS.stat(audioPath);
    const vnData = {
      fileCopyUri: fileInfo?.path,
      size: fileInfo?.size,
      type: 'audio/mpeg',
      name: `${generateAudioName()}.${getFileType(fileInfo?.path)}`,
    };
    const vnBase = `data:application/audio;base64,${fileContent}`;
    setAudioFile(vnData);
    setAudioBase(vnBase);
    // Now input code here to send your voicenote to websocket endpoint.
    setIsRecording(false);
  } catch (error) {
    console.log('Uh-oh! Failed to stop and send recording:', error);
  }
};
Alright, folks! It's time to put on a show. Let's play and pause our magnificent audio recordings.
const playAudio = async (newAudioUrl) => {
  if (active === newAudioUrl) {
    try {
      if (isPlaying) {
        await SoundPlayer.pause(); // Pause the audio if already playing
        setIsPlaying(false);
      } else {
        await SoundPlayer.resume(); // Resume playing the audio if paused
        setIsPlaying(true);
      }
    } catch (error) {
      console.log('Oh no! An error occurred while pausing/resuming audio:', error);
    }
  } else {
    try {
      if (isPlaying) {
        await SoundPlayer.stop(); // Stop the currently playing audio
      }
      dispatch(setPlaying(newAudioUrl)); // Set the new audio URL
      setIsPlaying(true);
      const soundData = await SoundPlayer.getInfo();
      setTotalDuration(soundData?.duration);
      SoundPlayer.addEventListener('FinishedPlaying', () => {
        setIsPlaying(false); // Reset the playing state when audio finishes playing
        dispatch(clearPlaying(newAudioUrl));
      });

      await SoundPlayer.playUrl(newAudioUrl); // Play the new audio
      const audio = await SoundPlayer.getInfo();
      setTotalDuration(audio?.duration);
    } catch (error) {
      console.log('Oops! An error occurred while playing audio:', error);
    }
  }
};
And that's a wrap! With these snippets of code, you'll be the star of the audio recording and playback show in your React Native app. Remember to add your own creative flair to generate unique audio names or customize the functionality as needed.
So go forth, unleash the power of voice notes, and let your app sing its heart out! Happy coding! 🎤🎶

Posted on June 23, 2023
Join Our Newsletter. No Spam, Only the good stuff.
Sign up to receive the latest update from our blog.
Related

July 5, 2022


