Getting Started with Artillery

NaveenKumar Namachivayam ⚡
Posted on July 28, 2022

There are over 50+ performance testing tools available in the market. It is not possible to learn all the tools, but instead, learning the general performance concepts helps you to master any tool irrespective of programming language. I usually cherry-pick when I write blog or create video tutorials. In this blog article, we are going to see about Artillery.
Artillery
Artillery is a modern open-source performance testing tool for performance test engineers, DevOps, SREs, and more.
It is built on top of JavaScript, and we can declare the tests in yaml format.
Following are the Artillery features which I picked from their repo:
- Supports various protocols
- Cloud-native and highly scalable
- Supports correlation, data parameterization, transactions, conditional logic, quick load testing and more
- Supports synthetic and functional tests
- O11Y and CI/CD integrations
- and more
Artillery comes with two flavors: Artillery Core and Artillery Pro. Artillery Pro is a premium offering with cloud features.
Installing Artillery
You can leverage npm to install the Artillery library using either of the below commands.
npm install -g artillery@latestTo validate, enter the below command:
artillery version
Hello Dino
To verify the artillery installation, enter the below command, which will display a Dino in rainbow colors.
artillery dino -m "QAInsights" -rHello Quick Load Testing
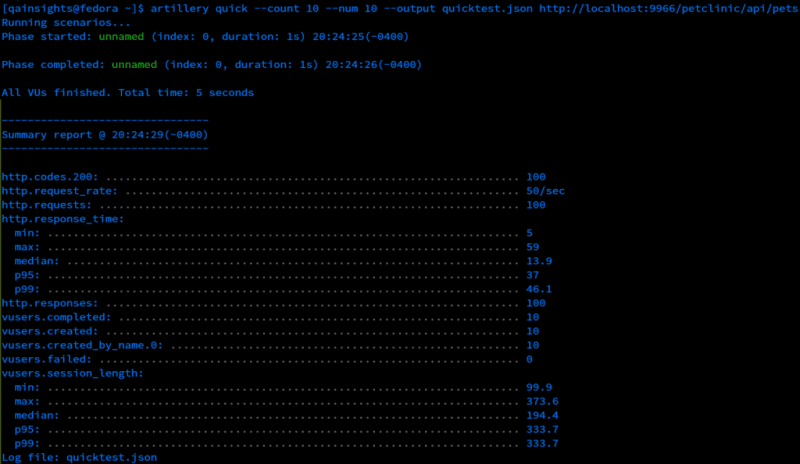
Let us run a quick load test without writing any tests in yaml. Enter the below command which will execute 10 virtual users each sending 10 requests, and stores the performance stats in the JSON file.
artillery quick --count 10 --num 10 --output quicktest.json http://localhost:9966/petclinic/api/petsHello Web Service
Now it is time to write our simple test in YAML format.
Below is the simple hello world test in Artillery. Copy and paste into hello-web-service.yml file.
config:
  target: http://localhost:9966/petclinic/api

scenarios:
- name: petclinic
  flow:
  - get:
      url: /pets
  - get:
      url: /pettypes
The inception JSON object is config which defines the target app. We create scenarios to define our flow. Each scenario has a name and flow. flow can be an array where we can define our steps sequentially as shown above.
Feel free to edit the target to a valid URL and execute the below command to start a smoke test.
artillery run hello-web-service.ymlThe above command will execute the yaml with 1 virtual user for 1 second duration.
The stats will be displayed in the terminal by default.
Data Parameterization
Here is a demo of how data parameterization works in Artillery.
Correlation
Here is a demo of how correlation works in Artillery.
Learn Artillery Series - GitHub Repo
<!-- /wp:button -->
HTML Report
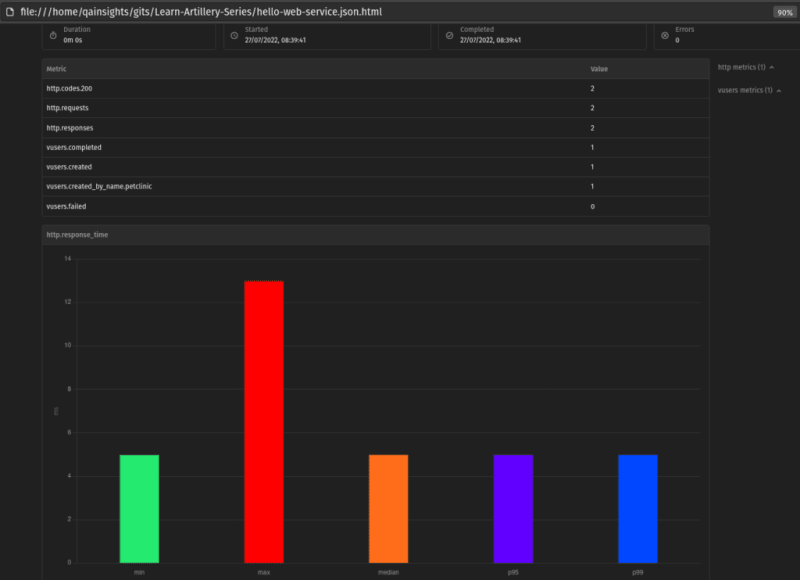
Artillery generates a basic HTML report from the output JSON. Generating a report involves a two-step process. First, we need to pass the output tag during the execution. The second step is to generate a report using the report command.
artillery run hello-web-service.yml --output hello-web-service.jsonartillery report hello-web-service.jsonPhases
To design the workload model, we can leverage Phases object in yaml. Here is a quick demo of phases.
Final Thoughts
We just scratched the surface of Artillery by seeing various fundamental concepts. Artillery also supports conditional logic, custom JS code, Docker, Kubernetes, Debugging, UI mode, O11Y integrations and more. If you already know JavaScript, then you do not need to learn a new language to work with Artillery. JavaScript expertise is required only if you are writing complex scripts.
Since Artillery wraps the core concepts, most of the time you will be good with the core features. You may need to opt in to Artillery Pro if you are planning to use highly scalable and distributed load testing in your AWS infrastructure. If you are into JMeter world and maintaining the scripts for a long time, I do not see any solid reason to switch it to another framework.

Posted on July 28, 2022
Join Our Newsletter. No Spam, Only the good stuff.
Sign up to receive the latest update from our blog.


