Deploy back-end api application with database to the kubernetes cluster with Jenkins CD

pongsatt
Posted on November 3, 2018

We will create a simple graphql api application that connects to mongodb. Then deploy to kubernetes cluster using Jenkins CD.
In addition, we will create ingress that support https so we can access this application securely.
This post is part of series "Setup your own kubernetes cluster on VMs".
Note:
This post assume that you follow from previous post
Prerequisite:
- A running kubernetes cluster with storage-class support
- Jenkins server with pipeline support
- Docker private repository
Build Application
We will create a project called "simpleapi" which is a graphql with mongodb application using nodejs.
1. Create project
mkdir simpleapi
cd simpleapi
yarn init -y
2. Build graphql api
yarn add graphql-yoga mongodb
Create "db.js" at root folder with content below.
const mongoClient = require('mongodb').MongoClient

module.exports = {
    users: () => execute((coll) => coll.find().toArray()
        .then(results => results.map(idToString))),
    createUser: (name) => execute((coll) => coll.insertOne({ name })
        .then(result => idToString(result.ops[0])))
}

function execute(fn) {
    return mongoClient.connect(process.env.DB_URL || 'mongodb://localhost:27017/test')
        .then(client => {
            const result = fn(client.db().collection('users'))
            client.close()
            return result
        })
}

function idToString(doc) {
    const {_id, ...rest} = doc
    return {_id: _id.toString(), ...rest}
}
This program connects mongo at url "mongodb://localhost:27017/test" or url from environment name "DB_URL" if provided.
It also contains 2 functions for querying user list and create new user. We will use these functions in "index.js" below.
Create "index.js" at root folder with content below.
const { GraphQLServer } = require('graphql-yoga')
const db = require('./db')

const typeDefs = `
  type User {
      _id: ID
      name: String
  }

  type Query {
    users: [User]
  }

  type Mutation {
      createUser(name: String!): User!
  }
`

const resolvers = {
  Query: {
    users: (_, { }) => db.users()
  },
  Mutation: {
    createUser: (_, {name}) => db.createUser(name)
  }
}

const server = new GraphQLServer({ typeDefs, resolvers })
server.start(() => console.log('Server is running on http://localhost:4000'))
In this program, we define graphql schema with function to query user and user creation and start server at port 4000.
3. Test graphql api
Note:
You need mongodb running at "mongodb://localhost:27017" to be able to test
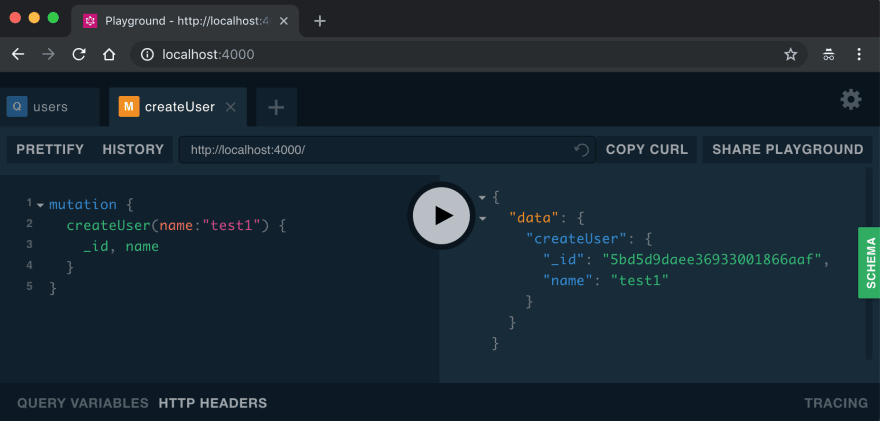
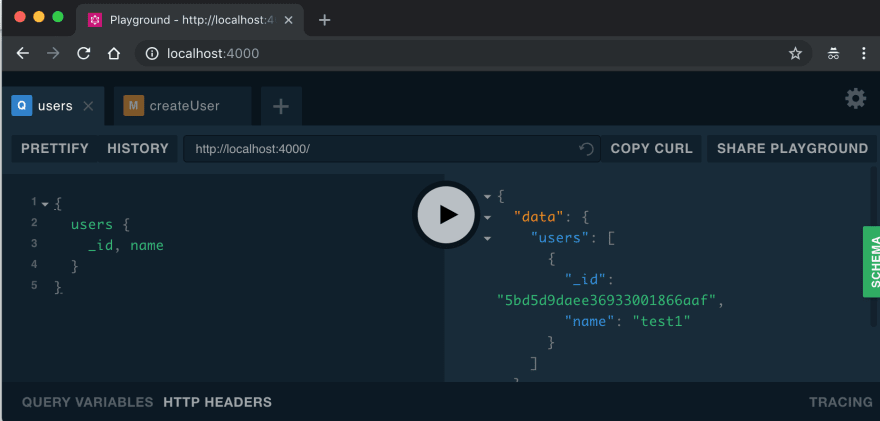
Start server by running node index.js and open url "http://localhost:4000".
Create user.
Query user.
Add Jenkins pipeline to project
The api application pipeline will need Dockerfile, kubernetes and Jenkins pipeline configurations.
1. Dockerfile
Here is the nodejs based Dockerfile configuration.
FROM node:8.11.0-alpine

WORKDIR /usr/src

COPY ./*.js package.json yarn.lock ./
RUN yarn install

EXPOSE 4000
CMD [ "node", "index.js"]
1. Kubernetes for database
Create file "k8s/db.yml" with content below.
kind: PersistentVolumeClaim
apiVersion: v1
metadata:
  name: simpleapi-db-claim
  annotations:
    volume.beta.kubernetes.io/storage-class: "ssdnfs"
spec:
  accessModes:
    - ReadWriteMany
  resources:
    requests:
      storage: 1Gi
---

apiVersion: v1
kind: ReplicationController
metadata:
  labels:
    name: simpleapi-db
  name: simpleapi-db
spec:
  replicas: 1
  template:
    metadata:
      labels:
        app: simpleapi-db
    spec:
      containers:
      - image: mongo
        name: mongo
        ports:
        - name: mongo
          containerPort: 27017
        volumeMounts:
            - name: mongo-persistent-storage
              mountPath: /data/db
      volumes:
        - name: mongo-persistent-storage
          persistentVolumeClaim:
            claimName: simpleapi-db-claim
---
apiVersion: v1
kind: Service
metadata:
  labels:
    name: simpleapi-db
  name: simpleapi-db
spec:
  ports:
    - port: 27017
      targetPort: 27017
  selector:
    app: simpleapi-db
This configuration will create Persistent Volume Claim that use storage class "ssdnfs" we created from previous post. We also define mongodb instance and its service.
We can access this db within cluster using "simpleapi-db:27017".
2. Kubernetes for application
Create file "k8s/api.yml" with content.
apiVersion: extensions/v1beta1
kind: Deployment
metadata:
  name: simpleapi
spec:
  replicas: 1
  template:
    metadata:
      labels:
        app: simpleapi
    spec:
      containers:
        - name: simpleapi
          image: "<imageTag>"
          env:
          - name: DB_URL
            value: "mongodb://simpleapi-db:27017/test"
          ports:
          - name: http
            containerPort: 4000
          readinessProbe:
            httpGet:
              path: /
              port: 4000
            initialDelaySeconds: 5
            periodSeconds: 10
          livenessProbe:
            httpGet:
              path: /
              port: 4000
            initialDelaySeconds: 3
            periodSeconds: 20
---
apiVersion: v1
kind: Service
metadata:
  name: simpleapi
spec:
  ports:
    - name: http
      port: 80
      targetPort: 4000
  selector:
    app: simpleapi
This config composes of a Deployment and Service. We can access this application through service "simpleapi:80".
We also override database url with environment "DB_URL".
will be replaced in the build process since it's generated later.
3. Kubernetes for ingress
As promise, this api will be able to access through https via ingress configuration (Setup from previous post).
Create file "k8s/ingress.yml".
Notes:
If you apply letsencrypt certificate using http01 protocol, you will need to uncomment/comment annotations.
Replace "simpleapi.yourdomain.com" with your real domain name
You will need to create DNS record for "simpleapi.yourdomain.com" so that it can apply for certificate (See previous post for more detail)
apiVersion: extensions/v1beta1
kind: Ingress
metadata:
  name: simpleapi-ingress
  annotations:
    kubernetes.io/ingress.class: "nginx"

    # use http01 protocol. uncomment line below to use http01
    # kubernetes.io/tls-acme: "true"

    # use dns01 protocol. comment 2 lines below if use http01
    certmanager.k8s.io/acme-challenge-type: "dns01"
    certmanager.k8s.io/acme-dns01-provider: "aws-route53"

spec:
  tls:
  - hosts:
    - simpleapi.yourdomain.com
    secretName: simpleapi-tls
  rules:
  # The host must be identical to the above one
  - host: simpleapi.yourdomain.com
    http:
      paths:
      - path: /
        backend:
          # The name of your service
          serviceName: simpleapi
          servicePort: 80
4. Jenkinsfile
Create "Jenkinsfile" at the root folder.
Notes:
Replace "192.168.1.105:8082" with your private registry
You need to create "User/password" credential name "myregUserPass" to access your Docker repository in Jenkins
pipeline {
    environment {
        IMAGE_TAG = "${env.BUILD_NUMBER}"
        REGISTRY = "192.168.1.105:8082"
        APP = "simpleapi"
    }
    agent { label 'docker' }

    stages {
        stage('build and push image') {
            steps {
                script {
                    docker.withRegistry("http://${REGISTRY}", 'myregUserPass') {
                        docker.build("${APP}").push("${IMAGE_TAG}")
                    }
                }
            }
        }
        stage('deploy') {
            steps {
                sh("sed -i.bak 's|<imageTag>|${REGISTRY}/${APP}:${IMAGE_TAG}|' ./k8s/api.yml")
                sh("kubectl apply -f k8s/")
            }
        }

    }

}
There are 2 stages in this pipeline.
- build and push image: build and push new image to docker private repo
- deploy: replace and apply all yml files
At this point, your project folders should look like this.
5. Publish project to git repository
You can push to any git. We will use this to configure Jenkins in next step.
Configure kubernetes for docker private registry
Kubernetes cluster will need to know user and password in order to pull image from it. We can set it up by patching service account that pull the image, in this case, default service account.
Create secret
On your master node.
Notes:
Replace with your private registry server
Replace with your registry data
kubectl create secret docker-registry dockerconfig --docker-server=<your-registry-server> --docker-username=<your-name> --docker-password=<your-pword> --docker-email=<your-email>

kubectl patch serviceaccount default -p '{"imagePullSecrets": [{"name": "dockerconfig"}]}'
Create Jenkins Pipeline
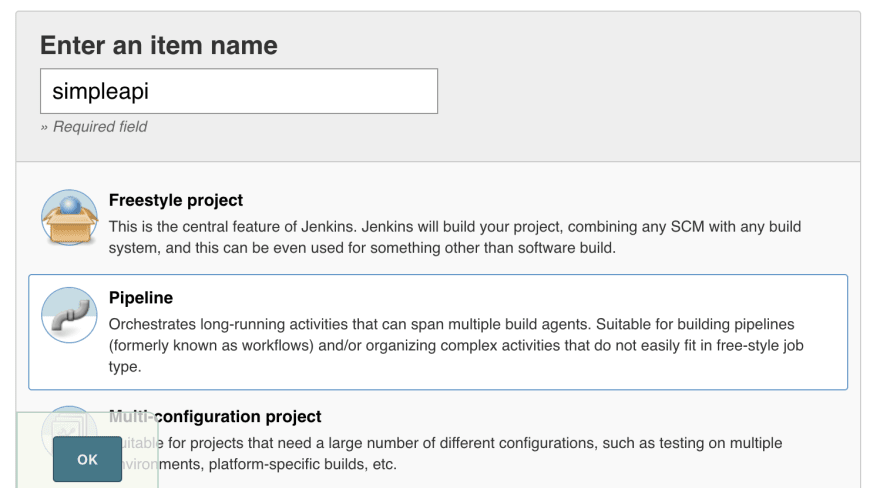
Now, we will create new pipeline project in Jenkins called "simpleapi".
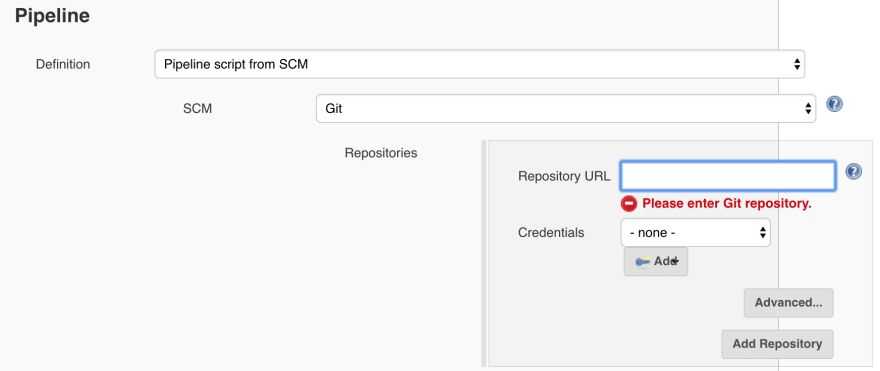
Set git repository and credential.
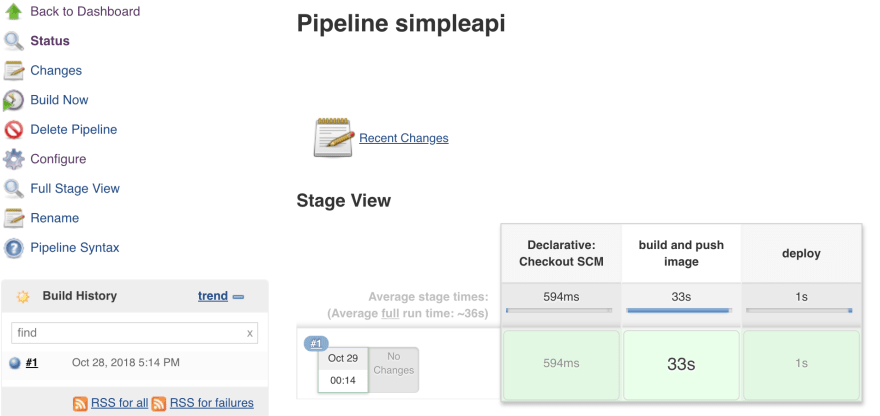
Run build and wait until success.
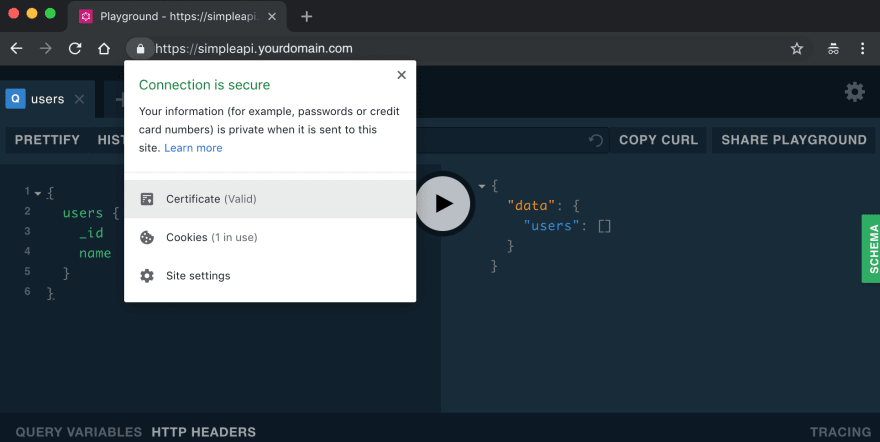
Run kubectl get secret. If you see "simpleapi-tls", means we can access our application through "https://simpleapi.yourdomain.com".
Summary
This is the last post of this series. We learned how to setup cluster until create front and back end with ingress and dynamic storage. I hope these posts provide some values for you. Thanks.

Posted on November 3, 2018
Join Our Newsletter. No Spam, Only the good stuff.
Sign up to receive the latest update from our blog.
Related

November 3, 2018
