Build and publish your first GitHub Action

Gary Großgarten
Posted on March 18, 2020
If you are using GitHub you most likely already heard about GitHub Actions. With GitHub Actions you can fulfill all of your CI/CD dreams right where your code lives. You do this by defining jobs that run a series of Actions - The building blocks of your repository workflows. This enables you to stay productive even when managing multiple projects at once. 👨💻
In this short guide you will learn how to create your first GitHub Action and publish it on the GitHub Marketplace! 💙
Quickstart
To get started quickly, you can initialize your own Action repository by generating it from GitHub Action Template. For the sake of simplicity this repository is a minimized version of the official typescript action template. You are free to choose which starter you want to use. The steps to build and release your Action will essentially remain the same.
Visit GitHub Action Template and click on Use this template.
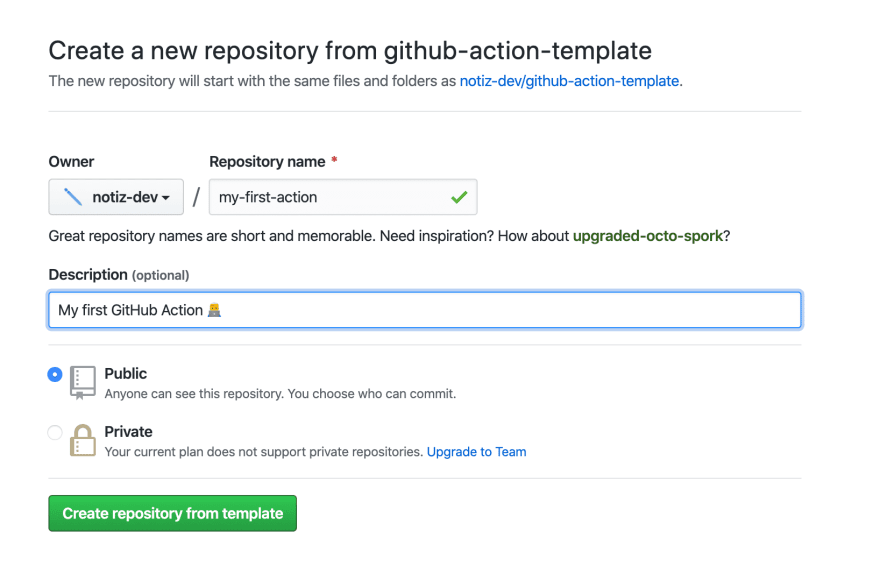
Fill out the form and click on Create repository from template.
Next clone your newly created repository and open it with your favorite IDE.
git clone git@github.com:<USERNAME/ORG>/<REPOSITORY>.git
Install all dependencies by running npm i.
Great! Everything is set up! 🚀 In the next section of this guide you'll get an overview of the most important files.
Template Overview
First, inspect index.ts:
The template Action is a simple script that receives an input string and outputs a hello world like greeting. (E.g. input World ➡ output Hello World). See how the actions/core api is being used to receive the value of the my_input input and to set the resulting string as an output. Also, setFailed can be called to set the running workflow as failed and stop the execution. API Documentation
Most toolkit and CI/CD operations involve async operations so your run function will most likely be async.
import * as core from '@actions/core';

async function run() {
  try {
    await asyncFunction();
  } catch (err) {
    core.setFailed(err.message);
  }
}

run();
Second, see action.yml in the root of your project.
name: 'GitHub Action Template'
description: 'simple typescript template for building GitHub Actions'
author: 'notiz.dev'
inputs:
  my_input:
    description: 'input description here'
    default: 'World'
runs:
  using: 'node12'
  main: 'dist/index.js'
branding:
  color: 'yellow'
  icon: 'bell'
The action.yml file defines some metadata that is mandatory to run and publish your Action on GitHub. Besides general information like name, description and author, you'll want to define all the necessary inputs for your Action. The entrypoint of the Action is set to run dist/index.js using version 12 of node. This file will be created once you build and pack the project.
To publish the Action, you additionally need to define a branding for how your Action appears on the GitHub Marketplace. For more information on the configuration of your Action see Metadata syntax for GitHub Actions.
Lastly, you'll find a workflow file under .github/workflows/test.yml.
name: 'test'
on: # rebuild any PRs and main branch changes
  pull_request:
  push:
    branches:
      - master
      - 'releases/*'

jobs:
  test:
    runs-on: ubuntu-latest
    steps:
    - uses: actions/checkout@v1
    - name: run action
      id: run_action
      uses: ./
      with:
        my_input: 'World'

    - name: log action output
      run: echo ${{steps.run_action.outputs.my_output}}
Essentially, this will start a workflow testing your Action on every push to master/release or on PRs. The test job will checkout and run your Action, defining World as the input value for my_input.
Finally, the log action output step of your job will echo the output set by your GitHub Action. Note the id that is defined in the run action step and later used to retrieve the output value.
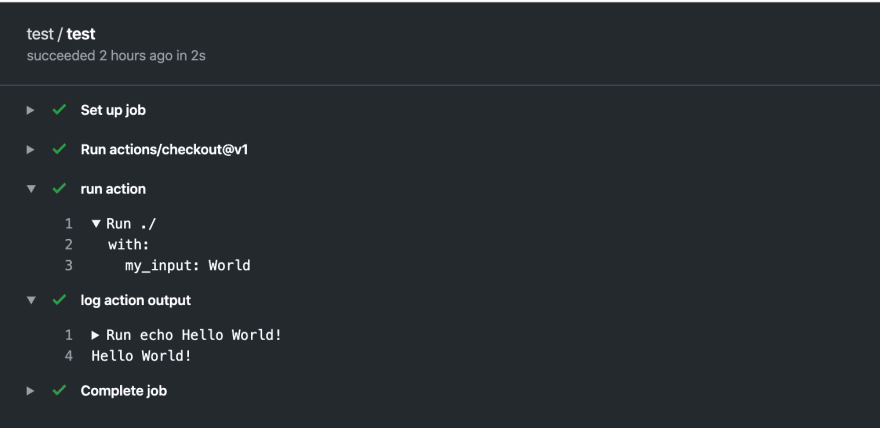
By creating your repository from the template earlier, the workflow already got invoked once:
As you can see in the image above, the log action output step successfully echoed Hello World to the console.
Implement the Action
Next, the fun part! 🙋
Implement your own Typescript code in src/index.ts. Just remember to update the action.yml and the test workflow .github/workflows/test.yml before pushing your changes. You can obviously do everything you want here. Feel free to install other libraries via npm.
To build changes to your Typescript code run:
npm run build
This will compile your Typescript to a lib folder.
Next, run:
npm run pack
This script will bundle your lib together with the required production node_modules. The bundled package can now be found in the dist folder containing the index.js that's been declared as the entrypoint in your action.yml.
See JSON Property GitHub Action for another example.
Publish to GitHub Marketplace
After you built and packed the Action you are ready to commit and push your changes to the GitHub Repository. You should definitely add a README with instructions on how to use your Action.
Check if your test workflow is working as expected. If you are happy with the results, you are ready to finally publish your Action to the Marketplace.
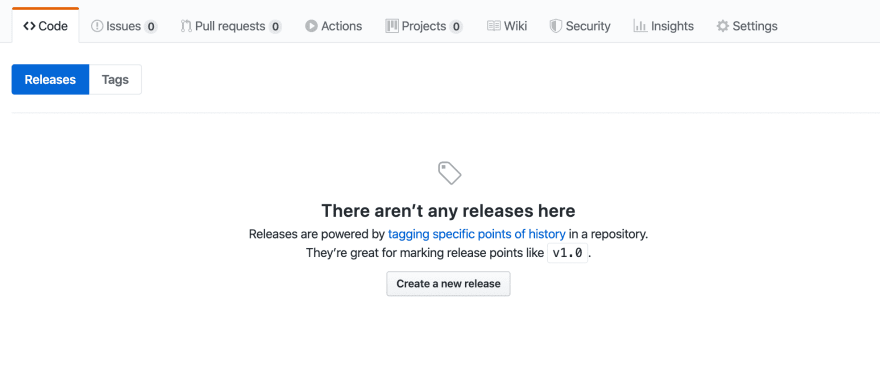
Hit the release tab of your repository to create a new version of your Action.
Click on Create a new release and select Publish this Action to the GitHub Marketplace.
Check if all requirements are checked and proceed to file the release.
Enter a tag and release title. Optionally specify a release description before clicking Publish release.
To make it easy for users to always use the latest release of your Action you can tag the newly created version with a
releasetag. Next time you release a version you can move thereleasetag from the previous to the latest version.
Using your Action
By now you should have a published version of your Action on the GitHub Marketplace.
You should see the Marketplace banner on your repository page:
Inspect the Action entry in GitHub Marketplace:
Use your Action by creating a workflow file in a repository of your choice. In case you tagged the version with the release tag, include your Action as follows:
...

jobs:
  test:
    runs-on: ubuntu-latest
    steps:
    - name: run action
      id: run_action
      uses: <USERNAME/ORG>/<REPOSITORY>@release
      with:
        my_input: 'World'

    - name: log action output
      run: echo ${{steps.run_action.outputs.my_output}}

...
Please replace <USERNAME/ORG> and <REPOSITORY> with your repository details.
Conclusion
Awesome, you made it to the end of this guide. 🎉
As you could see, building and publishing your first GitHub Action is fairly straightforward. To not double the efforts of building certain Actions you should check the Marketplace and this awesome list.
If you have further questions on the topic, feedback on the article or just want to say hi you can hit me up on twitter.

Posted on March 18, 2020
Join Our Newsletter. No Spam, Only the good stuff.
Sign up to receive the latest update from our blog.


