Exploring litmusctl: A Comprehensive Guide

Nagesh Bansal
Posted on August 23, 2023

This blog is a guide that explains how to run LitmusChaos on a remote cluster using Litmusctl. It's not just about scheduling Chaos Scenarios on your main cluster – Litmus also lets you set up Chaos on a remote cluster.
Litmusctl, a command-line utility developed by the LitmusChaos community, offers a powerful set of commands to manage, configure, and control various aspects of chaos engineering experiments.
In this guide, we will dive into the syntax, usage, and capabilities of litmusctl, making it easier for you to leverage this tool effectively.
Pre-Requisites
To run this experiment, we need a few things beforehand:
- Minikube cluster. Recommended sizing of at least: 2 vCPUs, 8GB memory, 10GB of disk space (for persistent volume creation)
- Helm3 or Kubectl
- Access to Internet from Cluster
- Have Litmus 3.0.0-beta9 or later installed.
- A Google Cloud Account
- A GCP project with privileges to access GKE.
Setting Up LitmusChaos Cluster on GCP
I'm using the GCP Kubernetes Engine to Run a LitmusChaos Chaoscenter instance on a remote cluster.
PS: You can use some other alternatives or maybe even a local cluster using minikube.
Install Litmus
Mongo installation via Helm - Bitnami Mongo
helm repo add bitnami https://charts.bitnami.com/bitnami
mongo-values.yml
auth:
  enabled: true
  rootPassword: "1234"
  # -- existingSecret Existing secret with MongoDB(®) credentials (keys: `mongodb-passwords`, `mongodb-root-password`, `mongodb-metrics-password`, ` mongodb-replica-set-key`)
  existingSecret: ""
architecture: replicaset
replicaCount: 3
persistence:
  enabled: true
volumePermissions:
  enabled: true
metrics:
  enabled: false
  prometheusRule:
    enabled: false

# bitnami/mongodb is not yet supported on ARM.
# Using unofficial tools to build bitnami/mongodb (arm64 support)
# more info: https://github.com/ZCube/bitnami-compat
#image:
#  registry: ghcr.io/zcube
#  repository: bitnami-compat/mongodb
#  tag: 6.0.5
helm install my-release bitnami/mongodb --values mongo-values.yml -n litmus --create-namespace
Apply the Manifest
Applying the manifest file will install all the required service account configuration and ChaosCenter.
kubectl apply -f https://litmuschaos.github.io/litmus/3.0.0-beta10/litmus-3.0.0-beta10.yaml
Verify the Installation
Check if the Litmus control plane components comprising the Web-UI (frontend), GraphQL server(server), Auth-server & MongoDB pods are created and running successfully.
litmusctl-guide@cloudshell:~ (litmus-393109)$ kubectl get po -n litmus
NAME                                       READY   STATUS    RESTARTS
litmusportal-auth-server-78dfb9f65-hq4lm   1/1     Running   0
litmusportal-frontend-8cd79bb47-88qgm      1/1     Running   0
litmusportal-server-7b85867b95-j2ndz       1/1     Running   0
my-release-mongodb-0                       1/1     Running   0
my-release-mongodb-1                       1/1     Running   0
my-release-mongodb-2                       1/1     Running   0
my-release-mongodb-arbiter-0               1/1     Running   0
It might take a few minutes for all the pods to have a running state. Give it some time.
Access the ChaosCenter
To access the litmus frontend, we need to know what service exposes this frontend. To get a list of running services in the litmus namespace, run the below command.
kubectl get svc -n litmus
NAME                                  TYPE        CLUSTER-IP     EXTERNAL-IP   PORT(S)
litmusportal-auth-server-service      NodePort    10.8.xxx.xxx   <none>        9003:xxxxx/TCP,3030:xxxxx/TCP
litmusportal-frontend-service         NodePort    10.8.xxx.xxx   <none>        9091:xxxxx/TCP
litmusportal-server-service           NodePort    10.8.xxx.xxx   <none>      9002:xxxxx/TCP,8000:xxxxx/TCP
my-release-mongodb-arbiter-headless   ClusterIP   None           <none>        27017/TCP
my-release-mongodb-headless           ClusterIP   None           <none>        27017/TCP
From the above, we can see that the frontend is exposed via a NodePort service and it has the name of litmusportal-frontend-service. It exposes this service on a TCP port that looks something like 9091:xxxxx/TCP where xxxxx is the corresponding node port of the service.
To access the ChaosCenter, we need to expose this port by using a firewall rule. We can do this by running this command:
Expose the node port
gcloud compute firewall-rules create frontend-service-rule --allow tcp:<NODE_PORT>
Replace the NODE_PORT in the command above with your service's node port. You should expose the firewall for both the litmusportal-frontend-service and the litmusportal-server-service.
You can now access the ChaosCenter, but first, you need to get the external IPs of your node.
Get node external IPs
nageshbansal59@cloudshell:~ (litmus-393109)$ kubectl get nodes -o wide
NAME                                           STATUS   ROLES    AGE   VERSION            INTERNAL-IP   EXTERNAL-IP     OS-IMAGE                             KERNEL-VERSION   CONTAINER-RUNTIME
gk3-autopilot-cluster-1-pool-1-243efeac-8xwq   Ready    <none>   19d   v1.26.5-gke.1400   10.xxx.xx.xxx   34.xxx.xx.xxx   Container-Optimized OS from Google   5.15.107+        containerd://1.6.18
gk3-autopilot-cluster-1-pool-1-936f0a64-4rmh   Ready    <none>   19d   v1.26.5-gke.1400   10.xxx.xx.xxx   34.xxx.xx.xxx    Container-Optimized OS from Google   5.15.107+        containerd://1.6.18
gk3-autopilot-cluster-1-pool-1-dcd5ea45-xx28   Ready    <none>   8d    v1.26.5-gke.1400   10.xxx.xx.xxx   34.xxx.xx.xxx    Container-Optimized OS from Google   5.15.107+        containerd://1.6.18
Copy the external IP of any of the above nodes and paste it into your browser's URL, followed by a :xxxxx where xxxxx corresponds to your node port. You will be presented with a screen showing the ChaosCenter's homepage.
Accessing the Chaos-Center
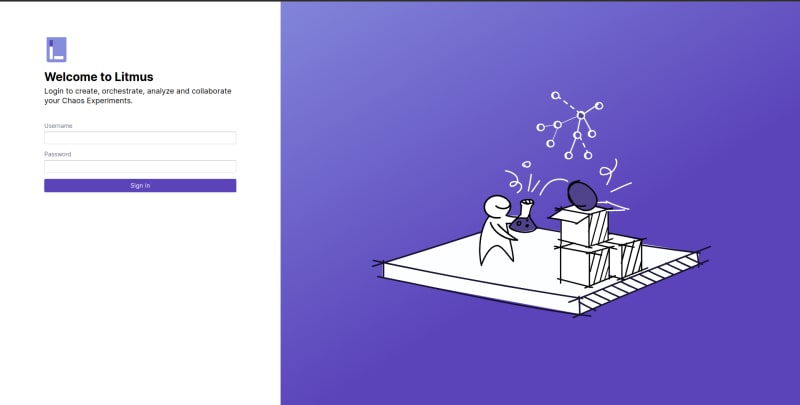
Use Following Credinatls to login into the Chaos-Center:
Username: admin
Password: litmus
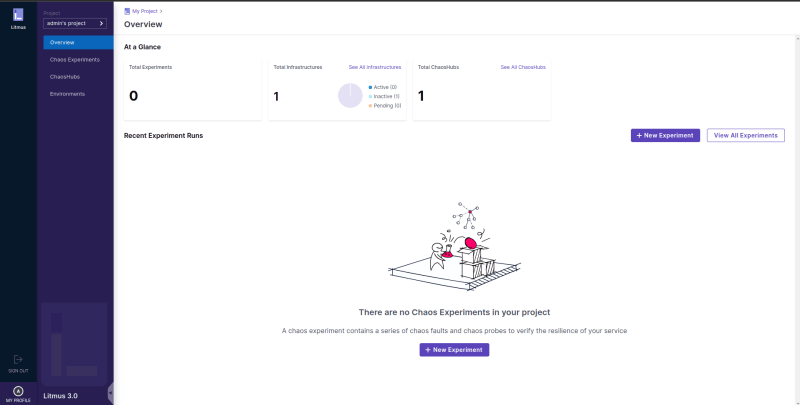
and here is the your Chaos-Center:
Litmusctl
The Litmuschaos command-line tool, litmusctl, allows you to manage litmuschaos's execution plane. You can use litmusctl to connect Chaos Infrastructures, create project, schedule Chaos Experiments, disconnect Chaos Experiments and manage multiple litmuschaos accounts.
Litmusctl binaries can be downloaded from the Litmusctl Releases according to the Compatibility Matrix.
As for now we're using the Litmus-3.0.0-beta10, so litmusctl-0.23.0 will be the version you should download according to OS.
NOTE: The binary should be downloaded to the target cluster and not the GKE cluster where the control plane is situated.
Installing litmusctl
For Linux/MacOS
- Extract the binary
tar -zxvf litmusctl-<OS>-<ARCH>-<VERSION>.tar.gz
- Provide necessary permissions
chmod +x litmusctl
- Move the litmusctl binary to /usr/local/bin/litmusctl. Note: Make sure to use root user or use sudo as a prefix
mv litmusctl /usr/local/bin/litmusctl
Verify Installation
>> litmusctl version
Litmusctl version:  0.23.0
Compatible ChaosCenter versions:
Using Litmusctl commands
litmusctl commands in Linux/macOS:
litmusctl <command> <subcommand> <subcommand> [options and parameters]
For using the v0.23.0 with Litmus-3.0.0-beta9 or later you can refer to the User Guide for v0.23.0
Connecting a Chaos Infrastucture to Chaos-Center
Litmusctl has the following requirements:
kubeconfig - litmusctl needs the kubeconfig of the k8s cluster where we need to connect litmus chaos delegates. The CLI currently uses the default path of kubeconfig.
kubectl - litmusctl is using kubectl under the hood to apply the manifest. To install kubectl, follow: kubectl
NOTE : I'm using a Minikube Cluster Locally.
- To setup an account with litmusctl
litmusctl config set-account
Next, you need to enter ChaosCenter details to login into your ChaosCenter account. Fields to be filled in:
ChaosCenter URL: Enter the URL used to access the ChaosCenter.(The Url we used to get to the frontend)
Example, https://34.xxx.xx.xxx:XXXX
Username: Enter your ChaosCenter username.
Password: Enter your ChaosCenter password.
Host endpoint where litmus is installed: 34.xxx.xx.xxx
Username [Default: admin]: admin

Password:
account.username/admin configured
- To Get a List of Projects
litmusctl get projects
- To connect a Chaos Infrastructure in a cluster mode
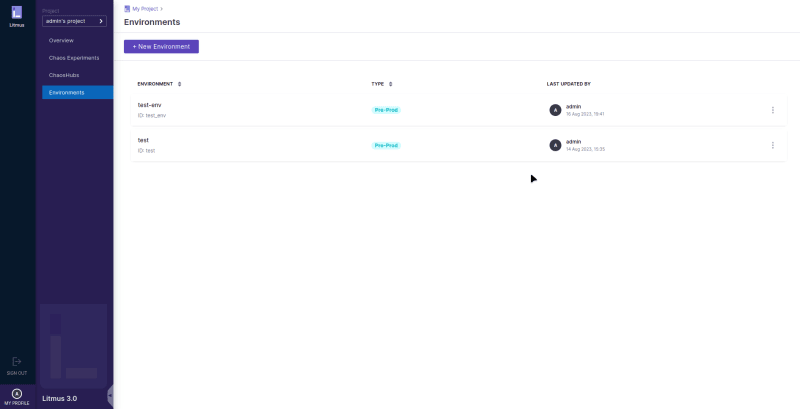
Before a connecting a new Infrastructure check if you have an existing environment in your chaos-center.
If you don't have any, new environments can be created using the command:
litmusctl create chaos-environment

Enter the Project ID: f20b7907-8644-42ad-b813-fbac39fb8eb4

Enter the Environment Name: demo-env

🚀 New Chaos Environment creation successful!! 🎉
EnvironmentID: demo_env
Now finally connecting a new Infrastructure
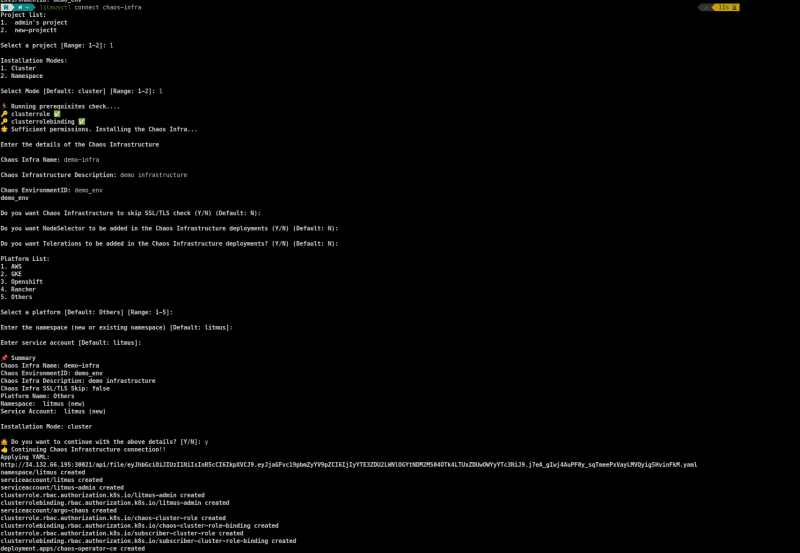
litmusctl connect chaos-infra
After Running this command, several details are required to connect the new Infrastructure:
And, after applying the manifest to your local cluster, we will get:
also, you can see the new Infrastructure in chaos-center:
Now,I would suggest you to try to run a Chaos Experiment Using the Litmusctl and Chaos-Center both and, let me know how it goes. ( Refer to Usage Guide if you hit any blocker :-).
And before we sign off, a big shoutout and heartfelt thanks go to the amazing folks behind the scenes—the Litmus team! Your dedication to crafting a tool as awesome as litmusctl doesn't go unnoticed
Discover more about LitmusChaos by becoming part of our community on GitHub and Slack.
It's time to let the chaos begin! 🚀🔥

Posted on August 23, 2023
Join Our Newsletter. No Spam, Only the good stuff.
Sign up to receive the latest update from our blog.


