Michael Lohr
Posted on March 10, 2022

Cover Photo by Samantha Lam on Unsplash.
When using tools like git, ssh etc. from the command line, reentering the passphrases of your keys can become very tedious rather quickly. This is where key management comes into play: Basically, you want to unlock your key once and keep it ready in your session for the tools to use it until the point where a timeout or system restart occurs.
I always just used some zsh ssh-agent plugin or had
eval ssh-agentin my.bashrctotally unaware of the fact that this is a very suboptimal solution...
SSH keys
When connecting to a server using SSH or pushing your changes to a git server you have to authenticate yourself using an SSH key. Git also allows HTTP authentication using a password, but you definitely should use SSH. SSH keys also should have a non-empty passphrase as an additional layer of security. If somebody steals your key (the file on your hard drive), they won't be able to use it without your passphrase.
You also might want to digitally sign messages and git commits with GPG, which also requires a password-protected key. Now, when actually signing a commit or connecting to a remote server using SSH, you have to enter the passphrase to your key. This is annoying if you have a long secure passphrase and use that very often.
ssh-agent
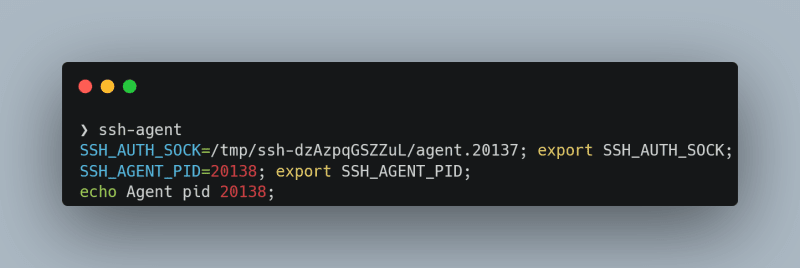
ssh-agent solves this problem: It creates a Linux socket that offers your ssh client access to your keys. It is started with the command ssh-agent, which returns a path to the socket:

After adding this path to the environment variables you can use ssh-add <path of your ssh key> to add your SSH key to the "cache" (you can list your added SSL keys with ssh-add -l).
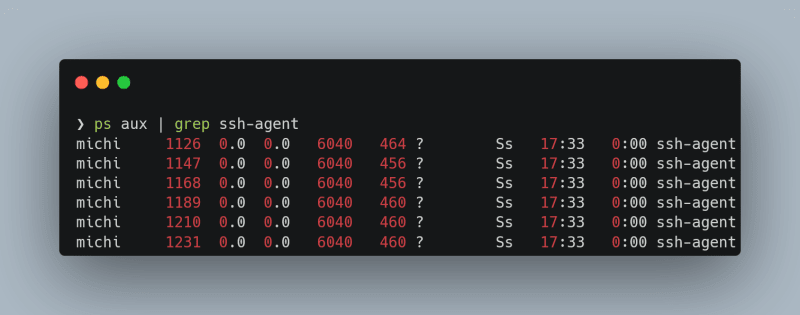
Most instructions online, will tell you to add something like eval "$(ssh-agent -s)" to your .bashrc file or similar. You might have already noticed, that executing ssh-agent will give you a new socket every time you execute that command. Meaning with every shell session you now start, you will spawn a new ssh-agent:

You will also have to enter your passphrase once per session. There has to be a better way, right? Right?!
As ysh7 pointed out, it is also possible to set a custom socket path using the flag -a bind_address and then set the environment variable SSH_AUTH_SOCK to that same value. ssh-agent can then be started as systemd service as described here.
keychain, ssh-find-agent, zsh ssh-agent, bash scripts...
Jon Cairns wrote a similar article about this problem and presented a solution: A script that tries to find and reuse existing ssh-agents. There are multiple scripts with similar approaches all written in bash: ssh_find_agent, zsh-ssh-agent, and the most popular one: keychain. (And later I also discovered envoy). But being bash scripts, they are hard to read, not really fast, and make debugging a hell. I had used keychain successfully until I encountered a problem that I wasn't able to understand. Also, those tools depend heavily on ssh-agent and ssh-add instead of using the socket directly.
I was ready to implement something similar to
keychainin Rust
I then actually sat down and implemented a prototype of my SSH/GPG agent manager in Rust, which forced me to really understand the tooling around SSH keys. But there was a problem, I could not solve: Every time I restarted my environment (in my case WSL), I had to reenter all my passphrases to all the keys even if I wouldn't need them.
gpg-agent to the rescue
After some reading through the confusing docs of different (outdated) versions of gpg-agent (yes not ssh-agent), I finally found a working solution: Apparently gpg-agent uses its own socket and works way smarter than ssh-agent. Luckily gpg-agent has support to also manage your ssh keys (and of course also manages your gpg keys)!
I don't fully understand the design decision behind ssh-agent, which prints fairly essential information out as executable code, and doesn't update the current shell with the required environment variables; that just seems a bit bizarre to me. - Jon Cairns
So how do we use it, then?
First of all, you need GnuPG, which installs the necessary tools. Sadly there is still no all-in-one version, but GpuPG comes with everything we need.
Now put the line enable-ssh-support into your ~/.gnupg/gpgagent.conf (create it, if it does not exist). You can also specify a timeout, by adding the following lines:
## 1-day timeout
default-cache-ttl 86400
max-cache-ttl 86400
Then add the following lines to your .bashrc, .zshrc or whatever you are using:
export GPG_TTY=$(tty)
gpg-connect-agent --quiet updatestartuptty /bye >/dev/null
export SSH_AUTH_SOCK=$(gpgconf --list-dirs agent-ssh-socket)
GnuPG uses pinentry, which allows it to create the console UI asking for your password. This dialog system requires the GPG_TTY environment variable to be pointing at your current tty. The next line starting with gpg-connect-agent starts the gpg-agent as a demon in the background if it is not already running and tells it to use your current terminal for those UI dialogs. Since it always outputs "OK", even when we specify --quiet, we forward the output into /dev/null to hide it. Finally, we use gpgconf to tell SSH where the socket of gpg-agent is located and export it to the environment (so now we use a socket managed by gpg-agent and not ssh-agent anymore).
Conclusion
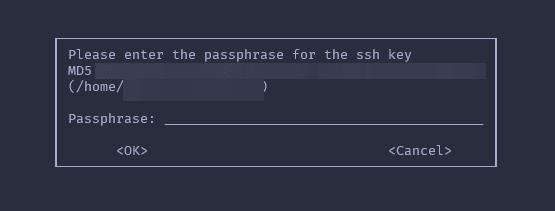
This is exactly what I have been looking for. I wish I had explored gpg-agent sooner. Now my shell asks me only once when using specific keys for the first time. The dialogue looks like this:

The only downside I see with this approach is that we have to call two commands (gpg-connect-agent and gpgconf) every time we launch a new shell. But this is fine, as they are really fast:
gpg-connect-agent --quiet updatestartuptty /bye > /dev/null  0.00s user 0.00s system 60% cpu 0.004 total
gpgconf --list-dirs agent-ssh-socket  0.00s user 0.00s system 89% cpu 0.001 total
If you want to have a look at my dotfiles, feel free to do so. Thanks for reading!

Posted on March 10, 2022
Join Our Newsletter. No Spam, Only the good stuff.
Sign up to receive the latest update from our blog.