Creating a serverless-deploy user with AWS IAM

Michael Timbs
Posted on March 8, 2020
If you are building a project with AWS serverless using SAM or serverless framework , you’ll need to be regularly deploying your code from your local machine and CI/CD pipelines. Both of these frameworks use AWS CloudFormation under the hood to provision and deploy resource stacks. In order for these frameworks to provision your infrastructure for you, you will need to give them permission to do so.
NOTE: This article assumes you already have the AWS CLI installed and configured. You will need to set that up first. Instructions can be found here.
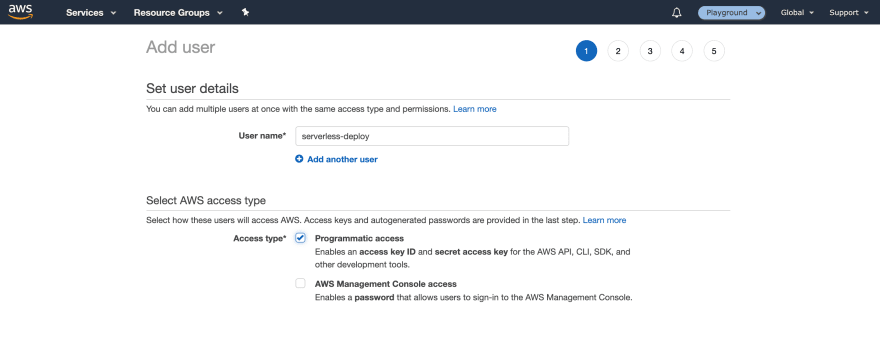
Firstly log into your AWS console and navigate to Identity and Access Management (IAM). Go to Users *and the create new user. Name it something that is easy to identify like *serverless-deploy. Ensure programmatic access is enabled.
Click through next, giving it no permissions, if required add some tags, otherwise click next. Download the user credentials (don’t lose these, you can’t recover them again) and then let’s add them to our local CLI.
AWS credentials are typically stored in ~/.aws on your local machine if you have configured the AWS CLI.
We’re going to add the following snippets to the config and credentials files in the .aws directory. See below.
~/.aws/config
[profile serverless-deploy]
region=<your-region>
output=json

~/.aws/credentials

[serverless-deploy]
aws_access_key_id = <access-key-here>
aws_secret_access_key = <secret-key-here>
*Note: *You can name your profile whatever you want and substitute “serverless-deploy” with whatever you want to call it.
We should now be able to deploy a serverless project locally from our machine. Below is an example of what you would do if you were using serverless framework.
sls deploy --stage dev --aws-profile serverless-deploy
At this point you should get an error. Most likely
- not authorized to perform: cloudformation:DescribeStacks
We now need to go and give this IAM user permission to create resources for us and spin up infrastructure based on our CloudFormation templates. Back in our AWS console we will need to create an IAM group *serverless-deploy *(or whatever you want to call it). We won’t any policies to it here but will create those separately.
We will now create a new IAM policy to attach to this group.
In this policy we will add a policy for the CloudFormation *service and then allow the Actions *List:DescribeStacks. *Indicate that this permission applies to all resources and then click *Review Policy. You’ll be prompted to give this policy a name, again something like serverless-deploy is fine. Give it a description if you like and then click Create Policy.
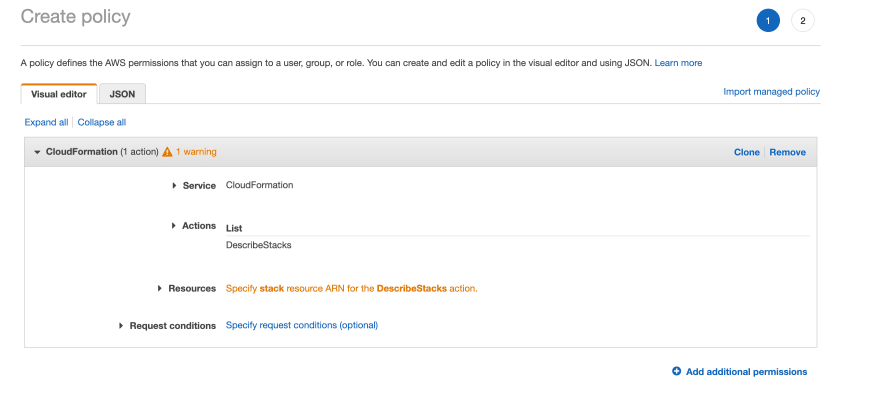 AWS IAM Console adding CloudFormation:DescribeStack permission to our user
*Note: **You can either create a universal *serverless-deploy user for all services/projects, or create a specific one for each project. If you want to create a specific one for each project you can limit the resources you give this user permission to.
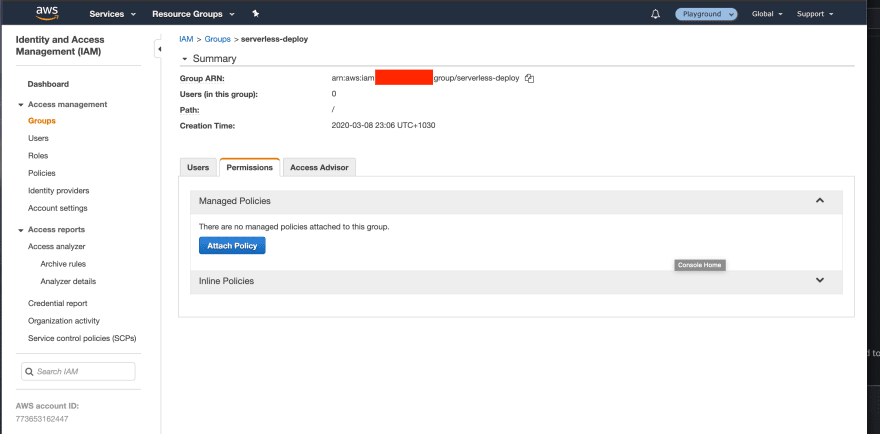
Now that we have created the policy, we need to attach it to the group we created before. Go back to groups, find the group we created before and click on Attach Policy.
Search for the newly created policy and attach it to the group.
Our serverless-deploy group now has a policy attached. We should now put our IAM user into this group so that it inherits it’s policies. We need to go back to our Users tab and then click on our user. Navigate to the Groups tab on the user info screen and attach a group.
Now we can add the serverless-deploy group to the user.
 AWS Console — IAM User Add user to groups
With these changes we can try deploying our app again and see what happens.
sls deploy --stage dev --aws-profile serverless-deploy
We should get another error, although this time the error will be different.
user/serverless-deploy is not authorized to perform:

cloudformation:CreateStack on resource
This is progress, which indicates that the work we just did at least changed something and appears to have worked. In the AWS console, go back to *Policies *and search for the serverless-deploy policy we created earlier.
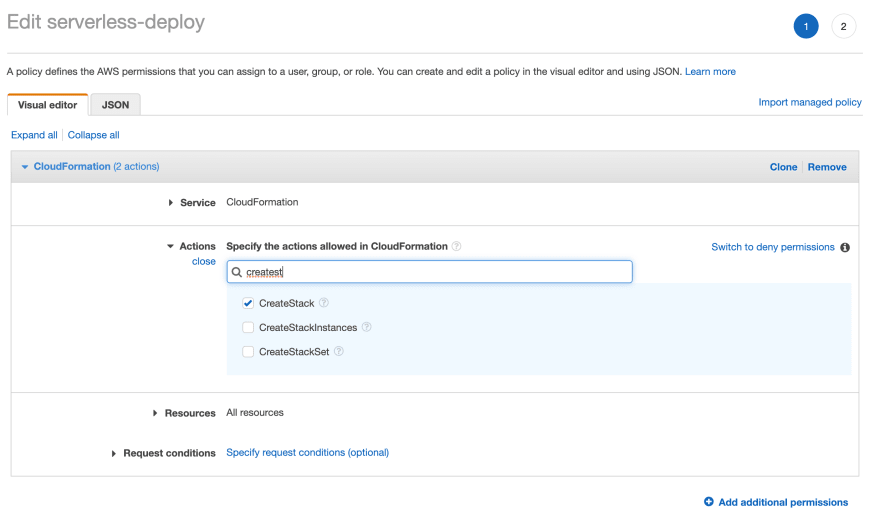
Click edit policy and add the CreateStack permission in the CloudFormation service. Review and save.
Rinse and repeat this process of deploying and then adding each policy incrementally. This is the best way to ensure you have the minimum possible permissions and avoid security risks of giving your IAM users too much access.
**Hint: **Sometimes the console output isn’t great so you can look at the CloudFront events log in the AWS console to get the errors.
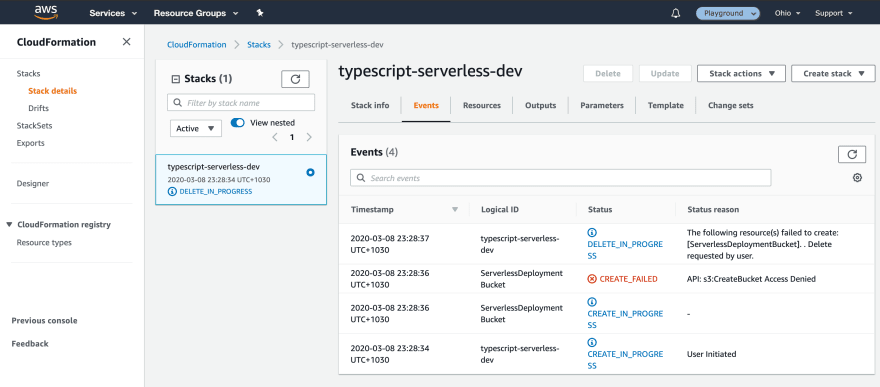 AWS Console — CloudFormation events
*Note: *If you keep going with this process you may have to manually delete some resources and the CloudFormation stack as you’ll hit an error, the stack will try to rollback but then not have permission to roll back.
Once you successfully get a deploy working I recommend creating an IAM.json in your project and copying across the final policy to your project and committing it to the repo. This will enable you to quickly duplicate this stack between staging/production accounts.
HINT: It is often best to go through this iterative process in a development account. Then once you have the final permissions, copy them across into your production account so that your deploys don’t fail and have unintended consequences. You can read about multiple accounts here
For the base template of a new serverless project (like the one here) the basic permissions should be as follows. Feel free to verify these permissions and copy them straight into your IAM policy if you are happy with them.

Posted on March 8, 2020
Join Our Newsletter. No Spam, Only the good stuff.
Sign up to receive the latest update from our blog.

