How to automatically post from your Gatsby blog to Medium and dev.to

Mario
Posted on November 6, 2019
This article was originally published on mariokandut.com.
A professor at university once said to me:
If he has to decide on hiring a lazy student or a top-notch student, assuming both get the same work in the same time done. He would always choose the lazy person, because the lazy student is more efficient.
After all these years I'd say don't be lazy, be smart. Automation can help you get the job done quicker and saves you time, which you can spend on the things you love. Maybe more coding? 😂
The three steps plan
I assume you know your way around npm, gatsby and javascript. This is what we are going to do:
- Setup an RSS feed in gatsby
- Create a zap RSS to Medium
- Configure RSS income stream in dev.to
1. Setup an RSS feed in gatsby
I will use the automation used in this blog as an example. I write the posts in markdown. In the Gatsby docs you can also find a good how-to.
Install the npm package.
npm install --save gatsby-plugin-feed
The RSS feed needs a way to uniquely identify content, typically a URL or slug or path.
In gatsby-config.js you need to add the plugin and in most cases you need to customize it. I wanted to integrate tags and exclude my blog post template.
In the rare case, you are happy with the basics, just add the plugin and your siteUrl.
module.exports = {
  siteMetadata: {
    siteUrl: `https://www.YOUR-WEBSITE-NAME.com`,
  },
  plugins: [`gatsby-plugin-feed`],
}
Now , let's have some fun with customizing the RSS feed plugin. Below is the code snippet I am using in this blog.
{
  resolve: `gatsby-plugin-feed`,
  options: {
    query: `
      {
        site {
          siteMetadata {
            title
            description
            siteUrl
            site_url: siteUrl
          }
        }
      }
    `,
    feeds: [
      {
        serialize: ({ query: { site, allMarkdownRemark } }) => {
          return allMarkdownRemark.edges
            .filter(
              edgePost =>
                edgePost.node.frontmatter.isPublished === 'true',
            )
            .map(edge => {
              return Object.assign({}, edge.node.frontmatter, {
                description: edge.node.frontmatter.description,
                date: edge.node.frontmatter.datePublished,
                url:
                  site.siteMetadata.siteUrl +
                  edge.node.frontmatter.path,
                guid:
                  site.siteMetadata.siteUrl +
                  edge.node.frontmatter.path,
                custom_elements: [
                  { 'content:encoded': edge.node.html },
                  { tags: edge.node.frontmatter.tags.join(',') },
                  {
                    featuredImage:
                      site.siteMetadata.siteUrl +
                      edge.node.frontmatter.titleImage
                        .childImageSharp.fixed.src,
                  },
                ],
              })
            })
        },
        query: blogPostsQuery,
        output: '/rss.xml',
        title: "Mario's RSS Feed",
      },
    ],
  },
}
I guess the syntax looks pretty self explanatory, so I just go through the main points. With output you customize the URL of the RSS feed and with title the title. The query field is the graphQL query, here the placeholder blogPostsQuery.
Before mapping of the edges I am filtering if the blogpost is published. I have a flag in markdown for this (isPublished).
.filter(edgePost => edgePost.node.frontmatter.isPublished === 'true')
I then map over the filtered edges and create my object. I also add customized elements to the RSS feed, such as the html encoded content , the tags (array in markdown) and the featuredImage.
custom_elements: [
                  { 'content:encoded': edge.node.html },
                  { tags: edge.node.frontmatter.tags.join(',') },
                  {
                    featuredImage:
                      site.siteMetadata.siteUrl +
                      edge.node.frontmatter.titleImage
                        .childImageSharp.fixed.src,
                  },
                ],
Now start the project with gatsby develop and go to localhost:8000/rss.xml. What do you see?
Yes, a 404 page. The RSS feed won't work with gatsby develop, you have to build and serve your project. gatsby build && gatsby serve, now go to localhost:9000 (standard port) and check the RSS feed. You should see something similar as here. If yes, commit your changes and deploy and we are done with the first step.
YaY , 🥳🥳🥳. Well done.
2. Create a zap
Zapier provides workflows to automate the use of web applications together. It is often described as a translator between web APIs. see wikipedia
So headover to zapier.com and create an account. I would recommend setting up Two-Factor-Authentification.
When you have confirmed your email and you've logged in into zapier, you see a red button MAKE A ZAP. Click it!
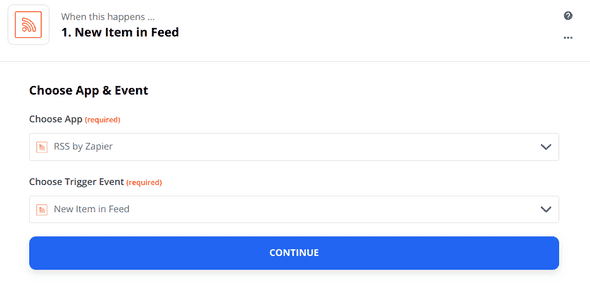
Our automation should do this. Create a new medium post if a new item is in our RSS feed.
Choose the app RSS by Zapier.
Choose the trigger event.
Click continue and check if it works with clicking on Test & Review. 
I have two items in my RSS feed, so I choose one for further testing and click Done editing. 
50% done. YAY. Now we have to setup the Do this... part. 
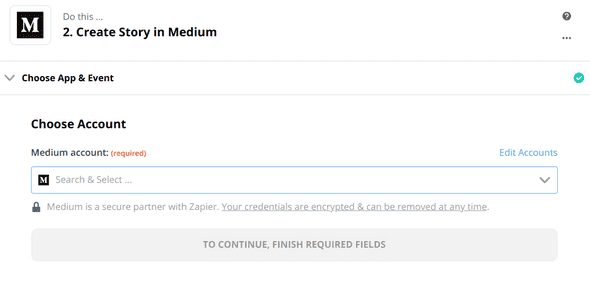
Choose the app MEDIUM and choose the action event CREATE STORY and click continue. 
Now choose the medium account you want to connect. If your account, doesn't appear you have to connect your medium account to your zapier account. Here are more details on this.
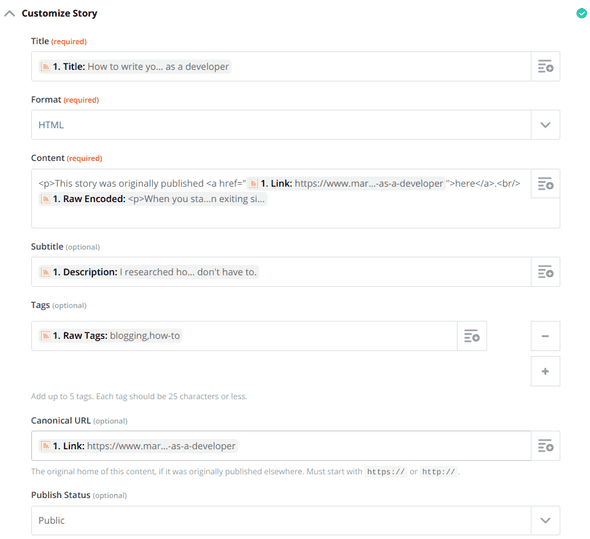
Now, let's customize our story for medium. You should see a form like this: 
All fields marked required, need to be filled in.
- For the title , choose the post title.
- Format should be post HTML.
- The content filed should be the Raw_Encoded post content. As the first line I am adding this, which links to the original post published on my blog and says it's a crossposting.
<p>This story was originally published ...</p>. - subtitle is optional, I use my description field.
- tags field is optional, I use my custom tags field.
IMPORTANT: for SEO purposes the original source of this content needs to be marked with a canonical tag. Otherwise, you have duplicate content and this could result in a search penalty.
- canonical url is optional, but we don't want to create duplicate content, so put the post url in.
- publish status is also optional, but I want it to go live automatically.
Now, click Retest & Review and your post should get send to medium. 
Log into medium and verify. And DONE! YAY. 👍 
3. Configure RSS income stream in dev.to
dev.to is an amazing developer community, if you haven't joined yet, do it now and check it out.
To add your RSS Feed to dev.to simply go to settings and click publishing from RSS. Then add your rss feed and click update. 
IMPORTANT: The synced posts will be in your dashboards as drafts, so you can double check them. If you want fully auto-posting contact the admins and give them the right to set your posts to public. (send an email to yo@dev.to).
Hope you managed to automate your posts. If you have any questions, use the comment function or send me a message on twitter @mariokandut.

Posted on November 6, 2019
Join Our Newsletter. No Spam, Only the good stuff.
Sign up to receive the latest update from our blog.


