Low-Code Automations for Beginners

Oleg
Posted on October 3, 2023
Hello DEV community! The Latenode team welcomes you. You might already be familiar with low-code automations and cloud development. However, even if you aren't, in this article, we'll provide a comprehensive guide on how to derive 80% of Latenode's value by learning just 20% of the platform's capabilities.
The Framework for Your Automations
"Trigger → Action" is the fundamental framework. Every scenario starts with a trigger. This trigger activates your scenario and runs subsequent modules – actions. You can think of it like this: "If something happens in one system, something else should be performed in another place."
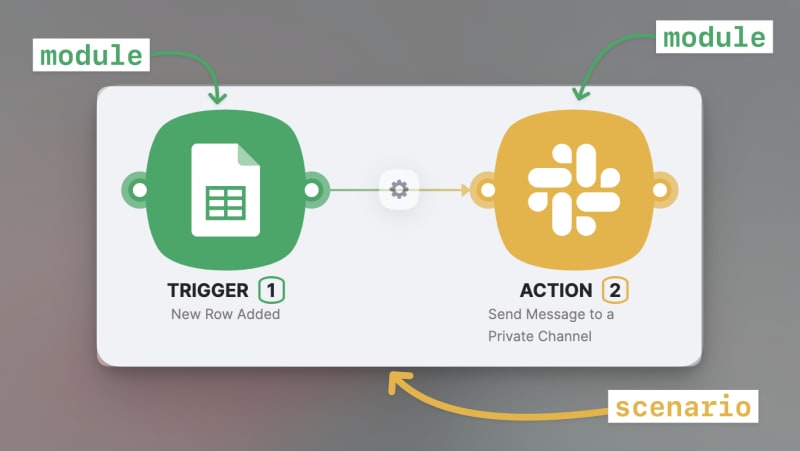 Each scenario consists of only one trigger, but there's no limit to the number of actions
Triggers
There are three types of triggers:
- Triggers from our no-code apps library
- Schedule
- Webhook
Trigger #1 No-code apps
A good example – the Google Sheet module shown in the screenshot above. This means if something happens in a specific Google Sheet, your scenario runs automatically. To use triggers from our no-code library, simply connect your accounts by adding a new connection. Once that's done, you'll be able to fill in all the required fields in just two clicks.
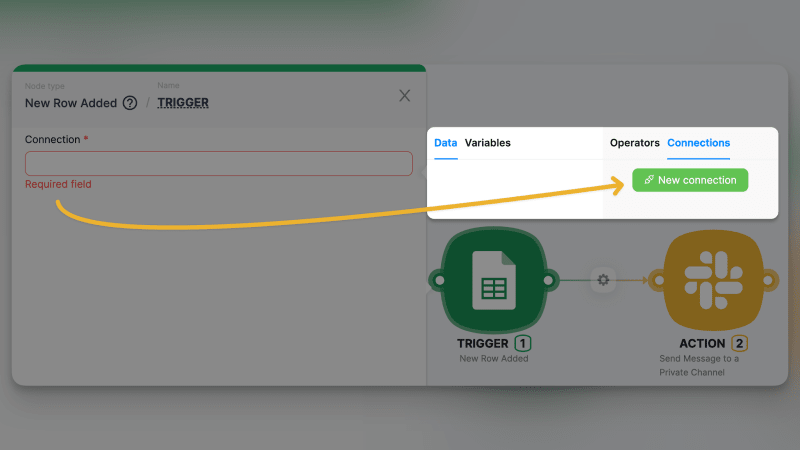 Add a new connection
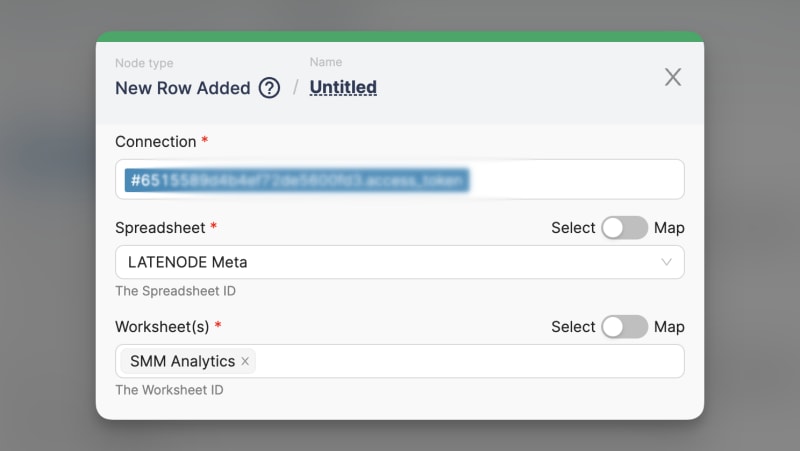 complete the trigger setup by filling in the required fields
Trigger #2 Schedule
This module runs the scenario at intervals you set. To establish this, set the period using the CRON expression. If you're unfamiliar with the CRON format, ask our AI for assistance. (A guide on our AI will be provided shortly.)
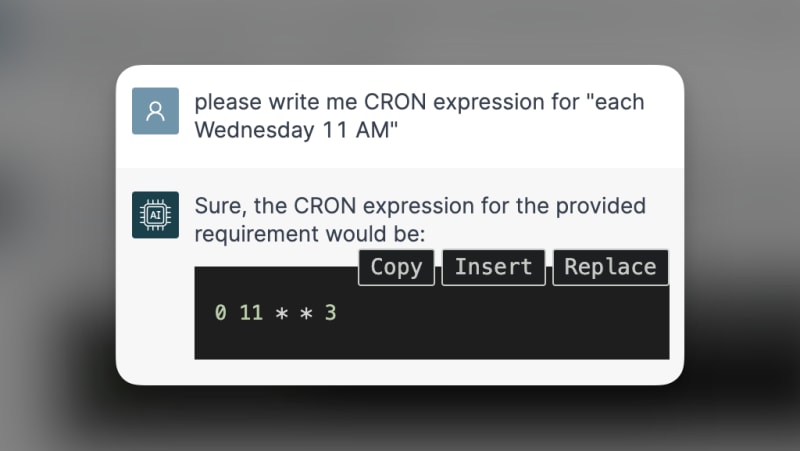 Latenode AI provides help 24/7
 Complete the setup of the schedule module
Trigger #3 Webhook
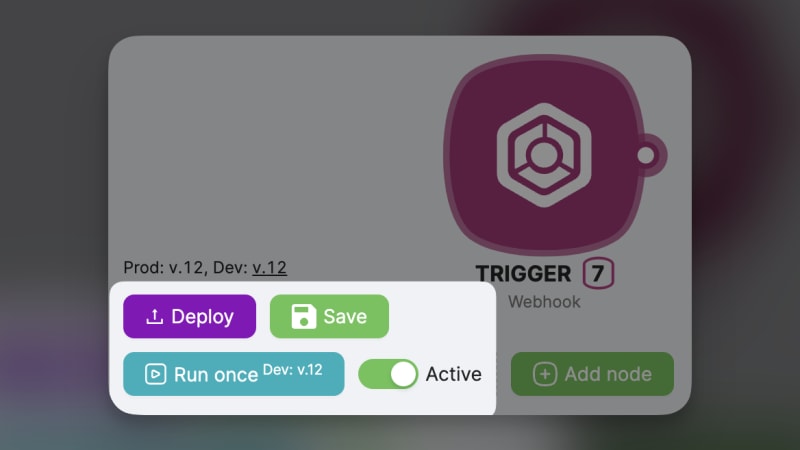
This module triggers the scenario each time an external call is made to a webhook URL. Think of it as phoning someone and saying, "Green light! Start working immediately." Additionally, if you wish to relay crucial information to your scenario, it's achievable through the webhook URL. Moreover, customizing your webhook URL is straightforward; refer to the screenshot below for guidance.
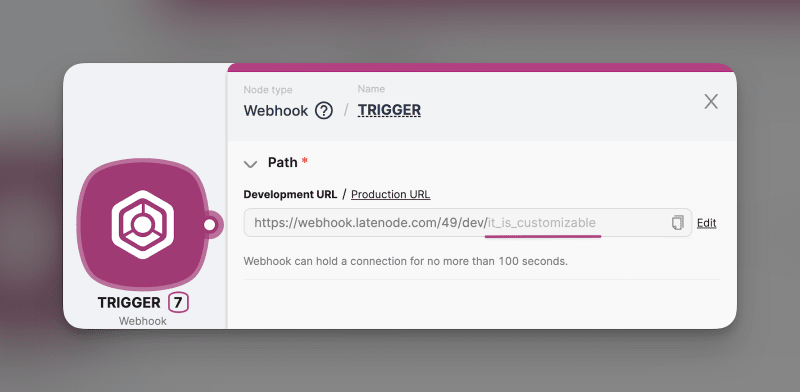
Let's try sending some information to this URL and observe how your scenario receives this info. We're going to invoke the webhook from the browser's command line. Keep in mind that, in the same manner, any external system can send data to your scenario.
Then, we enter our Webhook URL into the browser's command line and add three keys with their corresponding parameters we want to send to the scenario: budget, email, and name. Press enter.

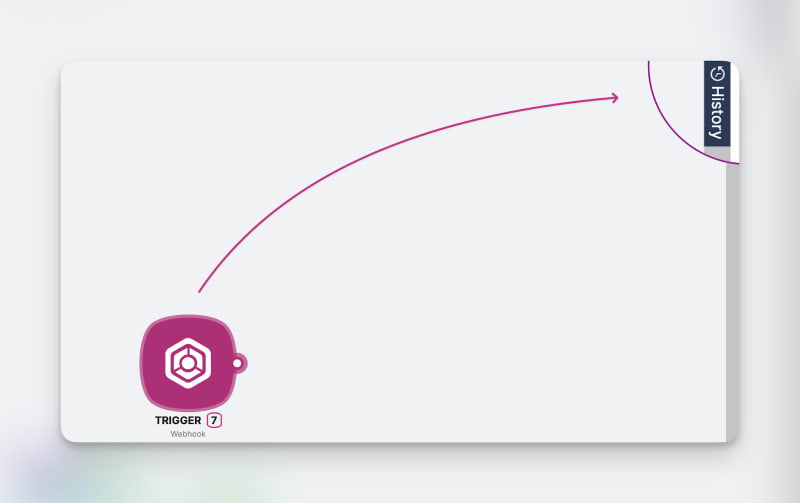
When we click on the eye icon from the list of historical launches, we see a circled number next to the Webhook module – its historical output. Upon clicking, a pop-up window appears displaying the result of the execution. And as you can see, all three parameters (budget, email, and name) are already there!
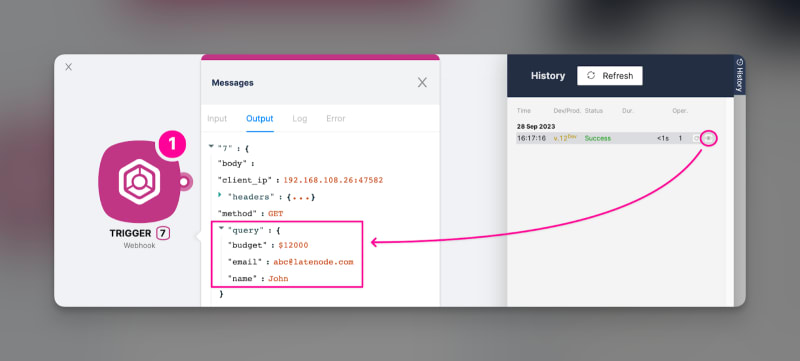
Once the data appears in your scenario, you can easily manipulate it in any subsequent module. The Data pop-up window will appear each time you click on a field where data is either required or allowed, such as the Value that should be added to your Google Sheet as a new row:
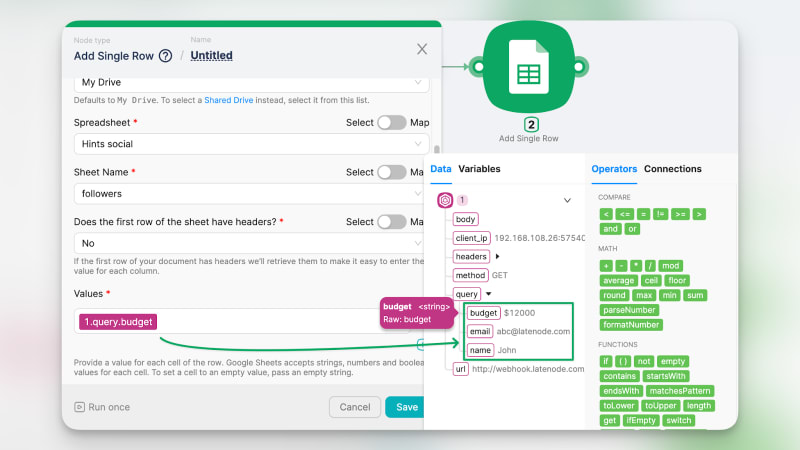
The History feature allows you to view the results of any previously run scenario. You can either check how the data flowed at any previous moment (using the eye icon) or re-run an updated scenario with historical data (using the repeat icon next to the eye) if an error occurred and you're trying to fix it.
Actions
When it comes to actions, there are 4 main groups you should know about:
- Actions from our no-code apps library.
- HTTP request
- Webhook
- JavaScript
Action #1 No-code apps
It’s as simple as no-code triggers, where you give access to your workspace and pick the exact action that should be performed.
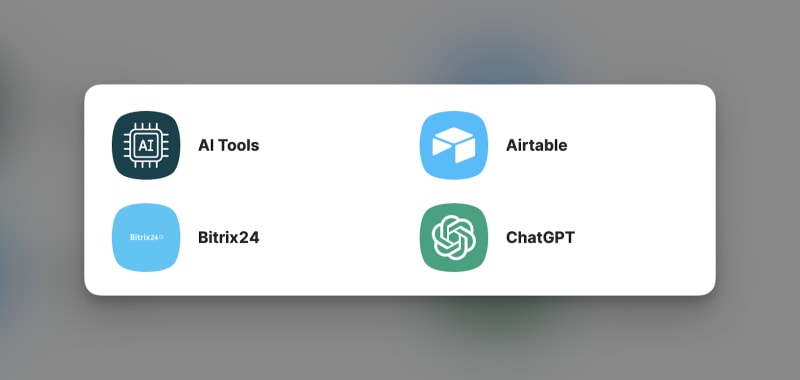
While we're in beta, our no-code library might not be comprehensive, but it already includes essential tools such as Airtable, ChatGPT, Google Drive/Sheets/Docs, and more. We're continually working on adding new apps! However, you don't need to wait for us to add the app you require because we've streamlined the process for creating your own integrations. The next type of action demonstrates this.
Action #2 HTTP request
This action allows you to integrate your scenario with any external app that isn't present in our library.

Let's assume you want to create a Trello card within your scenario. What are the steps to build your own app integration? It's quite straightforward.
Visit the Trello API documentation and locate a cURL example for the action you wish to perform within your Latenode scenario. Think of the cURL example as a ready-made recipe or template that instructs Latenode on how to communicate with that other app.
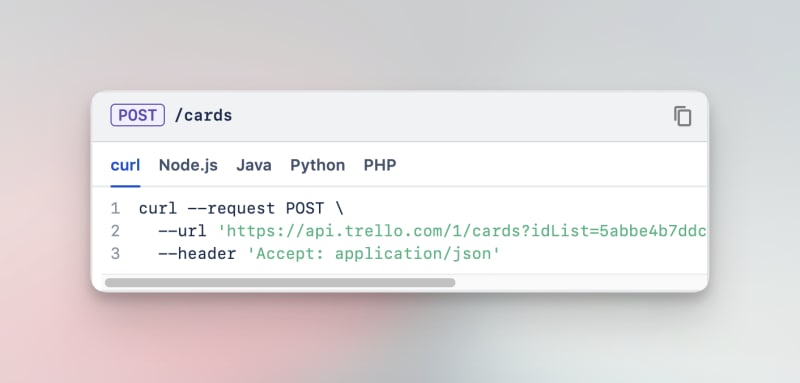
Simply copy and paste it into your HTTP request as shown earlier. Your HTTP request will then be configured with the necessary HTTP method and the correct URL to call.

Next, replace the placeholders for the API Key and Access Token with your actual ones. Additionally, add the required parameters for action execution. In our case, to add a new card, we must specify to Trello where it should be placed, so we need the ID of the column from our workspace – idList.
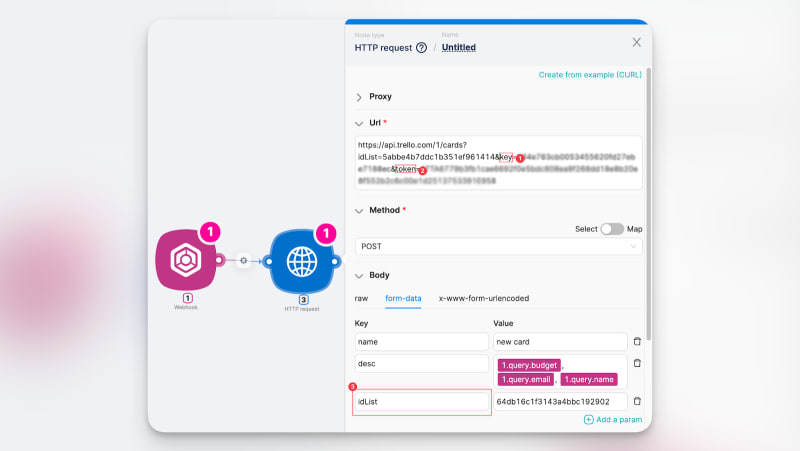
That's it! Now you can create a Trello card once the webhook is triggered by its unique URL! 🎉

TIP: Once built, a custom module (or scenario) can be copied and pasted into another scenario. Copied objects appear as text, so you can also transfer this text to any document and share it with a colleague or client to streamline their automation journey.
Action #3 Webhook response
After a scenario is triggered by the Webhook module and completes its actions, you might want to send a response back to the system that initiated the call. The "Webhook Response" module lets you specify that response. For instance, you could relay back a success message, an error message, or even data processed during the scenario. This is especially useful if the external system seeks confirmation that the scenario executed successfully or if it needs data in return. To illustrate, let's delve into a simple scenario:
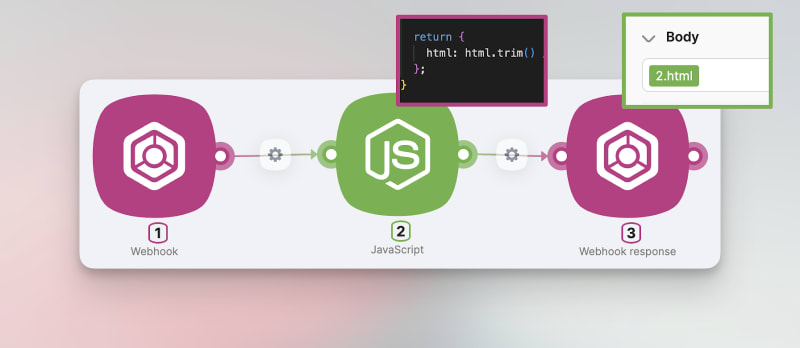
- The result of the JavaScript module execution is a JSON object named "HTML". It contains the HTML code of a website form designed for collecting answers.
- In the webhook response, we select this JSON object, so when you access the webhook URL, you are presented with the generated HTML form.
What is that JSON? That’s just the format of data, that can be easily flow between Latenode modules. When you perform something within JavaScript module, ask AI to return a JSON object to easily use it further.
Action #4 JavaScript
Last but not least, there's the module for custom code – our standout feature that may appear tailored for automation experts. However, fear not, as Latenode AI is here to support you.
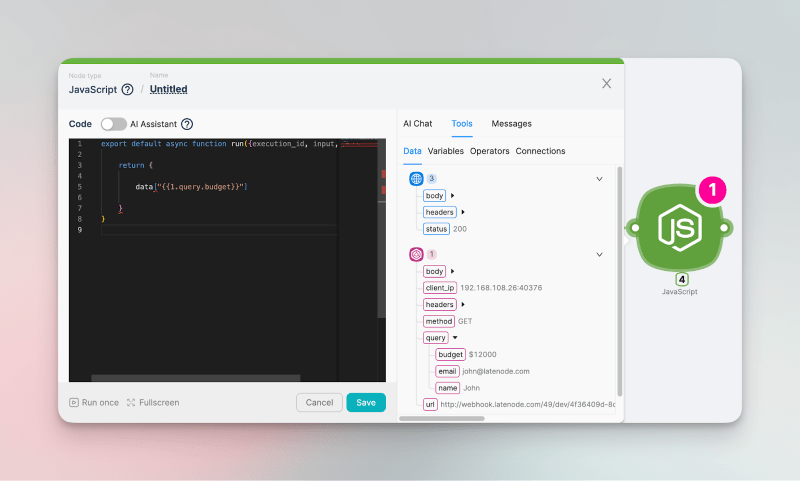
Broadly speaking, this module offers unparalleled flexibility. The JS module processes your code in the cloud and instantly provides results. Furthermore, it empowers you to integrate any of the 1.2 million NPM packages, enabling you to execute any action previously crafted by someone else.
Best part? You don't even need to write code! But that dives into another aspect of Latenode AI and its power: JavaScript + AI: a Perfect Duo for Low-code Automations
Test all the platform capabilities on Latenode platform and become part of our Discord community for human conversations about low-code.

Posted on October 3, 2023
Join Our Newsletter. No Spam, Only the good stuff.
Sign up to receive the latest update from our blog.
