Rails deployment pipeline with Planetscale & Heroku

Joshua Jansen
Posted on March 25, 2023
This morning, I tweeted my excitement about the deployment pipeline I got running with Planetscale and Heroku, Matt asked me to write up a little long form with some details, so here goes!
Planetscale is living in the future when it comes to managed databases. They abstract away all the complexities and their way of forcing deploy requests for schema changes is smart. Plus: their generous free-tier makes it an amazing option for getting started on new projects.
As a Rails dev, I've been quite used to following a strict db migrations system and having Heroku take care of running these migrations on deploy, directly on the primary production database. With Planetscale, this is not possible. As soon as you mark a branch as a production branch, they'll reject any direct schema changes. This is needed for them to be able to do their scaling and high-availability magic.
Instead, you'll have to "branch out" from the main database, connect to the newly created schema, run your migration(s) and then create a merge request into the main branch.
There's numerous ways to go about this, for example in Rails, they recently released a planetscale_rails gem that provides some useful tasks to smoothen the process. However, this does still add some overhead coming from a Rails setup where the whole process was just running migration locally, pushing the code to Github and having Heroku build the app + run migrations.
So the past months, I've been rolling with a setup that comes close to the convenience I was used to: a long-running staging branch that Heroku runs its migrations against and making sure to merge any schema changes on Planetscale before promoting my Rails to production.
If you're interested, here's how I set this up:
Prepare your PlanetScale database
Sign up and create your database through the Planetscale website. Make sure to select the region that matches your Heroku region.
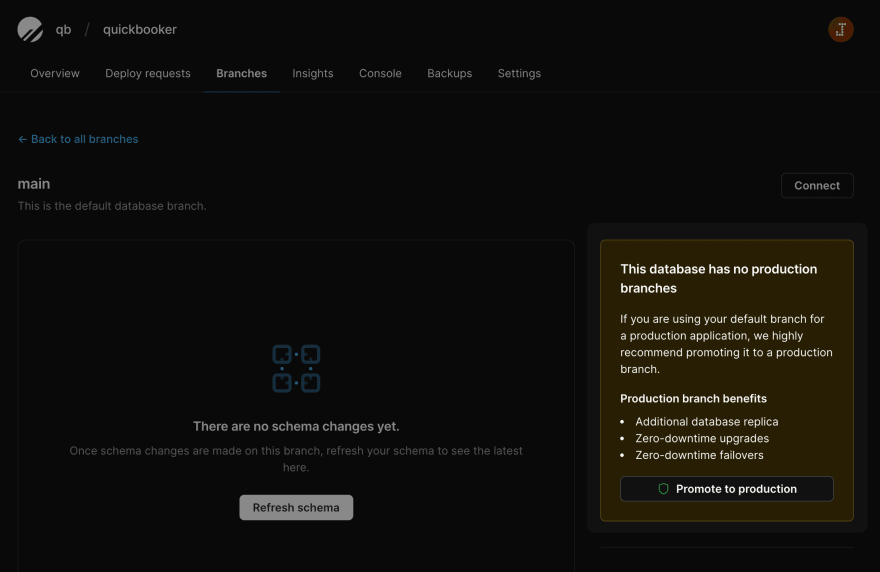
Click connect, securely store your credentials somewhere (as they won't show up again). Then, head over to branches, select your main branch and promote it to a production branch:
Go back to your branches and create a new branch, name to your liking, staging probably makes sense. Click connect and secure your credentials again.
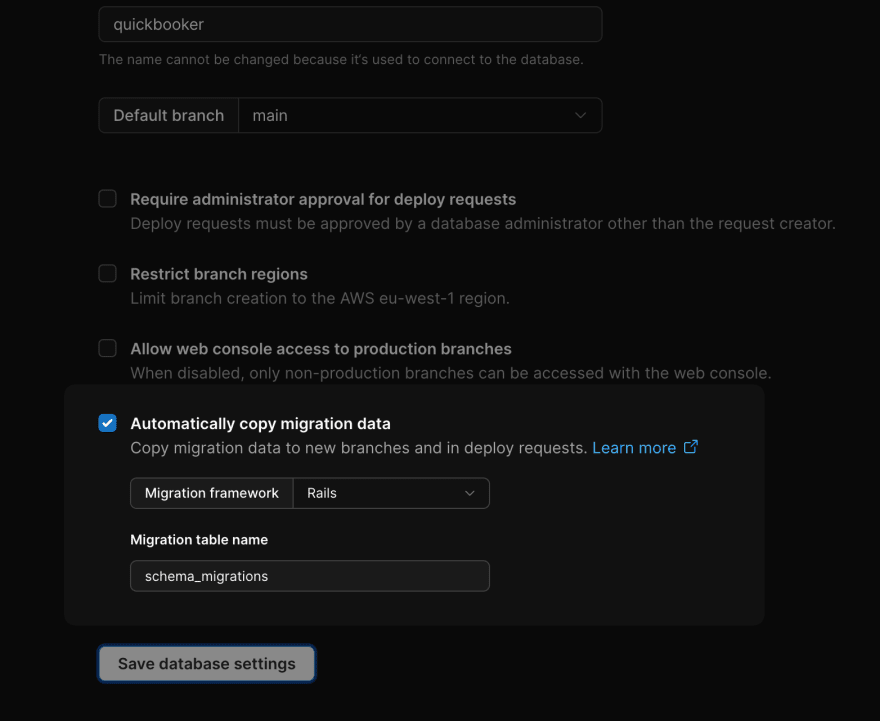
Now there's one more thing that's important: head over to settings, and enable "Automatically copy migration data". This is to make sure that your branches will keep their schema_migrations table in sync which ensure that your main branch won't ever be out of sync with your production code.
That's it for Planetscale for now!
Prepare your Heroku pipelines
My pipeline is pretty straightforward:
- a staging app that has auto-deploy from
mainenabled through the Github integration - a production app to which I manually promote a prebuilt staging image to release a new version to production
Hook up your Rails app
Update your database.yml based on the region you picked, database name and your secrets manager of choice (I'm using per-env Rails credentials).
production: &production
  <<: *default
  database: quickbooker
  host: eu-west.connect.psdb.cloud
  username: "<%= Rails.application.credentials.dig(:planetscale, :username) %>"
  password: "<%= Rails.application.credentials.dig(:planetscale, :password) %>"
  ssl_mode: verify_identity
  sslca: "/etc/ssl/certs/ca-certificates.crt"

staging:
  <<: *production
Then, if you haven't already, add a release phase that will migrate your database to your Procfile:
release: bundle exec rake db:migrate
This is pretty much it for your Rails app and you can proceed as you normally would, except for one thing: Planetscale doesn't support foreign keys for storage and scaling reasons, but since Rails will automatically add these for any reference you create, so you'll have to add a foreign_key: false to these migrations.
Ready to deploy!
So by now you should have:
- Planetscale: A protected "main" branch
- Planetscale: A schema writeabel "staging" branch
- Planetscale: "Automatically copy migration data" enabled
- Heroku: A staging app that builds and migrates from the git
mainbranch - Rails app:
database.ymlready to connect to respectively the staging and production branches - Rails app: Procfile that runs your database migrations on deploy.
If all is set up correctly, you should be able to push a migration to main, have Heroku build your app and run the migration on the staging Planetscale branch.
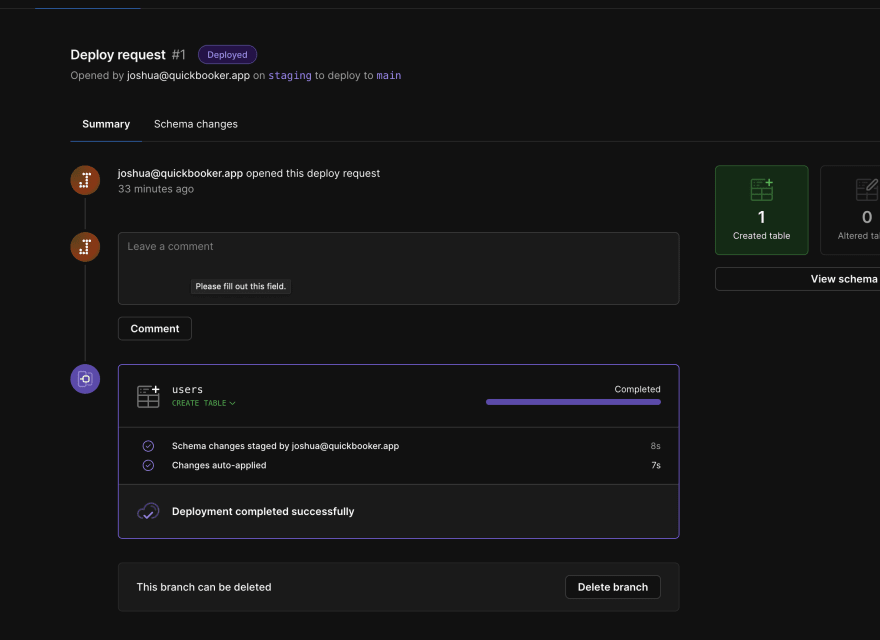
After that, navigate to your branch in Planetscale and you should see the schema changes pop up:
Create and merge your schema deploy request, just make sure to not delete the branch after merging, since you'll reuse it for any future migrations.
This is about it! Your production database is up to date and your code is ready to be promoted. Head over to Heroku and promote your staging app to production. The release phase on your production app will still try to run the migrations, but because Planetscale keeps the schema_migrations in sync thanks to the checkbox you ticked earlier, there should never be anything to migrate for the production app. If there is, it means you forgot to merge your database deploy request and Planetscale's rejection will fail the release phase, making it a nice sanity check that you followed this good practice!
So there it is! My development workflow is identical to what I've been used to, it's only when deploying a database schema mutation that an additional manual step is required, but the extra ensured safety of these conscious database deploys are more than worth it and the best practice going forward if you ask me!

Posted on March 25, 2023
Join Our Newsletter. No Spam, Only the good stuff.
Sign up to receive the latest update from our blog.


