JAMstack tutorial to create a website with just clicks and no code at all for free [Step by step]

Geshan Manandhar
Posted on April 20, 2020
![JAMstack tutorial to create a website with just clicks and no code at all for free [Step by step]](https://media2.dev.to/dynamic/image/width=1000,height=420,fit=cover,gravity=auto,format=auto/https%3A%2F%2Fdev-to-uploads.s3.amazonaws.com%2Fi%2Fyakkbc61m3iwcmx5g1ee.jpg)
This JAMstack tutorial will show you how to create a JAMstack website with just clicks, no code and for $0. It will detail how to set up a JAMstack website step by step with 30+ screenshots and 2000+ words. It will involve using a git-based CMS service to edit your content easily. Let's get started.
Originally posted at Geshan.com.np
Prerequisites
If JAMstack is something new for you have a look at my previous post detailing what is JAMstack and some of its technical aspects. For this tutorial following are the prerequisites:
- You must have a working email address (a no brainier, still good to be explicit).
- Knowledge of markdown would be beneficial.
- Knowledge of a static site generator like Hugo would help.
- Previous know-how of using any Content Management System (CMS) like Drupal or Wordpress would be great.
Services involved
You will need to register for the 4 (or less) online services to get your JAMstack website up and running. The good news is all of them have a free plan so your website will have a recurring running cost of exactly $0, hurray!
- Github - To host the code, probably you already have a Github account :)
- Netlify - CDN to host the website, it will be fast as it will be static files mainly
- Forestry - Git-based Content Management System (CMS) service to edit the JAMStack website content, your content changes will reflect on the website in a couple of minutes. Still fast for a JAMstack website.
- Stackbit - Service to manage above 3 and glue all of them together to bring your JAMstack website to life.
Let's dive in now.
Steps
1. Register on Github
The first step is to register on Github, If you already have a Github account skip to Step 2. Github is the service that will host your JAMstack website code. You can do a lot of things on Github and it is the de-facto service of open-source software and general code collaboration.
1.1. Start to register
Go to https://github.com/join and fill the details like below and yes complete the puzzle to prove that you are a human :) :
Then click "Create account"
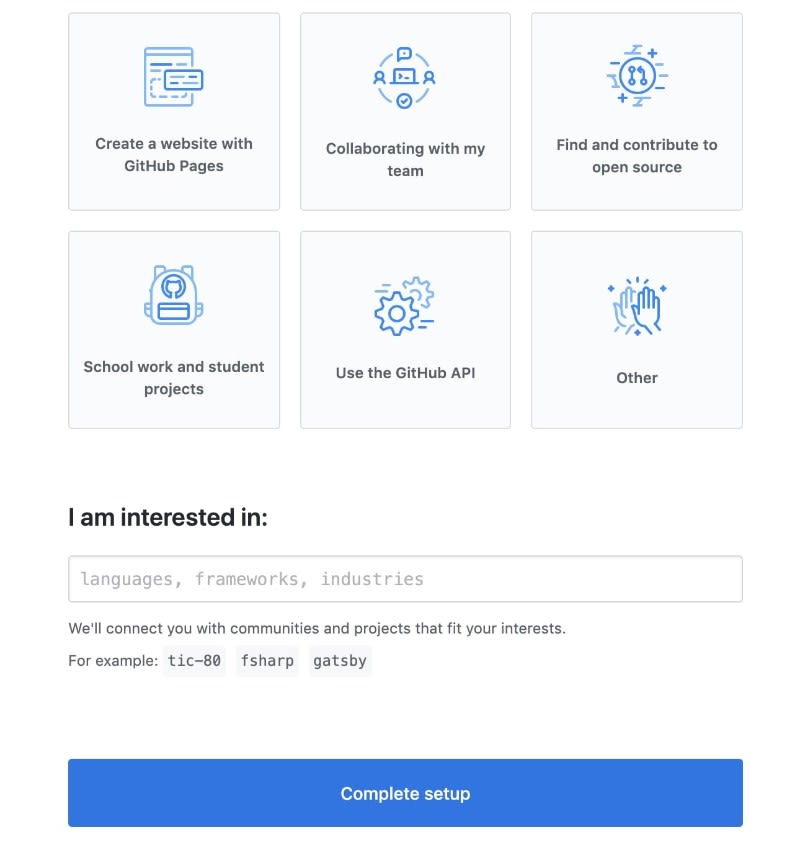
1.2. Complete setup
After that scroll to the next page and click "Complete Setup"
If you want to choose other options, it is up to you but nothing is mandatory.
1.3. Verify email
One more step is to verify your email, you will get an email for Github about registration with a title like [GitHub] Please verify your email address. open that email and click "Verify email address" to verify your email.
I promise you this is the only time you will need to verify your email, all other accounts have Github sign up Yay!
After your email is verified you will see the blue notification on top of the page as below:
1.4. See your Github profile page
Just as a quick check, have a look at your Github profile.
Carry on to register on Netlify.
2. Register on Netlify
Netlify will host your JAMstack website on its own Content Delivery Network (CDN), they have a free plan. So let's get a Netlify account too.
2.1. Registration page
Head on to the Netlify registration page and click "Github":
2.2. Register on Netlify with Github
After you click the "Github" icon it will ask you to "Authorize netlify" on Github, so click the "Authorize netlify" button on the pop-up window.
2.3. Registered on Netlify
Great! You have a Netlify account now.
Leave the tab as it is or close it, Let get a new tab to register on Forestry.io.
3. Register on Forestry
Forestry is a git-based online Content Management System (CMS) service that makes editing content on your JAMStack website a breeze. Head on to Forestry Sign Up page.
3.1. Forestry Sign Up Page
Here too just click the "Github" logo to carry on with the registration.
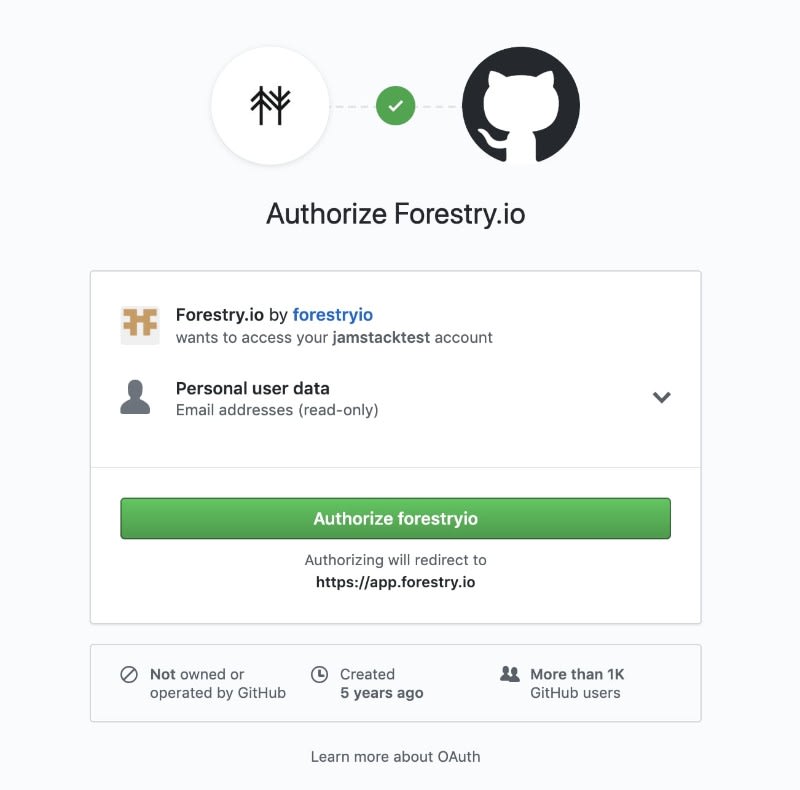
3.2. Register on Forestry with Github
Similar to Netlify, click the green button to "Authorize forestryio", in the pop-up to complete the sign-up process.
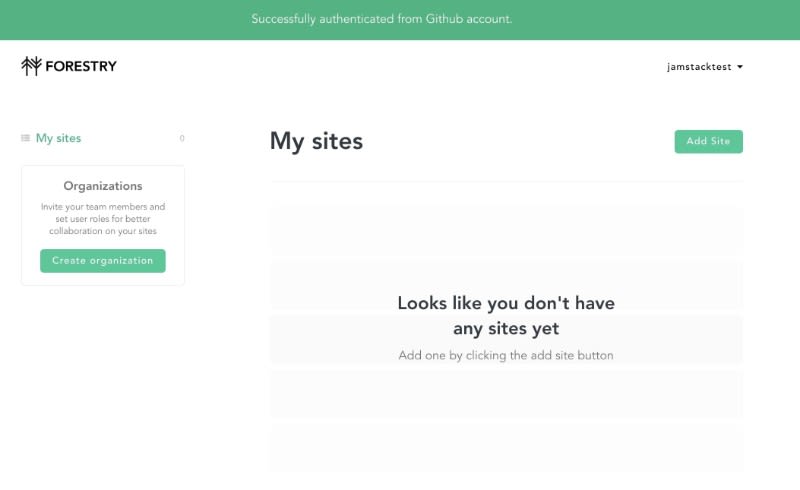
3.3. Registration Success on Forestry
Success! Your Forestry account is registered, let's go to the next step.
4. Register on Stackbit with Github
Stackbit is the magic glue that will cement all the other 3 services together to inject life to your JAMStack website. Let's go ahead and get an account for Stackbit on its Login page.
4.1. Stackbit registration
Click the "I agree to the terms and license" checkbox and then click on the "Github" logo. It will start the process to link up Stackbit with Github.
4.2. Authorize Stackbit on Github
Similar to Forestry.io, click the "Authorize Stackbit App by Stackbit" green button to register on Stackbit with Github.
4.3. Stackbit registration done
Great! The last registration is done too. Now we can build your website, woohoo!
5. Build your project
To build your project on Stackbit from the dashboard click "Build Your Project" as seen above to choose the theme:
5.1. Choose Fresh then click Continue to site generator
Click "Fresh" as your theme, it is a blog theme. If you want you can choose another theme as well, "Azimuth" is good for SAAS products. Let's go with Fresh for now, then click "Continue to site generation".
5.2. Choose Hugo click continue to cms
After that, click "Hugo", we are selecting Hugo as it claims to be the "fastest" static site generator.
5.0. Choose Forestry click connect accounts
Next step is to choose the CMS, let's choose Forestry you have an account there already :)
5.4. Add Project name
Then it is time to name the project and connect your accounts, I have named it jamstack-fresh, name it as you want.
For all the things to function correctly, you will need to connect Forestry and Github with Stackbit. Click the connect button beside Forestry to connect Forestry with Stackbit.
5.5. Connect Stackbit to Forestry
On the pop-up click the green "Authorize" to link up Stackbit and Forestry.
After it is authorized correctly it will show the "Connected" checkbox on the page, as below:
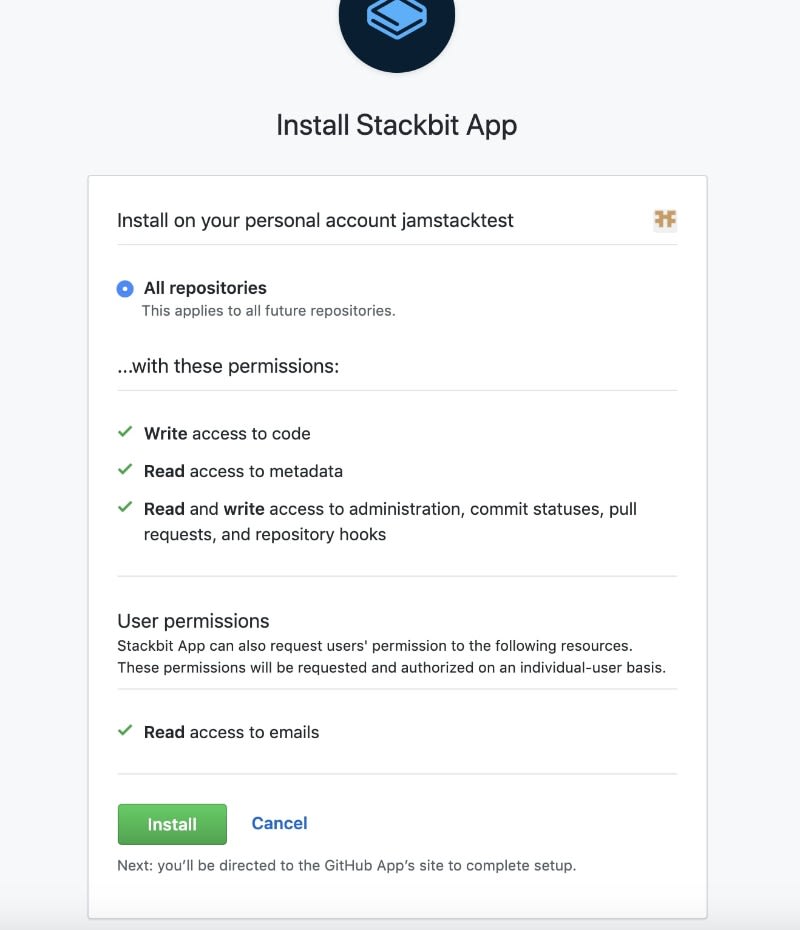
5.6. Connect Github to Stackbit
Similar to Forestry, click the "Connect" button beside "Github" and click the green "Install" button to add Stackbit to your Github account.
Great! now as both services are connected it is time to click "Create your project" as below:
5.7. Wait for it to build and deploy
We are getting close the, your website should be building at this point like below:
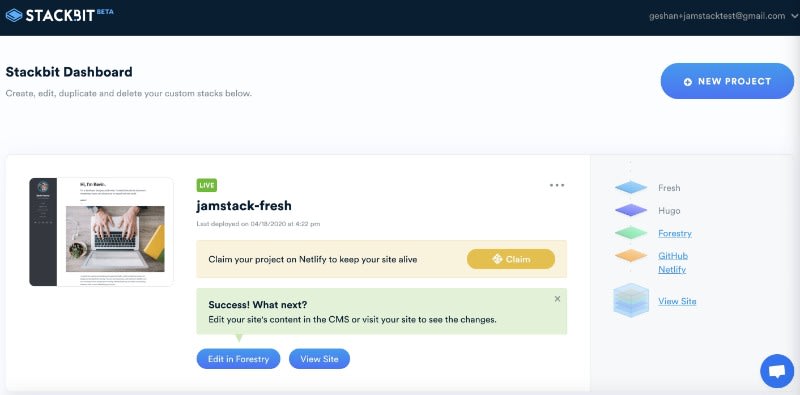
After a couple of minutes, it should be deployed, it will show up as below:
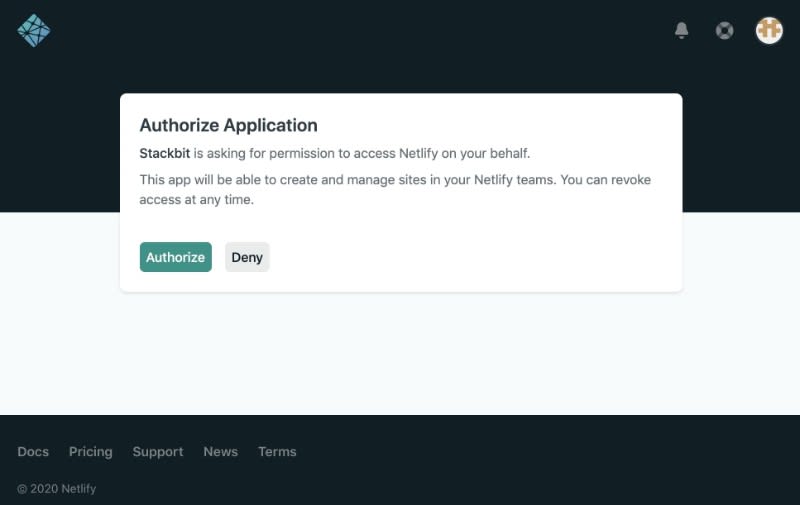
5.8. Claim website on Netlify - Authorize
Now it is time to Claim your Netlify URL, Click the "Claim" button to do so.
Great! now your URL has been claimed on Netlify too.
5.9. Click view website
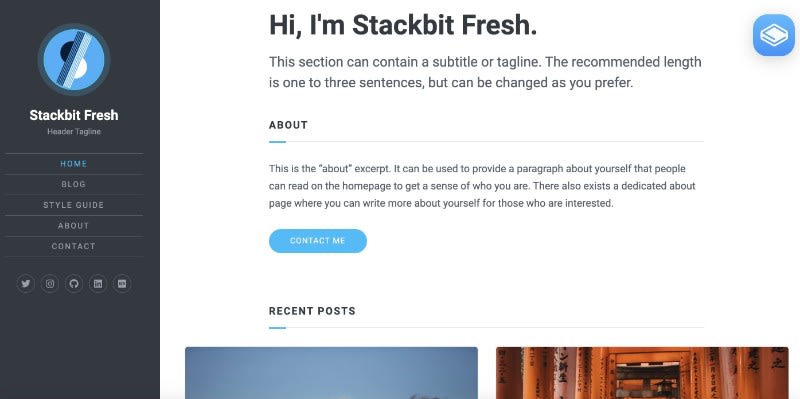
Hurray! Let's see your website live, click the "View Site" blue button, your site should open on a new tab and look like below:
6. Edit text on the website
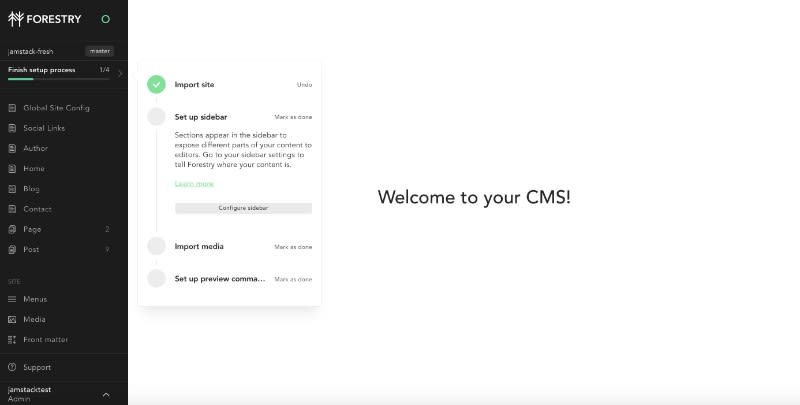
Good news, your website is up on a URL like https://jamstack-fresh-a9bfb.netlify.app/. Now you have to edit it to make it yours. Let's change the homepage text to say something different. For that click the "Edit in Forestry" blue button, you will be taken to the forestry dashboard.
6.1. Edit your website on Forestry
Click on the "Home" link on the sidebar.
6.2. Go to Home, click hero section and edit text
Then click on "Hero Section"
6.3. Edit the text of home hero section like below
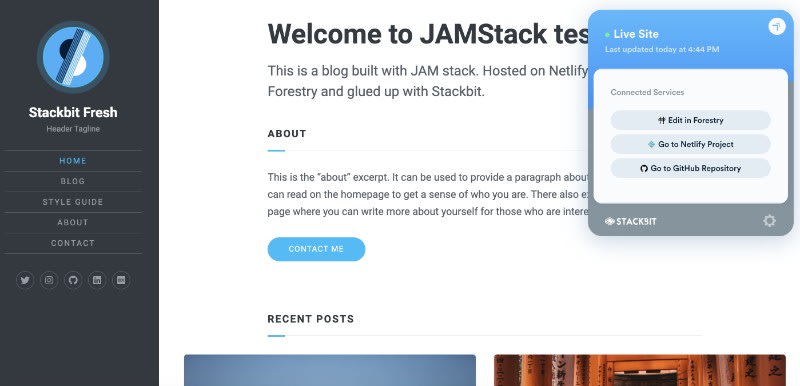
Now edit the Title to something like "Welcome to JAMStack test" and the content to something like below.
After that click on the "Save" at the top right and then go to the tab with your website open, it should start deploying now.
As you might have figured out by now, there will be some mapping to do. Generally, it is easy to find the element you need to edit to get your desired result.
6.4. Website deploying
The website will say "Publishing Site" like below:
6.5. Site deployed
After like a minute it will say "Rebuild Successful" now its time to click "Refresh" or refresh the browser.
6.6. Changes Updated
After you refresh you should see your changes, yes it is that easy to edit content.
Please check out the "Media" menu on the sidebar below the "Site" title and play around upload images. Add the images to your content. It is pretty easy.
Further steps
Here are some of the further steps you can take to enhance your new web presence:
- Please read through the Forestry Product Tour to know other things like adding an image from the media library and doing other changes. You will need to fiddle around with Forestry. It would be great to check the Forestry documentation for Managing Content and Media Library, it is easy.
- You can get a free top-level domain like a .tk, .ml, .cf or .gq for free. So you can have mywebsite.gq free from Freenom. If you want a .com try another domain registrar like NameCheap.
- You can then configure Custom Domain in netlify to get it working on the domain name you registered.
- If you are serious about your website or blog try to optimize it better for SEO, for this you will need some coding and help from someone who knows Go lang and has worked with Hugo.
- If you want to move out from medium to your JAMstack website you can try Stackbit medium import.
Caveats
There are some caveats you should consider for this free website, they are as follows:
- Be mindful of the build minutes, Netlify free plan has 300 build minutes per month. That means each time you hit save or add a new image from Forestry it will trigger a build and deploy on Netlify.
Each build will take around a minute or more and this reduces your build time quota of 300 minutes every month. So, it is advisable to bulk your changes, mainly the text ones and be careful and use the "Save" button sparingly.
- Even though setting up the website is just clicks, I think this website will be a good one for a proof of concept or staging. If you want a great production-ready performance-tuned website there will be some coding changes required.
Conclusion
Now you have a fully functional website in under 15 mins, there was no coding involved and you didn't even have to take your credit card out.
This is just scratching the surface, now you can show your running website to people but do remember to optimize it well before going live.
Originally posted at Geshan.com.np

Posted on April 20, 2020
Join Our Newsletter. No Spam, Only the good stuff.
Sign up to receive the latest update from our blog.


