
Florence Okoli
Posted on May 26, 2024

Let's say you are a blogger or even a small business owner looking for a way to share your insights or products with the world at large. For this, you would need a perfect platform for your website that is also flexible with a vast array of plugins.
Well, here comes WordPress to the rescue.
You now have a great platform, but you may want the freedom to customize your server environment and ensure that every aspect of your website runs exactly as you want, without relying on managed hosting services.
Okay. Ubuntu comes into play and combined with the power of the LAMP stack (Linux, Apache, MySQL, PHP) gives you complete control over your website.
All these may seem daunting at first but in this guide, I will walk you through the process of hosting WordPress on Ubuntu using the LAMP stack.
Overview of Key Components
Before we delve into the step-by-step process, let's take a brief look at what WordPress, Ubuntu, and the LAMP stack are, and their roles in this project:
WordPress - WordPress is a widely used content management system (CMS) for creating and managing websites. It is well-known for its user-friendly interface and extensive library of plugins and themes. With WordPress, you can build anything from basic blogs to advanced e-commerce sites without requiring advanced technical skills. In this guide, WordPress will serve as the platform for creating and managing your website's content.
Ubuntu - Ubuntu is a popular, open-source Linux operating system known for its stability, security, and ease of use. In this project, Ubuntu serves as the foundation, hosting the web server and other essential software components.
-
LAMP Stack - LAMP is a set of open-source software for creating web servers, comprising Linux (Ubuntu as the operating system), Apache (webserver), MySQL (database), and PHP (scripting language). Each component is important and here is what they will do in this project:
- Linux: Provides the Operating System foundation.
- Apache: Handles browser requests and serves web pages.
- MySQL: Manages the WordPress database.
- PHP: Processes dynamic content and interacts with the database.
Prerequisites
- An Ubuntu Server: You can use either a local machine(Vagrant virtual box)or a cloud-based virtual private server from AWS, Digital Ocean or Google Cloud.
- A basic understanding of Linux commands
Steps
Update your package index
- This command
sudo apt updateupdates the package lists for upgrades and new package installations from the repositories defined in your system.
Install Dependencies
- To install Apache2 and PHP, run the following command
sudo apt install apache2 \
                 ghostscript \
                 libapache2-mod-php \
                 mysql-server \
                 php \
                 php-bcmath \
                 php-curl \
                 php-imagick \
                 php-intl \
                 php-json \
                 php-mbstring \
                 php-mysql \
                 php-xml \
                 php-zip
Copy and paste this command into a text file before pasting it into your virtual environment to avoid errors.
Install WordPress
- Let's create a new directory first and change the ownership of
this directory to the user
www-datato ensure that the webserver has the appropriate access to these files.
sudo mkdir -p /srv/www
sudo chown www-data: /srv/www
- Next, let's download the latest version of WordPress and extract it into the
/srv/wwwdirectory.
curl https://wordpress.org/latest.tar.gz | sudo -u www-data tar zx -C /srv/www
Here is what the code does:
This
curl https://wordpress.org/latest.tar.gzcommand usescurlto download the file at the given URL, which is the latest version of WordPress in a gzipped tarball format.
The pipe|command takes the output of the command on its left and uses it as the input to the command on its right.
sudo -u www-data: This runs the following command as thewww-datauser. This is done because the/srv/www directoryis owned bywww-data, which we set earlier if you can remember
This commandtar zx -C /srv/wwwextracts the gzipped tarball. Thezoption tells tar to uncompress the file (as it is gzipped), thexoption tells it to extract the files from the tarball, and the-C /srv/wwwoption tells it to change to the/srv/wwwdirectory before doing so.
To confirm you followed the above step correctly, run this command
ls -l /srv/www/wordpress
If you see an image like the one below, then you are on track.

Configure Apache for WordPress
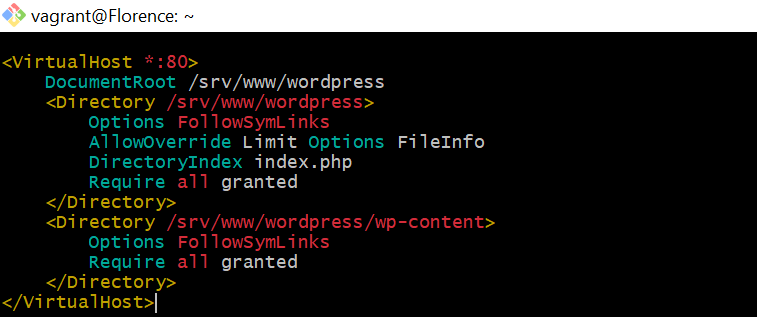
- To configure Apache for WordPress, run this command to create and edit WordPress configuration file ```
sudo vi /etc/apache2/sites-available/wordpress.conf

The command above opens up an empty configuration file. Copy the codes below and paste them into the configuration file. Then, save it
DocumentRoot /srv/www/wordpress
Options FollowSymLinks
AllowOverride Limit Options FileInfo
DirectoryIndex index.php
Require all granted
Options FollowSymLinks
Require all granted
* When this is done, enable the site using this command - `sudo
a2ensite wordpress` and then enable URL rewriting using this
command `sudo a2enmod rewrite` lastly, disable the default site
using `sudo a2dissite 000-default`

* To finish up with this step, reload apache2 to apply all these
changes
`sudo service apache2 reload`
**Configure MySQL Database**
* Before we proceed, it is important to note that MySQL commands end with ; or /g
* Let's begin with opening up the MySQL CLI using this command
`sudo mysql -u root`
This command opens the MySQL command-line client as the root user

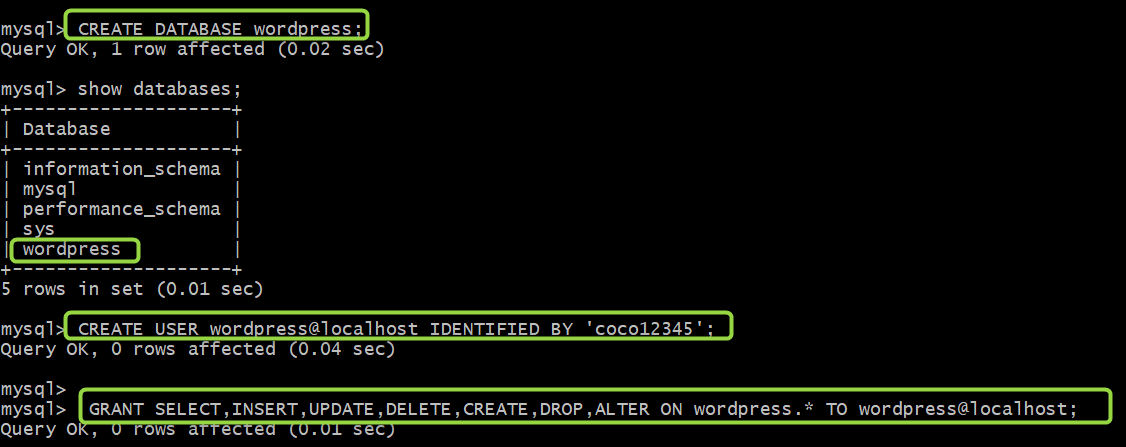
* Now, we create a database called wordpress, create a user for
this database and give it a unique password. Next, we grant
privileges to this user and with the flush privileges command,
we reload the user privileges from the grant tables in the
MySQL database.
Here is the code at play:
CREATE DATABASE wordpress;
CREATE USER wordpress@localhost IDENTIFIED BY '';
GRANT SELECT,INSERT,UPDATE,DELETE,CREATE,DROP,ALTER ON wordpress.* TO wordpress@localhost;
FLUSH PRIVILEGES;
quit
* Please note that these commands should be copied one after the * other into the CLI to avoid errors.
* To apply these changes we made, let's enable the MySQL service
with this command here - `sudo service mysql start`
**Configure WordPress to connect to the database**
* First, let's create a new configuration file for WordPress by
copying the sample configuration file to `wp-config.php`
sudo -u www-data cp /srv/www/wordpress/wp-config-sample.php /srv/www/wordpress/wp-config.php

* Next, we configure the credentials in the configuration file.
Please note that the only thing you are expected to change in
the commands below is your password.
Remember the unique password you created when you were creating
the MySQL database? Yeah, that's the one.
sudo -u www-data sed -i 's/database_name_here/wordpress/' /srv/www/wordpress/wp-config.php
sudo -u www-data sed -i 's/username_here/wordpress/' /srv/www/wordpress/wp-config.php
sudo -u www-data sed -i 's/password_here//' /srv/www/wordpress/wp-config.php

* Now we need to edit the WordPress config file. Use this command
to open and edit the config file `sudo -u www-data
/srv/www/wordpress/wp-config.php`
* In your config file, scroll down to where you will find the
commands below:
define( 'AUTH_KEY', 'put your unique phrase here' );
define( 'SECURE_AUTH_KEY', 'put your unique phrase here' );
define( 'LOGGED_IN_KEY', 'put your unique phrase here' );
define( 'NONCE_KEY', 'put your unique phrase here' );
define( 'AUTH_SALT', 'put your unique phrase here' );
define( 'SECURE_AUTH_SALT', 'put your unique phrase here' );
define( 'LOGGED_IN_SALT', 'put your unique phrase here' );
define( 'NONCE_SALT', 'put your unique phrase here' );
* Now delete these commands above and replace them with the
content you will find [here](https://api.wordpress.org/secret-key/1.1/salt/). (This address is a randomiser that
returns completely random keys each time it is opened.)
See mine below:
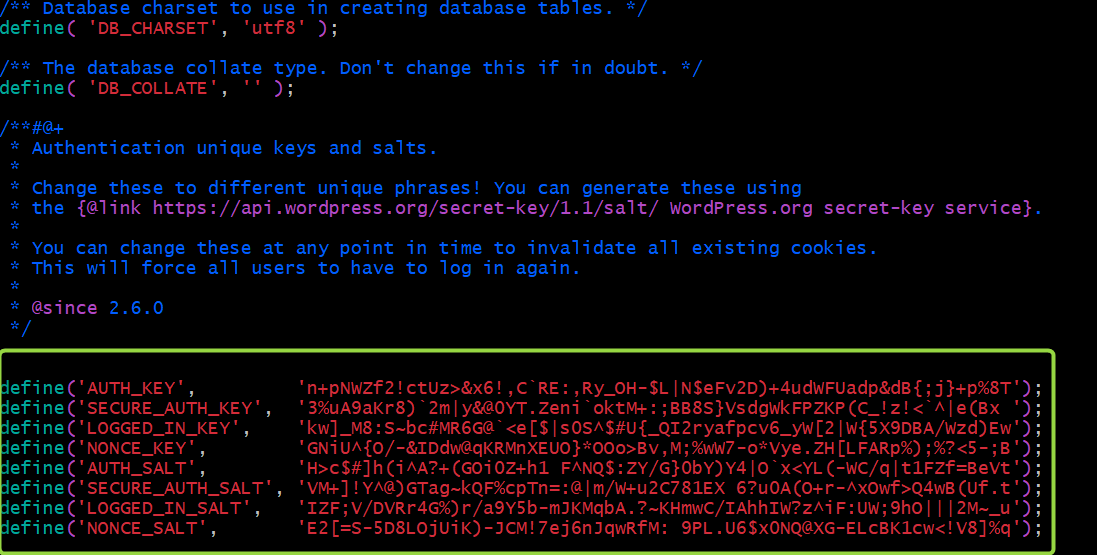
> This step is important to ensure that your site is not vulnerable to attacks.
Save the changes.
**Customize WordPress to serve your web pages**
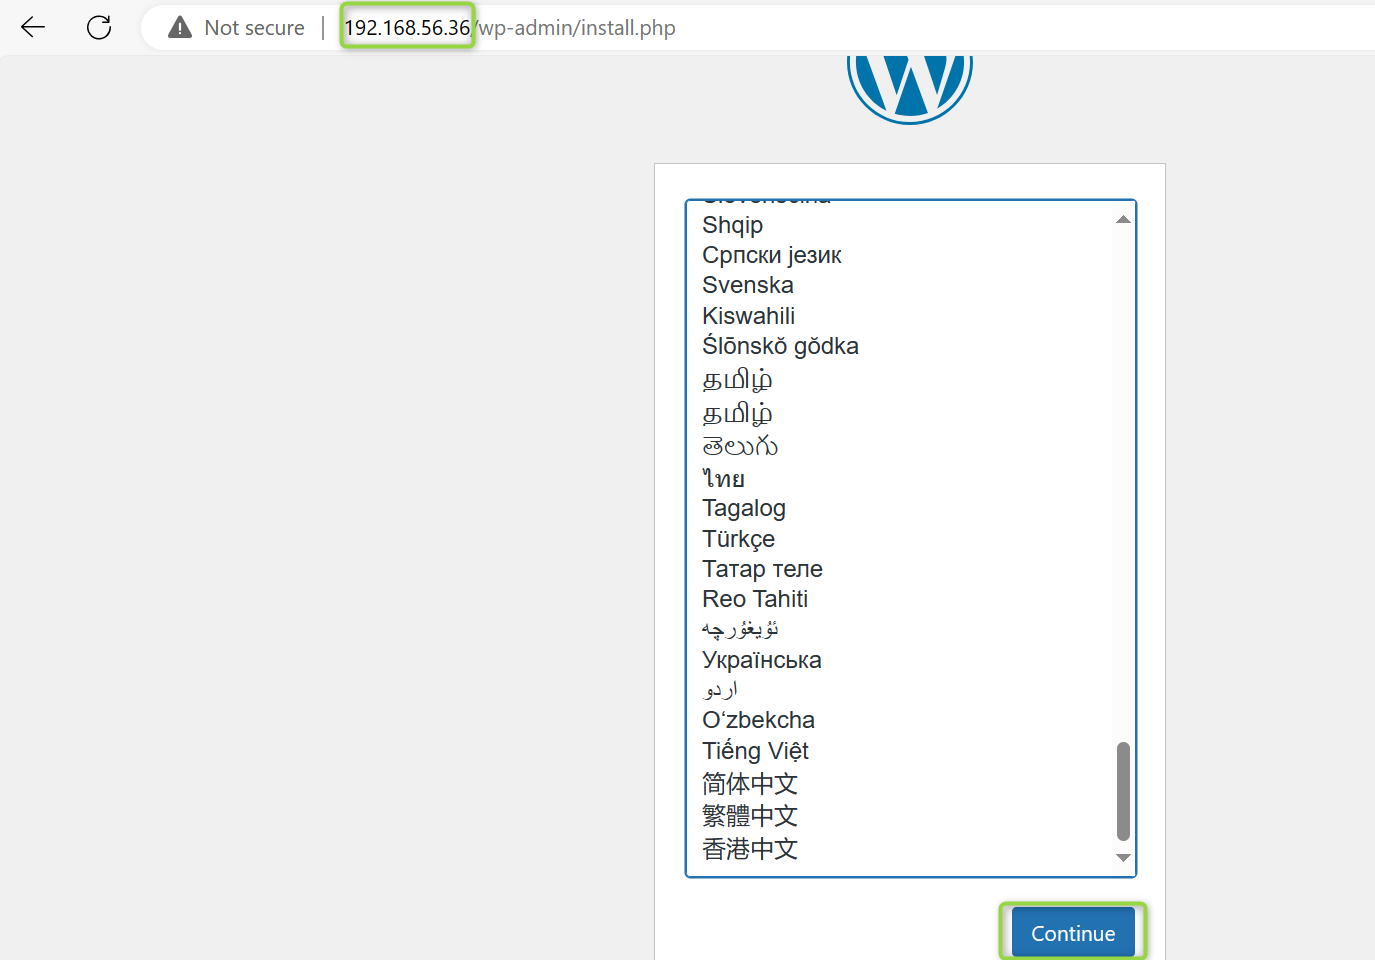
* On your terminal, run this command `ip a` to copy the IP
address of your local machine. Copy and then paste the address
on your browser. You will see an image similar to the one below
upon loading your browser. Click on "continue" to customize
WordPress for hosting your web pages.
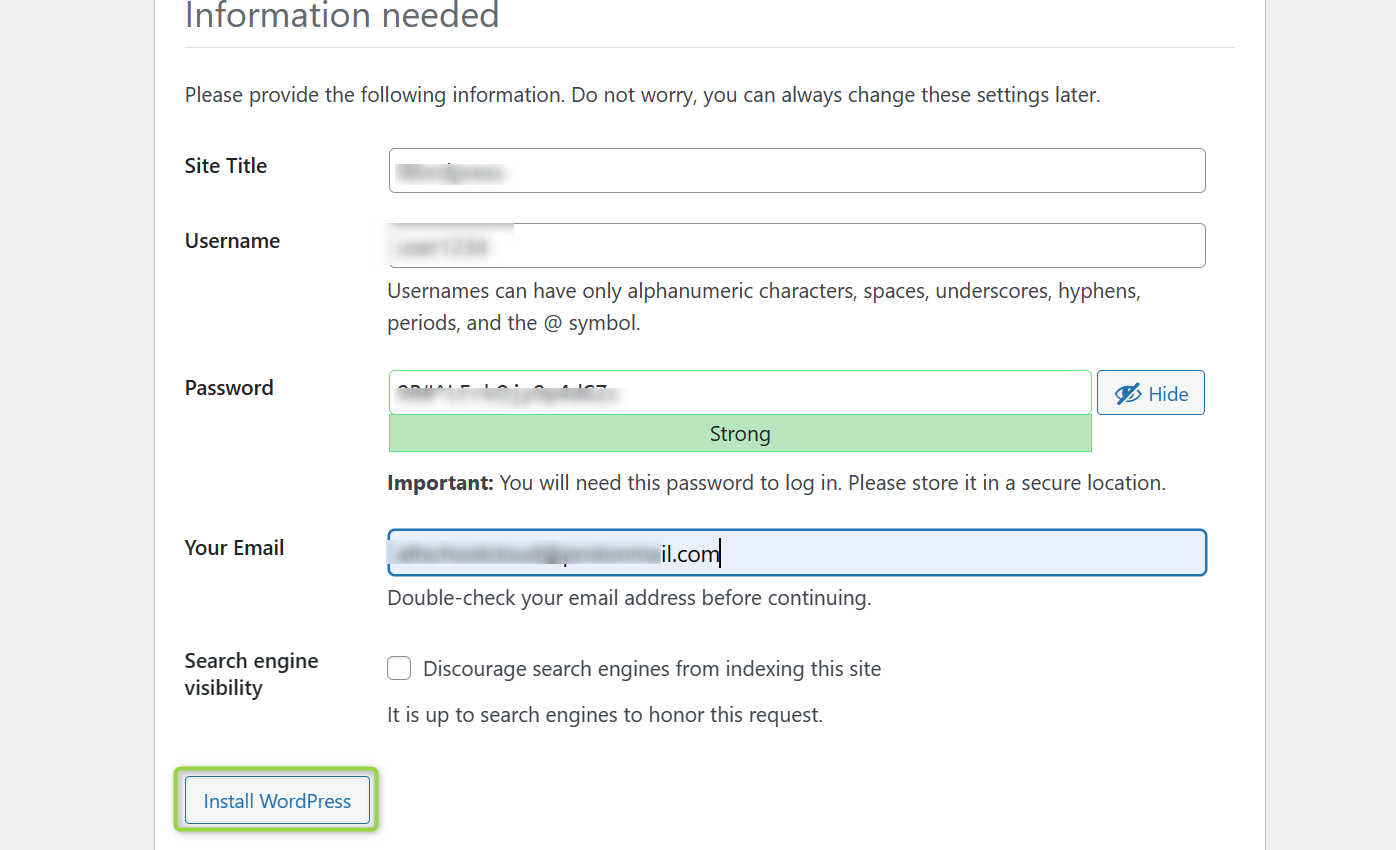
* Next, enter the title of your new site, username, password, and
a valid e-mail address. Note that the username and password you
choose here are for the WordPress site and not the ones you
used for the MySQL database earlier.
Click on Install WordPress to continue
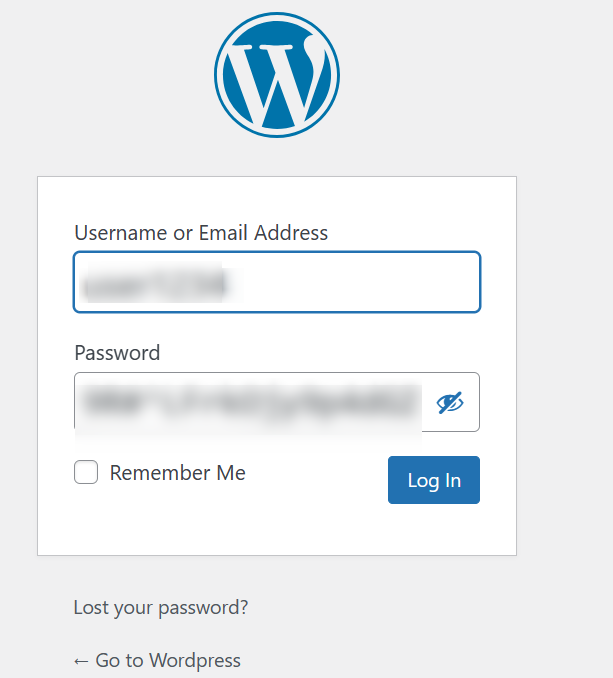
* Now, let's log in with our details
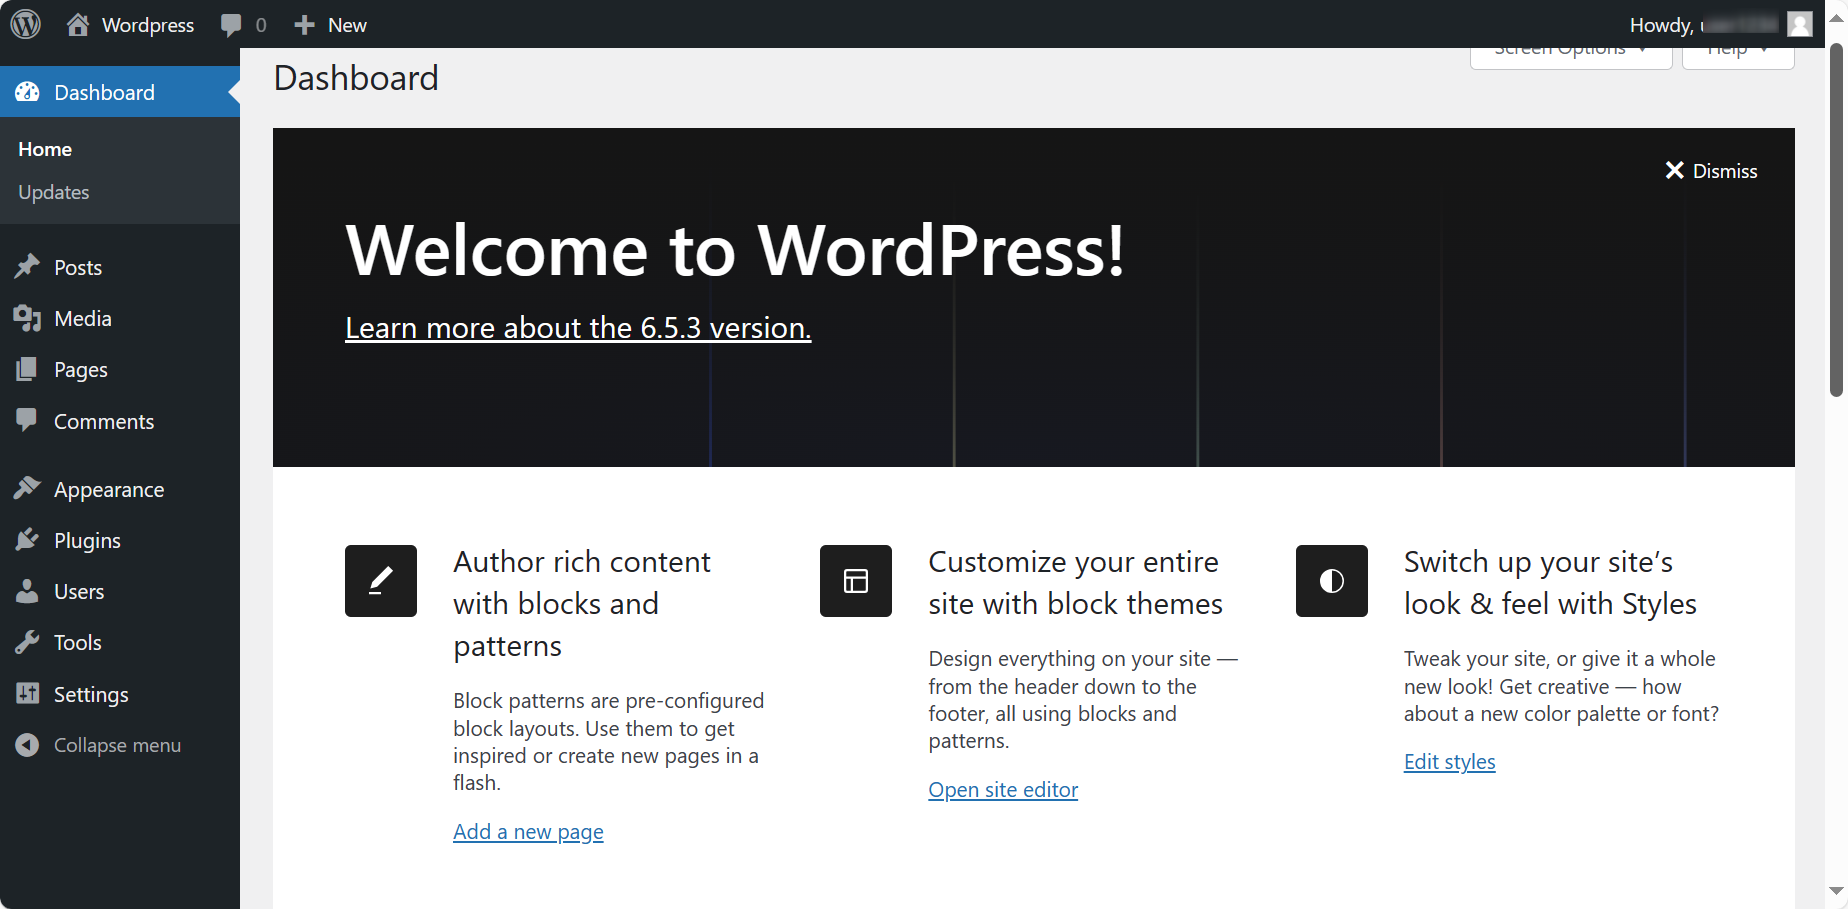
* Once you log in to the WordPress dashboard, you will find a variety of icons and options to customize your website according to your preferences.
C'est fini!!
Congratulations on taking the first step toward creating your own WordPress website on Ubuntu using the powerful LAMP stack! By following this guide, you've set up a flexible and customizable platform for sharing your insights, products, or even services with the world.
I hope you found this tutorial helpful and easy to follow.

Posted on May 26, 2024
Join Our Newsletter. No Spam, Only the good stuff.
Sign up to receive the latest update from our blog.


