🚀 Axelar: The Future of Cross Chain Communication for Web3

Vedant Chainani
Posted on December 11, 2022

📜 Introduction
Cross-chain communication is an essential part of the Web3 ecosystem, enabling different blockchain networks to interoperate and exchange data and value. By facilitating the seamless transfer of information and assets between different blockchains, cross-chain communication allows for the creation of a more open, connected, and inclusive decentralized world. With the ability to bridge the gap between different blockchains, cross-chain communication is a powerful tool for driving innovation and adoption in the world of decentralized technologies.
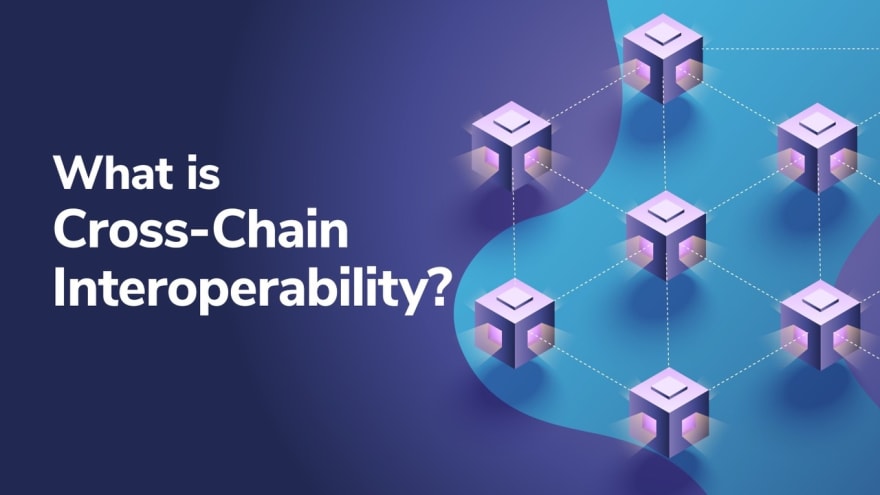
What is Cross-chain Interoperability?
Cross-chain communication refers to the ability of different blockchain networks to communicate and exchange information with each other. This is important because it allows for the transfer of value and data between different blockchains, which can help to increase the overall interoperability and effectiveness of the broader blockchain ecosystem.
For example, if two different blockchain networks are able to communicate with each other, it would be possible for a user on one network to send a transaction to another user on the other network, even though the two users are on separate blockchains. This can help to improve the overall usability and utility of blockchain technology.
🤔 What is Axelar
Axelar provides Web3 with secure cross-chain communication. Axelar is built on proof-of-stake, the battle-tested method utilised by Ethereum, Cosmos, Avalanche, and others.
Axelar-based cross-chain apps are really permissionless, which means that their transactions cannot be restricted by any oracle, relayer, or validator. Axelar's security model is similar to that of many of the chains it connects.
Fundamental functionality
Here are two basic cross-chain functions that Axelar can add to a dApp.
- Token transfers: Securely send and receive fungible tokens from one chain to another, including Cosmos-to-EVM and other complex transfers.
- General Message Transmission: Call any EVM chain function from within a dApp; construct DeFi functions; move NFTs cross-chain; execute cross-chain calls of any kind that securely sync state between dApps on different ecosystems.
🚀 What we'll be building
Today, we will create a smart contract in which a user can send a token (say, USDC) from one chain to an account on another chain with "payment information." Payment information can include an invoice/description of payment/reason and note to a buddy, among other things.
Prerequisites
- Must be familiar with smart contracts written in solidity.
- You must be familiar with the Metamask wallet.
- Be passionate about creating cool things.
Step 1: Setting Up Dev Environment
To begin, we must clone the examples GitHub repository so that we may work on the pre-built example to send tokens from the source chain to an account in the destination chain.
git clone https://github.com/axelarnetwork/axelar-local-gmp-examples
Next, we must perform a clean installation of the essential npm packages for this run.
npm ci
Next, we'll need our Ethereum wallet private key to deploy contracts to the testnet. Rename .env.example to .env then insert your private key into the .env file.
cp .env.example .env
Step 2: Editing The Smart contract
Open the DistributionExecutable.sol file in the example/call-contract-with-token directory. The contract will be written by default and used to send tokens from the source chain to numerous addresses on the destination chain. For example, if we send 100 aUSDC from the source chain to five addresses in the destination chain, each will receive around 20 aUSDC.
We will be creating a new feature that will include payment information with the transaction. Payment information can include an invoice or the purpose for sending the token.
In our file, we will create a struct called TransactionInfo to contain payment information such as the sender's address, the address of the token sent, the amount, and finally the message.
// TransactionInfo struct to store transaction details
struct TransactionInfo {
    address sender;
    address tokenAddress;
    uint256 amount;
    string message;
}
Then we'll add two mappings:
-
recipientsToTransactions: which will link the struct to the sender's address. -
recipientsTransactionCounter: which will hold the number of structures associated with a given address.
// Mapping to store transaction details for each recipient
mapping(address => TransactionInfo[]) public recipientsToTransactions;

// Mapping to store number of transactions for each recipient
mapping(address => uint256) public recipientsTransactionCounter;
Then we'll modify our sendToMany method to include message as one of the function parameters. The message will then be included in the payload variable, ensuring that it is included in the transaction.
function sendToMany(
    string memory destinationChain,
    string memory destinationAddress,
    address[] calldata destinationAddresses,
    string memory symbol,
    uint256 amount,
    string memory message // Added message parameter
) external payable {
    address tokenAddress = gateway.tokenAddresses(symbol);
    IERC20(tokenAddress).transferFrom(msg.sender, address(this), amount);
    IERC20(tokenAddress).approve(address(gateway), amount);
    bytes memory payload = abi.encode(destinationAddresses, message, msg.sender); // <-- updated payload to include message
    if (msg.value > 0) {
        gasReceiver.payNativeGasForContractCallWithToken{ value: msg.value }(
            address(this),
            destinationChain,
            destinationAddress,
            payload,
            symbol,
            amount,
            msg.sender
        );
    }
    gateway.callContractWithToken(destinationChain, destinationAddress, payload, symbol, amount);
    }
Finally, in the _executeWithToken function, we will pass some more variables in the decode function so that we can also store the message and the sender of the tokens.
(address[] memory recipients, string memory message, address sender) = abi.decode(payload, (address[], string, address)); // Decoding payload to get message and sender
And then, once we have all of the necessary details, we will create a struct in memory and pass the variables in that struct, as well as map the struct to the sender address. Finally, we'll increase the counter.
TransactionInfo memory txnInfo = TransactionInfo(sender, tokenAddress, sentAmount, message); // Create TransactionInfo struct
recipientsToTransactions[recipients[i]].push(txnInfo); // Store TransactionInfo struct in mapping
recipientsTransactionCounter[recipients[i]]++; // Increment transaction counter for recipient
Step 3: Making changes to deploy script
Navigate to the scripts directory and open the deploy.js file. To make the script operate with our smart contract, we need to make a few tweaks.
To begin, we must modify our test function to populate certain variables based on the console parameters.
async function test(chains, wallet, options) {
    const args = options.args || [];
    const getGasPrice = options.getGasPrice;
    const source = chains.find((chain) => chain.name === (args[0] || 'Avalanche'));
    const destination = chains.find((chain) => chain.name === (args[1] || 'Fantom'));
    const amount = Math.floor(parseFloat(args[2])) * 1e6 || 10e6;
    const accounts = options.args[3].split(',');
    const message = options.args[4];

    if (accounts.length === 0) accounts.push(wallet.address);

    for (const chain of [source, destination]) {
        const provider = getDefaultProvider(chain.rpc);
        chain.wallet = wallet.connect(provider);
        chain.contract = new Contract(chain.distributionExecutable, DistributionExecutable.abi, chain.wallet);
        chain.gateway = new Contract(chain.gateway, Gateway.abi, chain.wallet);
        const usdcAddress = chain.gateway.tokenAddresses('aUSDC');
        chain.usdc = new Contract(usdcAddress, IERC20.abi, chain.wallet);
    }

    let balances = [];

    // code ....
}
Following that, we will write two nested function that will be used to log the balances of the address's aUSDC tokens.
async function logAccountBalances() {
    console.log(`Source : ${wallet.address} has ${(await source.usdc.balanceOf(wallet.address)) / 1e6} aUSDC`);
    let i = 0;

    for (const account of accounts) {
        const destinationAccountBal = await destination.usdc.balanceOf(account);
        console.log(`Destination ${i + 1}: ${account} has ${destinationAccountBal / 1e6} aUSDC`);
        balances.push(destinationAccountBal / 1e6);
        i++;
    }
}

async function matchandLogAccountBalances() {
    console.log(`Source(After Transaction) : ${wallet.address} has ${(await source.usdc.balanceOf(wallet.address)) / 1e6} aUSDC`);
    let i = 0;
    for (const account of accounts) {
        console.log(`\n------------For Account ${account}------------`);
        const destinationAccountBal = await destination.usdc.balanceOf(account);
        console.log(`Destination(Before Transaction) ${i + 1} : ${account} has ${balances[i]} aUSDC`);
        console.log(`Destination(After Transaction) ${i + 1}: ${account} has ${destinationAccountBal / 1e6} aUSDC`);

        console.log(`\tDetails of TransactionInfo `);
        console.log('\t---------------------------');
        const recipientsCount = (await destination.contract.recipientsTransactionCounter(account)).toNumber();
        for (let count = 0; count < recipientsCount; count++) {
            const transactionInfo = await destination.contract.recipientsToTransactions(account, count);
            console.log(`\tSender\t\t : ${transactionInfo.sender}`);
            console.log(`\tTokenAddress\t : ${transactionInfo.tokenAddress}`);
            console.log(`\tAmount\t\t : ${transactionInfo.amount.toNumber() / 1e6}`);
            console.log(`\tMessage\t\t : ${transactionInfo.message}`);
        }
        i++;
    }
}
Then, using the getGasPrice method, we will obtain the gas price of the, verify the balance of the destination account, and then initiate a transaction to the source account to approve spending a particular quantity of aUSDC tokens, and wait until the transaction is approved.
const gasLimit = 3e6;
const gasPrice = await getGasPrice(source, destination, AddressZero);

const approveTx = await source.usdc.approve(source.contract.address, amount);
await approveTx.wait();
Then, using the sendToMany method, we will send the amount of aUSDC from the source account to be shared equally among the destination accounts. We'll wait once the transaction is finished.
const sendTx = await source.contract.sendToMany(
    destination.name,
    destination.distributionExecutable,
    accounts,
    'aUSDC',
    amount,
    message,
    {
        value: BigInt(Math.floor(gasLimit * gasPrice)),
    },
);
await sendTx.wait(1);
console.log(`Transaction Hash : ${sendTx.hash}`);
console.log('\n--- Waiting Period Started ---');
Then we'll create a loop that checks to see if the destination address balance has been changed, and if it has, we'll exit the loop and print out the account amount.
while (!allBalancesMatched) {
    let i = 0;
    let pendingMatch = false;

    await sleep(60000);
    waitTimeInMin++;
    process.stdout.write(`\rWaited for ${waitTimeInMin} minutes`);

    for (const account of accounts) {
        const accountBalance = (await destination.usdc.balanceOf(account)) / 1e6;
        if (accountBalance == balances[i]) {
            pendingMatch = true;
        }
        i++;
    }
    allBalancesMatched = !pendingMatch;
}
console.log('\n--- After ---');

await matchandLogAccountBalances();
Step 4: Testing on Local chain
To start a local node, open a new terminal window and enter the following command.
node scripts/createLocal.js
Now we must deploy our smart contract to the local chain. To do so, run the following command.
node scripts/deploy.js examples/call-contract-with-token local
Let's put our contract to the test. We'll transmit 100 aUSDC tokens from Polygon to the Avalanche chain and distribute them to two users by running the following command.
node scripts/test examples/call-contract-with-token local "Polygon" "Avalanche" 100 0x438d67e825D31D4a9910241074025B75b08470e1,0x57E2355F3CD8CB932952e773a5C57b64cE692e76 "Here's your Coffee"
Output after executing the transaction:
--- Waiting Period Started ---
Waited for 1 minutes
--- After ---
Source(After Transaction) : 0xBF4979305B43B0eB5Bb6a5C67ffB89408803d3e1 has 999999999900 aUSDC

------------For Account 0x438d67e825D31D4a9910241074025B75b08470e1------------
Destination(Before Transaction) 1 : 0x438d67e825D31D4a9910241074025B75b08470e1 has 0 aUSDC
Destination(After Transaction) 1: 0x438d67e825D31D4a9910241074025B75b08470e1 has 49.5 aUSDC
        Details of TransactionInfo
        ---------------------------
        Sender           : 0xBF4979305B43B0eB5Bb6a5C67ffB89408803d3e1
        TokenAddress     : 0x1d1aD0c677c2Ca7945f0B9D47298ca8eb9e61909
        Amount           : 49.5
        Message          : Here's your Coffee

------------For Account 0x57E2355F3CD8CB932952e773a5C57b64cE692e76------------
Destination(Before Transaction) 2 : 0x57E2355F3CD8CB932952e773a5C57b64cE692e76 has 0 aUSDC
Destination(After Transaction) 2: 0x57E2355F3CD8CB932952e773a5C57b64cE692e76 has 49.5 aUSDC
        Details of TransactionInfo
        ---------------------------
        Sender           : 0xBF4979305B43B0eB5Bb6a5C67ffB89408803d3e1
        TokenAddress     : 0x1d1aD0c677c2Ca7945f0B9D47298ca8eb9e61909
        Amount           : 49.5
        Message          : Here's your Coffee
Step 5: Deploying to Testnet
after successfully testing our contract we can deploy to testnet for this we can use the following command:
node scripts/deploy.js examples/call-contract-with-token testnet
Let's put our contract to the test. We'll transmit 10 aUSDC tokens from Axelar to the Ethereum chain and distribute them to two users by running the following command.
node scripts/test examples/call-contract-with-token testnet "Axelar" "Ethereum" 10 0x919d935dca4abc9079cfb9abe01529581c355552 "Here's your Coffee"
And with that, you've successfully launched a cross-chain smart contract that shows how to transfer tokens from one chain to another using Axelar.
Here you may view the finished transaction:
Transaction Hash: 6B293A9A00D7419FE92698AEA41390D7F3DC25F70B8C155F3FE5C3978515A519
Testnet Transaction: https://testnet.axelarscan.io/transfer/6B293A9A00D7419FE92698AEA41390D7F3DC25F70B8C155F3FE5C3978515A519
Note: Make a separate account for testing smart contracts rather than using your main account for testnet transactions.
Conclusion
Congratulations 🥳🎉 on making it to the end of this article. I hope you learned something new today. If you enjoy constructing cool projects like this one, be sure to follow me for more amazing web3 and blockchain lessons.


 Vedant 🔭🧑💻 🌐
@envoy_1084
 Hello👋, I'm Vedant.
My goal is to assist developers in navigating the challenging yet incredibly rewarding 🏆 world of blockchain.
I write threads about web3, crypto, front-end development, productivity tips , and occasionally, if you're lucky, a 👻 random topic.
10:38 AM - 25 Oct 2022


My goal is to assist developers in navigating the challenging yet incredibly rewarding 🏆 world of blockchain.
I write threads about web3, crypto, front-end development, productivity tips , and occasionally, if you're lucky, a 👻 random topic.

Posted on December 11, 2022
Join Our Newsletter. No Spam, Only the good stuff.
Sign up to receive the latest update from our blog.


