Dillon McElhinney
Posted on May 21, 2021

In this series of posts I am going to be building out the UI for Airbnb's "Explore" tab from scratch. This is an exercise in figuring out how to achieve the different layouts and effects you find in popular apps and I chose Airbnb because I thought it had several great examples. It is not intended to be used for anything other than for educational purposes and all my code will be available at this repo if you want to follow along and build it yourself. A few disclaimers:
- For all the illustrations in the app I just took screenshots of the actual app and cropped them to size. They are not the full versions of the illustrations and they are not really even formatted correctly for use in an iOS app. I tried to spend as little time as possible on that prep.
- We will get the fonts, colors and icons as close as we can with just using the system versions. I am pretty sure the font and icons that Airbnb actually uses would require a license and I don't care that much about making this exact. With the way we organize it, it would be pretty easy to swap in the real ones if you want to take that step yourself.
- We will not do any business logic. We will hard code all the data and not handle any user actions. Again, this is not meant to be production code, just an exploration of some UI techniques.
- There is a good chance that Airbnb will look different by the time you see this. Honestly, there's a non-zero chance that it will change before I finish writing this, so the live app will probably look different than what you see me build, but the layout/principles should be pretty much the same. (Editorial note: it has already changed before I was able to finish writing this series, but I have a few screenshots of what the app looked like before, and we'll just build up to the spec that I created.)
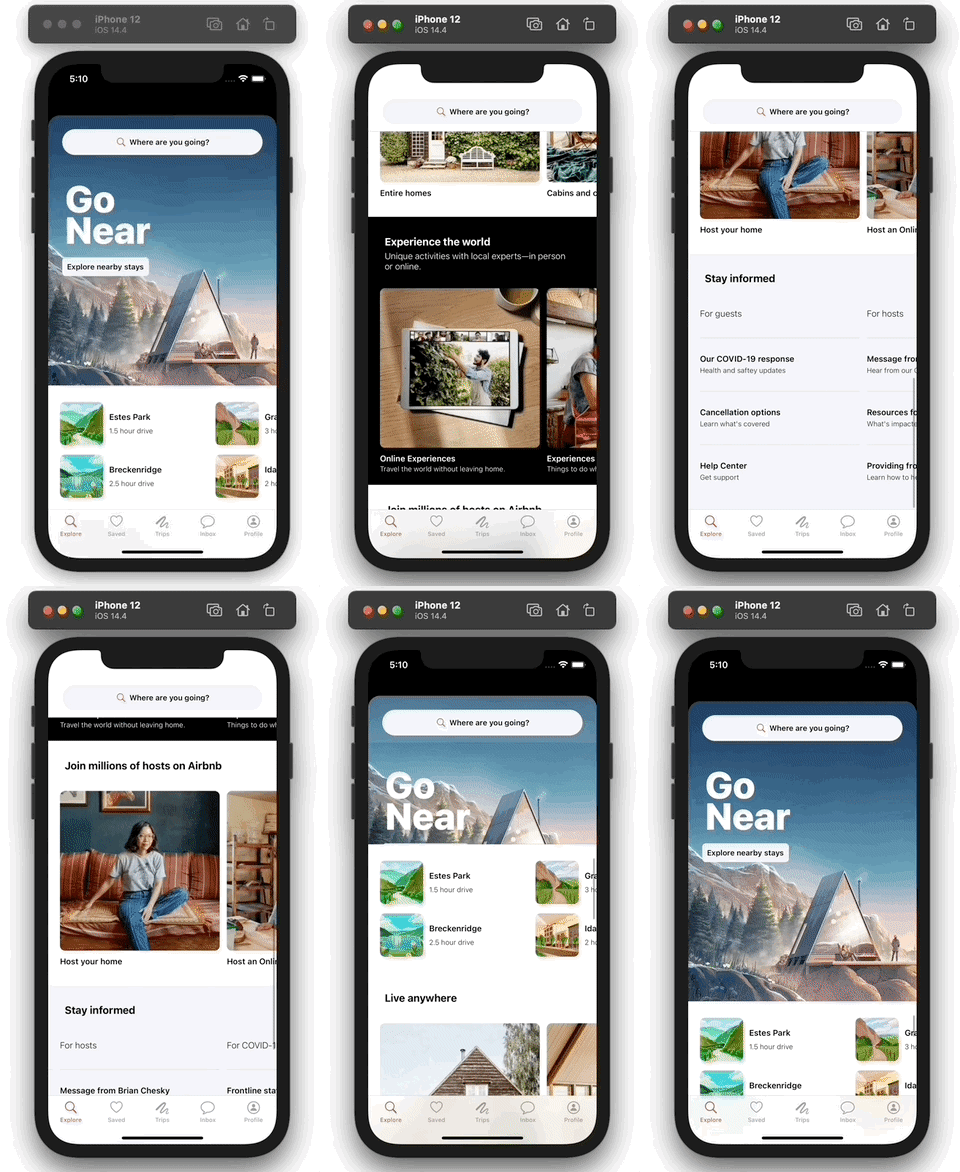
Here's what our final product will look like:
With all that said, let's go.
Laying The Ground Work
Before we actually start building stuff, we need to do some set up to make our lives easier down the line. I also promised that we'd build from scratch, so this is me showing my work. If you don't care about these set up steps and just want to get into it, jump ahead to [First Cell and Section] and grab this branch from the repo.
Make a new project
First, we need to make a project. It'll be an iOS App that I am going to call "Airbnb Home". It'll be a Storyboard, UIKit and Swift app.
Set Up The Storyboard
The first thing we'll do in the app is reconfigure the storyboard to have a tab controller with four empty view controllers and the one we'll be setting up. This should be the only time we need to mess with the storyboard.
Click on the view controller in the storyboard, click the "Embed In" button on the bottom right and click "Tab Bar Controller". I like to move the view controller down below the tab bar controller, because that will mimic the theoretical layout in the app.
Add another view controller, place it next to the first, control+click and drag from the tab bar view controller to the new view controller and click on "view controllers" under "Relationship Segue". This will embed the view controller in the tab bar.
Repeat three more times so there is a total of five view controllers. Now you should have a layout that looks like this:
Set the image tint to "System Pink". This is what we'll use to get close enough to Airbnb's brand color throughout the app.
Click on the first tab item and set its title to "Explore" and for the image select the "magnifyingglass" system image. For all of these I just tried to pick the closest SF Symbol that I could without spending a ton of time on it. If you want to pick your own icons you're welcome to.
For the rest I did:
- "Saved" and "heart"
- "Trips" and "scribble.variable"
- "Inbox" and "message"
- "Profile" and "person.circle"
Set Up The Resources
Delete the existing asset catalog and drag in the one that contains all the assets we'll be using. You can get just the asset catalog this from this repo. To get these I literally took screenshots these from the Airbnb app and cropped them down to the right size.
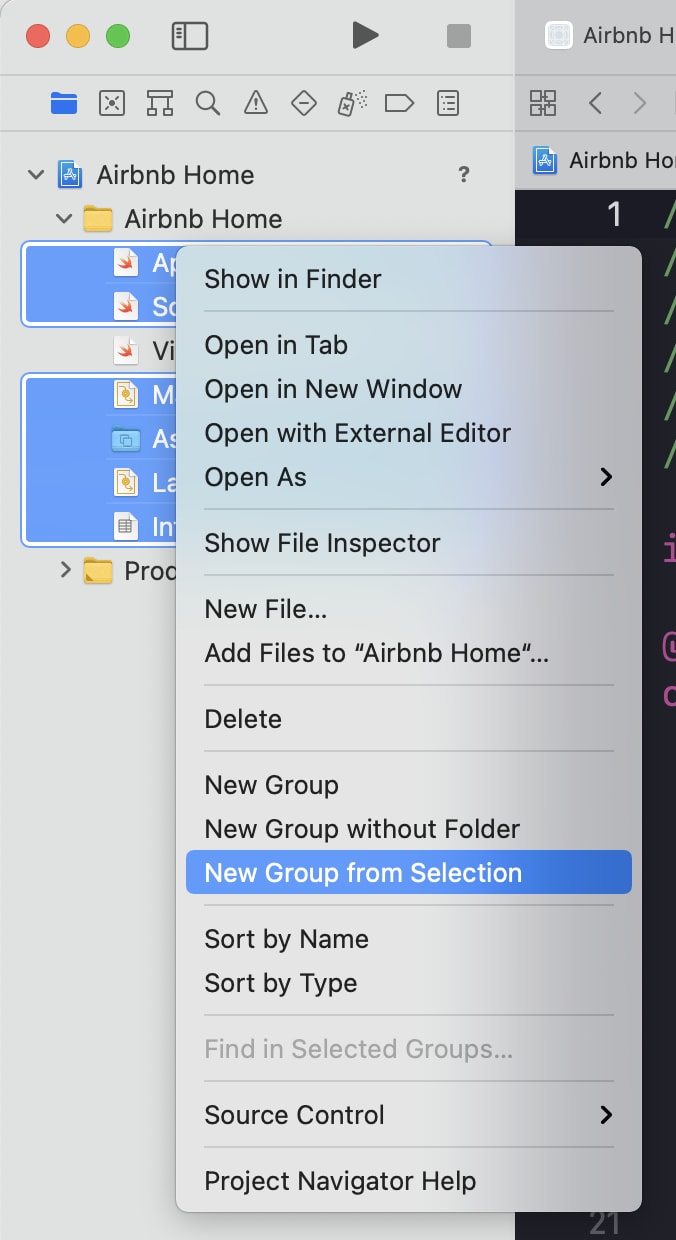
Move all the default stuff that we don't care about into a folder called 'Resources'. Right now, this is all of the files except "ViewController.swift"
If you try building at this point, you'll probably get an error saying that "Build input file could not be found..." This is because the path to the Info.plist file has changed and you need to tell the build settings that. Click on the project file, click on the "Airbnb Home" target, go to the "Build Settings", scroll down to the "Packaging" section and in the middle of that section there is a "Info.plist File" entry. Change that path to Airbnb Home/Resources/Info.plist and it will fix the problem.
Rename ViewController to be something more meaningful like HomeViewController
Pull In Helpers
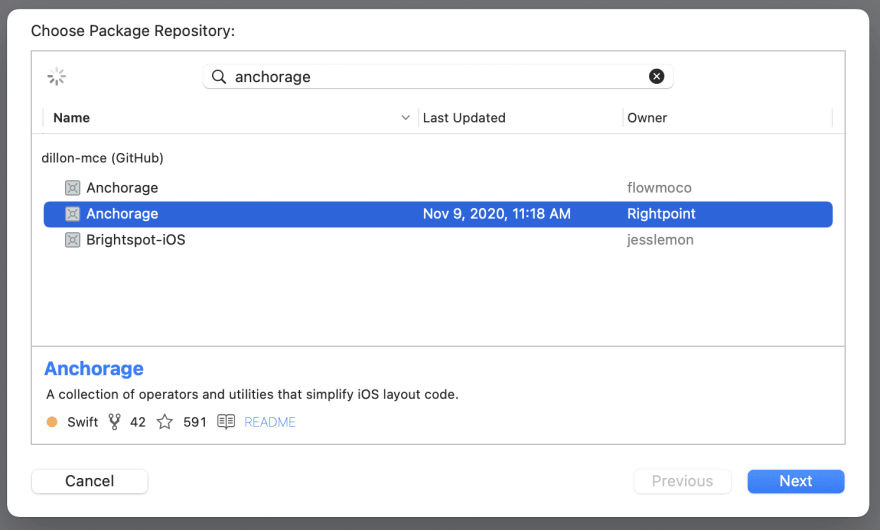
Add Anchorage as a Swift Package Dependency. We want the one from RightPoint and the default values are fine.
Add a file called ProgrammaticView.swift and add the ProgrammaticView class which will be the base class for all our views. I laid out these patterns in How I Layout UI Code in Swift, so I won't go into too much detail on that here, but it looks like this:
// ProgrammaticView.swift
import UIKit

class ProgrammaticView: UIView {

    @available(*, unavailable, message: "Don't use init(coder:), override init(frame:) instead")
    required init?(coder: NSCoder) {
        fatalError("init(coder:) has not been implemented")
    }

    override init(frame: CGRect) {
        super.init(frame: frame)

        configure()
        constrain()
    }

    func configure() {}
    func constrain() {}
}
Add some helper functions on UIView and UIStackView. I like to put these in their own files, in a folder called "Extensions":
// Extensions/UIView+Helpers.swift

import UIKit

extension UIView {
    func addSubviews(_ views: UIView...) {
        views.forEach { view in addSubview(view) }
    }
}

// Extensions/UIStackView+Helpers.swift

import UIKit

extension UIStackView {
    func addArrangedSubviews(_ views: UIView...) {
        views.forEach { view in addArrangedSubview(view) }
    }
}
Add a helper function on UIImage that seems obvious to me and I'm not sure why it isn't built in, but it makes our code a lot cleaner. UIImage(named:) is already a failable initializer, but it takes a String not a String?, so this initializer just allows us to use an optional string without unwrapping it before passing it to the initalizer:
// Extensions/UIImage+Helpers.swift

import UIKit

extension UIImage {
    convenience init?(named name: String?) {
        guard let name = name else { return nil }
        self.init(named: name)
    }
}
Finally, we'll add a file for our fonts. For now, it won't do anything but the file will just be a placeholder that we come back to when we need to add custom fonts.
// Extensions/UIFont+Custom.swift

import UIKit

extension UIFont {

}
Create Views And Model
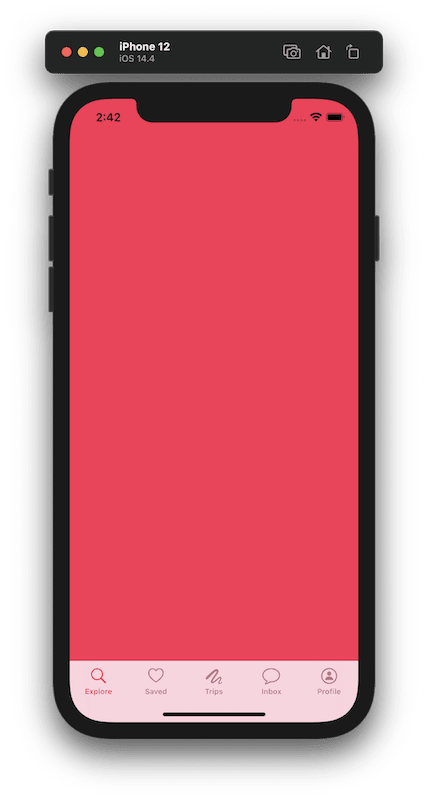
Add an empty HomeView and make it the view of the HomeViewController. I'm setting the background color to pink here just to confirm to myself that everything is working.
// HomeView.swift

import Anchorage
import UIKit

class HomeView: ProgrammaticView {
    override func configure() {
        backgroundColor = .systemPink
    }
}

// HomeViewController.swift

class HomeViewController: UIViewController {

    private lazy var contentView: HomeView = .init()

    override func loadView() {
        view = contentView
    }
}
At this point you can run the app and it will look like this. Not quite the Airbnb app yet, but moving in the right direction.
Add an empty HeaderView. We'll lay this out later in the series, but for now we will just give it a color.
// HeaderView.swift

import Anchorage
import UIKit

class HeaderView: ProgrammaticView {
    override func configure() {
        backgroundColor = .systemTeal
    }
}
Finally, we need our Content model. This is what everything will use to hold the content that we want to render on screen and as such, it is pretty generic. This isn't necessarily how I would organize my model in a real app, but it keeps things simple for now while we're setting up the UI. I put it in a group called "Models".
// Models/Content.swift

import UIKit

struct Content: Hashable {
    enum Style {
        case standard, title
    }
    let title: String
    let subtitle: String?
    let image: String?
    let style: Style

    init(title: String, subtitle: String?, image: String?, style: Style = .standard) {
        self.title = title
        self.subtitle = subtitle
        self.image = image
        self.style = style
    }
}
This is also where we'll throw all the stubbed data, but commented out, so that you don't have to type it all up like I did.
// MARK: - Headers
//
//extension Section {
// var headerContent: Content? {
// switch self {
// case .nearby: return nil
// case .stays: return .init(title: "Live anywhere", subtitle: nil, image: nil)
// case .experiences: return .init(title: "Experience the world",
// subtitle: "Unique activities with local experts—in person or online.",
// image: nil)
// case .hosting: return .init(title: "Join millions of hosts on Airbnb", subtitle: nil, image: nil)
// case .info: return .init(title: "Stay informed", subtitle: nil, image: nil)
// }
// }
//}

// MARK: - Stub Data
//
//extension Section {
// func stubData() -> [Content] {
// switch self {
// case .nearby:
// return [
// .init(title: "Estes Park", subtitle: "1.5 hour drive", image: "estes-park"),
// .init(title: "Breckenridge", subtitle: "2.5 hour drive", image: "breckenridge"),
// .init(title: "Grand Lake", subtitle: "3 hour drive", image: "grand-lake"),
// .init(title: "Idaho Springs", subtitle: "2 hour drive", image: "idaho-springs"),
// .init(title: "Glenwood Springs", subtitle: "4.5 hour drive", image: "glenwood-springs"),
// .init(title: "Pagosa Springs", subtitle: "7.5 hour drive", image: "pagosa-springs"),
// ]
// case .stays:
// return [
// .init(title: "Entire homes", subtitle: nil, image: "entire-homes"),
// .init(title: "Cabins and cottages", subtitle: nil, image: "cabins-cottages"),
// .init(title: "Unique stays", subtitle: nil, image: "unique-stays"),
// .init(title: "Pets welcome", subtitle: nil, image: "pets-welcome"),
// ]
// case .experiences:
// return [
// .init(title: "Online Experiences",
// subtitle: "Travel the world without leaving home.",
// image: "online-experiences"),
// .init(title: "Experiences",
// subtitle: "Things to do wherever you are.",
// image: "experiences"),
// .init(title: "Adventures",
// subtitle: "Multi-day trips with meals and stays.",
// image: "adventures"),
// ]
// case .hosting:
// return [
// .init(title: "Host your home", subtitle: nil, image: "host-your-home"),
// .init(title: "Host an Online Experience", subtitle: nil, image: "host-online-experience"),
// .init(title: "Host an Experience", subtitle: nil, image: "host-experience"),
// ]
// case .info:
// return [
// .init(title: "For guests", subtitle: nil, image: nil, style: .title),
// .init(title: "Our COVID-19 response", subtitle: "Health and saftey updates", image: nil),
// .init(title: "Cancellation options", subtitle: "Learn what's covered", image: nil),
// .init(title: "Help Center", subtitle: "Get support", image: nil),
//
// .init(title: "For hosts", subtitle: nil, image: nil, style: .title),
// .init(title: "Message from Brian Chesky", subtitle: "Hear from our CEO", image: nil),
// .init(title: "Resources for hosting", subtitle: "What's impacted by COVID-19", image: nil),
// .init(title: "Providing frontline stays", subtitle: "Learn how to help", image: nil),
//
// .init(title: "For COVID-19 responders", subtitle: nil, image: nil, style: .title),
// .init(title: "Frontline stays", subtitle: "Learn about our program", image: nil),
// .init(title: "Sign up", subtitle: "Check for housing options", image: nil),
// .init(title: "Make a donation", subtitle: "Support nonprofit organizations", image: nil),
//
// .init(title: "More", subtitle: nil, image: nil, style: .title),
// .init(title: "Airbnb Newsroom", subtitle: "Latest announcements", image: nil),
// .init(title: "World Health Organization", subtitle: "Education and updates", image: nil),
// .init(title: "Project Lighthouse", subtitle: "Finding and fighting discrimination", image: nil),
// ]
// }
// }
//}
Wrap Up
With that, we've got all the boring stuff out of the way and we're ready to actually get started building something. See you in the next part!
Check out the code up to this point on this branch in the repo.
If this has been helpful buy me a coffee!

Posted on May 21, 2021
Join Our Newsletter. No Spam, Only the good stuff.
Sign up to receive the latest update from our blog.


