Creating a temperature calculator with TravisCI, CDK,Rust, and AWS Lambda/Function URLs

David💻
Posted on June 3, 2022

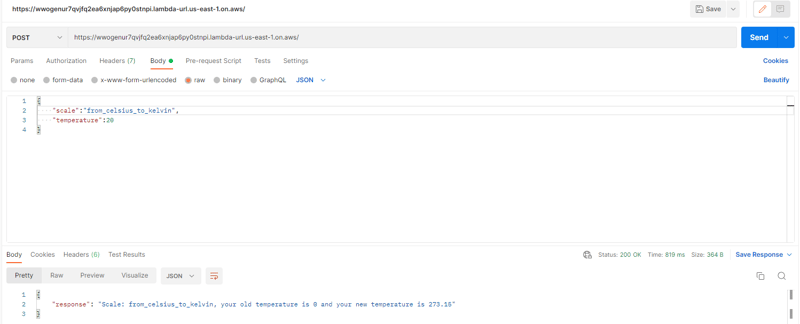
We will create a tool that calculates the equivalent temperature values across several commonly used temperature scales.
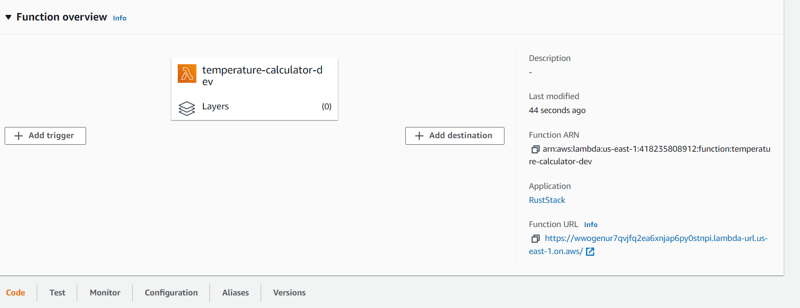
This article aims to create a temperature calculator written in Rust, which we will expose as a URL endpoint through Function Urls characteristic of AWS Lambda. We will try to automate these resources with CDK and Travis CI for CI/CD deployments.
Requirements
- AWS account
- NPM / CDK / TypeScript / Nodejs
- Rust (cargo)
- Travis CI account
- Docker (optional)
Walkthrough
Configure our AWS credentials with aws configure. Create a typescript project with cdk, run:
cdk init rust-app --language typescript
At the root of our project, create a folder named lambda and another folder called temperature; inside this folder, create a file named main.rs and a file named Cargo.toml.
In our Cargo.toml, we will define our dependencies.
[package]
name = "rust-lambda-temperature"
version = "0.1.0"
edition = "2021"
authors = ["david"]
autobins = false

[dependencies]
lambda_runtime = "0.5.1"
log = "0.4.17"
serde_json = "1.0.81"
simple_logger = "2.1.0"
tokio = {version = "1.18.2", features = ["full"]}

[[bin]]
name = "bootstrap"
path = "src/main.rs"
In main.rs file we will define our code in rust, we will expect the scale and temperature value we would like to convert.
In our CDK stack code, we will create a rust lambda that will use the arm64 architecture and will be exposed as a Function URL. Because AWS Lambda does not currently support the arm64 runtime in rust, we will use a custom runtime provided.al2. It is essential to specify the compiled code as a bootstrap binary. You can find more information about it here.
#rust-stack.ts
import { Duration, Stack, StackProps } from 'aws-cdk-lib';
import * as lambda from 'aws-cdk-lib/aws-lambda';
import { Construct } from 'constructs';

export class RustStack extends Stack {
  constructor(scope: Construct, id: string, props?: StackProps) {
    super(scope, id, props);

    let fn = new lambda.Function(this, 'LambdaRustStack', {
      code: lambda.Code.fromAsset(
        'lambda/target/aarch64-unknown-linux-gnu/release/lambda'
      ),
      functionName: "temperature-calculator-dev",
      handler: 'main',
      memorySize: 1024,
      environment: {
        RUST_BACKTRACE: '1',
      },
      runtime: lambda.Runtime.PROVIDED_AL2,
      architecture: lambda.Architecture.ARM_64,
      timeout: Duration.seconds(300),
    });

    fn.addFunctionUrl({
      authType: lambda.FunctionUrlAuthType.NONE,
    });
  }
}
Before building our code with cargo build, we must compile it to work on arm64architectures. We will use the cross library, which will allow us to make cross compilations to different architectures without affecting system installation. You can read more about cross-compilation here and about the library here.
Install the library with cargo install cross, change directories to where our Cargo.toml file is and run cross build --target aarch64-unknown-linux-gnu --release; this will create some files and our binary bootstrapfile. If you like, create an additional folder inside target/aarch64-unknown-linux-gnu/release directory named lambda; here, execute cp bootstrap lambda, which we reference in our code: lambda.Code.fromAsset section of our lambda, we previously defined in our CDK stack.
Now we have almost everything set to deploy our lambda into AWS. Run
cdk bootstrap
To create the necessary IAM Roles, to deploy our code through CDK. And then run
cdk deploy
To deploy our code into AWS.
And that's it! We learned how to deploy an arm64 Rust Lambda into AWS with CDK. Now, let's automatize the deployment process with Travis CI.
What is Travis CI?
Travis CI is a continuous integration tool that quickly tests and deploys your projects. Let you sync your build projects within minutes from different sources like Github, Bitbucket, and Gitlab.
Create a file named .travis.ymlin the root of our project.
Our build specification will define our AWS credentials; for CDK to create resources into AWS, we will use a rust language image. However, as CDK uses Nodejs/Typescript, we need to update the native version of Nodejs in this image with nvm. Finally, we will use crosscommand to compile our code and CDK to push our code into AWS.
Note: If done previously consider removing the
cdk bootstrapline
env:
  global:
    - AWS_ACCESS_KEY_ID=${AWS_ACCESS_KEY_ID}
    - AWS_SECRET_ACCESS_KEY=${AWS_SECRET_ACCESS_KEY}
jobs:
  include:
    - language: rust
      script: echo "npm test temporarily disabled"
      before_install:
        - sudo wget https://raw.githubusercontent.com/creationix/nvm/v0.33.8/install.sh -O ~/.nvm/nvm.sh
        - source ~/.nvm/nvm.sh
        - . "$NVM_DIR/nvm.sh"
        - nvm install 14.5.0
        - node --version
        - npm i -g typescript
        - npm install -g aws-cdk
        - npm i
        - curl "https://awscli.amazonaws.com/awscli-exe-linux-x86_64.zip" -o "awscliv2.zip"
        - unzip awscliv2.zip
        - sudo ./aws/install
        - aws --version
      before_script:
        - cd lambda
        - cargo install cross
        - cross build --target aarch64-unknown-linux-gnu --release
        - cd target/aarch64-unknown-linux-gnu/release
        - mkdir lambda
        - cp bootstrap lambda
        - ls
        - cd lambda
        - ls
        - cd ../../../../../
        - ls
        - mkdir ~/.aws/
        - touch ~/.aws/credentials
        - echo -e "[default]\n $AWS_ACCESS_KEY_ID \n $AWS_SECRET_ACCESS_KEY \n region=us-east-1" >> ~/.aws/credentials
        - cdk bootstrap
        - cdk deploy --require-approval never
In Travis CI dashboard, be sure to give enough permissions for travis to see and manage the repository.
Here we will add our AWS credentials as secrets, hit View Config, More Options and then Settings, in the Environment section add your credentials, be sure to check any spelling error, it should be the same as the env section in our .travis.ymlfile.
That's it now any change we make on our repository will be reflected in our lambda in AWS.
You can check the complete code here.
I hope you have learned something new with this tutorial!

Posted on June 3, 2022
Join Our Newsletter. No Spam, Only the good stuff.
Sign up to receive the latest update from our blog.


