codeSTACKr
Posted on June 13, 2020

What is a micro-interaction?
They are small animations that let the user know something has happened or is happening. They are a great way to improve the user experience (UX) in your user interface (UI).
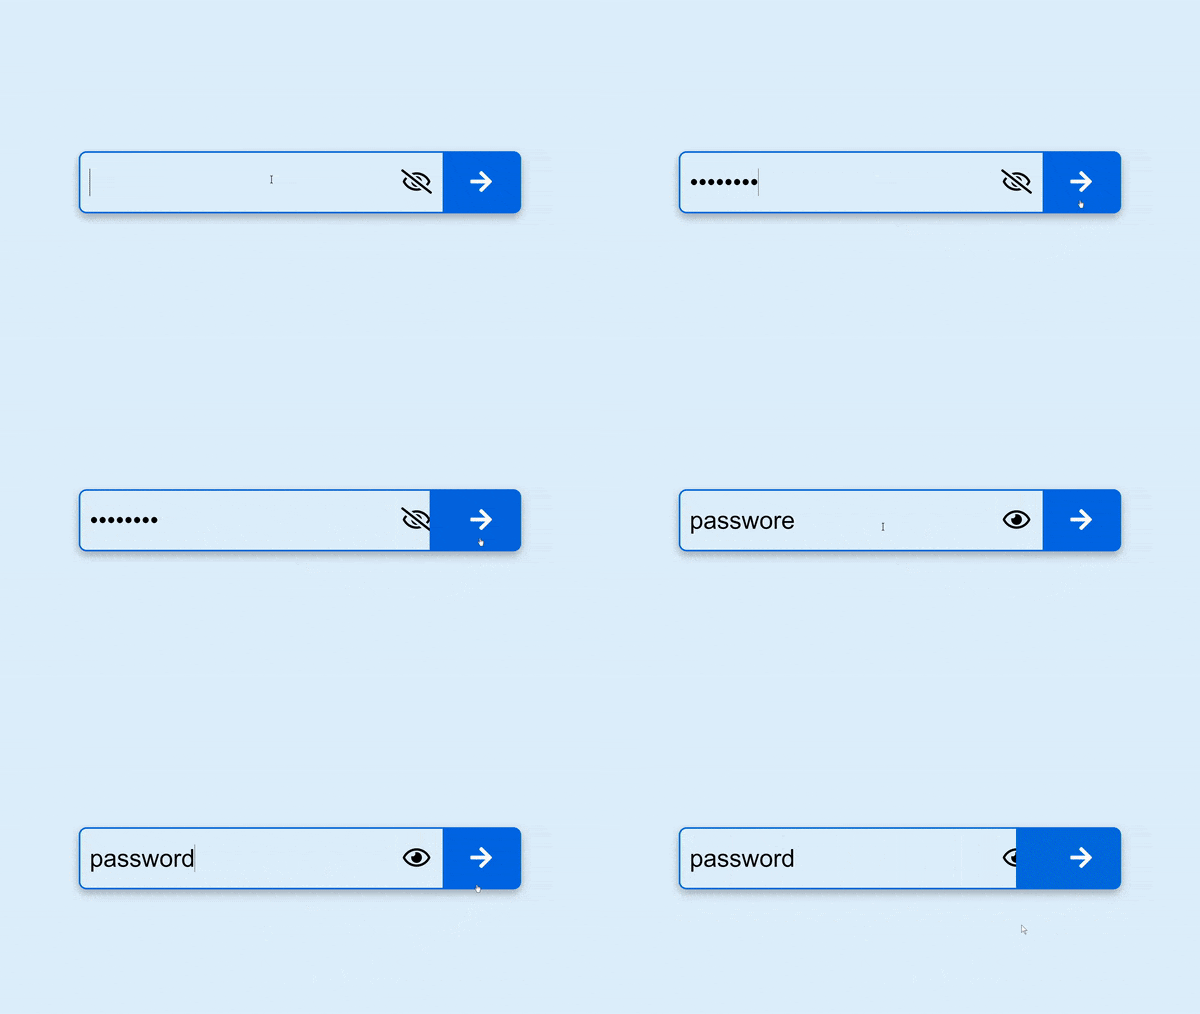
Today we are going to build an animation inspired by @frontendjoe, who collaborated with Miriam Isaac on Instagram to break down the password validator. Here we see a textbox next to a button, and when clicked, fills the element and reveals a validation message.
Now, they built this in Vue. We are going to recreate it using vanilla JavaScript.
Ok, so let's get started.
HTML
The HTML is pretty simple:
<!DOCTYPE html>
<html lang="en">
  <head>
    <meta charset="UTF-8" />
    <meta name="viewport" content="width=device-width, initial-scale=1.0" />
    <title>Micro Interaction Password Input</title>
    <link rel="stylesheet" href="style.css" />
  </head>
  <body>
    <div class="wrapper">
      <input type="password" id="password" />
      <button class="eye">
        <i id="openEye" class="far fa-eye hide"></i>
        <i id="closeEye" class="far fa-eye-slash"></i>
      </button>
      <button class="action" data-content="">
        <i id="arrow" class="fas fa-arrow-right"></i>
        <i id="check" class="fas fa-check hide"></i>
        <i id="times" class="fas fa-times hide"></i>
      </button>
    </div>

    <script src="https://cdnjs.cloudflare.com/ajax/libs/font-awesome/5.12.0-2/js/all.min.js"></script>
    <script src="app.js"></script>
  </body>
</html>
CSS
The CSS is where a lot of the magic happens. We are going to use custom properties (variables) to change the scale, opacity, and color of various elements. The main reason for this is so that we can manipulate the pseudo elements in JavaScript. Since these are not technically part of the DOM, we cannot select them directly in JavaScript.
:root {
  --scale: scaleX(0);
  --opacity: 0;
  --color: #0069df;
}

body {
  margin: 0;
  padding: 0;
  box-sizing: border-box;
  display: flex;
  align-items: center;
  justify-content: center;
  height: 100vh;
  font-family: sans-serif;
  font-size: 2rem;
  background-color: #e2f1ff;
}

button,
button:active,
button:focus {
  border: none;
  outline: none;
  font-size: inherit;
}

.wrapper {
  position: relative;
  border: 2px solid var(--color);
  border-radius: 10px;
  padding-left: 10px;
  box-shadow: 0px 5px 12px rgba(0, 0, 0, 0.3);
  transition: border-color 0.75s;
}

input {
  display: inline;
  font-size: inherit;
  border: none;
  outline: none;
  background-color: transparent;
}

.eye {
  display: inline-block;
  background-color: transparent;
  padding: 5px;
  width: 50px;
  cursor: pointer;
}

.action {
  display: inline-block;
  padding: 20px;
  width: 100px;
  background: var(--color);
  color: white;
  border-radius: 0 5px 5px 0;
  cursor: pointer;
  transition: background 0.75s;
}
.action::before {
  content: "";
  position: absolute;
  top: 0;
  left: 0;
  background: inherit;
  border-radius: 5px 0 0 5px;
  width: calc(100% - 99px);
  height: 100%;
  transform: var(--scale);
  transform-origin: right;
  transition: transform 0.75s;
}
.action::after {
  content: attr(data-content);
  position: absolute;
  top: 0;
  left: 0;
  text-align: center;
  line-height: 4.5rem;
  width: 100%;
  height: 100%;
  transform: var(--scale);
  opacity: var(--opacity);
  transition: opacity 1s;
}

.hide {
  position: absolute;
  opacity: 0;
}
JavaScript
For the JavaScript, we will select all of the DOM elements that we will interact with. Then we will use the root documentElement to change our custom properties in CSS. This will allow us to animate the pseudo elements along with changing the color of all of the elements based on the password validation.
The password validation in this example is simply checking to see if the password is equal to "password". If it is false then the color is changed to red, the icon is changed to "X", and the message displayed is "Invalid Password". If it is true then the color is changed to green, the icon is chaned to "check mark", and the message displayed is "Welcome Back".
We also implement the ability to reveal the password entered by toggling the input from a type of "password" to a type of "text".
We keep track of the states of the application by using variables.
const action = document.querySelector(".action");
const eye = document.querySelector(".eye");
let open = false;
let showPwd = false;

action.addEventListener("click", () => {
  const root = document.documentElement;
  const arrow = document.getElementById("arrow");
  const check = document.getElementById("check");
  const times = document.getElementById("times");
  const password = document.getElementById("password");

  arrow.classList.add("hide");
  check.classList.add("hide");
  times.classList.add("hide");

  if (open) {
    root.style.setProperty("--color", "#0069df"); // blue
    root.style.setProperty("--scale", "scaleX(0)");
    root.style.setProperty("--opacity", 0);
    arrow.classList.remove("hide");
  } else {
    if (password.value === "password") {
      action.dataset.content = "Welcome Back";
      root.style.setProperty("--color", "#00b692"); // green
      check.classList.remove("hide");
    } else {
      action.dataset.content = "Invalid Password";
      root.style.setProperty("--color", "#fa394e"); // red
      times.classList.remove("hide");
    }
    root.style.setProperty("--scale", "scaleX(1)");
    root.style.setProperty("--opacity", 1);
  }
  open = !open;
});

eye.addEventListener("click", () => {
  const password = document.getElementById("password");
  const openEye = document.getElementById("openEye");
  const closeEye = document.getElementById("closeEye");

  openEye.classList.toggle("hide");
  closeEye.classList.toggle("hide");

  if (showPwd) {
    password.setAttribute("type", "password");
  } else {
    password.setAttribute("type", "text");
  }

  showPwd = !showPwd;
});
Watch the full video here:
If you are interested in more content like this, feel free to subscribe to my YouTube channel.
Thanks for reading!

Posted on June 13, 2020
Join Our Newsletter. No Spam, Only the good stuff.
Sign up to receive the latest update from our blog.

