How to Create an Amazon Elastic Kubernetes Service Cluster With Terraform

Bravin Wasike
Posted on July 19, 2023

Amazon Elastic Kubernetes Service (Amazon EKS) is a fully managed Kubernetes service provided by Amazon Web Services (AWS). Amazon EKS is a Kubernetes Cluster platform that automates the deployment and management of Kubernetes applications on the AWS cloud. It automatically runs and scales the Kubernetes application containers across the multiple AWS cloud zones.
In this tutorial, you will learn how to create an Amazon Elastic Kubernetes Service cluster using Terraform. Let's get started with Terraform,
azure
Getting started with Terraform
Terraform is an open-source infrastructure-as-code (IaC) tool written in Go and developed by HashiCorp. Terraform is used to automate the creation and provisioning of infrastructure on the cloud. We will use Terraform to provision resources and infrastructure on the AWS cloud.
We will write Terraform files using the HashiCorp Configuration Language to configure all the AWS resources for the Amazon EKS Cluster. Terraform will use these files to create and provision the Amazon EKS cluster infrastructure.
Let's start by installing Terraform on Linux, Windows, and macOS.
Linux Machine
To install Terraform on a Linux machine, run this sudo command on your terminal:
sudo apt-get install terraform
Windows Machine
To Install Terraform on a Windows machine, run this Chocolatey command on your terminal:
choco install terraform
macOS Machine
To Install Terraform on a macOS machine, run this brew command on your terminal:
brew install hashicorp/tap/terraform
After the installation, you will verify the Terraform installation using the following command:
terraform -help
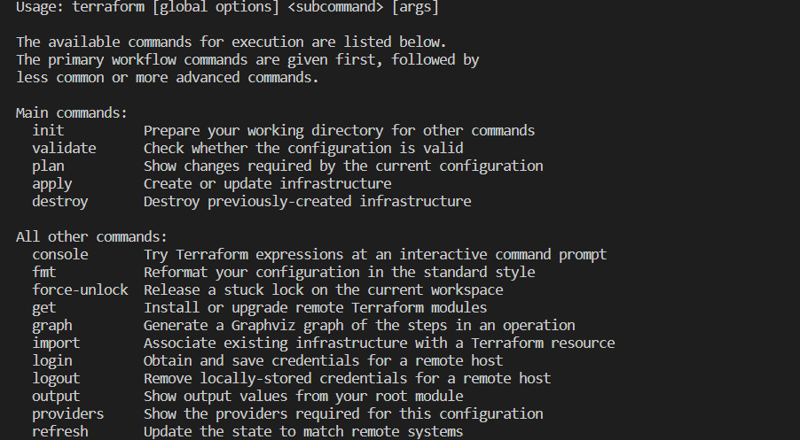
When you run the command above, Terraform will output the following Terraform commands on your terminal:
We will use the following commands to create and provision the Amazon EKS cluster using Terraform. Let's now create an Amazon Web Services (AWS) free-tier account.
Create an Amazon Web Services Free Tier Account
Before you create an Amazon Elastic Kubernetes Service cluster using Terraform, you need an Amazon Web Services (AWS) free account. In this tutorial, we will create an Amazon Web Services free tier Account.
To create an Amazon Web Services free Account, use this link. After creating the AWS free account and verifying your credit/debit card information, the next step is to install the AWS CLI.
Installing the AWS CLI
AWS CLI is a powerful command line interface tool that allows AWS cloud users to access/interact with their AWS Cloud account from the terminal. There are various ways of downloading and installing the AWS CLI. In this tutorial, you will download and install the AWS CLI using this link. Follow the link and install the AWS CLI on your specific operating system.
The next step is to configure the AWS account using the AWS CLI.
Configure the AWS account using the AWS CLI
To configure the created AWS account using the AWS CLI, run this AWS CLI command:
aws configure
It will enable you to access/interact with your created AWS Cloud account from the terminal. You will be required to input the "Secret access key", "Access key ID", ‘Output format’ and ‘AWS Region’. All these values are found in your AWS account. If you do not know how to get these values, you can read this Sweet Code article.
The next step is to install Kubectl on your machine.
Installing Kubectl on your machine
Kubectl is a command line interface tool that allows DevOps engineers and practitioners to communicate/interact and access any Kubernetes cluster from their terminals. We will use the Kubectl interface tool to access the Amazon EKS cluster that Terraform will create and provision.
To install Kubectl, follow this link. After installing Kubectl, run the following command to verify the installation.
kubectl version --short --client
At this point, you should now have created an Amazon Web Services Free Tier Account. You should have Terraform, AWS CLI, and Kubectl installed on your machine. Let's now create an Amazon Elastic Kubernetes Service cluster using Terraform.
Creating an Amazon Elastic Kubernetes Service Cluster using Terraform
We will use Terraform to create and provision an Amazon Elastic Kubernetes Service Cluster with the following AWS resources:
- AWS Virtual Private Cloud (VPC)
- Three public and three private AWS Subnets in different AWS Cloud availability zones.
- One AWS Route Table.
- Two AWS Route Table Association
- AWS Internet Gateway attached to the VPC.
- AWS EKS Cluster. It will have one master node to manage the Kubernetes application.
- AWS EKS Node Group with two worker nodes.
- AWS Security Group with an Ingress rule.
- IAM Role for the AWS EKS Cluster with two policies.
- IAM Role for the Node Group with three policies.
We will write Terraform files to configure all the AWS resources for the Amazon EKS Cluster. Let's start working on our Terraform files.
Create variables.tf file
In your machine create a terraform-provison-eks folder. Open the folder and create a new file named variables.tf. In the new file add the following Terraform code to define our Terraform variables:
variable "region" {
  description = "AWS region"
  type        = string
  default     = "us-east-2"
}
This file defines the region we will create the Amazon EKS cluster. The default region is us-east-2.
Create a terraform.tf file
In the terraform-provison-eks folder, create a new file named terraform.tf. Open the terraform.tf file and add the following Terraform code to configure the Terraform AWS provider:
terraform {
  required_providers {
    aws = {
      source  = "hashicorp/aws"
      version = "~> 4.46.0"
    }

    random = {
      source  = "hashicorp/random"
      version = "~> 3.4.3"
    }

    tls = {
      source  = "hashicorp/tls"
      version = "~> 4.0.4"
    }

    cloudinit = {
      source  = "hashicorp/cloudinit"
      version = "~> 2.2.0"
    }

    kubernetes = {
      source  = "hashicorp/kubernetes"
      version = "~> 2.16.1"
    }
  }

  required_version = "~> 1.3"
}
This file defines the Terraform AWS provider that allows Terraform infrastructure-as-code (IaC) to interact with the AWS cloud. Terraform will use the AWS provider from hashicorp/aws.
Create a vpc.tf file
In the terraform-provison-eks folder, create a new file named vpc.tf. Open the vpc.tf file and add the following Terraform code to configure the AWS VPC:
module "vpc" {
  source  = "terraform-aws-modules/vpc/aws"
  version = "3.14.2"

  name = "Demo-VPC"

  cidr = "10.0.0.0/16"
  azs  = slice(data.aws_availability_zones.available.names, 0, 3)

  private_subnets = ["10.0.1.0/24", "10.0.2.0/24", "10.0.3.0/24"]
  public_subnets  = ["10.0.4.0/24", "10.0.5.0/24", "10.0.6.0/24"]

  enable_nat_gateway   = true
  single_nat_gateway   = true
  enable_dns_hostnames = true

  public_subnet_tags = {
    "kubernetes.io/cluster/${local.cluster_name}" = "shared"
    "kubernetes.io/role/elb"                      = 1
  }

  private_subnet_tags = {
    "kubernetes.io/cluster/${local.cluster_name}" = "shared"
    "kubernetes.io/role/internal-elb"             = 1
  }
}
Terraform will use the AWS VPC module from terraform-aws-modules/vpc/aws to create a VPC named Demo-VPC. It will also create three private_subnets with private_subnet_tags. It creates three public_subnets with public_subnet_tags.
Create an eks-cluster.tf file
In the terraform-provison-eks folder, create a new file named eks-cluster.tf. Open the eks-cluster.tf file and add the following Terraform code to configure the AWS EKS cluster:
module "eks" {
  source  = "terraform-aws-modules/eks/aws"
  version = "19.0.4"

  cluster_name    = local.cluster_name
  cluster_version = "1.24"

  vpc_id     = module.vpc.vpc_id
  subnet_ids = module.vpc.private_subnets
  cluster_endpoint_public_access = true

  eks_managed_node_group_defaults = {
    ami_type = "AL2_x86_64"

  }

  eks_managed_node_groups = {
    one = {
      name = "node-group-1"

      instance_types = ["t3.small"]

      min_size     = 1
      max_size     = 3
      desired_size = 2
    }

    two = {
      name = "node-group-2"

      instance_types = ["t3.small"]

      min_size     = 1
      max_size     = 2
      desired_size = 1
    }
  }
}
Terraform will use the terraform-aws-modules/eks/aws module to configure and provision the AWS EKS cluster. It will create a t3.small instance type for the eks_managed_node_groups.
Create a main.tf file
In the terraform-provison-eks folder, create a new file named main.tf. Open the main.tf file and add the following Terraform code:
provider "kubernetes" {
  host                   = module.eks.cluster_endpoint
  cluster_ca_certificate = base64decode(module.eks.cluster_certificate_authority_data)
}

provider "aws" {
  region = var.region
}

data "aws_availability_zones" "available" {}

locals {
  cluster_name = "demo-eks-${random_string.suffix.result}"
}

resource "random_string" "suffix" {
  length  = 8
  special = false
}
This file defines the AWS Cloud availability zones and the AWS EKS Cluster name.
Create outputs.tf file
In the terraform-provison-eks folder, create a new file named outputs.tf. Open the outputs.tf file and add the following Terraform code:
output "cluster_name" {
  description = "Amazon Web Service EKS Cluster Name"
  value       = module.eks.cluster_name
}

output "cluster_endpoint" {
  description = "Endpoint for Amazon Web Service EKS "
  value       = module.eks.cluster_endpoint
}

output "region" {
  description = "Amazon Web Service EKS Cluster region"
  value       = var.region
}


output "cluster_security_group_id" {
  description = "Security group ID for the Amazon Web Service EKS Cluster "
  value       = module.eks.cluster_security_group_id
}
This file defines the outputs to be displayed in your terminal after running the Terraform commands. Using the following files, Terraform will output the "cluster_name", "cluster_endpoint", "region" and "cluster_security_group_id". Let's run the Terraform commands to create and provision the Amazon EKS cluster using Terraform. We will start with the terraform init command.
Terraform init command
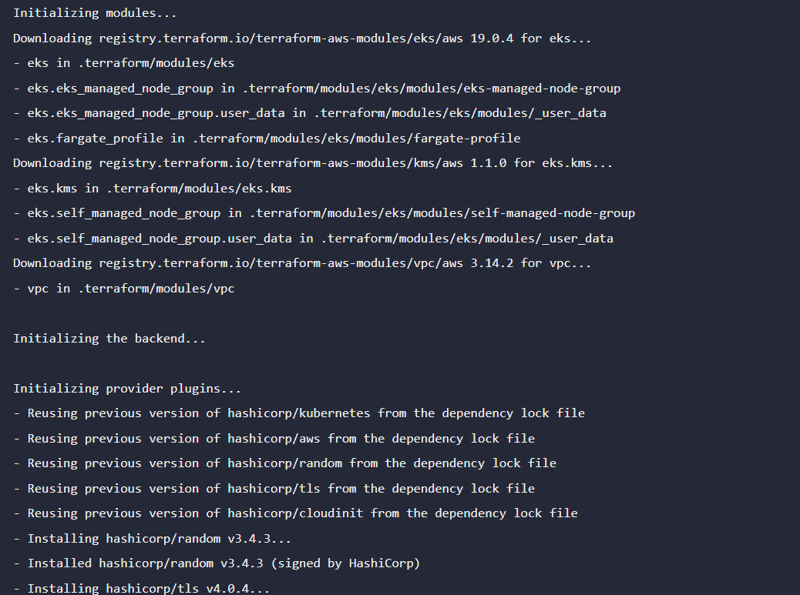
This command will initialize the Terraform AWS EKS modules and the Terraform backend. It will download the modules from the Terraform registry. It will also download and install the AWS EKS provider plugins from the hashicorp/aws:
terraform init
The Terraform init command will output the following in your console to show initialization:
Terraform plan command
This command will show all the AWS resources defined in the Terraform files. These are the AWS resources that Terraform will provision in the AWS EKS cluster:
terraform plan
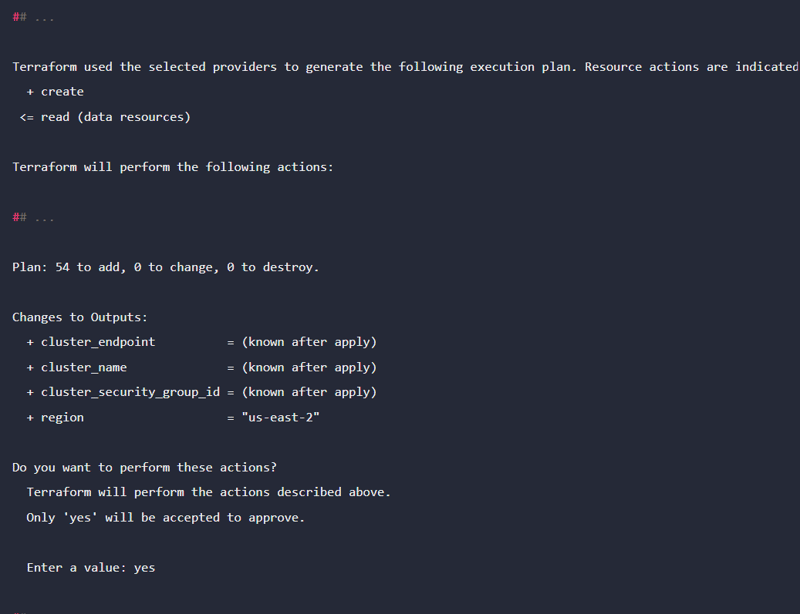
The Terraform plan command will display the following AWS resources in your terminal:
Terraform apply command
This command will provision the AWS EKS Cluster and all the AWS resources defined in the Terraform files:
terraform apply
Terraform will ask you for confirmation for Terraform to provision the AWS resources. It will allow you to review the AWS resources displayed in your terminal. If you are satisfied you will type yes and Terraform will provision these AWS resources. After a few minutes, Terraform will create the AWS EKS cluster with all the AWS resources.
Checking the AWS EKS Cluster Information
To check the AWS EKS Cluster information, run this command in your terminal:
kubectl cluster-info
The Kubectl command displays the following AWS EKS Cluster Information:
Getting the AWS EKS Cluster Nodes
To get the AWS EKS Cluster Nodes, run this command:
kubectl get nodes
The Kubectl command displays the following AWS EKS Cluster nodes:
Login into your AWS Management Console
The next step is to login into your AWS management console to see the created AWS EKS cluster and the AWS resources:
AWS EKS Cluster
The created AWS EKS CLuster is shown below:
Subnets
The created Subnets are shown below:
Route Tables
The created Route Tables are shown below:
Internet Gateways
The created Internet Gateways are shown below:
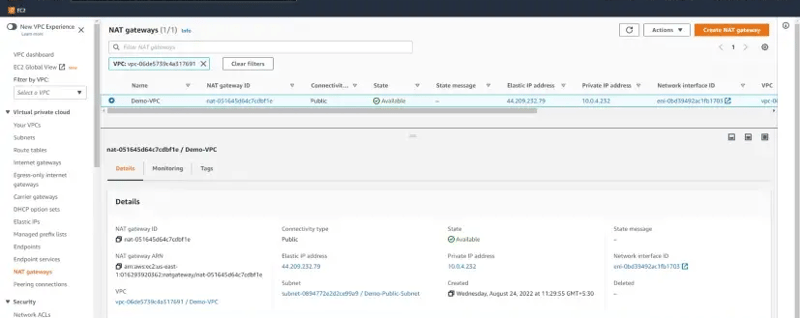
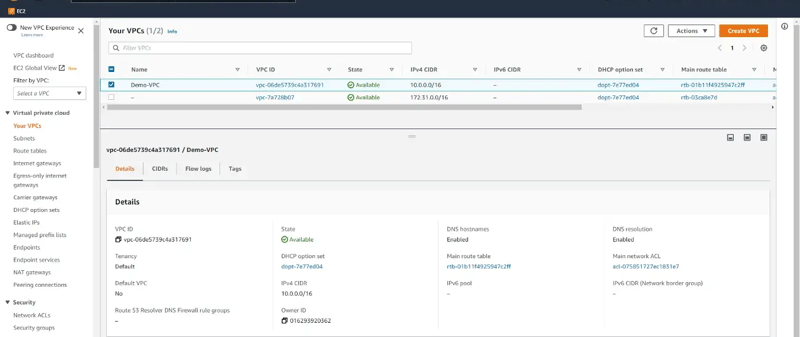
VPC
The created VPC is shown below:
We have successfully created an Amazon Elastic Kubernetes Service cluster using Terraform. Let's now destroy the AWS EKS Cluster and the AWS resources.
Terraform destroy command
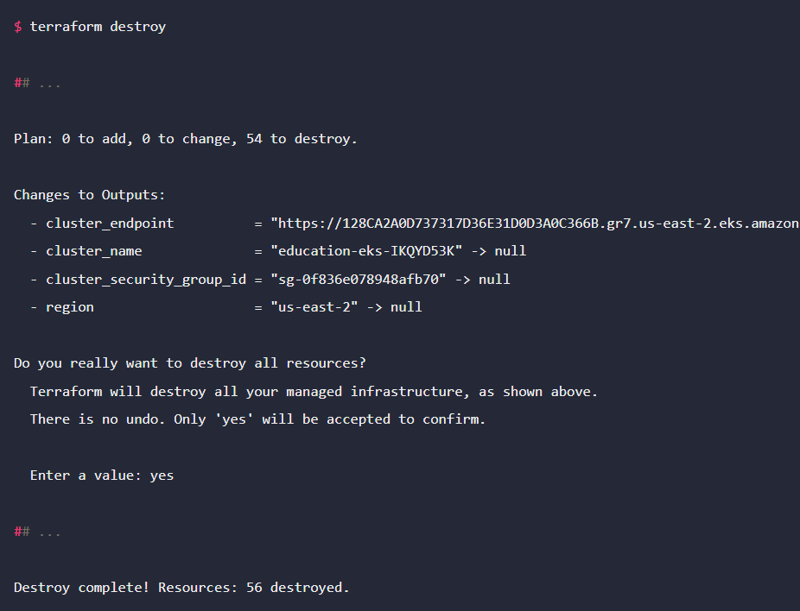
To destroy the AWS EKS Cluster and the AWS resources, run this command:
terraform destroy
You will type yes to confirm and all the AWS resources for the EKS cluster will be destroyed as shown below:
Conclusion
In this tutorial, you have learned how to create an Amazon Elastic Kubernetes Service cluster using Terraform. I showed you how to install Terraform on Windows, Linux, and macOS machines. Before we started creating an Amazon Elastic Kubernetes Service cluster using Terraform, we created an Amazon Web Service free tier account. After this, we installed the AWS CLI that enabled us to interact with our AWS Cloud account from the terminal.
Next, we created multiple Terraform files. Terraform used these files to create the AWS EKS Cluster and provision the AWS resources. Finally, we used Terraform commands to create and provision the AWS EKS Cluster. You can easily follow this tutorial and create an Amazon Elastic Kubernetes Service (Amazon EKS) cluster using Terraform. Thanks for reading and all the best.

Posted on July 19, 2023
Join Our Newsletter. No Spam, Only the good stuff.
Sign up to receive the latest update from our blog.
