Arnaud Delante
Posted on September 6, 2020

This article will assume that you already have WSL 2 set up and working. If you need help with that, you can check the Microsoft documentation.
WSL has been a pretty amazing update. From the speed improvement and the Docker integration, developing on Windows has never been better. But some lasting network issues were preventing to totally switch to it for Web development. But all of this is behind us since the last update. So, update your Windows and come if you want to learn how to set up a LAMP configuration on your WSL installation.
Windows configuration
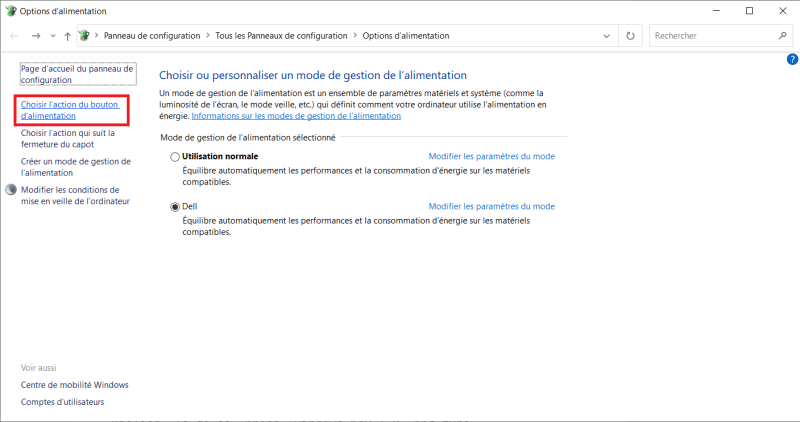
First of all, we need to disable a Windows feature which could prevent everything to work fine. This feature is Fastboot. It used to be pretty nice. But now, with SSDs, it has become quite useless. To do so, press Windows Key + R and type powercfg.cpl, hit Enter to to open the power management control panel. Click on the second option in the sidebar
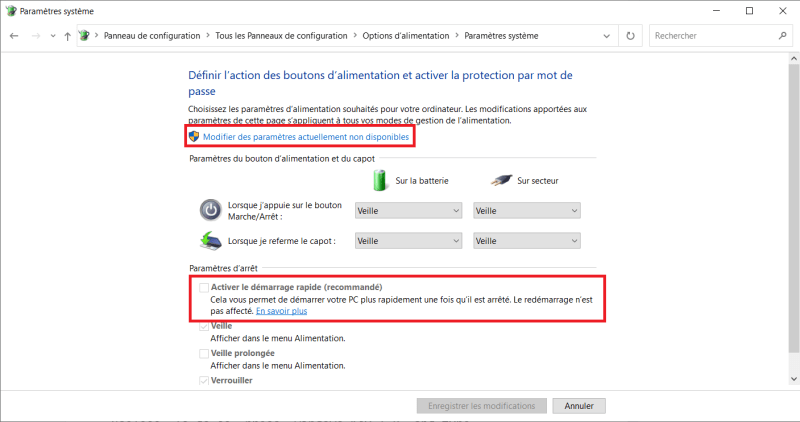
Allow modification on all the options and uncheck fastboot
Apply changes, reboot and we're ready to to continue.
Apache
Now that the path is clear, open a WSL terminal and we'll start to install what we need. First, let's install Apache with:
sudo apt-get install apache2
To avoid connectivity issue, edit /etc/apache2/apache2.conf and uncomment this line:
AcceptFilter http none
And activate the rewrite module:
sudo a2enmod rewrite
PHP
Now, for PHP, first add the repository by doing:
sudo apt-get install software-properties-common
sudo add-apt-repository ppa:ondrej/php
apt-get update
And then install PHP and its modules:
sudo apt-get install php7.4 libapache2-mod-php7.4 php7.4-mysql php7.4-curl php7.4-json php7.4-gd php-memcached php7.4-intl php7.4-mbstring php7.4-xml php7.4-zip
MySQL
And finaly, for MySQL, we'll be going with MariaDB:
sudo apt-get install mariadb-server
Now, we need to run the script to secure the installation:
sudo mysql_secure_installation
Change the root password? [Y/n]: n
Remove anonymous users? [Y/n]: y
Disallow root login remotely? [Y/n]: y
Remove test database and access to it? [Y/n]: y
Reload privilege tables now? [Y/n]: y
To wrap up the MySQL installation, log in your MySQL instance with sudo mysql -u root and create a user (replace mysql_user and mysql_password by whatever you want):
CREATE USER 'mysql_user'@'%' IDENTIFIED BY 'mysql_password';
GRANT ALL PRIVILEGES ON *.* TO 'mysql_user'@'%' WITH GRANT OPTION;
FLUSH PRIVILEGES;
EXIT;
As WSL doesn't start services automatically, you need to start Apache and MySQL by yourself. Which can be done with this command:
sudo service apache2 start && sudo service mysql start
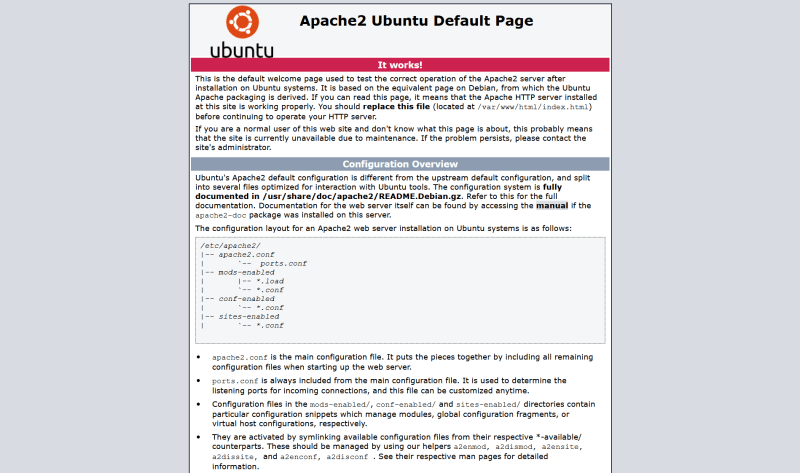
Now, with your browser, go to http://localhost. You should see the Apache landing page:
To test the PHP installation, create a file called phpinfo.php in /var/www/html/ with this inside:
<?php
phpinfo();
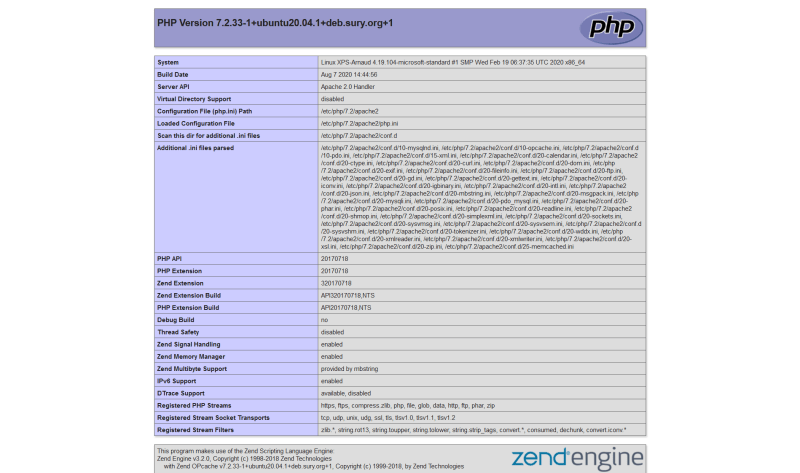
Back in the browser, go to http://localhost/phpinfo.php to check your PHP configuration:
And here you are, a fully working LAMP stack running on your WSL installation. Things could stop here, but we can have 2 extra steps to improve quality of life.
Adminer
Managing MySQL through the CLI is fine. But having a GUI might sometimes be better. For that, I choosed Adminer.
To install it, go to /var/www/html and download it with:
sudo wget -O adminer.php https://github.com/vrana/adminer/releases/download/v4.7.7/adminer-4.7.7-mysql.php
Now if you go to http://localhost/adminer.php, you'll be able to log in with the user you created before.
Virtual hosts
Accessing your different projects with http://localhost/project-name is enough. But why not making things a bit fancier by having http://project-name.local?
To do so, edit /etc/apache2/sites-available/000-default.conf and for each domain, add:
<VirtualHost *:80>
        ServerName your-project.local

        ServerAdmin admin@local.host
        DocumentRoot /path/to/project

        <Directory />
            Options FollowSymLinks
            AllowOverride all
        </Directory>
        <Directory /path/to/project/>
            Options Indexes FollowSymLinks
            AllowOverride all
            Require all granted
        </Directory>


        # Available loglevels: trace8, ..., trace1, debug, info, notice, warn,
        # error, crit, alert, emerg.
        # It is also possible to configure the loglevel for particular
        # modules, e.g.
        #LogLevel info ssl:warn
        SetEnvIf Request_URI "\.(jpg|xml|png|gif|ico|js|css|swf|js?.|css?.)$" D$

        ErrorLog ${APACHE_LOG_DIR}/error.log
        CustomLog ${APACHE_LOG_DIR}/access.log combined env=!DontLog
</VirtualHost>
Then restart Apache with sudo service apache2 restart. And finally, on Windows, edit C:\Windows\System32\drivers\etc\hosts and add, for each domain:
127.0.0.1 your-project.local
::1 your-project.local
And here we are, you have a fully functional LAMP stack on your WSL. Enjoy the speed and pleasure of a Unix environment on your Windows computer.
If you face any issue, feel free to ask and I'll try to help as much as I can 👍

Posted on September 6, 2020
Join Our Newsletter. No Spam, Only the good stuff.
Sign up to receive the latest update from our blog.


