Athleteg
Posted on March 14, 2024
TL;DR:
You might use this simple and functional script (or full-fledged tool) in case you need a quick and ready solution.
Prologue:
First of all, an article contains a lot of links to other materials to get a better understanding of the technologies and be able to answer your questions (at least).
Secondly, during the way will encounter some 'rarely used' techs/instruments for iOS and macOS (probably) engineers.
Thirdly, this paper will explore the ‘Shell’ scripting language to write own script (step by step).
As an outcome, it will be a complete script that opens a favorite project in Xcode with an extension of either ‘.xcodeproj’ or ‘.xcworkspace’.
Besides, this paper will answer such questions as:
What is a terminal and Shell script?
Why do I need it?
How to write a script on the ‘Shell' scripting language?
It consists of 5 paragraphs:
- What a terminal and Shell is and what they are eaten with.
- A bit of basics of macOS.
- Is a Shell scripting language dead?
- Improvement of a written Shell script to open a project in Xcode.
- A script usage in practice.
This paper is helpful for iOS and macOS developers. It also is profitable for others who want to get an understanding of it.
Paragraph 1: What a terminal and Shell is and what they are eaten with.
- What is a terminal in Mac?
In terms of ‘terminal.app’ in macOS would be better to refer to Apple’s documentation.
Also, can be encountered such common-known related names as a command line interface (CLI), a terminal emulator, a console, a ‘Bash’ window, etc.
Often, by terminal means a terminal emulator.
A historical meaning of a terminal is a console (physical terminal) consisting of a display with buttons (or keyboard) to interact with hardware or with other more powerful computers.
Therefore, from a technical point of view, the computer world knows a terminal in two definitions, at least. The first one is as an application (emulator) and the second one is as a console (traditional meaning). Both of them were intended to interact with the operating system.
Summarizing the above, the terminal in a Mac machine is a GUI application that includes a CLI to allow the user to interact with the operating system (especially with its public kernel API) through its outermost layer as Shell program. Behind the whole greatest UI of macOS is hidden CLI. It means that all actions (e.g. file copying, file removing, downloading some data, etc) can be performed without the greatest macOS UI.
The default terminal is just a program. So, it can be replaced by other external programs.
In simple words, a terminal is a GUI program (emulator) where the user inputs some text (commands or scripts) which is expressed as a sequence of characters and gets output then. As you might guess a terminal reflects the CLI for the user. Behind this all are hidden Shell environment.
- What is a Shell in the computer world?
Next, on the arena appears ‘Shell’. For its definition would be also better to refer to wiki.
Foremost, the next descriptions will be about the Shell in a general sense.
Shell description could be separated into three parts:
- Shell is a program.
- Shell is an interpreter.
- Shell is the scripting language.
Regarding the first one. Shell program is exposed as the outermost layer (surrounded OS) between the user and operating system (e.g. a kernel).
All interfaces with operating system (OS) happen through a shell program.
One of the many points of it is being a human operator to access the OS.
To interface with shell, a user can open a terminal (that is why an engineer should understand what is the terminal exactly), or a Finder in macOS.
Already decades, Shell has been represented as a CLI and GUI program in macOS. In a terminal - it is a CLI. In a ‘Finder’, user’s desktop, etc - it is a GUI.
When a user uses the shell program directly via a terminal, shell prompts him about its readiness by displaying special symbols (e.g. $, %, etc) to get input commands or scripts. These special symbols are called a command prompt.
In opposite, when user writes a Shell script within a file - the command prompt usage is avoiding.
To sum up, the Shell program is an essential part of any Unix-like/Unix-based OS. It is a common name for the outermost layer surrounding the OS. By using a Shell users can interface with the OS, enter commands to the OS, and create their own Shell scripts. It is like a shell for a kernel (e.g. walnut) - this is a pretty good example of what it is.
Regarding the second one. As was mentioned above the Shell is a program. However, the term ‘Shell’ is also can refer to a command interpreter. It is the outermost layer surrounding the OS and a user should interface with it (in a pony world). To handle the user commands the Shell interprets its input and executes it.
The world knows vast Shell-like programs like Bash, Zsh, etc. Nonetheless, they are separate programs. That is why they are 'Shell-like' programs. Typically, a user has more than one of such programs in OS.
So, a user must point out Shebang with the exact path of a needed interpreter. It is important to show which interpreter is responsible for a script's execution.
To clear up the confusion - Shell is a big program, but it also acts as an interpreter to handle user commands.
Regarding the third one. Shell can be also considered as a scripting language. The Shell script is a command or either a set of commands written in a terminal or a separate file.
Every such file that has a Shebang is already a Shell script. No matter whether there are written commands or not.
Usually, Shell scripting language is used to automate some repetitive processes.
To the bottom line, the Shell scripting language is a common name for various dialects. It means that such well-known Shell-like programs as Zsh and Bash might have different syntaxes to do the same task as they are different programs and have different interpreters. Many popular 'Shell-like' programs have a backward compatibility with each other. Nonetheless, there is no guarantee that a script for Zsh (abstract example) can be interpreted in the same way for Bash (abstract example) and vice versa.
- What is a Zsh?
Well, for the full description of Zsh would be better to refer to wiki.
Foremost, the world knows many programs like Zsh, Dash, Bash, Shell (first classical), etc. These all programs are the 'Unix-Shell' programs. Every such program can be replaced by another one.
Previously, in this paper, a Shell was described in a general sense. It means that Shell is a common name for every such program.
Zsh is a type of Unix-Shell. It means that exactly Zsh is represented as an outermost layer between a user and the kernel’s API. Moreover, everyone can write such a program for the 'Unix-Shell' and use it instead of Zsh or other ones.
To sum up, the Zsh is a default Shell program for all modern macOS.
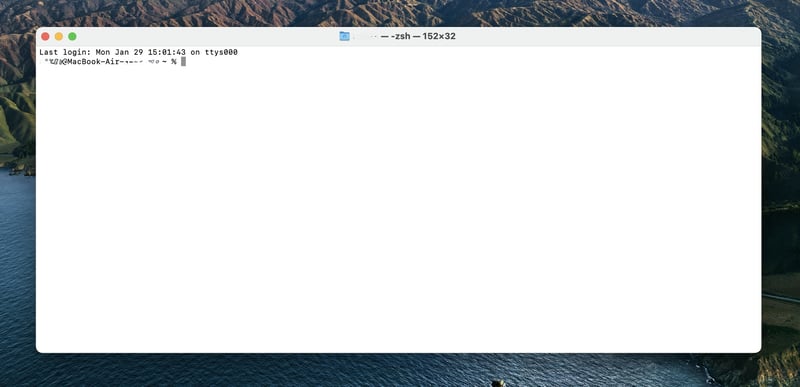
Opening a terminal the user will see Zsh as the default Shell interpreter.
Zsh has a command prompt as a “%”.
Paragraph 2: A bit of basics of macOS.
- Why is Linux mentioned?
A small step aside.
The Linux came out as a free OS, foremost. As a consequence, Linux and its Linux-based distributives are commonly used operating systems for servers, etc.
The FreeBSD came also out as a free OS, and it has its niche in working with servers, etc.
Some of these operating systems are Unix-like, some Unix-based. They share the common keyword - ‘Unix’.
Regarding the macOS, would be better to refer to the wiki description. From there, fairly evident that macOS derived some parts of FreeBSD and contributed to it.
Despite macOS and Linux having different kernels they both adhere to Unix standards/conventions. It means many basic commands and utilities for CLI in Linux are also available in macOS. Nonetheless, some of such commands work similarly, some differently.
Occasionally, the same with a shell environment. A Zsh as a default shell program for macOS is often used in Linux-based OSs. The same also was with Bash which had been set as a default shell program for old macOS versions, however, it is currently used in Linux-based OSs as well.
Almost all guides, workarounds, and questions about CLI, Shell, and many other parts are related to Linux-based OSs. The reason for that is CLI and the shell environment are an essential part of the knowledge of any Linux user while the opposite with macOS where a user rarely uses them for daily tasks.
While it might be difficult to find some questions, commands, or workarounds for macOS - it can be found easily for Linux, and its result might be aligned with macOS.
Regarding the shell programs, they are almost the same (e.g. a Zsh) in both OSs. It gives a nice possibility for macOS users. The vast majority of questions, regarding shell programs (e.g. a Zsh) can be found as solved thanks to Linux users.
Summarising everything, thanks to common historical ancestors/way, a macOS has many built-in commands, and utilities as in Linux as well, and uses/supports almost the same Shell-based programs (a Zsh, a Bash, etc). The topic of OS is a long way and the information above is represented only for introduction and requires a lot of time to dive into it as well as every paragraph here.
- How to write the first simple instructions in Terminal?
Foremost, every shell program has its built-in commands.
Regardless of a shell environment, the Unix-like OSs (e.g. macOS, Linux) have also built-in base commands to interface with the OS. It means that the Unix-like commands are built into the OS rather than being part of a shell environment. While shell commands are commands that are implemented in the shell program itself.
These commands are super powerful and helpful for engineers. All of them have a great execution speed. Under the hood, many of them have a lot of options which make them pretty flexible to solve many problems.
Below, there are a common-used built-in commands.
Shell built-in commands (utilities):
- cd
- pwd
- which
- echo
- kill
- ls
- man
- whereis
- open
- find
- mkdir
- rm
- grep
- clear
This is just a small piece of them. Of course, the knowledge of them is not a silver bullet.
Nonetheless, understanding how they work and when would be nice to apply them - is a bold plus to the engineer’s piggy bank.
% cd
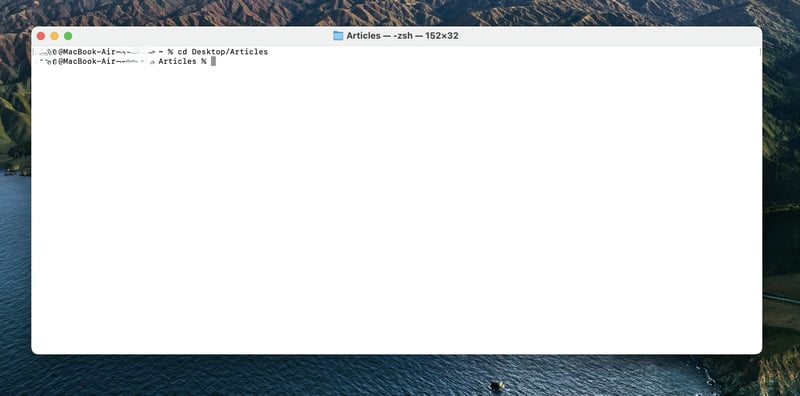
By using this command, a user can change its current directory to the needed one. That is why cd (change directory).
In order to return to the parent directory user should enter % cd ..
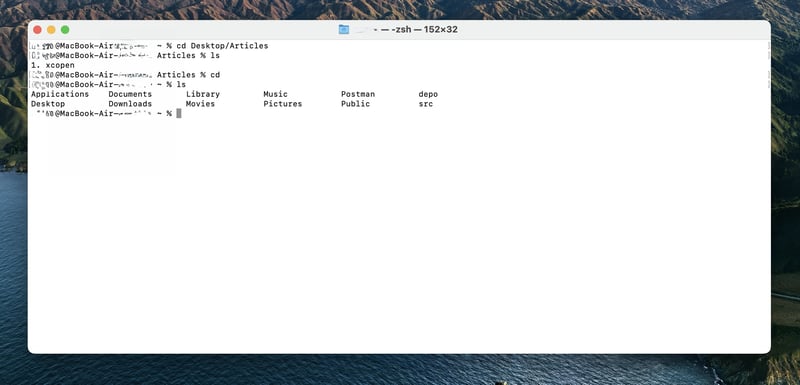
% cd OR % cd ~
It returns to the user’s home directory.
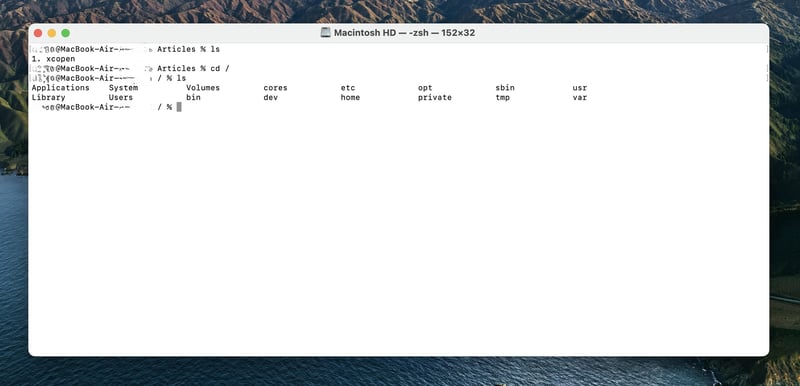
% cd /
It returns to the outermost (root) directory.
% ls
In the above examples, the % ls command is to show a list of content in the directory. It often is used as a pair with the % cd command.
% man
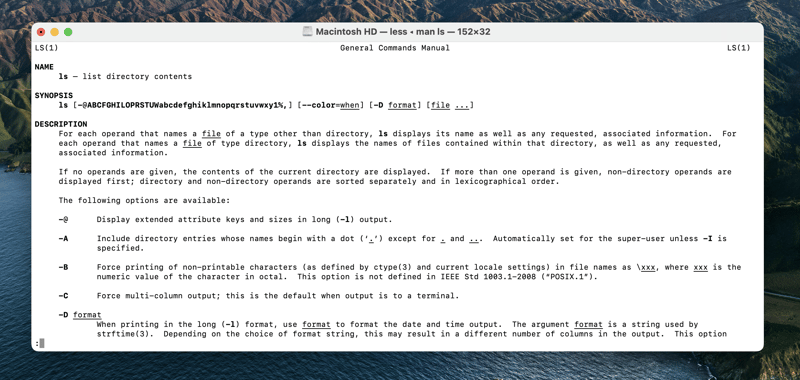
Manual page or shortly a documentation for command (tool).
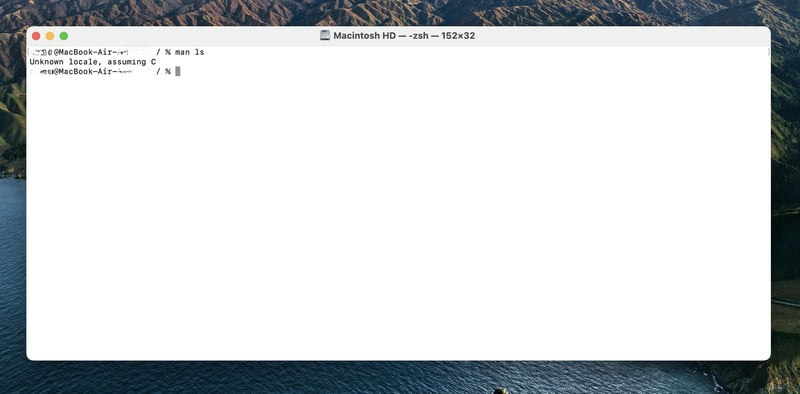
The syntax is pretty simple: % man cmd (e.g. % man ls, % man echo, % man man, etc).
Regarding the % man command, it is a helper for engineers which describes commands, explores their options, etc. It is a good practice to use the man page for commands before google about it. Typically, the man page already includes all needed information about a command with its available options, examples, etc.
Nonetheless, not all commands support manual pages.
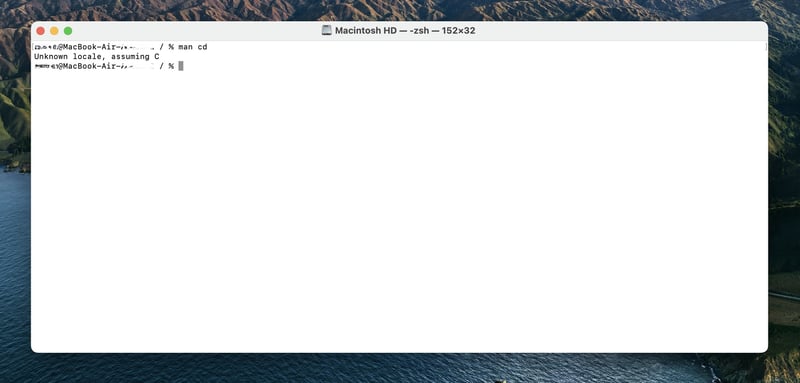
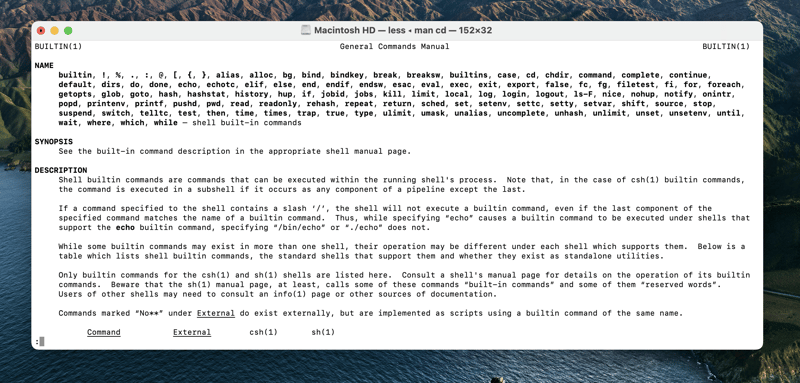
% man cd
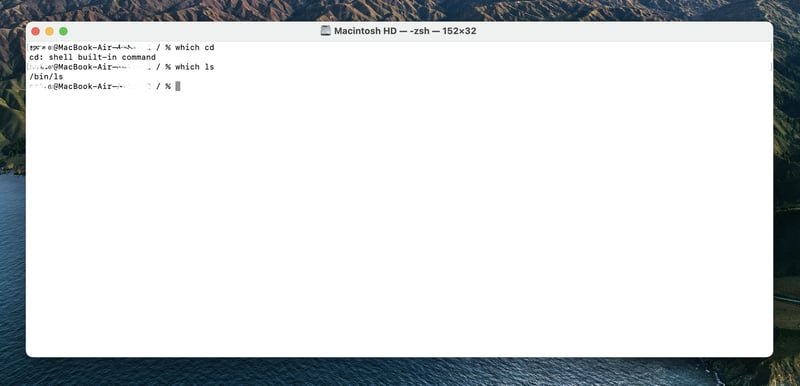
It tells that this command is a shell built-in command. So, there are no manual pages for the listed commands (see screen).
In such cases, there are a lot of other resources, questions, and books where the needed command is described with examples of it.
% which
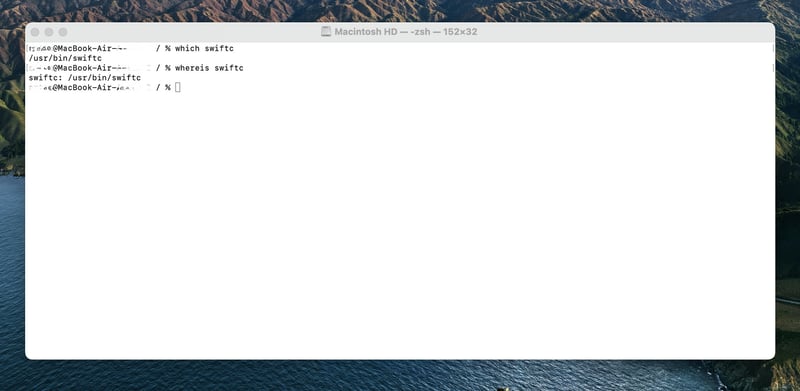
The name speaks for itself. It is useful to understand how something would be interpreted (which path it has) if it is used as a command (tool). Besides, it says to the user whether it is a shell built-in command or not.
Also, the % whereis utility shows the full path of something.
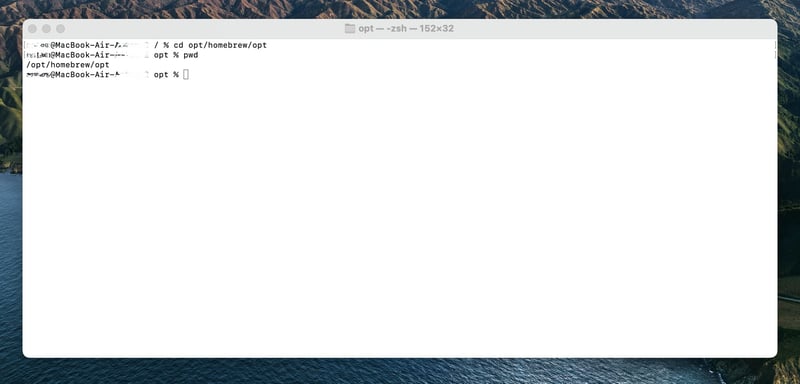
% pwd
It prints an absolute path of the current working directory.
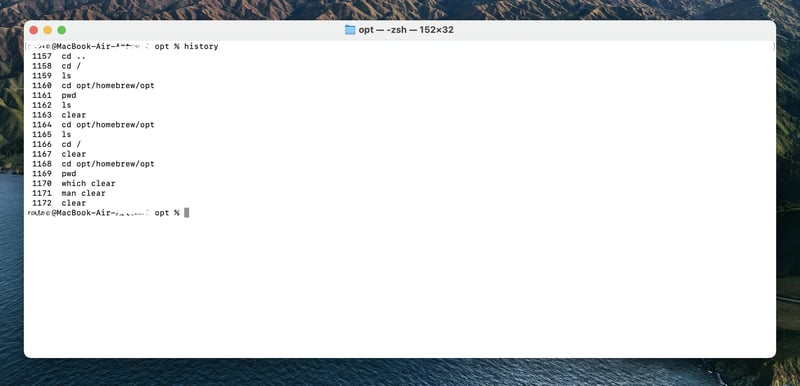
% history
It prints the latest input commands.
Users can set an amount of printed list (e.g. % history -20).
% clear
It merely clears the terminal screen.
The syntax is simple too, it is required to enter: % clear without any options.
As was mentioned, these commands are just the smallest piece of the CLI world. For instance, an engineer can also use % find for a simple search, % grep or % awk for a detailed search, % open for an opening of a file, % rm for a file removing, and so many others.
Not to mention the fact, that in addition to existing built-in commands/tools, the world has a lot of self-written ones that might be also used for solving of vast majority of tasks.
- Is it really useful?
Many tasks might be resolved by different tools/approaches. To understand which tool and approach is better an engineer should possess essential knowledge and experience. The same and for writing commands to the kernel’s public API.
Imagine an abstract example, there is some file with a lot of text data. The task is to derive some data from this file and put it into a new text file. It could be solved by any programming language. The engineer just needs to write some parser logic and that is all.
Or, it can be solved by entering one line into a terminal where might be used % grep or other similar commands.
For example something like that: % grep ‘search text’ searchFile >> Result.txt.
Here, by using the % grep utility it is possible to find needed lines of text in the searched file easily and return a result to the new text file. (This task also can be solved by other commands.)
This simple and primitive example shows how knowledge of base commands can help engineers save their time, at least.
Also, it is important to notice that this approach or knowledge is not a silver bullet and engineers should always keep in mind all its pros and cons, think about what they do.
Paragraph 3: Is a Shell scripting language dead?
- The basic commands.
Let us imagine a context where it is not possible to use GUI for any reason and needs to open a project in Xcode, instantly.
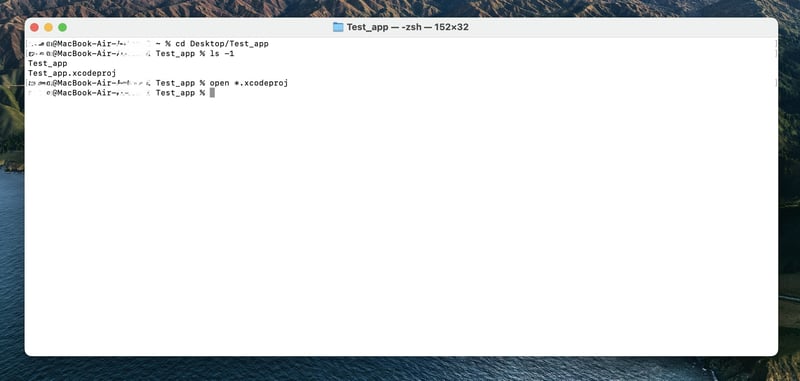
The first solution is an entering command by command:
Here, a % cd command is used to get a folder with the ‘.xcodeproj’ extension. Then, a % ls -1 command is used to list all files (option -1 declares that one file == 1 line). Finally, a % open command speaks for itself. It opens a file with the ‘.xcodeproj’ extension in a program that sets as a default one for such extension type (in this case it is the Xcode).
A bit words about a * symbol. In simple words, it replaces any number of characters by itself. It is important to look at the file name with extension as on the whole string (e.g. “helloWorld.txt”).
In the solution’s example, it does not matter what the name of the project is exactly but it matters what is the extension exactly. The name could contain any set of characters until the .xcodeproj extension where this set of characters (regarding the extension and dot) must be matched absolutely.
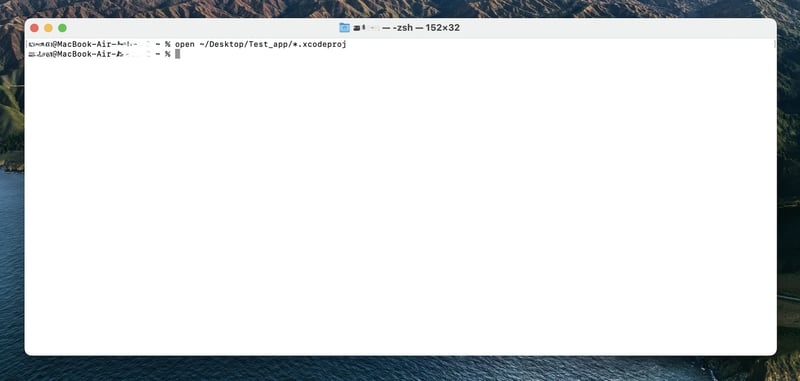
The second solution requires just 1 line and looks simpler than the previous one.
In this case, the leverage of % cd and % ls commands was dropped. Instead of usage of them, there is an open command with an exact path for the file with the ‘.xcodeproj’ extension.
For detailed information, it is appreciated to check a manual page by entering % man open. Within its description are a lot of usage examples.
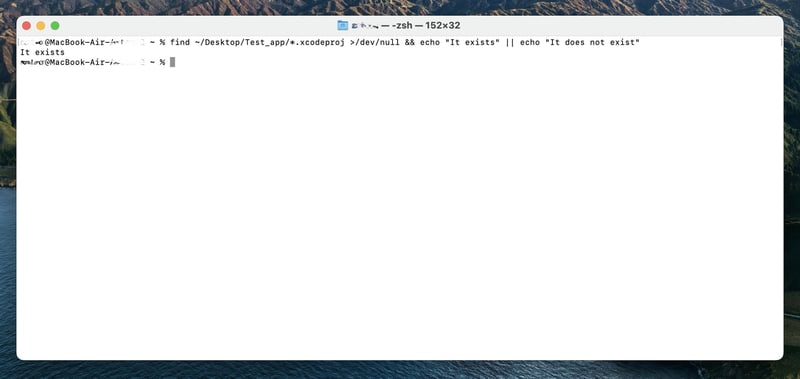
Next on the arena, it is appeared a simple % find command.
In this line, the searched file with the .xcodeproj extension exists at this path. The logic related to && is executed and there is an output with text as ‘It exists’.
From the beginning, a % find command speaks for itself. This command also has a lot of options (a manual page helps with it).
The first part of an instruction (find ~/Desktop/Test_app/*.xcodeproj) is a % find command part where:
-
findis a command, -
~/Desktop/Test_app/is a path to a project, -
*.xcodeprojis a project name with a searched extension. (If there are several projects with such extensions - it will return the first encountered one.)
The second part of an instruction is a >/dev/null. Regarding this part would be better to refer to IBM's description of it.
In simple words, it discards everything that it gets as an input (it is like a black hole). This is a useful technique when an output should be hidden.
Regarding a > symbol in a shell environment, would be better to refer to the STDOUT (standard output).
The third part are the && and || logical operators (a reference to the IBM). Their behavior is the same as in many other programming languages. The '&&' == AND, the '||' == OR.
The final command in this line is % echo. It just writes arguments to the standard output (like the typical behavior of print command). For detailed information, see the manual page.
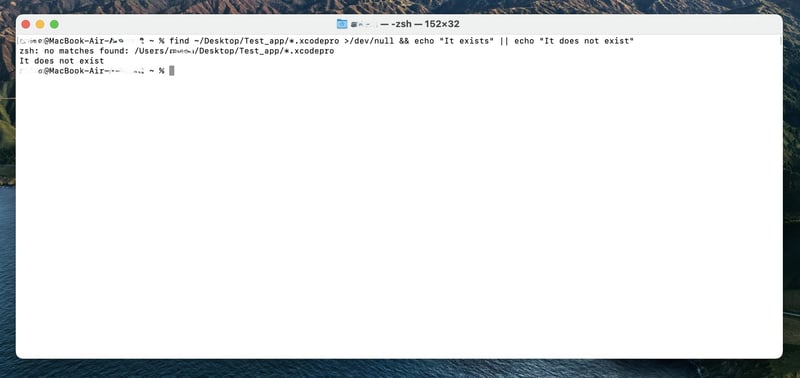
On the opposite, when there is any mistake (e.g. removing a “j” letter from the extension) the interpreter follows the || logic and the output is “It does not exist”.
Also, in this case, it is appearing the STDERR.
- A simple own Shell script.
A small previous logic works great. But an entering of command by command is not a script. As a consequence, all commands must be wrapped into one file with a shebang at the beginning of it.
A bit aside, as a text editor for the script’s writing might be the default TextEdit or any other external programs like a macVim, etc.
Also, if it is required to use another shell interpreter than the default one (Zsh), then in terminal has to be entered % which nameOfShell (instead of nameOfShell must be: bash, sh, ksh, etc). An output will show a path of the shell program (if it exists). This is a path of interpreter, and it should be used for the Shebang.
Regarding the below snippets, there will be used a default Zsh as a shell interpreter, and macVim as a text editor for the script’s writing.
To start, let us create a new file. The file should be created without any extensions (.txt, etc).
All paths in the examples are abstract. An engineer should paste its paths everywhere instead of abstract ones in the examples (e.g. a project’s folder, a script’s folder, etc).
First of all, at the top of a file is a shebang (#!/bin/zsh).
Then, there was declared a variable with a path to a project ( DIR_PATH=~/Desktop/Test_app).
To understand what is going on there, an echo command prints the current status (at 5 line).
Also, the last line is almost the same as in the previous example. The name of a file was extracted from the searching path and put to the -name option (% find anyPath -name “test”). It is just another technique of searching than the previous one. Also, was added an open command as a logic related to the && scope.
A couple of words about variables in Shell. A variable in Shell should be declared without any spaces around the = symbol. To get a variable’s value in Shell, it is used a $ symbol before a variable declaration (e.g. $VARIABLE).
It is too appreciated to play with variable declaration and its calling with and without $ to get a better understanding of its work. Regarding a style (camel/snake case), would be better to refer to the vision from Google. Of course, instead of Google's style might be any other one.
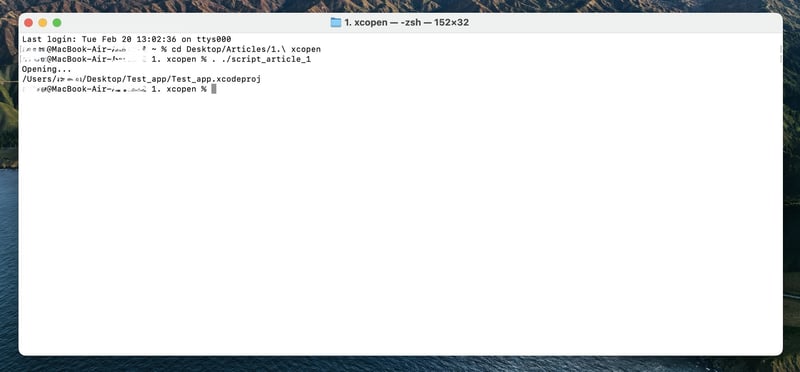
All that is left to do is to launch a script in the terminal.
Here, a cd command is used to get the script’s directory.
Regarding a . ./script_article_1, it consists of two parts:
- the first dot (
.) is an OS' built-in executor. It executes the file in the current shell (more detailed about it is in the 5th paragraph). - the other part is the script itself. If a user is in the script’s directory (pwd == script’s folder), then a script can be launched either by
./nameOfScript, orzsh nameOfScript. In detail about it is here. Besides, it is appreciated to play with the script's launches. For instance, it also will be launched by other (ksh, sh, bash, etc) interpreters (e.g.ksh scriptOfName). A shebang sets a path to the interpreter, so that, there is no need to exactly enterzsh nameOfScript. Nonetheless, a user can point out to exact interpreter byksh nameOfScript, and a shebang in such case will be skipped. (Despite this fact a shebang is an essential part of any script - it is not appreciated to skip it).
Important notice! There is no guarantee that a script written for Zsh will be perfectly interpreted on Bash, and so on. An engineer should keep it in mind. The best practice is to write one script for exactly one shell's program (zsh, bash, sh, ksh, etc).
Nonetheless, the above example contains an edge case that does not allow the execution of a script just via a ./ command.
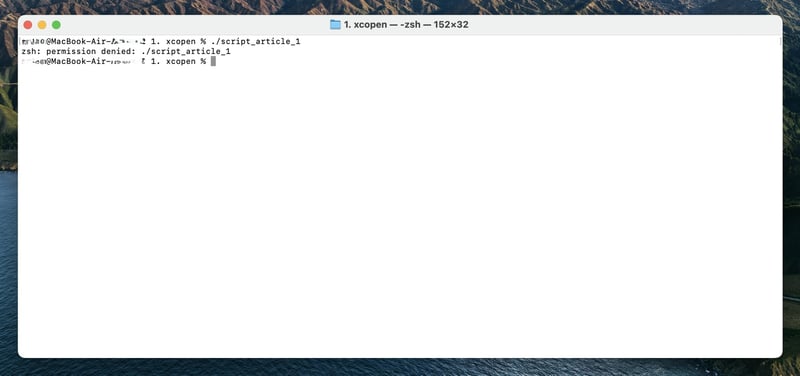
Let us try to launch a script (% ./script_article_1) simply without an additional dot (executor) before itself.
Here is an output with a ‘permission denied’ warning. It means that this file is not executable. Nonetheless, it can be executed (as was above), if there is pointed out an interpreter directly or via (.) executor (% . ./script OR % zsh script).
Permission was denied because that file is not executable. Hence, it is required to check the permissions of this file:
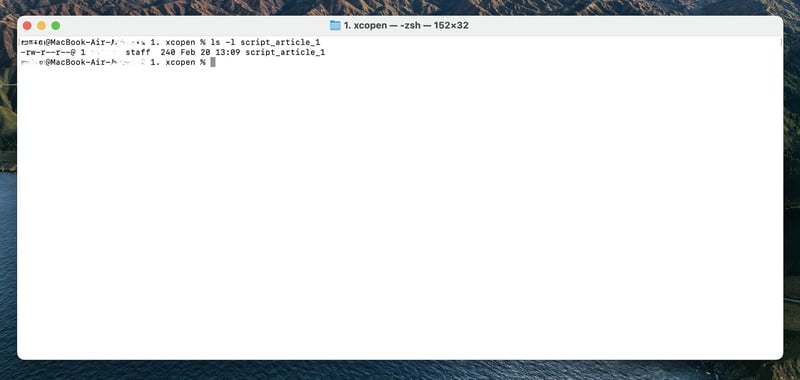
The easiest way to check it just use a % ls command. But it is just a list of contents without any useful information. So, there is a ‘-l’ option that shows all needed information about the file (see a man page).
Take a look at the output, especially on the -rw-r--r--. That is a default permission for a file.
The first part -rw- is a file owner permission.
The second one r-- is an owner’s group permission.
The third one r-- is a permission for others that excludes an owner and its group.
Regarding this area, would be better to refer to this documentation.
So, to make this script executable - it is required to change its mode (permissions).
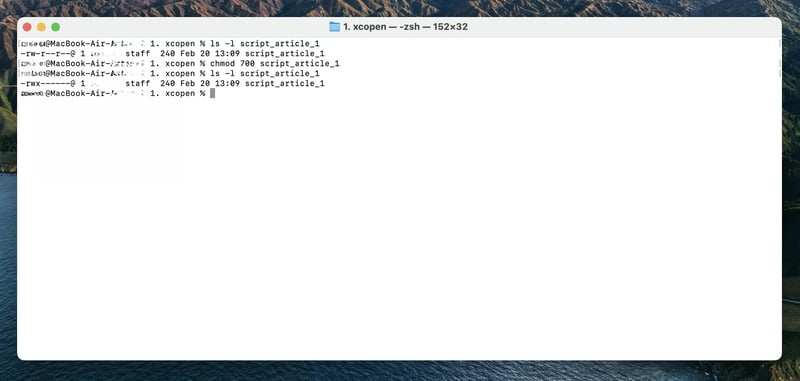
The % chmod command is a nice utility for this goal (see man page).
The logic is pretty simple, in the line % chmod 700 nameOfScript the 700 is a numeric permission value where the first digit (7) is equal to the owner, the second (0) to its group, and the third (0) to others. Each digit is a sum of x,w,r.
It works by simple principle where:
4 == read (r),
2 == write (w),
1 == execute (x).
So, in terms of a text’s value, the first number (7) is equal to -rwx- for a file owner. The second and the third number (0) are equal to --- (triple dash) for the owner’s group and others. (It is too appreciated to play with it to understand how it works).
Let us go back to a script's launching via % ./nameOfScript. As long as this file is executable - it can be launched this way.
It is so important to remember about permissions and check them from time to time.
Hence, the first small warning has been fixed. Nevertheless, the written code snippet within a file has some potential flaws.
Paragraph 4: Improvement of a written Shell script to open a project in Xcode.
- Take a script to make it readable and reliable.
What if there exists a file with the .xcworkspace extension? Or what if it contains both of those extensions, or one was removed by mistake, and so on…
This script must check these questions before opening a file and throws a readable error in case it is a failure.
Usually, almost all projects use frameworks. Therefore, they have an additional file with the .xcworkspace extension.
So, would be better to use such logic as a lookup of a file with the .xcworkspace extension first, then if it is failed, take a file with the .xcodeproj extension. If the last one has not been found, then throw an error message.
First of all, there were created marks wrapped by many # symbols. It is like a 'MARK: -' in Swift. Take a look at a style from Google.
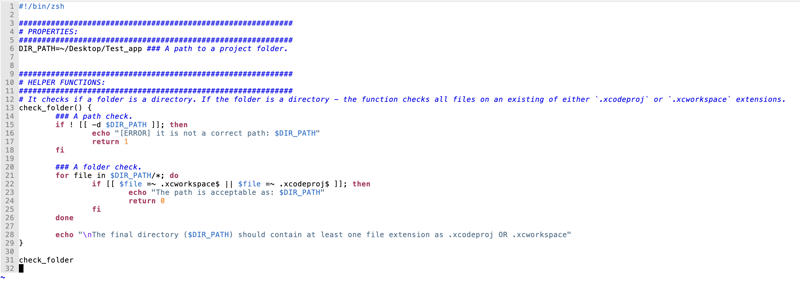
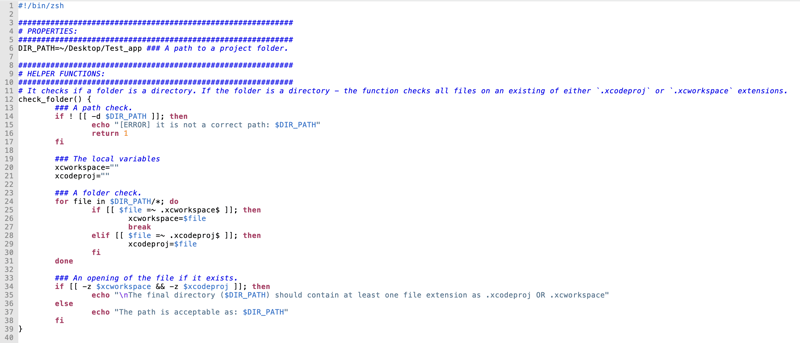
Next, there was created a function that checks a path on correctness and looks for files with extensions either .xcworkspace or .xcodeproj.
In this paper, functions are written shortly, but it is also possible to write them by function keyword (see.
This function consists of two similar parts:
Fist. A path check. Here are appeared the if-else statements. Regarding its syntax would be better to refer to Zsh documentation. It has the same behavior as in many programming languages.
Notice! Every statement in Shell should have its final keyword. In the case of if; then it is a fi. In a case of for; do it is a done, and so on.
Regarding the [[ and ]] double brackets - they are the constructs. This is a modern version of [, ] single brackets (or Test utility). The double brackets have some benefits. For instance, it allows for regular expression matching. More about it is here and here.
Regarding the conditional expressions. In the path check, there is a -d (== directory) expression between double brackets which is a binary one. It returns true if it is a directory in the pointed path, or false if it is not a directory.
An exclamation mark (!) has the same behavior as in many other programming languages (e.g. Swift). It is a negation of an expression. A directory's path is getting in a $DIR_PATH. As was mentioned, by using a $ symbol, it is possible to get property value (which is a path in the example).
A ; symbol is used when there is another keyword on the same line (e.g. if expression; then).
The echo command in this example plays the role of logs and shows what kind of error there is.
Regarding a return command. It is a utility (see man page) which returns the exit status to a caller function. The exit status is an integer number and can be used also as a return value from a function. Basically, a 0 integer is a success, the numbers > 0 are the failures.
In this example, a return utility is used to return from a function, if the expression is valid, so that there will not be executed the echo command at the 28 line.
Second. A folder check. It checks on the existence of at least one extension. There was added a for-in loop. This construction also requires the do-done construction with it. The working principle is the same as in many programming languages.
The for, in - are the keywords (construction). A file - is the name of a constant property.
A value of a $DIR_PATH property is a path to the project directory. Also, there was added /* where / separator, and * symbol designates a looking for through all files.
A ; symbol is the same as in the previous example.
As was mentioned before, the double brackets allow for regular expression matching. This is achieved by a specified sequence of symbols (=~). In the example, it matches every file (in a $file property) on the existing extension either .xcworkspace or .xcodeproj at the end of this file name. A $ symbol at the end of every extension (e.g. .xcodeproj$) means that a check on this set of characters should be performed only from the end. In detail about regular expressions and their symbols would be better to refer to IBM documentation.
Also, the double brackets include the logical operator || (OR) where an expression is valid only if one of these extensions exists. An echo command prints the acceptable path in such case. The return command returns success (0) and thanks to that command there will not be executed echo at 28 line.
Finally, the last echo command at 28 line executes only, if the above checks fail. It is just a helper to better understand what is going on there.
To call the function in Shell - just need to write its name without any braces (as in 31 line).
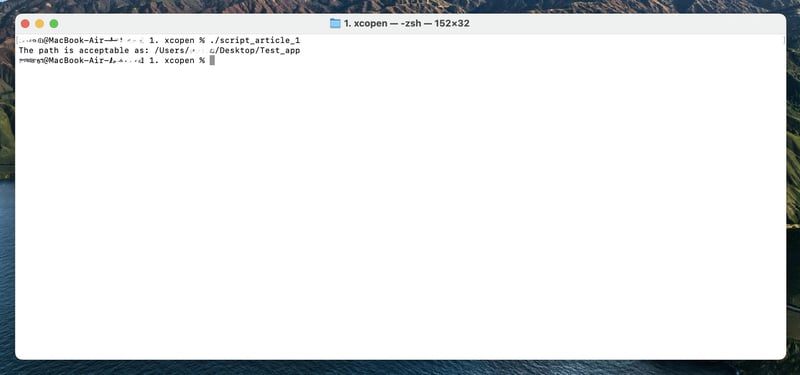
Time to check it. A Test_app directory includes a file with the .xcodeproj extension.
Everything is working correctly.
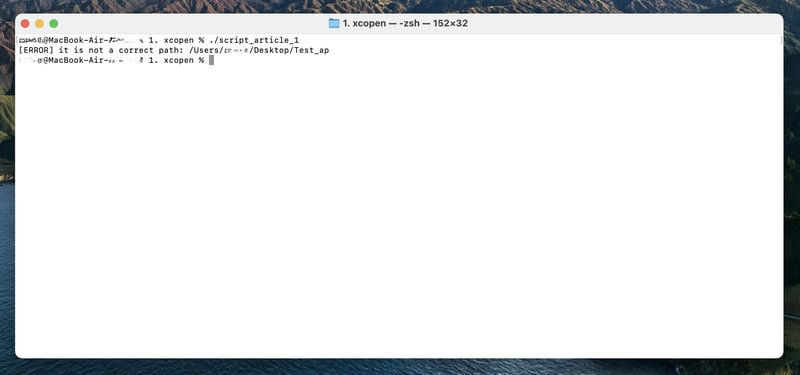
A case when the path is not correct. (For instance, remove any one letter at a path in DIR_PATH property).
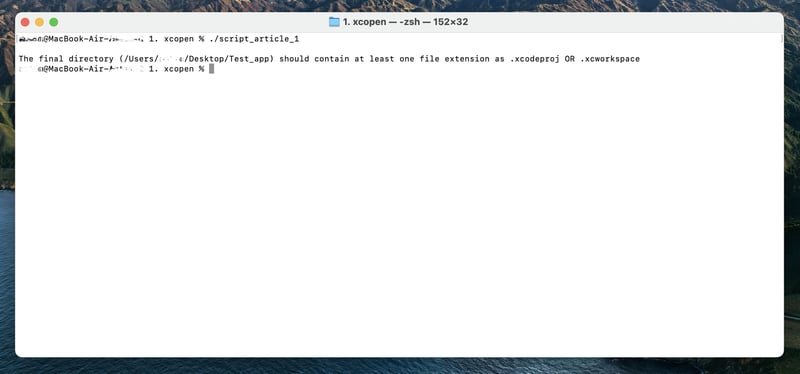
When there is no file with such extensions. A Test_app directory does not include a file with the .xcodeproj extension.
Got it. Nonetheless, the final goal is a file opening. Let us extend some parts of this code.
A path checking is as it was.
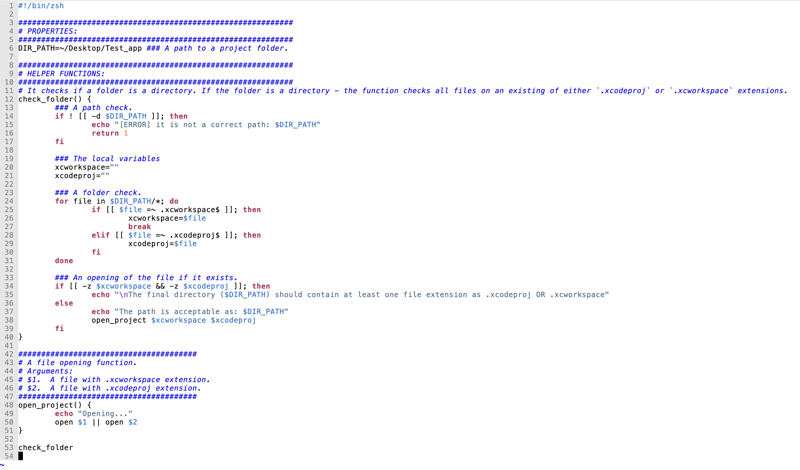
Next, there appear two local variables to store a file with its name and extension. Their initial values are empty strings (20-21 line).
A folder checking. Here are some changes. Now, there are two
ifblocks (added aelifwhich is equal toelse ifin Swift) instead of one as there was. Every one of which is for the exact extension. It has been done to set every local property with value if it is possible. Also, in the firstifblock appeared abreakkeyword (at 27 line). Its meaning is the same as in many programming languages (e.g. Swift). It returns from the current executed loop (breaks it), no more. As was mentioned before, the first goal is a search of a file with a.xcworkspaceextension. So, if this point is valid, then a goal is almost achieved.
A couple of words about the 26 and 29 line. There are also used a$symbol to get a file's value (which is the name of a file in this case) and set it to the variable without any spaces.The new block is a file opening in case it exists. Within the double brackets is a
-z(zero) binary option, which returns true if a file length is zero, and false if a file length is more than zero. The&&logical operator within the double brackets designates the AND. Its behavior is the same as in many programming languages. This logical operator (at 34 line) makes us sure that two local variables have a length that is equal to zero. Only then, this expression will be valid.
To sum up these all, a new version of this function can define an extension of a file and store it within itself. A general idea is simple: check on path correctness, then set a file name with its extension to the local variable (if it is possible). Finally, if all local variables are empty - throw a message about it, else to open a file.
A time to write a function to open a file.
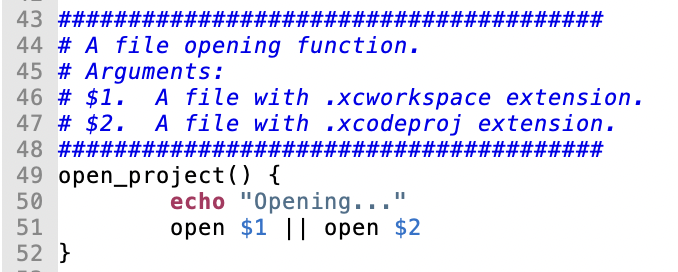
It is a pretty simple function that has two arguments as an input. The first one ($1) is for a file with the .xcworkspace extension, and the second one ($2) is for a file with the .xcodeproj extension.
A step aside, every function in the Shell environment can get arguments. From left to right, from 1 to ~.
Important, $0 in function is a name of itself. All arguments count from 1. In the example, a $1 == first argument, a $2 == second one, etc. The idea is simple.
The open command speaks for itself (see man page). So, it opens a file with the .xcworkspace extension which is the first argument ($1). If it fails, by logical operator || (OR) it opens the second file with the .xcodeproj extension.
Now, it is time to link up these two functions.
There was added just one line at 38 line. It is a calling of the open_project function and sharing to it the two local variables. The first argument is $1==$xcworkspace, the second one is $2==$xcodeproj.
Now, all looks nice, except for the script structure.
Hence, just improve it.
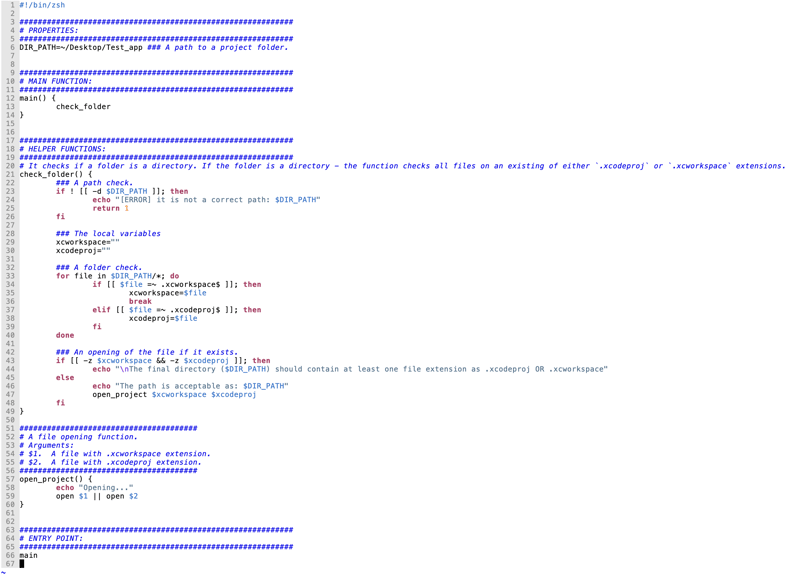
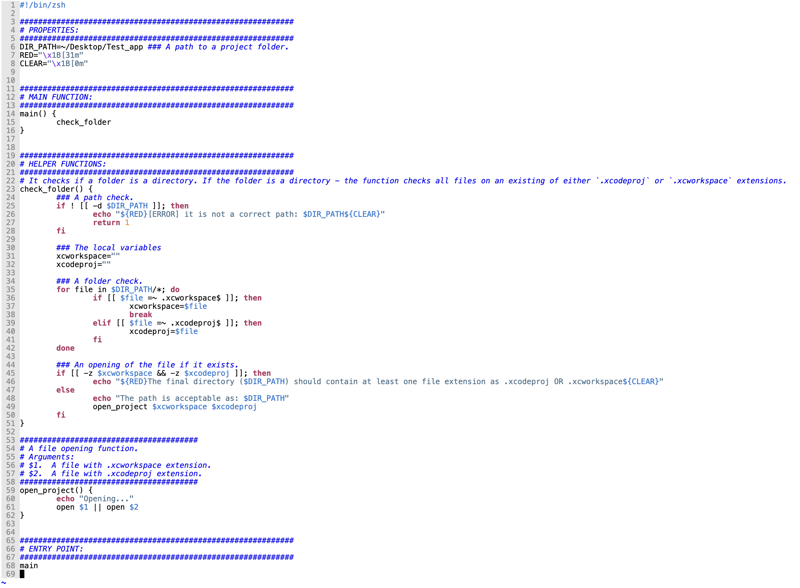
There was added the main function which wrapped all helper's functions. Also, were added two marks for the entry point and main function. Now, it looks viable.
Finally. How about adding a bit of color?
There has been added two global properties at 7-8 line. This is a property with a red color code and a property for clearing any colors. More about it is here.
Important notice! Every color's printing must end up with a clearing of it. Once, the printing has been colored, it will be colored until a clearing is performed.
Have a look at the 26 and the 46 line. At the beginning of the text, was appeared a property ${RED} to color text to red. At the end of a text, there was added a clearing property ${CLEAR} which cancels any custom colors except the default one.
It is appreciated to play with colors to understand deeply the logic of it.
Paragraph 5: A script usage in practice.
- Diversity of a script opening.
Every shell script executes with its shell environment. In other words, it executes as a separate program. Also, it is possible to send scripts on a background and vice versa, take them from the background.
For instance, when a script is called like: % ./script - it is called in its shell environment as a separate program. If this script is called this way and it changes some sensitive global properties/aliases that are used somewhere right now - there will be unexpected behavior. The reason is that a script changes some global data within its shell environment, while a user stands in its current (another) one.
That is why it is so important to work with sensitive data in the current shell environment. It is possible by entering: % source script OR source ./script. This is the same if the script code is written in a terminal and then launched directly there. In other words, it is as to dump the code of a script directly to the terminal and then perform it.
To sum up, a usage of executor (. OR source) launches a script in the user’s shell environment. Meanwhile, using just % zsh script or % ./script launches a script with its shell environment as a separate program. This answer covers this logic pretty well.
- Do we need such script extensions like '.sh'?
This is purely a matter of taste. Some people write this extension, some do not. In the paper's example, there is no extension for a script. More about it is here.
Epilogue:
Sum up. This paper does not pretend to be the single source of truth. Any task can be solved by many different approaches/utilities/techniques. Hence, this paper is strongly for educational purposes only.
If at the end of this paper, an engineer will be able to write its simple script, then the aim of this paper has been achieved.
Finally, feel free to highlight any recommendations/issues if they exist.
Thank you for your attention,
Athleteg.

Posted on March 14, 2024
Join Our Newsletter. No Spam, Only the good stuff.
Sign up to receive the latest update from our blog.
