From Wordpress to Contentful

Anna Collins
Posted on September 8, 2020

So the situation might sound familiar to you. You work for a really cool tech company with a great product, using all the latest technologies. It’s all fun and games… until you have to work with the blog… written in Wordpress 😱. What’s the problem with Wordpress you might ask? It’s easy to use, has great SEO… Well, it’s only easy to use if you know how to use it, and not one of the developers in my company knows how 🤔. So when things start going wrong and you as a developer are asked to fix them, it’s not so fun. Not to mention the worry of security issues or scalability.
This scenario has been the case in both of the previous two companies I’ve worked for. And even though it’s a headache for developers, migrating the blog seems like such a huge project to tackle and due to a lack of resources and time, it’s just not high enough up on the list of priorities. At Typeform, thankfully, we decided that enough was enough, and we tackled Wordpress head on.
This is the blog in Wordpress that we are currently migrating: https://www.typeform.com/blog/
First things first, what did we actually need? We came up with a list of Must Haves:
- A static site using Next.js to align with the stack used for other public assets.
- Contentful as a CMS. We were already using Contentful for copies on the public website so the marketing team were already familiar with it.
- The exact same design and functionality as the current blog.
- The same customisation abilities as the current blog.
- A similar editing experience to Wordpress.
- The ability to preview content when editing.
And our blog needed to have 4 types of pages:
- Home page
- Article page
- Category page (a list of all articles of a given category)
- Author page (a list of all articles of a given author)
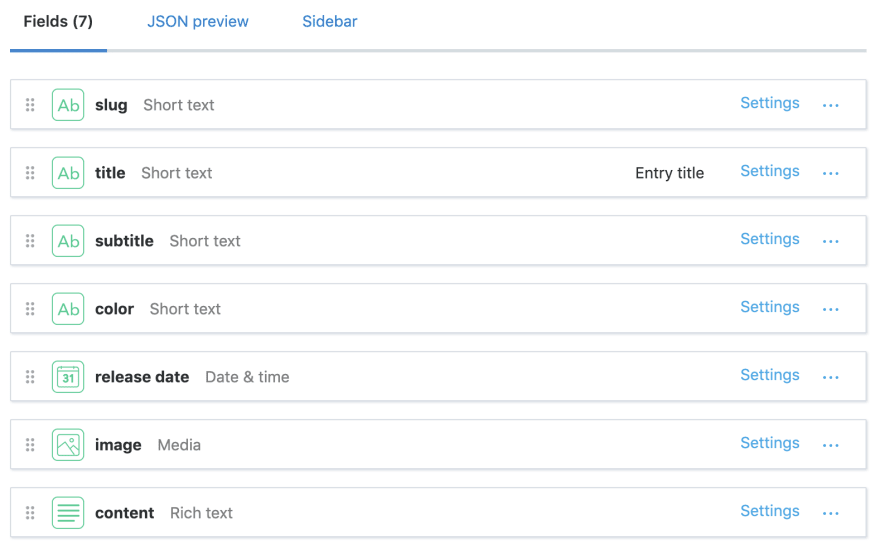
Contentful works by creating models for each entry type, so first of all we created a loose version of the models we were going to need. One for each of the pages Home and Article, one for a Category and one for an Author, with a home page referencing various articles and an article referencing a category and an author. We created some mock entries using the models so we could start fetching data in our Next.js project.
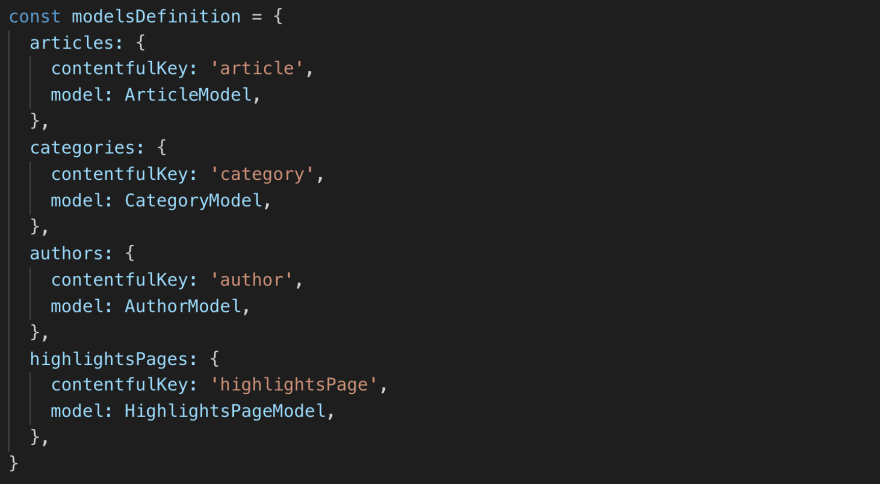
We also created models in the front end for each entry type to keep development easier and so we knew what each component was expecting in terms of props.
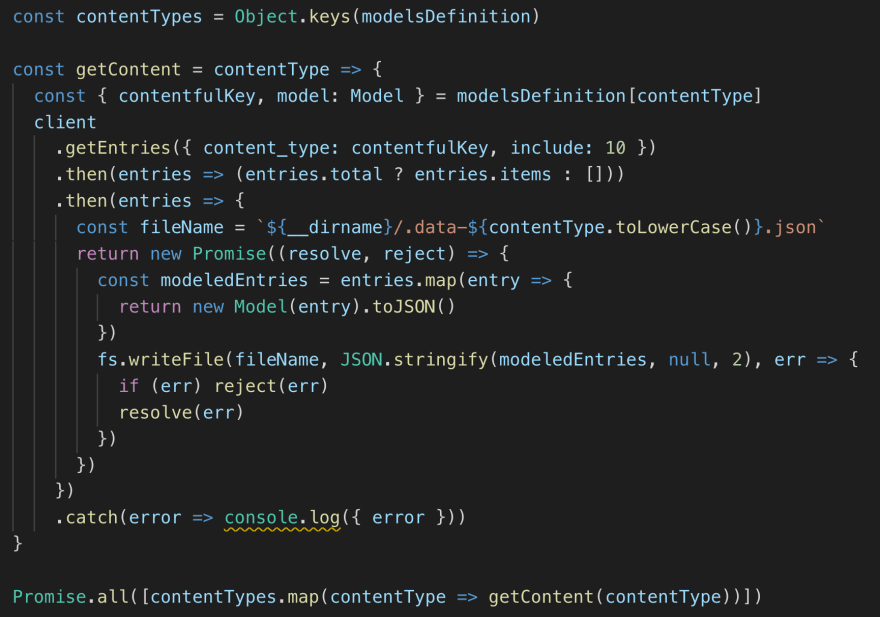
When we fetched the data from Contentful, we did it by page type, using the corresponding model to transform the data and then saved it in a .json file per page type.
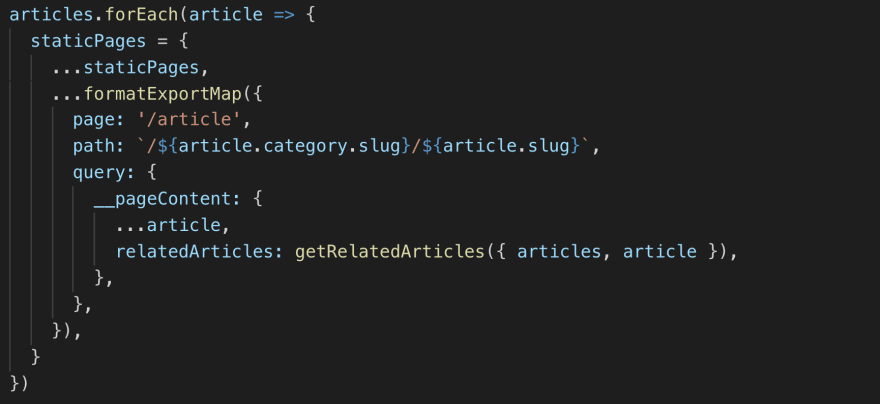
Next.js generates routes out of the box based on what’s in the /pages folder at the root. Since we needed dynamic routing based on the data fetched from Contentful, we made use of the exportPathMap function in the next.js.config file (which overwrites the default) along with the files we generated from the Contentful fetch, to dynamically create our routes. Each route is provided with a page from the /pages folder which is to be rendered, along with a query where any data needed for the page can be passed.
Static pages are hydrated without their route parameters provided and after hydration, an update is triggered to provide the route parameters in the query object, so we are unable to retrieve the page data from the route query. Instead, we use getInitialProps in the page which receives a context object including the query, amongst other properties. The value returned becomes available as props on the page.
Great! So now we have all the data from Contentful and have generated a route for each page with the required data on each page available through its props. It’s time to start rendering components. As with most blogs, the structure of each article is the same except for the article content itself. We wanted to make the editor experience as similar to Wordpress (or a WYSIWYG editor) as possible, so for the article content field in the article entry, we made use of the Rich Text field type in Contentful. This field type allows editors to use different headings, font styles, links, bullet points etc. But apart from this, and more importantly, it allows us to insert other entries.
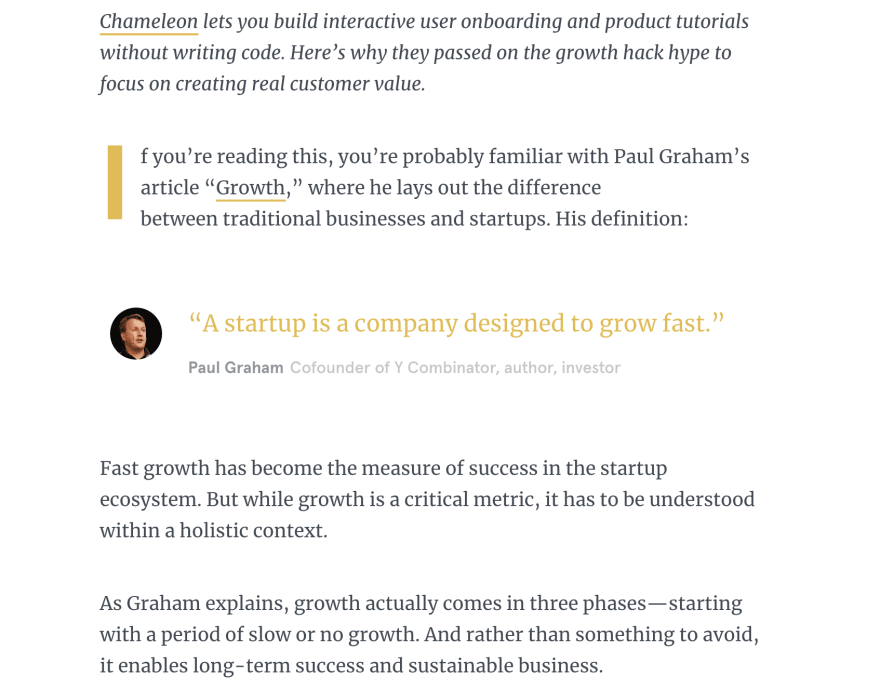
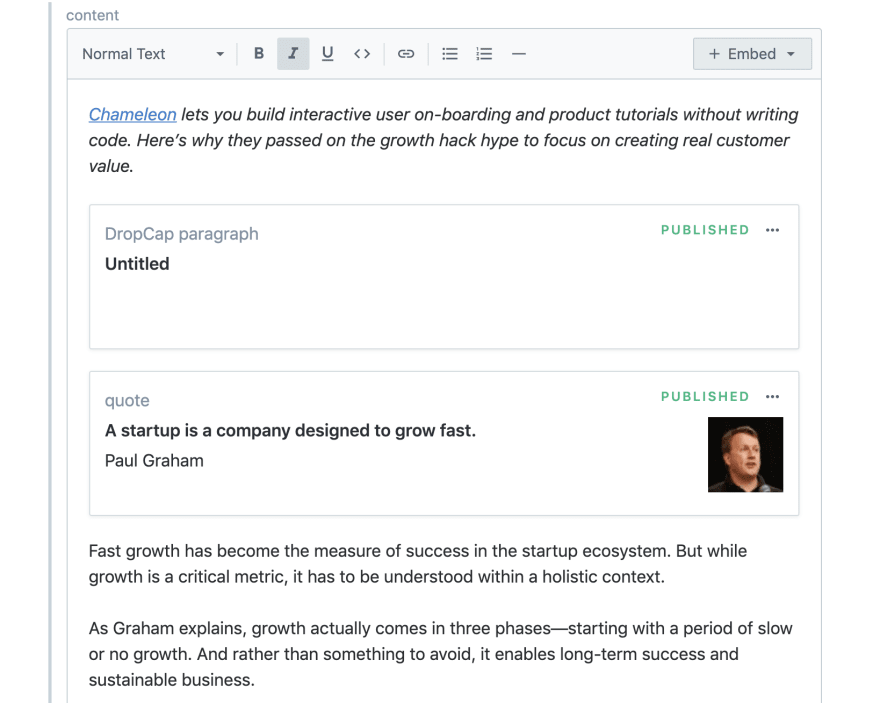
For example, in the section above, we have a paragraph with a drop cap and a quote with an avatar. Neither of these are possible in the native rich text field. We created separate entries for these content types and inserted them into the rich text as seen below.
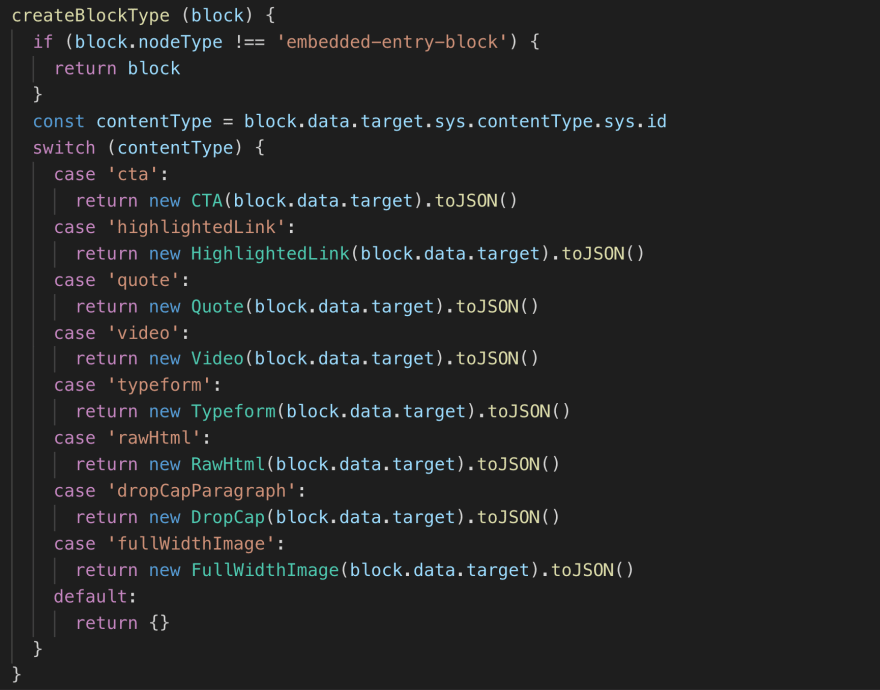
In the article model in our Next.js project, for the article content field (the rich text), we transform the response using a RichText model which maps through all the blocks in the response and either returns the block itself if it is a standard block (not one of our custom embedded entries) or the corresponding model if it is a custom embedded entry (i.e. the drop cap for example).
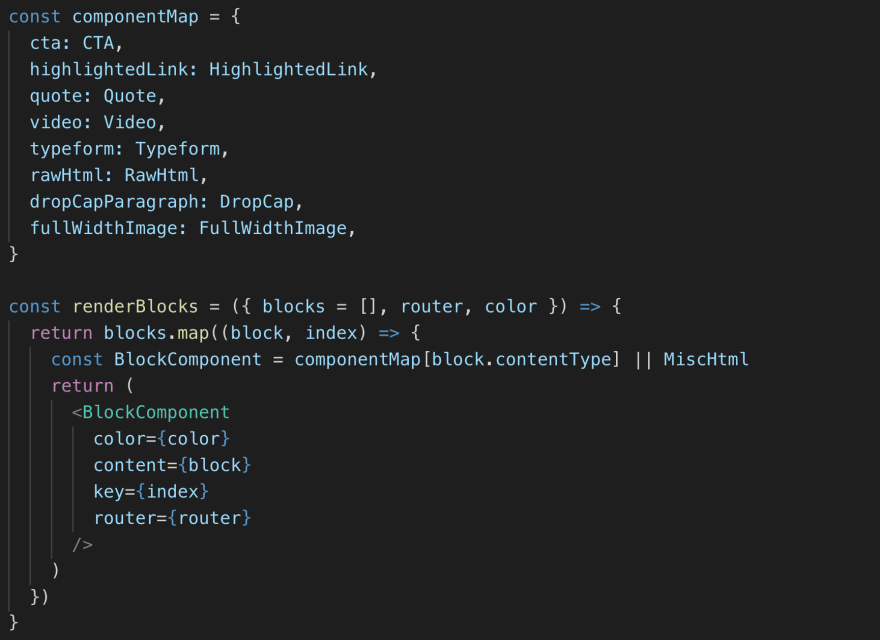
We can then in our ArticleContent component for the article page map over these blocks and return the corresponding component.
One last thing to address are the standard blocks in the rich text. The response is not so easy to work with so luckily Contentful provides us with a package '@contentful/rich-text-types' which exposes a method, documentToReactComponents, that we can use really easily inside a component to transform the response json into HTML.
Et voila! We have all the data where it needs to be and we can now start adding any necessary fields to contentful and begin styling the page 💃
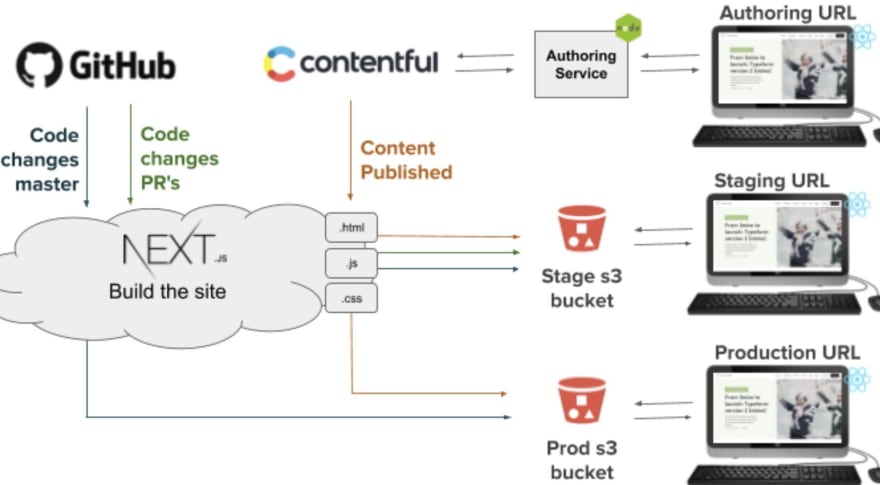
We set up 3 deployment environments for the project:
Production: This is a static bundle in s3 built on every push to master using Travis. The content fetched is all published content from Contentful.
Staging: The same as production except built on every pull request created.
Authoring: This is a SSR application deployed on every push to master hosted on Now. It contains all content, including draft content, from Contentful. Content is refreshed on every change in Contentful by a web-hook. This will enable the marketing team to preview their changes in Contentful.
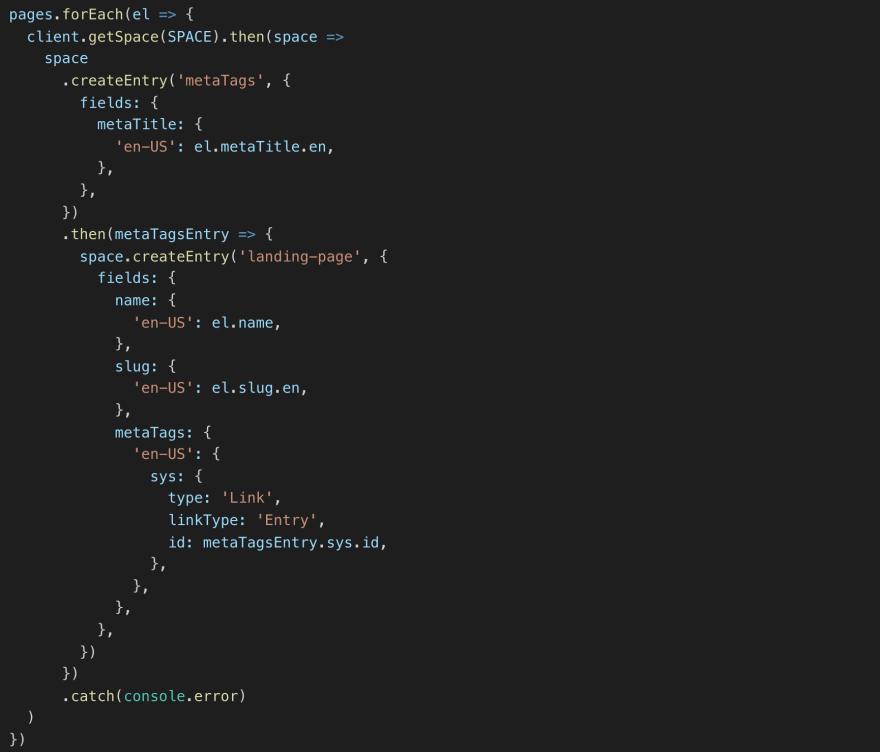
So now for the fun part, the actual migration! Luckily using the Wordpress API and the Contentful API, we were able to fetch all articles and their content from Wordpress and run a script to create all the entries in Contentful and fill them with all the required titles, subtitles, slugs, images, metadata, author name, category color… everything except for the article content rich text as this was too complex to migrate via a script. But since we already have the entries created and the images uploaded, it's just a matter of copying and pasting the content from Wordpress into the rich text field, creating the odd custom entry and inserting the images into it. We migrated one and it took us 15 minutes to input the data and check everything else was OK, so for the 200, that’s around 50 hours work, quite a while but not so terrible. Also the Contentful API is pretty good and easy to use. Here's a simple example of how to add an entry, creating and linking its metadata entry to it.
So that’s where we’re currently at with our blog migration! We are pretty close to finishing it, just a few tweaks after speaking to the blog owner and then we plan to hire a contractor to migrate the rich text content. We will work on performance too when it’s all done, deploy a few of the pages live to check SEO is all ok, and 🚀 All in all I think it has been pretty successful, and not as much of a drama as one might at first think!

Posted on September 8, 2020
Join Our Newsletter. No Spam, Only the good stuff.
Sign up to receive the latest update from our blog.

