Xiao Ling
Posted on May 28, 2021
The Flutter barcode SDK series is coming to the end. This week, we switch the coding environment to macOS to finish the rest of the plugin platforms - iOS and macOS - using Swift.
Download
- flutter_barcode_sdk
- Dynamsoft Barcode Reader
Flutter Barcode Plugin for iOS
As always, we add the iOS template to the existing plugin project first:
flutter create --template=plugin --platforms=ios .
The command generates a flutter_barcode_sdk.podspec file for build configuration and a Classes folder containing code implementation.
You can either set vendored_frameworks or dependency for linking in flutter_barcode_sdk.podspec. The difference is vendored_frameworks are the paths of the framework bundles shipped with the plugin, whereas setting dependency triggers pod install if the framework is not locally cached. If you have trouble in building the project with dependency, vendored_frameworks could be the alternative. The only problem of using vendored_frameworks is you cannot publish the package to pub.dev if the package size is over 100 MB.
Next, we open Classes/SwiftFlutterBarcodeSdkPlugin.swift file to start coding.
Here is the code snippet for importing and initializing Dynamsoft Barcode Reader:
import DynamsoftBarcodeReader

public override init() {
    super.init()
    let lts = iDMLTSConnectionParameters()
    lts.organizationID = "200001"
    reader = DynamsoftBarcodeReader(licenseFromLTS: lts, verificationDelegate: self)

    reader!.initRuntimeSettings(with: "{\"ImageParameter\":{\"Name\":\"Balance\",\"DeblurLevel\":5,\"ExpectedBarcodesCount\":512,\"LocalizationModes\":[{\"Mode\":\"LM_CONNECTED_BLOCKS\"},{\"Mode\":\"LM_SCAN_DIRECTLY\"}]}}", conflictMode: EnumConflictMode.overwrite, error:nil)
    let settings = try! reader!.getRuntimeSettings()
    settings.barcodeFormatIds = Int(EnumBarcodeFormat.ONED.rawValue) | Int(EnumBarcodeFormat.PDF417.rawValue) | Int(EnumBarcodeFormat.QRCODE.rawValue) | Int(EnumBarcodeFormat.DATAMATRIX.rawValue)
    reader!.update(settings, error: nil)
    reader!.setModeArgument("BinarizationModes", index: 0, argumentName: "EnableFillBinaryVacancy", argumentValue: "0", error: nil)
    reader!.setModeArgument("BinarizationModes", index: 0, argumentName: "BlockSizeX", argumentValue: "81", error: nil)
    reader!.setModeArgument("BinarizationModes", index: 0, argumentName: "BlockSizeY", argumentValue: "81", error: nil)
}
The organization ID 200001 authorizes developers to use the SDK for 7 days.
The public func handle() function is used to handle Flutter method call:
public func handle(_ call: FlutterMethodCall, result: @escaping FlutterResult) {
    switch call.method {
    case "getPlatformVersion":
        result("iOS " + UIDevice.current.systemVersion)
    case "setLicense":
        self.setLicense(arg: call.arguments as! NSDictionary)
        result(.none)
    case "setBarcodeFormats":
        self.setBarcodeFormats(arg: call.arguments as! NSDictionary)
        result(.none)
    case "decodeFile":
        let res = self.decodeFile(arg: call.arguments as! NSDictionary)
        result(res)
    case "decodeImageBuffer":
        DispatchQueue.global().async {
            let res = self.decodeBuffer(arguments: call.arguments as! NSDictionary)
            result(res)
        }
    default:
        result(.none)
    }
}
We can implement the corresponding methods as follows:
func decodeBuffer(arguments:NSDictionary) -> NSArray {
    let buffer:FlutterStandardTypedData = arguments.value(forKey: "bytes") as! FlutterStandardTypedData
    let w:Int = arguments.value(forKey: "width") as! Int
    let h:Int = arguments.value(forKey: "height") as! Int
    let stride:Int = arguments.value(forKey: "stride") as! Int
    let ret:[iTextResult] = try! reader!.decodeBuffer(buffer.data, withWidth: w, height: h, stride: stride, format:.ARGB_8888, templateName: "")
    return self.wrapResults(results: ret)
}

func setBarcodeFormats(arg:NSDictionary) {
    let formats:Int = arg.value(forKey: "formats") as! Int
    let settings = try! reader!.getRuntimeSettings()
    settings.barcodeFormatIds = formats
    reader!.update(settings, error: nil)
}

func decodeFile(arg:NSDictionary) -> NSArray {
    let path:String = arg.value(forKey: "filename") as! String
    let ret:[iTextResult] = try! self.reader!.decodeFile(withName: path, templateName: "")
    return self.wrapResults(results: ret)
}

func setLicense(arg:NSDictionary) {
    let lic:String = arg.value(forKey: "license") as! String
    reader = DynamsoftBarcodeReader(license: lic)
}

func wrapResults(results:[iTextResult]) -> NSArray {
    let outResults = NSMutableArray(capacity: 8)
    for item in results {
        let subDic = NSMutableDictionary(capacity: 8)
        if item.barcodeFormat_2 != EnumBarcodeFormat2.Null {
            subDic.setObject(item.barcodeFormatString_2 ?? "", forKey: "format" as NSCopying)
        }else{
            subDic.setObject(item.barcodeFormatString ?? "", forKey: "format" as NSCopying)
        }
        subDic.setObject(item.barcodeText ?? "", forKey: "text" as NSCopying)
        let points = item.localizationResult?.resultPoints as! [CGPoint]
        subDic.setObject(Int(points[0].x), forKey: "x1" as NSCopying)
        subDic.setObject(Int(points[0].x), forKey: "y1" as NSCopying)
        subDic.setObject(Int(points[1].x), forKey: "x2" as NSCopying)
        subDic.setObject(Int(points[1].x), forKey: "y2" as NSCopying)
        subDic.setObject(Int(points[2].x), forKey: "x3" as NSCopying)
        subDic.setObject(Int(points[2].x), forKey: "y3" as NSCopying)
        subDic.setObject(Int(points[3].x), forKey: "x4" as NSCopying)
        subDic.setObject(Int(points[3].x), forKey: "y4" as NSCopying)
        subDic.setObject(item.localizationResult?.angle ?? 0, forKey: "angle" as NSCopying)
        outResults.add(subDic)
    }

    return outResults
}
Before testing the plugin, we have to open example/ios/Runner.xcworkspace in Xcode to configure the signing certificate. After that, we can run flutter run in terminal to launch the barcode scanner demo app. No extra Flutter code needed, because the Dart code for UI is shared between Android and iOS:
Flutter Barcode Plugin for macOS
Once the Flutter barcode plugin is done for iOS, developing the plugin for macOS is much easier. Probably you have noticed that there is no framework for macOS but only dylib. To utilize the barcode SDK for macOS, we need to create a bridging header.
Here are the steps:
-
Add the Flutter macOS template to the current plugin project:
flutter create --template=plugin --platforms=macos . -
Create a bridging header
macos/Runner/Runner-Bridging-Header.h:
#import "DynamsoftBarcodeReader.h"Set the path of the bridging header in Xcode:
Copy the Swift code from
ios/Classes/SwiftFlutterBarcodeSdkPlugin.swifttomacos/Classes/FlutterBarcodeSdkPlugin.swift.
Although the macOS application can now run successfully, it will fail to access files due to the sandbox restriction. To enable loadings file via file path string, we disable the entitlement com.apple.security.app-sandbox in example/macos/Runner/DebugProfile.entitlements:
<?xml version="1.0" encoding="UTF-8"?>
<!DOCTYPE plist PUBLIC "-//Apple//DTD PLIST 1.0//EN" "http://www.apple.com/DTDs/PropertyList-1.0.dtd">
<plist version="1.0">
<dict>
    <key>com.apple.security.app-sandbox</key>
    <false/>
    <key>com.apple.security.cs.allow-jit</key>
    <true/>
    <key>com.apple.security.network.server</key>
    <true/>
</dict>
</plist>
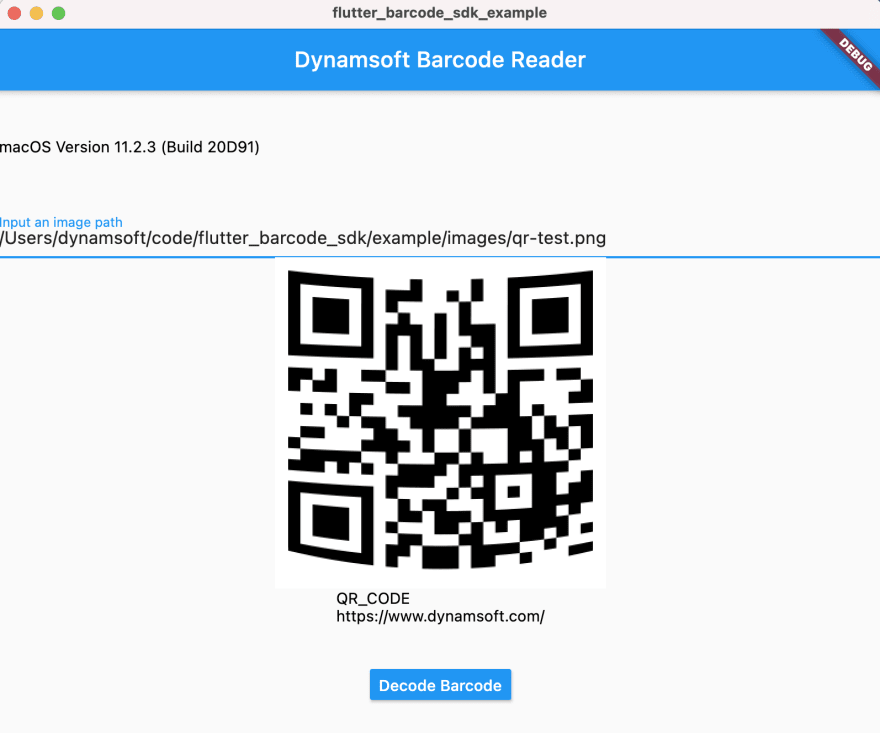
Finally, the Flutter macOS barcode reader can work perfectly.
flutter run -d macos
Ending
So far, the Flutter barcode SDK has covered Windows, Linux, macOS, iOS, Android, and web. It will also support Fuchsia OS in the near future.
Source Code

Posted on May 28, 2021
Join Our Newsletter. No Spam, Only the good stuff.
Sign up to receive the latest update from our blog.


