Victor Macarios
Posted on January 25, 2020
Hey folks!
Today I gonna show you how to configure GitHub on IntelliJ IDEA CE.
It's quite simple.
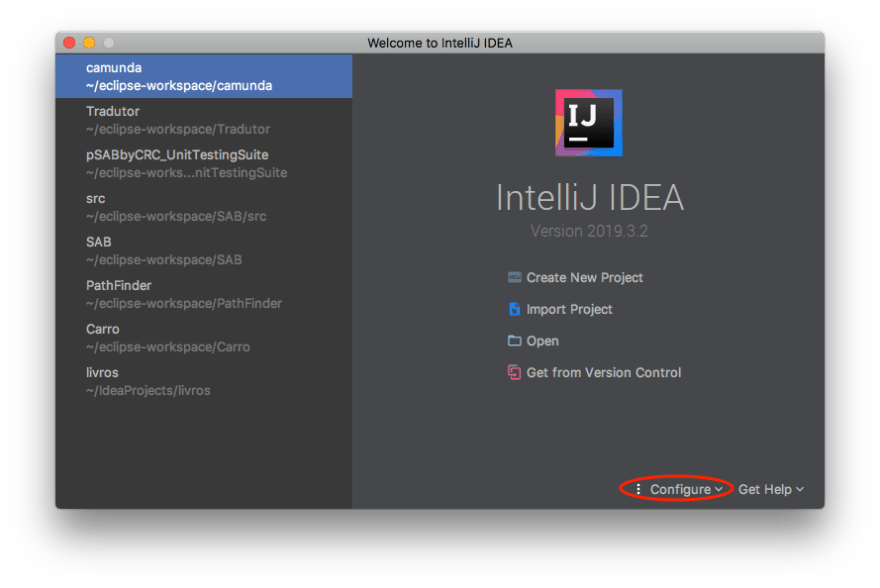
The first step is to open IntelliJ and, on the Welcome screen, click on "Configure", at the bottom right.

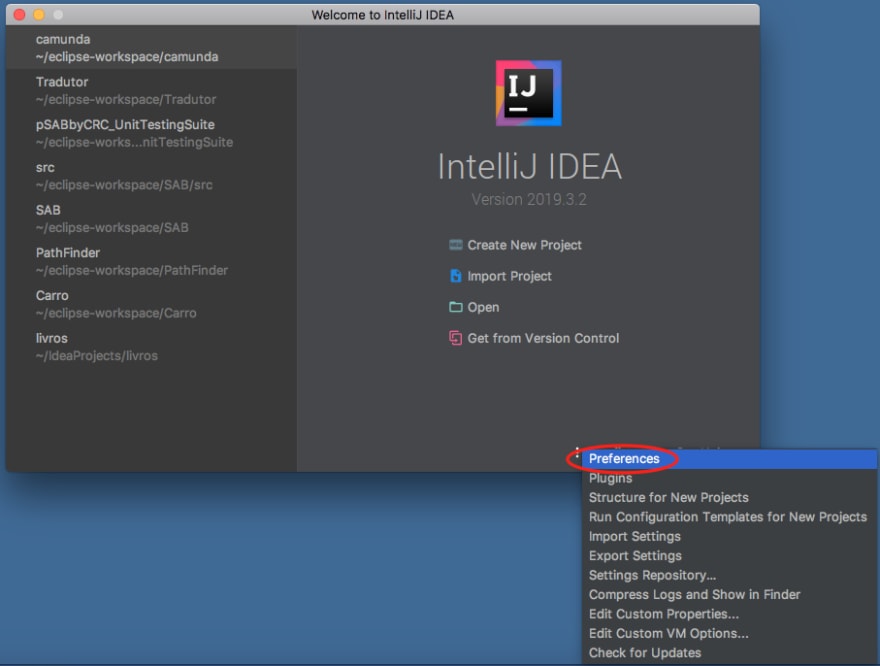
Choose the option "Preferences"

Open the Version Control section by clicking on the triangle at its left
Click on "GitHub"
Click on "Add account" at the center of the window

Insert your credentials and click on "Log In" button

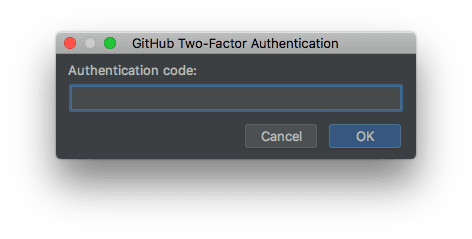
If you have the two-factor authentication activated, a window will open asking your authentication code. Insert it and click in OK.

Now, just click OK to close the Preferences window.
Now your GitHub account is configured.
If you want to download a hosted code, click on "Get from Version Control" in the Welcome screen and select your repository by clicking at GitHub on the left side of the window.
But, if you want to upload a project, open it, click in VCS menu and choose Import into Version Control > Share Project on GitHub

Fill in the requested information and click on the "Share" button.

In the next window, select the files you want to upload, fill in the Commit Message and click on the "Add" button.

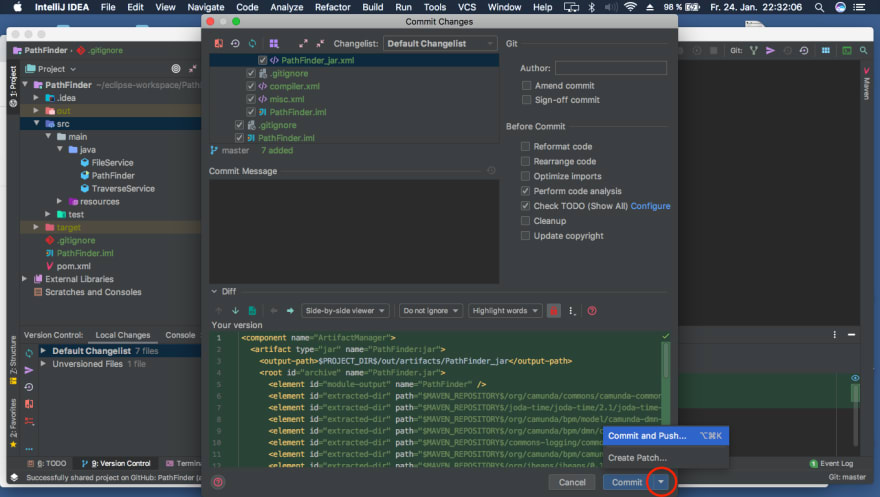
The next edited files can be committed by clicking on VCS menu > Commit.
Check the desired files, fill in the Commit Message and, on the bottom left click on the triangle next to the "Commit" button and click on the "Commit and Push" option.

That way, the files will be versioned in your local machine and on the GitHub server as well.
Confirm the push on the following screen and you are done.

Happy coding.

Posted on January 25, 2020
Join Our Newsletter. No Spam, Only the good stuff.
Sign up to receive the latest update from our blog.