Build A Simple CLI Tool With Deno

Mayowa Ojo
Posted on April 20, 2020
What is Deno?
Deno is a secure runtime for JavaScript and TypeScript created by Ryan Dahl who also happens to be the creator of Nodejs. If you've never heard of deno, I suggest you watch these talks by Ryan: He talks about his mistakes with Nodejs here and a more in-depth look into deno here
Deno is basically what Nodejs would have been if it was written today. Now, deno is still a relatively new project and it's not reached v1.0 yet and although it's not intended to replace Nodejs, it certainly has prospects to be the future of server-side JavaScript. Some of the core values that makes it different from Nodejs include:
- security out of the box - explicit access is required for file, network and environment access.
- a different module management system - deno does not use npm and there's no node_modules. Rather, it has a module management system similar to Go where modules are imported via URL.
- in-built support for typescript - you can run typescript files directly without compiling to javascript.
- it is built with Rust!
I'm personally very excited about this project especially because of its support for typescript. However, it's nowhere near reaching Nodejs in terms of popularity and adoption.
Let's build something!
In this article, we're going to build a simple cli tool to demonstrate some of the features of deno. Our cli will be interacting with a cryptocurrency API to fetch live data.
Requirement: make sure you have deno installed. If you don't, refer to this link. It's pretty straightforward.
Deno projects typically have an entry file called mod.ts so we're going to start here. If you're coding along, create your project folder alongside your entry file. Here's what the project directory looks like:
Overview:
-
mod.tsis our entry file. -
Makefilecontains useful commands that would typically be in package.json for a Node.js project. -
deps.tscontains all our dependencies. -
types.d.tscontains our type definitions. -
import_map.jsoncontains our import maps. We use this to enable clarity and readability.
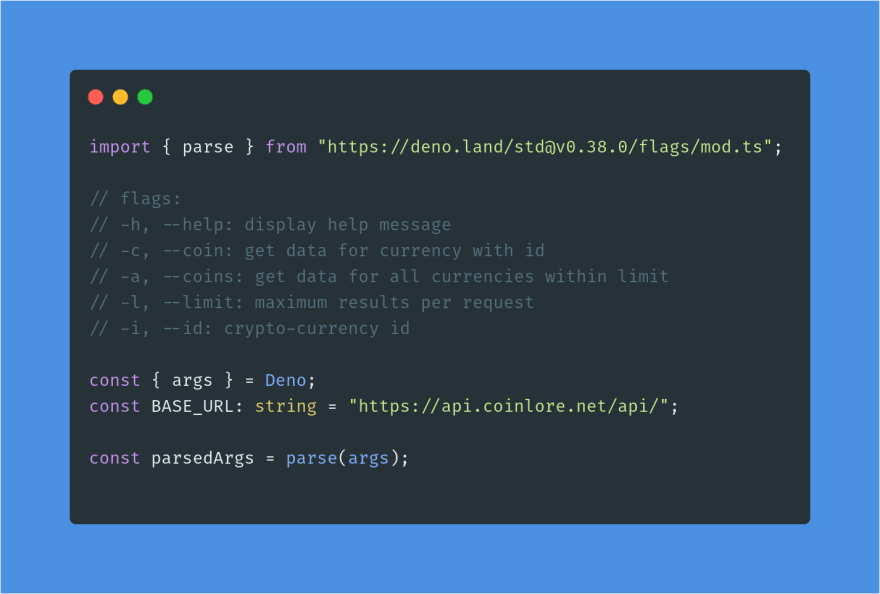
Our cli is basically going to provide two commands. One to fetch and list all coin prices within a limit and one to fetch a particular coin using an id. First off, we need to parse the flags provided with each command and deno provides us just what we need from the std library. So we're going to import the parse method from the flags module. This is how we import modules in deno:
In deno, modules are imported using a URL and they're cached the first time you run your app so even if you don't have an internet connection at subsequent times, your app will still run. The @v0.38.0 in our import means I'm importing from the release version I currently have installed. You can omit that and just import from the latest version if you just installed deno. In the code above, we're destructuring the args variable from the Deno namespace which simply returns the arguments passed to a script then we pass it to the parse method which returns an object containing all arguments passed in key-value pairs. For example, if we run our program as $ crypto-cli --coins --limit 10, the object returned will be: {_: [], coins: true, limit: 10}. The first property in the object is always an array containing all arguments that did not have an option associated with them(i.e it doesn't match -f or --flag). If you do not pass a corresponding value to a flag, it defaults to true.
Let's write out the function for our first command:
Here, we have an async function that returns the data from our API call. We're making a fetch request (yes, deno has browser functionality in-built) to the API endpoint to get all coins within the limit provided. The if statement checks if a limit was not provided and defaults to 10.
The function for the second command looks very similar, only that an id is provided this time.
The response data from the API contains a bunch of information so we're going to filter what we need out and format the data we want to display.
In the code above, the formatData function accepts the raw data object and returns a string of the coin name and current price in USD.
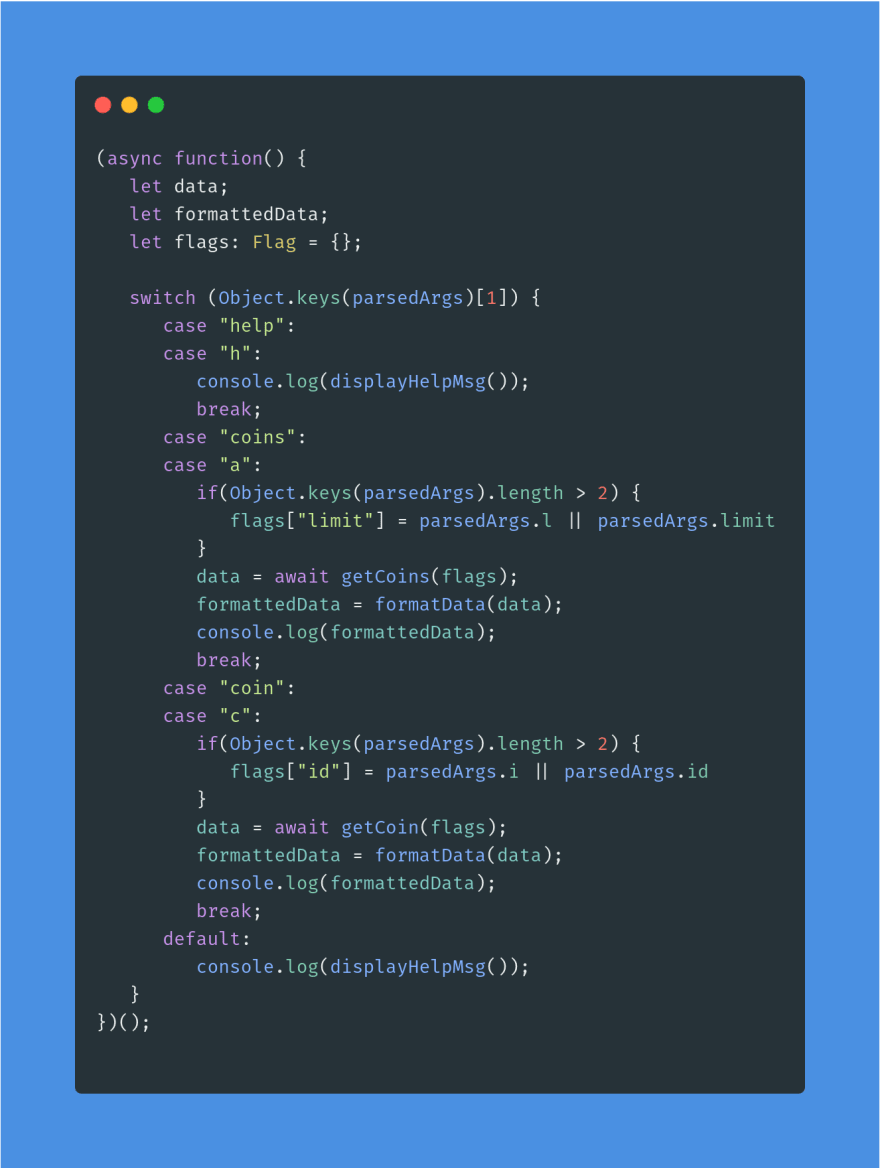
Now let's define the main function which executes our program commands.
The function above is an IIFE which runs immediately the file is executed. We have a switch statement to check the first flag that was passed and calls the appropriate function. The default case simply displays the welcome message. We also have if conditions to check for optional flags like the limit.
To test our program, we're going to run $ deno run --allow-net mod.ts --coins --limit 10. We should get the following result:
You must have noticed the --allow-net flag passed to the command. This is an example of deno being security first. Deno can't access your network, files, or environment without giving it explicit access. So for example, if your code needs to access the file system you'd need to run it with the --allow-read flag.
That's all there is for our cli tool. If you'd like to see the full code, the repository is linked here. In conclusion, Deno is a very exciting project especially because you get all the benefits of typescript out of the box without the need to compile your files to js. You can build a lot with it, ranging from cli Programs to HTTP servers. Do have a look at the collection of 3rd party libraries and see what people are building.

Posted on April 20, 2020
Join Our Newsletter. No Spam, Only the good stuff.
Sign up to receive the latest update from our blog.


