Linux Desktop Guide: Backing Up Your Data With Veeam Agent (Part 1)

TheMentor
Posted on September 9, 2019
Welcome, Linux Geeks,
This is Part 1 of 2 articles about Veeam Agent for Linux in this part I will cover the reason I chose this solution and how to perform a backup. In part 2 I will cover the different restore processes.
Veeam Agent for Linux is a good Bare-Metal (when the OS won't boot) backup solution.
The reason you should be interested in a bare-metal backup solution is that if there is a hard drive failure, you won't need to spend hours setting up your computer the same way it was before.
With a bare-metal solution, the computer will be at the same point it was when the last backup took place saving a lot of time and headache.
I tried a few of them but they all fell short for me. Either they did not offer a Bare-Metal restore or they couldn't easily restore a single file or a directory.
I want my backup to be versatile and adapt to my needs. After a lot of research, I settled on Veeam Agent for Linux.
Unfortunately, it's not an open-source solution so if that bothers you, I understand. I have a more pragmatic approach so I'm using it.
Many suggested CloneZilla, despite it being a really awesome tool it fell short in a few things for me.
- It can't run a backup/clone while the OS is running.
- It can't easily restore single files or directories.
Deja-Dup/Duplicaci/Borg does not support bare-metal restore.
So, in the end, I picked Veeam Agent for Linux specifically the free edition as my laptop's backup tool.
Setup Guide
I'm going to show you how to setup Veeam Agent for Linux on my Ubuntu Mate 19.04 system but the setup should be quite similar for alternative Operating Systems.
For a full list of supported Operating Systems and File-Systems check the Veeam Agent for Linux 3.0.2 Release Notes
A few of the supported Operating Systems
- Debian 6 – 9.7
- Ubuntu 10.04 – 19.04
- Fedora 23 – 30
- RHEL 6.0 – 8.04
- CentOS 6.0 – 7.6
- Many more
A few of the supported Filesystems
- Ext 2/3/4
- Btrfs (for OSs that run Linux kernel 3.16 or later)
- XFS
- F2FS
- Many more
Supported Backup Targets/Destinations
Backup can be performed to the following disk-based storage destinations:
- Local (internal) storage of the protected computer (not recommended)
- Direct attached storage (DAS), such as USB, eSATA or Firewire external drives.
- Network Attached Storage (NAS) able to represent itself as SMB (CIFS) or NFS share.
- Veeam Backup & Replication 9.5 Update 4 or later backup repository (except DataDomain DDboost, HP StoreOnce).
- Veeam Cloud Connect 9.5 Update 4 or later repository.
In this example I will perform a backup to a USB external drive
Installation:
-
Go to Veeam Agent for Linux FREE Download Link and click download, You will need to make a free account to login or sign in with a supported account (Google/Facebook/LinkedIn/Microsoft).
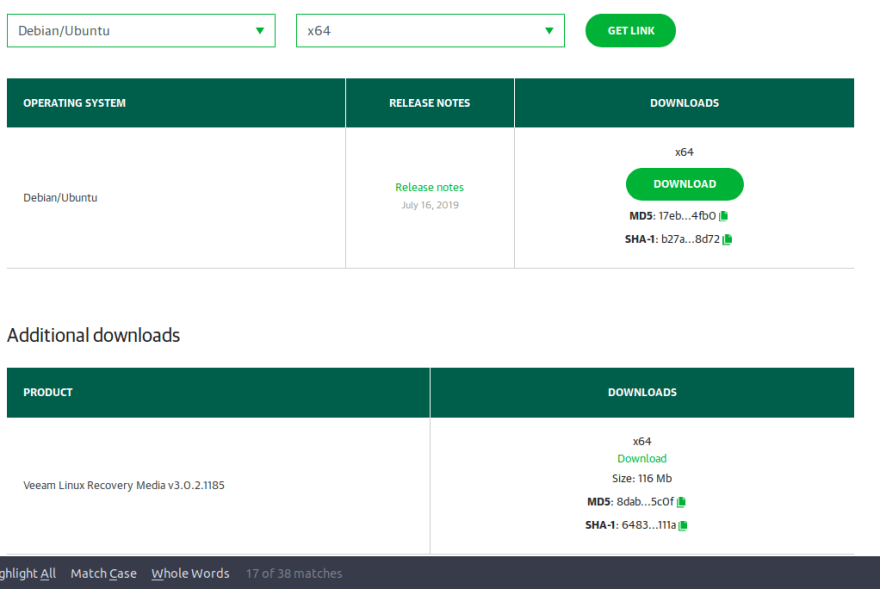
After logging in you will be presented with an option to select an Operating System and Architecture.
As you can see in the screenshot below I selected "Debian/Ubuntu" for the OS and "x64" for the architecture and clicked "Get link"You will be presented with 2 download links
- Veeam Agent for Linux App
- Veeam Linux Recovery Media (you will need to boot your computer using the recovery media for bare-metal restores).
Click the first download link and accept the terms and conditions (after you've read them of course)
Select the location where to save the file since I've selected Ubuntu it will be a .DEB file. if you picked fedora you will get a .RPM file
Once the download completes open your file manager and navigate to the folder you downloaded the file to.
-
You can double-click the DEB file and click install but if you prefer to install it from the terminal, you can do that using the following command:
# on Ubuntu/Debian run the following commands sudo dpkg -i veeam-release-deb_1.0.7_amd64.deb -
After installing the deb file, we will need to install the actual Veeam Agent for Linux program using the following commands:
sudo apt update
sudo apt install veeam
Let the package manager do its magic, In some cases, it will need to compile some DKMS kernel modules for filesystem snapshot support.
How to Launch and Use Veeam
-
Veeam Agent for Linux is a terminal-based GUI. To launch it run the following command:
sudo veeam -
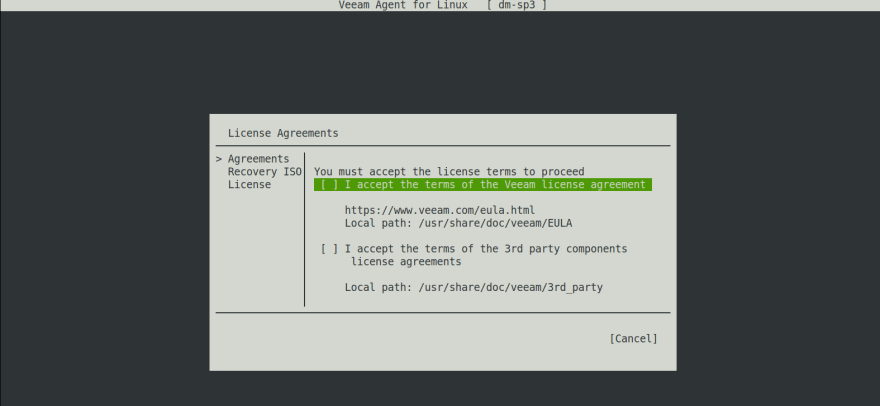
Accept the following terms before continuing: (after you've read them of course)
- "I Accept the terms of the Veeam license agreement"
- "I Accept the terms of the 3rd party components license agreement"
Select Next using the keyboard and press ENTER
-
(optional) If you've installed any special drivers on your machine, Veeam will give you the option to create a custom recovery ISO with your drivers built-in.
Usually, this is important if you've installed storage/hard drive related drivers like RAID cards so the Veeam recovery media will have access to the drives when it boots up.
In my case, everything is built into the kernel so I'm going to skip this step -
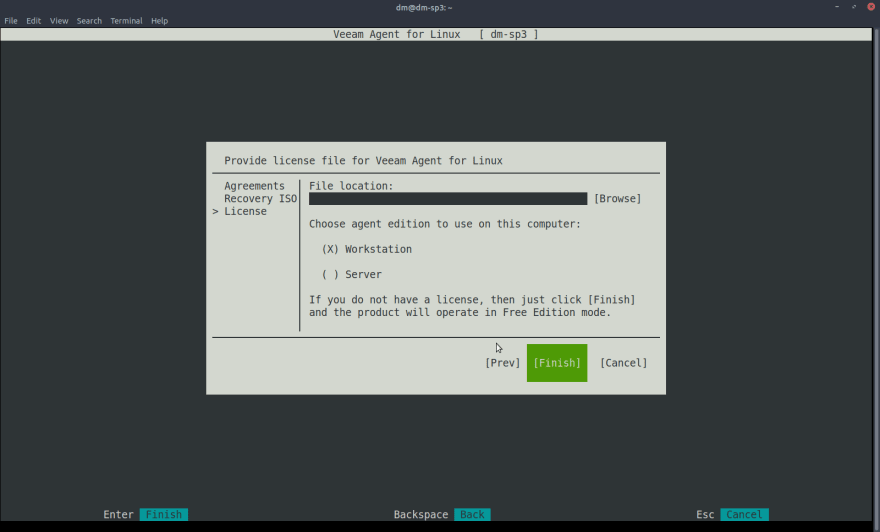
Selecting a License - We are going to use the free edition of Veeam Agent for Linux so we can just leave everything as is and select FINISH
-
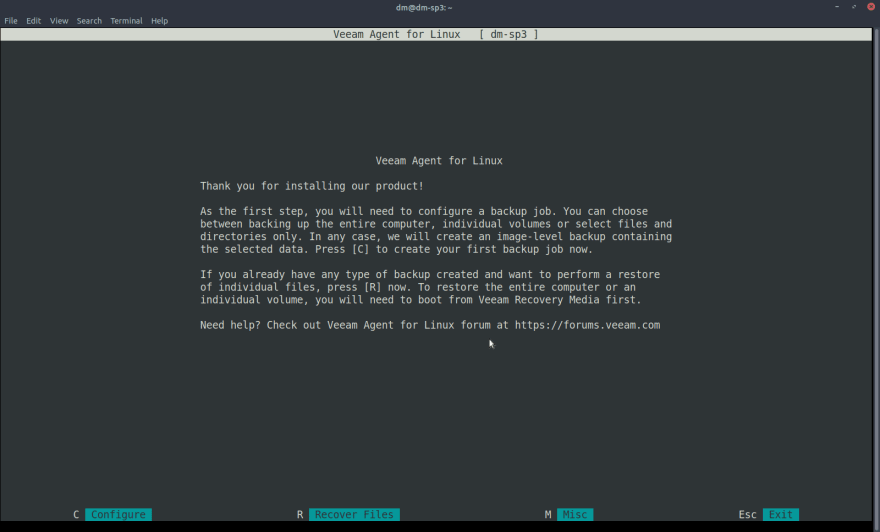
You will be presented with the welcome screen, To start configuring a backup job press C on your keyboard
How to Setup your first Backup Job
This assumes you've followed the last section of the guide and are in the new backup job setup screen
If you are not in the new backup screen to quickly get there from a terminal run the following commands
sudo veeam
And Press C on your keyboard
-
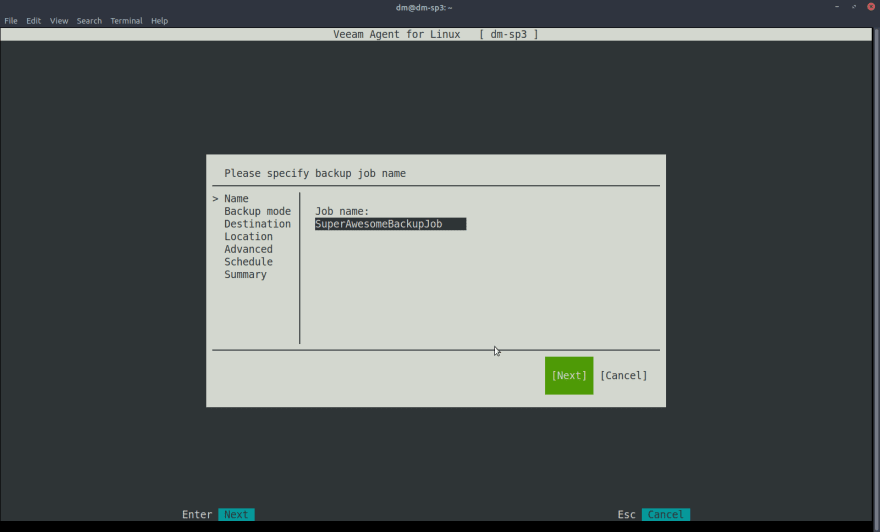
You will see this screen in front of you enter a name for your backup job and select NEXT
-
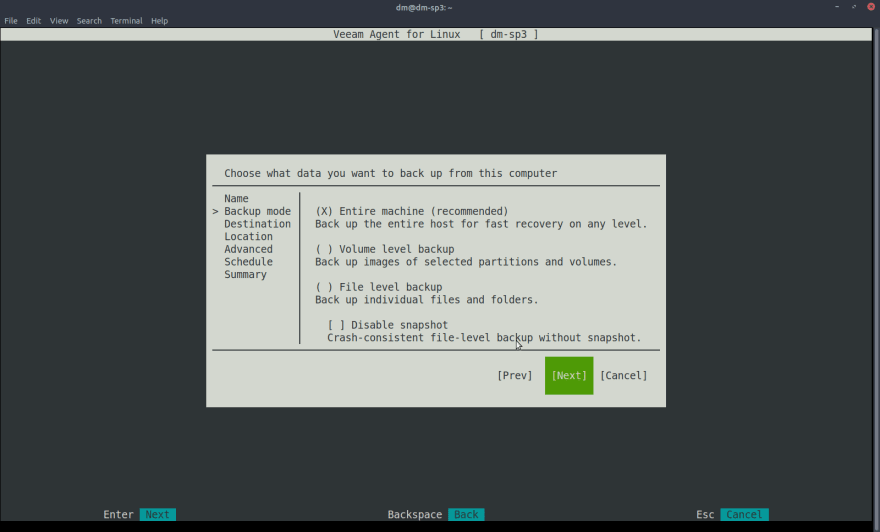
I want to backup my entire machine so in the backup mode screen I chose the "Entire machine".
If you want to only backup specific volumes or files/folders you can play around with the settings of this screen
Press NEXT -
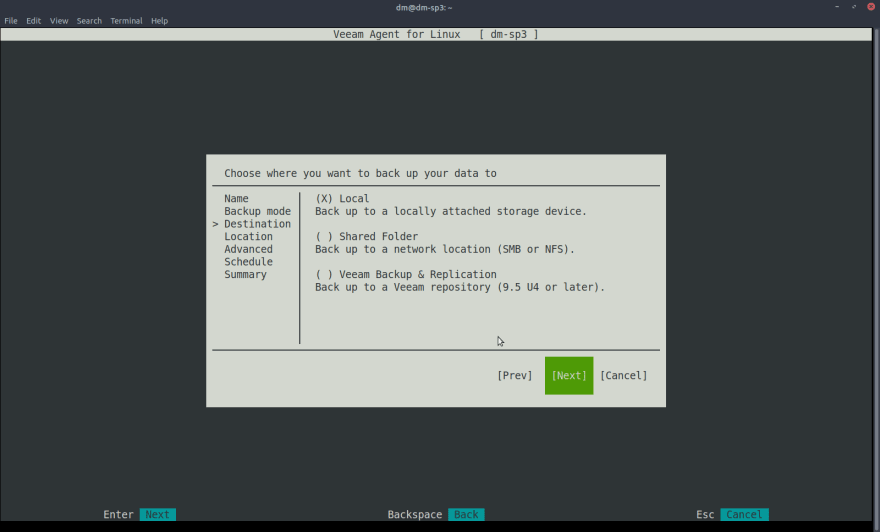
Select the destination you want Veeam to store your backups.
I've selected "Local" since I have a USB drive attached to the machine.
Press NEXT -
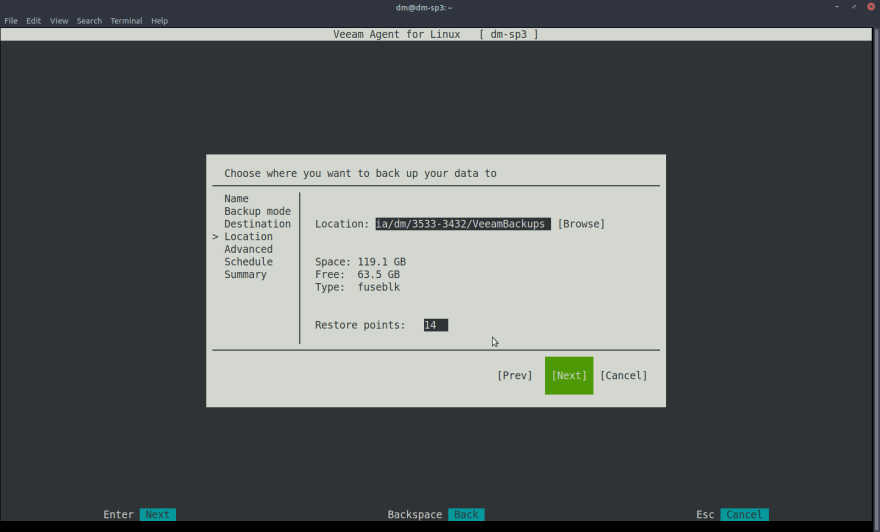
In order to select the location you want Veeam to store your backups, you can either use the [browse] button or type the path yourself either one will work. After selecting a path, you need to select the amount of restore point you want to keep (the number of backups you want to keep) I kept the defaults of 14.
Press NEXT -
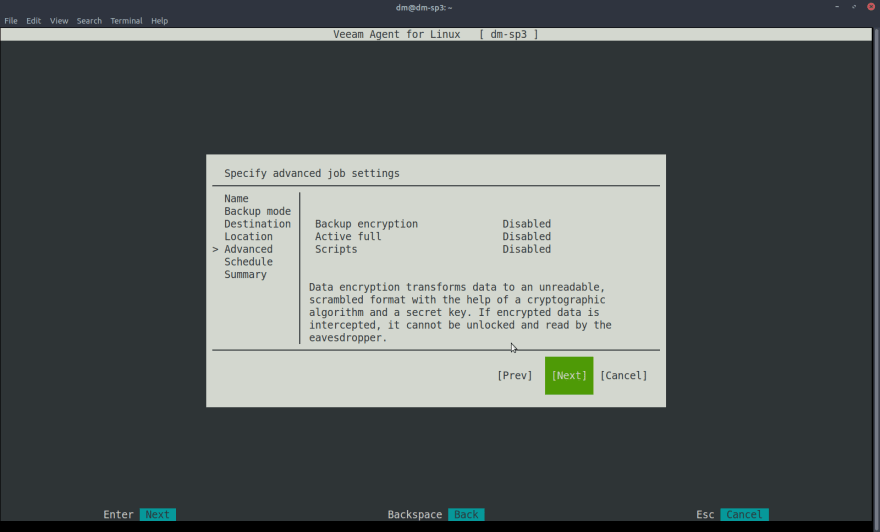
In the advanced features, we cannot select anything since these features are only available for paid versions of Veeam Agent for Linux
Note: If you want to use encryption you can always encrypt the drive that stores the backups rather than the backups themselves.
Press NEXT -
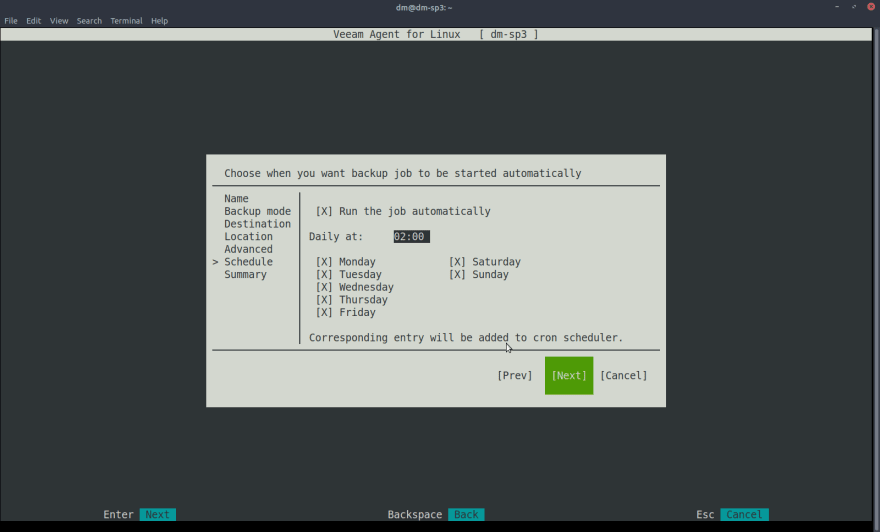
You can schedule your backup job by selecting the relevant time. I've setup mine to run every day at 2:00 AM.
Press NEXT -
This is the Summery screen where you can choose if you want to run the job now or not and Press Finish
This is it for today,
In part 2 I will go over the restore process.
If you want to get notified when I publish part 2 don't forget to follow me on one of my Twitter accounts
The_Mentor or PowerShellOnLinux.
Huge thanks for Jason Evangelho from the Linux4Everyone Podcast for the publishing tips you can find more of him at the Linux4Everyone twitter account.
-DM

Posted on September 9, 2019
Join Our Newsletter. No Spam, Only the good stuff.
Sign up to receive the latest update from our blog.
Related
November 29, 2024
