Aliko Sunawang
Posted on July 1, 2023

Divi is a popular WordPress theme that has a built-in page builder called Divi Builder (available as an integral part instead of a separate plugin). Just like other page builders like, for instance Elementor, Divi Builder can also make it easier for you to create the core pages on your WordPress website, with a visual editor. There are a bunch of design elements (called modules) you can use when creating a page with Divi Builder. One of which is Text.
The Text module, as the name suggests, is designed to add text element to your page. This module offers plenty of built-in styling options to make your text look eye-catching, including the ability to create a gradient heading without needing to add custom CSS.
However, for a certain reason, you might prefer to use custom CSS to create a gradient heading. Especially if you get used to gradient tools like Gradienta and CSS Gradient.
Creating Gradient Heading in Divi Using CSS
To create a gradient heading in Divi using custom CSS, first, you can prepare the CSS gradient first. To ease your job, you can use online CSS gradient generators as mentioned above. Here is an example of CSS gradient generated with Gradienta:
background: linear-gradient(157.92deg, #b1b9f1 0%, #288cbd 51.59%, #2c2cf0 100%);
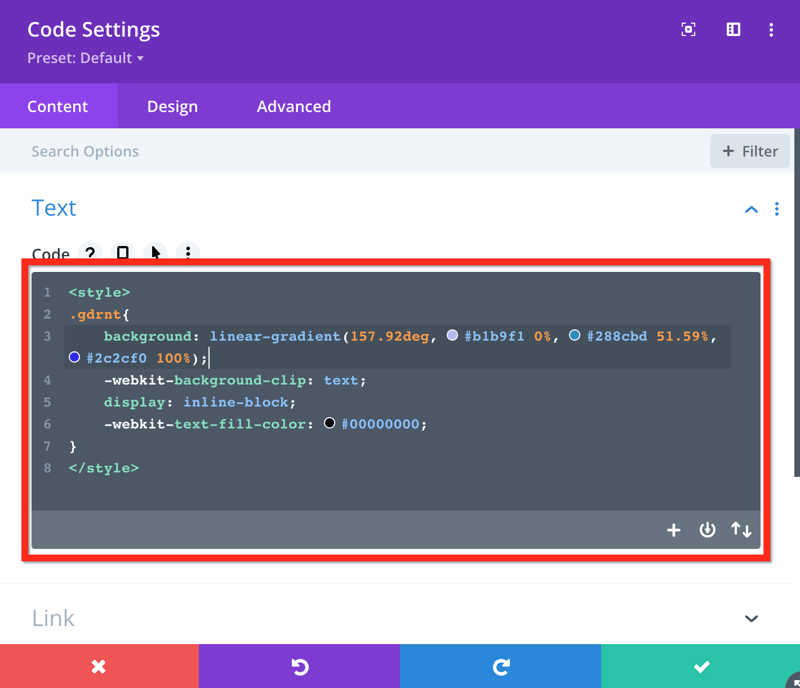
Once your CSS gradient is ready, open the Divi Builder editor and add the Code module. Add the following code to the editor.
The code:
<style>
.gdrnt{
    background-image: linear-gradient(to left, #feac5e, #c779d0,#4bc0c8);
    -webkit-background-clip: text;
    display: inline-block;
    -webkit-text-fill-color: #00000000;
}
</style>
You can replace the gradient to your liking. Please notice that the above code has the class selector name of gdrnt.
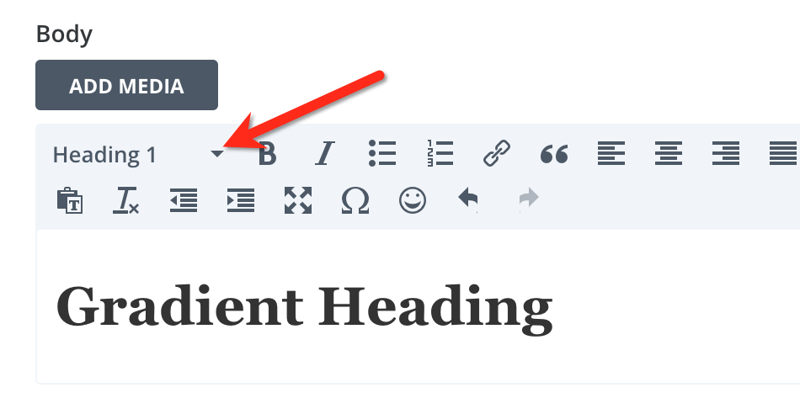
Next, add a Text module and replace the default text on the text editor. Make sure to specify a heading level.
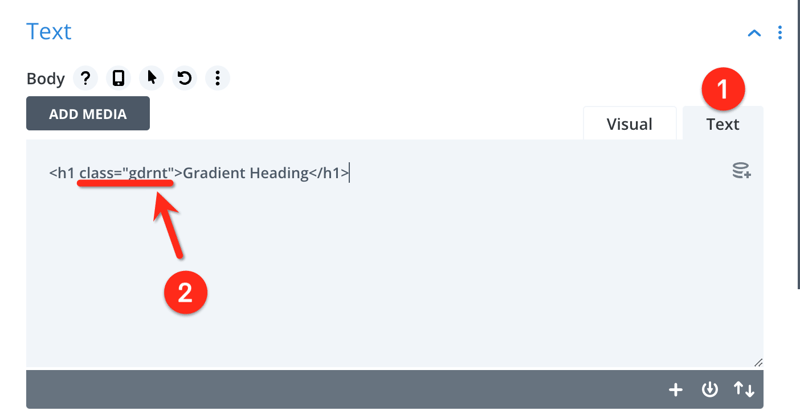
Next, switch to the Text mode and add the class.
That's it. You can enjoy the result.

Posted on July 1, 2023
Join Our Newsletter. No Spam, Only the good stuff.
Sign up to receive the latest update from our blog.


