An Introduction to Micro Frontend using Module Federation

Strapi
Posted on January 20, 2023

Author: Temitope Oyedele
Micro Frontend is a concept from microservice. They have become a popular method of increasing flexibility. It enables teams to combine components created with the same framework, various frameworks, or libraries.
In this tutorial, we will dive into what Micro Frontend is. Also, discuss its advantages and how it works by sharing its state within two different applications using Module Federation. What we'll cover:
- What is Micro-frontend?
- Benefits of Micro-frontend
- A quick look at tools used in this tutorial (module federation, Strapi, React)
- How it works
- Conclusion
Let’s get started!
What Is Micro Frontend?
The term “micro frontend” comes from the concept of microservices. Consider a Micro Frontend to be a website comprised of various web pages. These pages contain features contributed by several teams.
Consider the case of Strapi. The header section and the contents of the first page or other pages may have been produced by separate teams. These teams operate in diverse ways to construct the main Strapi website.
Micro frontends can also be considered separate pages on the main site. These pages work together to form the website. Micro frontends are a common way to boost flexibility. It enables teams to combine components created in several frameworks or libraries.
There are numerous approaches to implementing micro frontends. In this tutorial, we'll focus on module federation, but first, let's look at its benefits and how we split our apps.
Benefits of Micro Frontends
There are many benefits of using micro frontends, some of them include:
Independent deployments
Micro frontends, like incremental upgrades, help to limit the scope of deployments. All decoupled codebases should have their own CI/CD pipelines so that teams can independently determine whether their app is ready for production and, if so, that no issues from other apps will harm it. Furthermore, with monoliths, you must package and deploy all of the code for a bit of modification or fix some sections of the app. Pipelines for monoliths have long-running build and test processes, but with a micro-frontend, you would simply ship the app where the fix is required.
Independent teams
Because we have separated codebases and autonomous deployments, the teams can own the project from start to finish. The teams can have complete control over their deliverables. As an aside, in many projects with monoliths, the frontend team is structured based on technical skills. For example, one team will handle all layout and markup work, another will handle all logic work, and another will handle CSS details and animations. This setting may not be applicable in micro frontends, where each team must have all developers with Layout, Logic, and CSS detailing capabilities.
Easier maintenance and bug fixes
If you've ever worked with large applications, you know how difficult they can be to maintain, especially when they're monolithic and bound to grow large. Micro frontends, on the other hand, employ the divide-and-conquer technique. As a result of using this architecture for your web application, you can make every business requirement easier to maintain and also fix bugs.
Tech stack freedom
Because micro frontends are made up of small, independent elements, you can build each one with a different technological stack, which has proven helpful in many ways. One of which are we can divide a team into numerous tiny teams based on competence in a particular tech stack, which also adheres to the idea of single responsibility. Second, because many tech stacks will be used on the same project, it will be easier to hire fresh developers.
Simple decoupled units.
A monolith has a large amount of code that grows over time. On the contrary, the source code for micro frontends would be significantly smaller, which would be a huge relief. Furthermore, micro frontends, like microservices, would force us to create proper boundaries between apps and avoid all couplings that may unintentionally exist in monoliths.
How Do We Split Apps?
Here are some examples of how developers split large apps:
Page by page
Having multiple pages open at the same time might cause devices to crash. In these circumstances, splitting by page is the most secure choice.
You can run independent, unique micro-apps for each page if you have appropriate routing.
In terms of functionality
Assume you have a single page with numerous features. Then you may separate those notable features into smaller apps. It will turn each one into a separate application that runs a specific functionality.
By section
You can also organize your apps into sections. It allows many programs to share the same chunk or components.
Now that we understand what micro-frontend is let's take a brief look at what Strapi is as well as Module Federation.
Module Federation
Zack Jackson designed the JavaScript module federation framework. The idea is to make code sharing more manageable and autonomous. It enables one JavaScript program to import code from another. This can be accomplished by configuring Webpack.
The module will create a unique JavaScript entry file. This file is accessible to other apps. It allows you the freedom and flexibility to construct your project exactly how you want.
We now have a basic understanding of what Micro frontend is and also what module federation is. Let's now showcase how it works by doing a quick tutorial.
What Is Strapi?
Strapi is an open-source headless CMS. It enables the creation of configurable APIs in any frontend application. Strapi is simple to use since it allows you to create versatile APIs with unique features that you'll appreciate.
To keep things structured, you can build custom content kinds and relationships between them. It also has a media library to save photographs and music files.
Prerequisites
To follow through with this article, you'll need the following:
- React: React is a free and open-source frontend JavaScript library for creating UI components-based user interfaces.
- Yarn or npm installed.
- Node 14 installed.
- A basic understanding of
JavaScript.
Project Scope
To show how it works, we'll make a small app consisting of two separate applications. The first contains the header, while the other will contain the content. We'll be using Strapi to display our pricing card.
The aim is to understand how Micro Frontend works so you can use this concept to build more complex and exciting applications.
Setting up Strapi
To get started, we'll first have to install Strapi. Create a folder called microfrontends from the terminal. That's where we want our Strapi installation. Also the sample project we'll be using will also be stored there:
mkdir microfrontends
Next, cd into the just created folder and run either of the following commands:
npx create-strapi-app@latest my-project --quickstart
    #or
 yarn create strapi-app my-project --quickstart
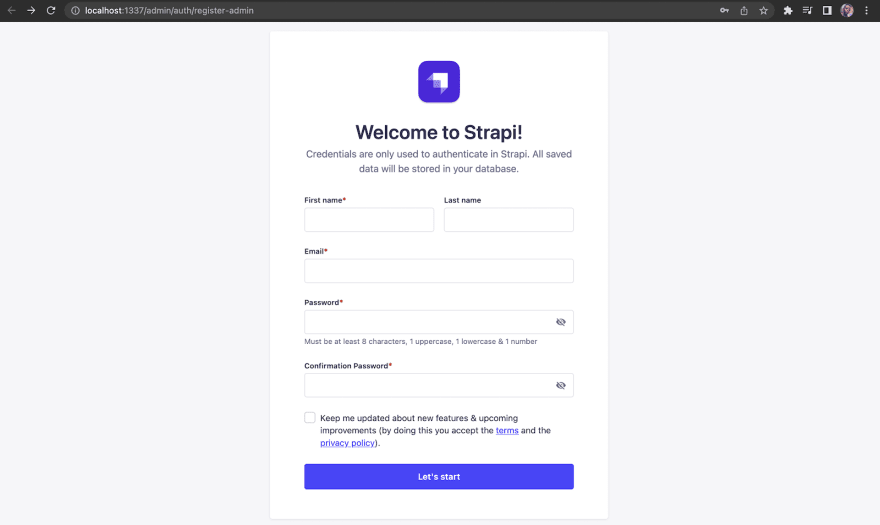
This will install all of the packages required for this project. Our Strapi application will be started instantly in our browser after installation.
After registering to configure our backend contents and APIs, it'll direct us to the admin homepage.
Creating Our Collection Type
To create a collection type, on your admin homepage, go to content-type builder and create a new collection type. I'll be naming my collection type the display name of display (Weird, right?). You'll notice that Strapi automatically pluralizes it for us.
For our Display, we'll need to create a title in the form of text, a description in the form of a rich text label, and a price in the form of text. Let's go and create them:
Click on save to save our collection, and let's move on to populate our collection.
Populate the collection
Now, in the top left corner of the admin page, select content manager. It will direct you to the page where we will add content to our database. You can populate the content with as much content as you want.
When we're through, we can either save and test it first or bypass that step and publish it right away.
To make our Display available to consume in our react Frontend, navigate to Roles under Users and Permissions Plugins. Then click on the public and scroll down to permissions.
Whenever we try to retrieve it by using the Strapi API, it sends us the data.
We are done with the first part! Let’s move on to create our frontend applications.
Setting up our frontend Applications
In our folder directory, run the following command:
npx create-mf-app
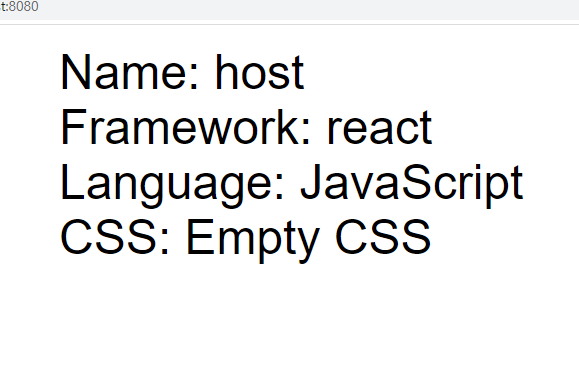
We'll call this the host app, which will consume a Micro Frontend from a remote app. Let's give it the name of host and then the port number 8080.
Then we’ll choose to React as our framework and select JavaScript and CSS
Next, cd into the just created folder and run:
npm install
You also should install axios:
npm install axios
Next, start it up by running:
npm start
We should see something like this:
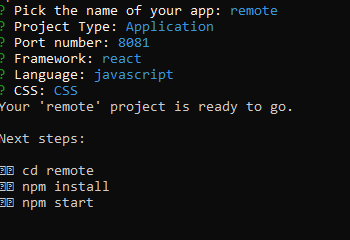
Now let's create another application for our remote App. Open a new terminal and run the same installation:
npx create-mf-app
This will be our remote app, so give it the name of remote, the project type would also be application and give it a port of 8081. We’ll also be giving it the same configuration as we did for our host application.
cd into the just created folder and run:
npm install
You can start it up by running:
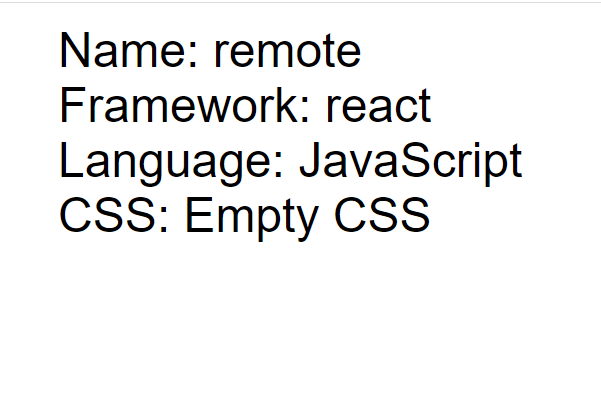
npm start
You should have something like this pop up on your browser:
We now have both of our applications set up!
Now imagine Strapi or any organization had two teams tasked with creating the first page of a site. The first team took care of the header section, while the other team took care of the contents on the first page.
The remote app we created will be for the header while the host contains our content. That is what we are going to achieve in this project. We'll combine the work done by both teams using module federation.
Navigate to the remote app. Inside our src folder, create a new file called Header.jsx and input this into it:
    import React from "react";
    import "./style.css";
    function Header() {
      return (
        <div>
          <nav>
            <ul>
              <li>
                <a href="/">Home</a>
              </li>
              <li>
                <a href="/">About</a>
              </li>
              <li>
                <a href="/">Info</a>
              </li>
              <li>
                <a href="/">Contact</a>
              </li>
            </ul>
          </nav>
        </div>
      );
    }
    export default Header;
Create another file called style.css to add a little styling to it:
    /* Fix navigation to create a sticky nav bar */
    nav {
        position: fixed;
        margin-top: -20px;
        width: 100%;
        background-color: #1a1a1a;
        padding: 0 25px;
    }
    nav ul {
        margin: 0;
        padding: 0;
    }
    nav li {
        display: inline-block;
        width: 70px;
        color: #fff;
        text-align: center;
        padding: 10px 0;
    }
    nav li:active {
        background-color: #333333;
    }
    nav li:hover {
        background-color: #8f8f8f;
    }
    nav a {
        text-decoration: none;
        color: #fff;
    }
    nav button {
        display: none;
    }
Next, go to app.jsx inside our src folder and import the Header.jsx into it. Our App.jsx should look like this:
    import React from "react";
    import ReactDOM from "react-dom";
    import Header from "./Header";
    import "./index.css";
    const App = () => (
      <div className="container">
        <div><Header/></div>
      </div>
    );
    ReactDOM.render(<App />, document.getElementById("app"));
We should have a simple header showing in our browser.
Now let's share the state of our remote App with our host app, where we'll focus on adding content. We'll convert our Header into a Micro Frontend to do this. Let's open up the webpack config file inside our host App. Scroll down to the module federation plugin. You should notice that it has a default name called remote. We could change it to any name we want, but it has to be a valid JavaScript variable name. Inside the exposes{}, add this:
"./Header": "./src/Header.jsx",
What we’re saying is that this application exposes the header. Let’s restart our remote app. To do that, press the ctrl+c to stop and then npm start.
You might not notice this, but a new file is generated by webpack. You can see it by adding /remoteEntry.js in the localhost:8081 URL.
It is a manifest of all the modules exposed from the remote application.
Let's copy the URL of our remote, which is localhost:8081/remoteEntry.js. Next, go to our host directory. Inside the src/webpack.config.js, scroll down to plugins: ModuleFederationPlugin.
Instead of posting this inside our exposes, we'll be pasting it inside the remotes{} section:
remote: " remote@http://localhost:8081/remoteEntry.js "
If you’re wondering why it's named remote, it’s because that was what we defined it as in our webpack.config in our remote application.
What we do now will allow us to access any exposed components from the remote application.
Inside our App.jsx, in our host app, lets import our Header and edit it to look like this:
    import React from "react";
    import ReactDOM from "react-dom";
    import Header from "remote/Header";
    const App = () => (
      <div className="container">
        <div><Header/></div>
      </div>
    );
    ReactDOM.render(<App />, document.getElementById("app"));
We should see our Header now showing! We just shared the state of our remote application with our host application.
The exciting thing about this is that whatever changes are being made in the remote section get to show also. The team working on the content does not have to bother with tweaking the Header.
So now, let’s build our host app by adding content that we’ll fetch from Strapi.
In our src folder create a folder called component, and a file called index.js. inside it, let’s paste this:
    import axios from "axios";
    const url = "http://localhost:1337/api/displays";
    export const readDisplay = () => axios.get(url);
Here we are fetching our display content from Strapi using Axios
Now let’s create another file called view.jsx and paste this:
    import React from "react";
    import ReactDOM from "react-dom";
    import { useState, useEffect } from "react";
    import * as component from "./components/index";
    function View() {
      const [display, setDisplay] = useState([]);
      useEffect(() => {
        const fetchData = async () => {
          const result = await component.readDisplay();
          setDisplay(result.data.data);
        };
        fetchData();
      }, []);
      return (
        <div>
          <section id="intro">
            <p className="name">
              <span>MICRO FRONTEND</span>
            </p>
            <p>
              sit amet consectetur adipisicing elit. Sed, ad inventore deserunt
              omnis numquam cumque quisquam quos, molestiae quaerat assumenda earum
              quis nihil ea explicabo illo tempora labore? Distinctio, officia.{" "}
              <a href="/" target="_blank">
                click here
              </a>
              .
            </p>
          </section>
          <div className="cards_wrapper">
            <div classNmae="pricing_card">
              {display.map((display) => (
                <div className="pricing">
                  <h2 class="title">{display.attributes.title}</h2>
                  <p class="plan_description">{display.attributes.description}</p>
                  <p class="price">${display.attributes.price}</p>
                </div>
              ))}
            </div>
          </div>
        </div>
      );
    }
    export default View;
Here, we are displaying our content. Let’s add some styling to it. Inside our index.css, replace all with this:
    body {
      font-family: Arial, Helvetica, sans-serif;
    }

    a {
      color: #e310cb;
      text-decoration: none;
    }
    a:hover {
      color: #ff17e4;
      text-decoration: none;
    }
    /* intro styles*/
    #intro {
      padding-bottom: 10rem;
      background-color: #171321
    }
    #intro p {
      font-size: 1rem;
      line-height: 1.5;
      color: #fff;
    }

    .name span {
      margin-top: 18px;
      font-family: var(--sans);
      font-size: 4rem;
      color: #86fbfb;
      display: block;
    }
    intro h2 {
      font-size: 10rem;
      color: #fff;
    }

    .pricing {
      display: flex;
      float: left;
      width: 25%;
      flex-direction: column;
      margin-left: 50px;
      margin-top: 20px;
      background-color: white;
      color: #333;
      min-height: 320px;
      max-width: 260px;
      border-radius: 8px;
      box-shadow: 1px 10px 20px rgba(0, 0, 0, .2);
    }
    .title {
      font-size: 32px;
      font-weight: 300;
      margin-bottom: 16px;
    }
    .plan_description {
      margin-bottom: 48px;
      color: lightslategray;
      line-height: 140%;
      letter-spacing: .25px;
    }
    .price {
      font-size: 52px;
      font-weight: bold;
      margin-bottom: 4px;
    }
    .price_description {
      font-size: 12px;
      color: lightslategray;
      margin-bottom: 16px;
    }
Now let’s update our App.jsx file to include our View component:
    import React from "react";
    import ReactDOM from "react-dom";
    import Header from "remote/Header";
    import View from "./View";
    import "./index.css";
    const App = () => (
      <div className="container">
        <div>
          <Header />
        </div>
        <div>
          <View />
        </div>
      </div>
    );
    ReactDOM.render(<App />, document.getElementById("app"));
Here’s our result:
We just built ourselves a Micro Frontend website using module federation!
Here's a link to codes on my GitHub repository.
Conclusion
In this article, we talked about micro frontend and its benefits, module a federation, a powerful tool for creating micro frontend apps.
We also did a tutorial, where we practiced how Micro Frontend works by creating two separate applications, one for the Header and the other for the content, which was our pricing cards using Strapi collection types. I look forward to seeing what complex micro frontend stuffs you can build with Strapi and sharing them with the community. Would you please share if you found this helpful?

Posted on January 20, 2023
Join Our Newsletter. No Spam, Only the good stuff.
Sign up to receive the latest update from our blog.


