How to connect GoDaddy domain with Heroku and Cloudflare

Evgeni Sautin
Posted on June 28, 2020

Well, if you (as me just recently) struggle to connect newly registered domain from GoDaddy with your app at Heroku, and in addition would like to use advantages of Cloudflare – this article is for you 🎯
Though you can find some useful information on the web, nothing worked for me out of the box and since I don't do this procedure on a daily basis, it wasn't obvious where is the mistake. Hope it will help you and without many words, let's jump in!
Sections
👉 Heroku settings
👉 Cloudflare settings
👉 GoDaddy settings
Heroku
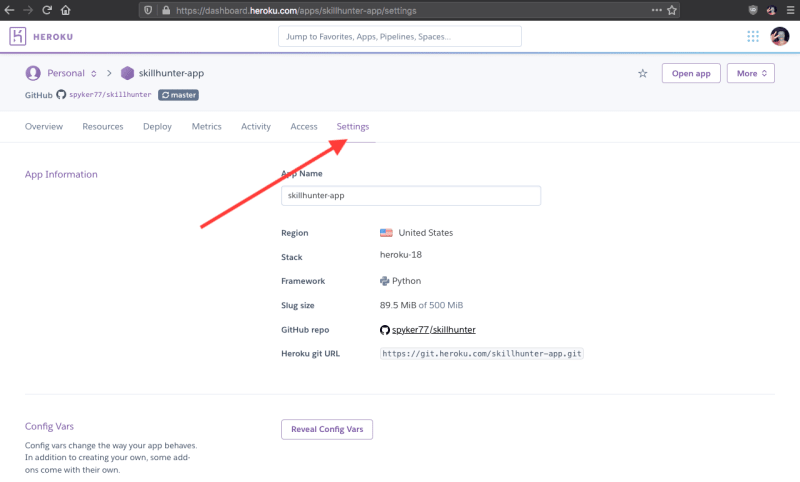
Step 1: Go to your app's settings on Heroku.
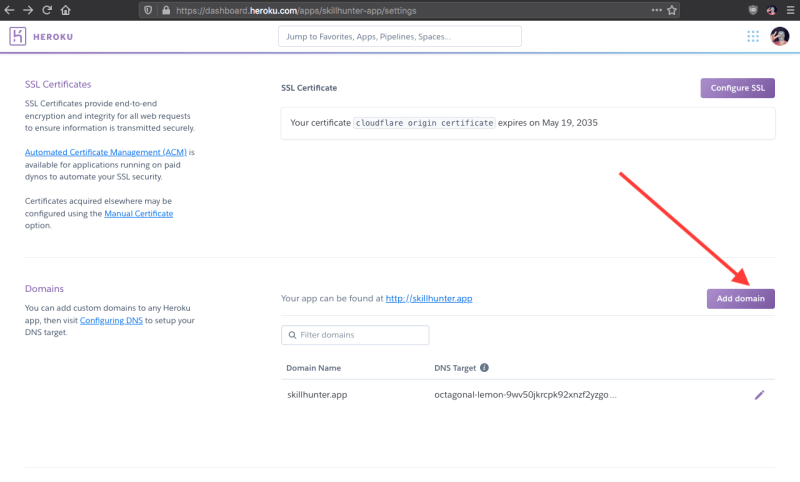
Step 2: Scroll down to the domains section and click "Add domain".
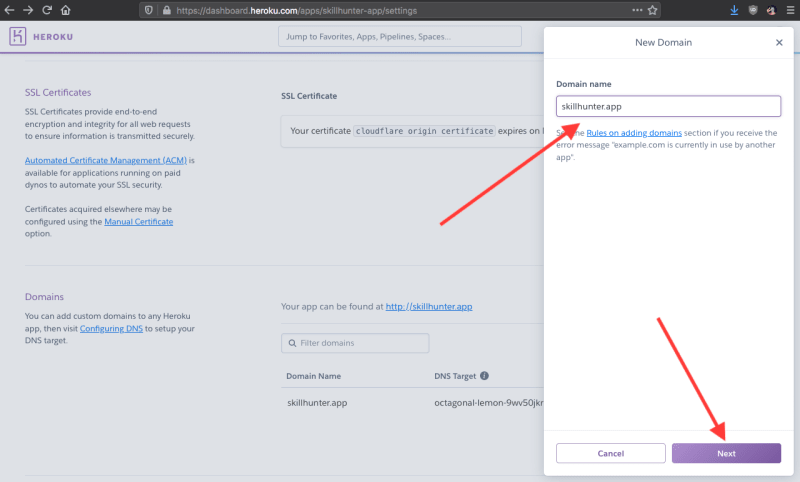
Step 3: Enter your domain name that you've got from GoDaddy and click "Next".
After clicking "Next" you'll be given a "DNS target" record that you need in the next steps.
Cloudflare
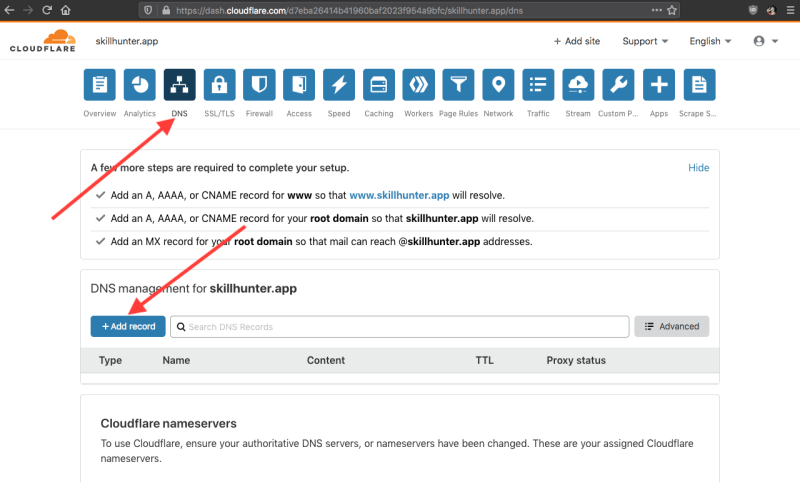
Step 1: Go to the "DNS" tab of your site and click "Add record" in DNS management section.
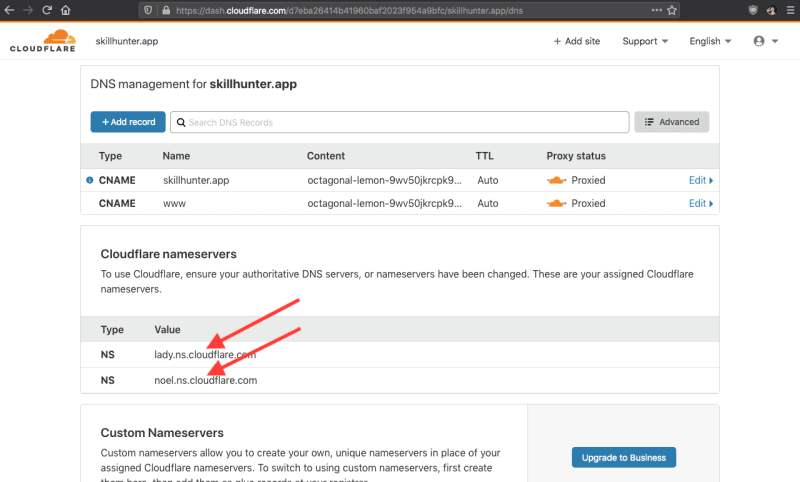
Step 2: Enter two CNAME records. First has the name of your domain and target – is your "DNS target" record from last step at Heroku. Second CNAME record must have the name of www and the same targer record from Heroku. In order to finish with this tab, copy provided nameservers as you gonna need them soon.
Step 3: Go to the "Page Rules" tab and let's add redirect from www address to the main clean one. For example, in my case www.skillhunter.app redirects to skillhunter.app. Pay attention to asterisk (*) character in the first record and trailing $1 in the last one.
GoDaddy
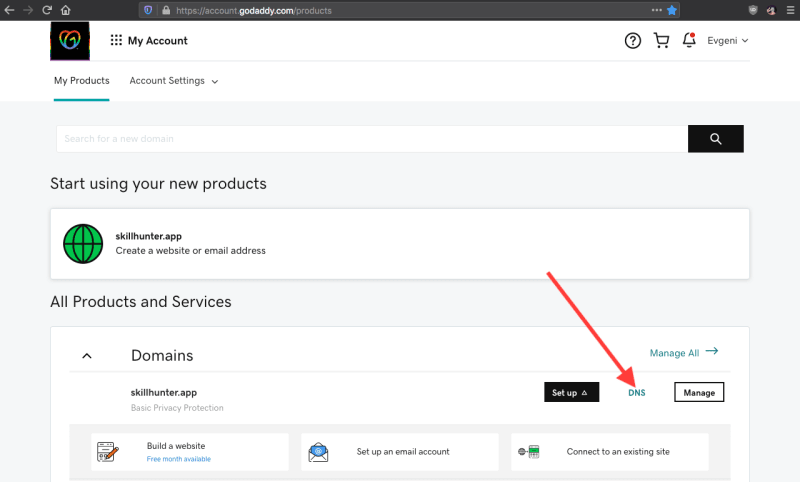
Step 1: From your product's page click on "DNS" related to your domain.
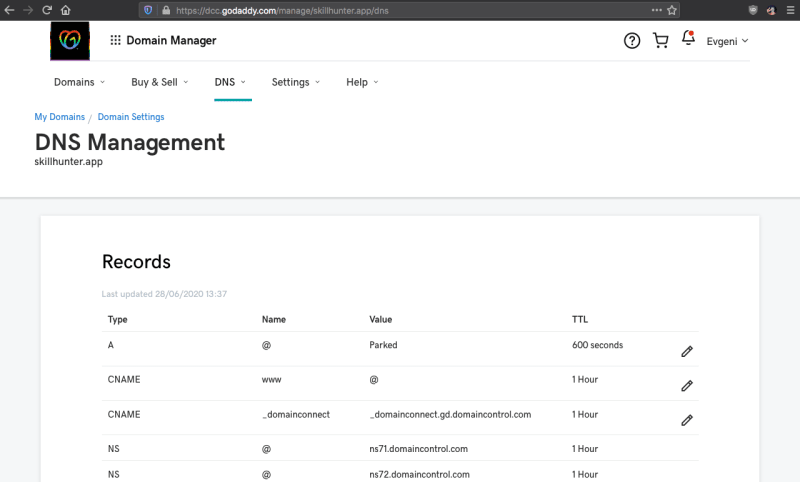
Step 2: Now you should see DNS records similar to the following.
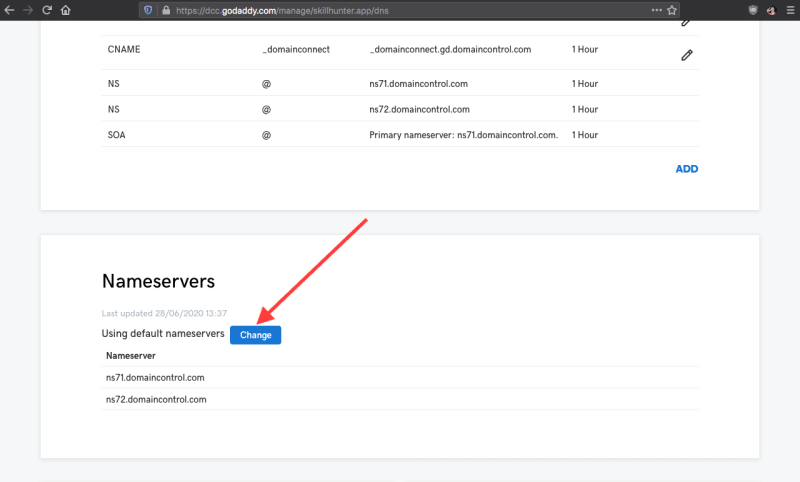
Step 3: Scroll down to the Nameservers section and click "Change".
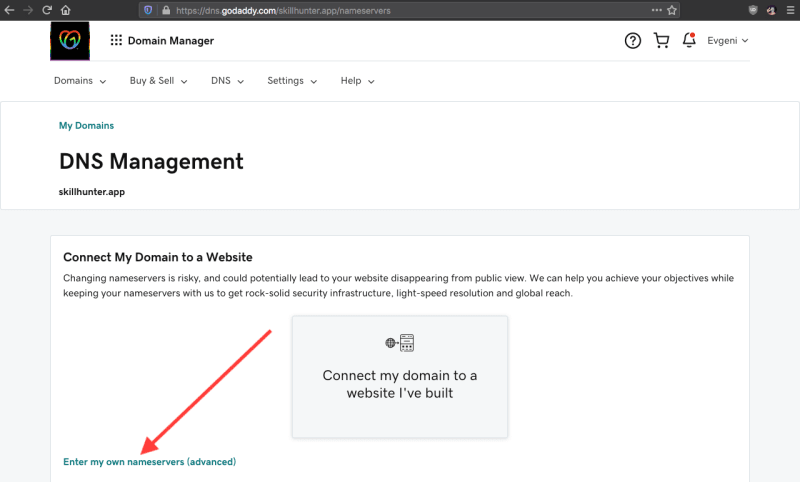
Step 4: Click the phrase "Enter my own nameservers (advanced)".
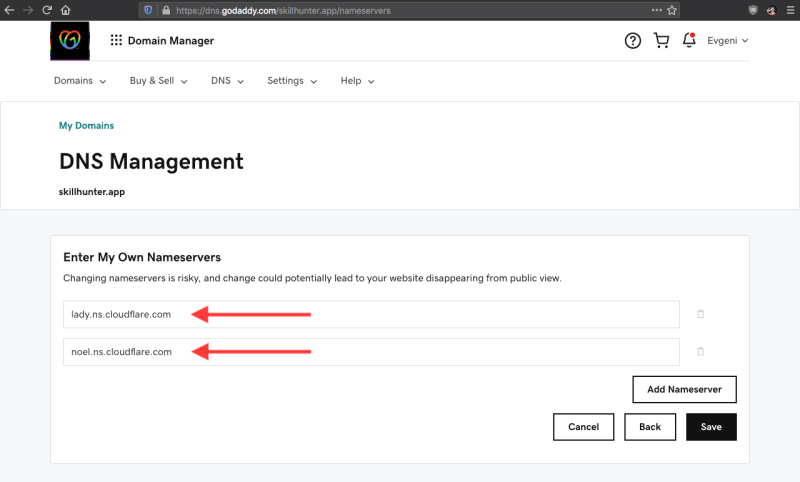
Step 5: Enter the nameservers, that you've copied at step 2 of Cloudflare settings and click "Save".
Congrats 🎉
You did it! Just don't forget to wait, as DNS records update may take up to 72 hours.
Last but not least, big shout out to Clint Adair from Unsplash for cover photo!

Posted on June 28, 2020
Join Our Newsletter. No Spam, Only the good stuff.
Sign up to receive the latest update from our blog.
