LiveCode is a modern day HyperCard

Andre Garzia
Posted on September 23, 2019
This post is a reply to Why HyperCard had to Die — by Stanislav. I’m not saying the post is wrong, I am just presenting an alternative that is alive and working well. LiveCode is a modern day HyperCard and everyone who used HyperCard will feel at home at it.
LiveCode runs on macOS, Windows and Linux and can generate standalone binaries for all those platforms plus Android and iOS. You can get it from https://www.livecode.com or you can get a GPL version of it from https://www.livecode.org.
In this post, I will recreate the demo that Stanislav created on their post which was a simple four operation calculator. I hope readers will notice how familiar the environment is and yet how modern it became.
Disclaimer: I work for LiveCode.
LiveCode Start Center
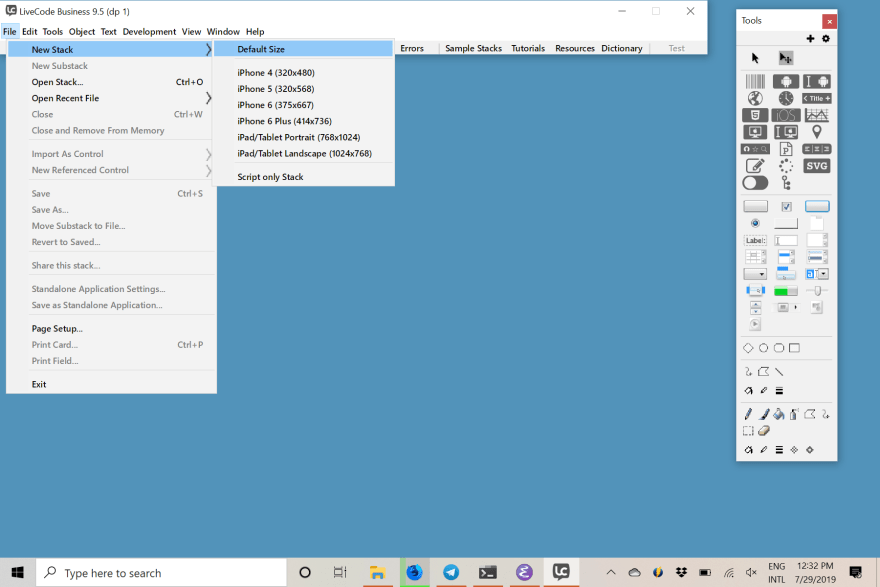
The first step is to create a stack.
Creating a new stack
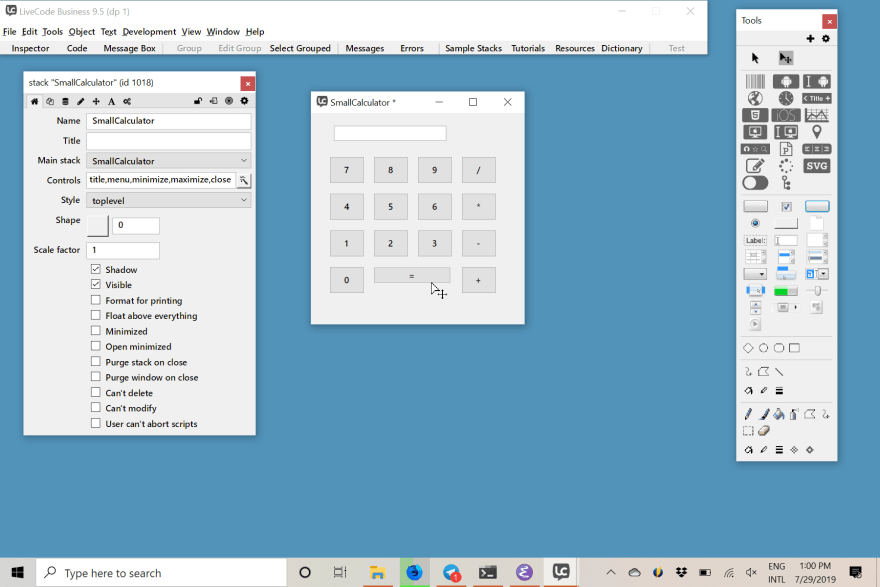
We name it SmallCalculator using the Stack Inspector that is available from the menu or with the CTRL+K hotkey.
Naming the stack
Lets drag & drop a field into the stack to serve as our LCD for the calculator.
Drag & Drop an object into the stack
Be aware that just like HyperCard, we’re working with a stacks -> cards -> objects metaphor. All we’re doing here is targetting card 1 which is the first card on the stack. When I mentioned droping a field into the stack, it is actually creating a field on card 1 of stack “SmallCalculator”.
Naming the field
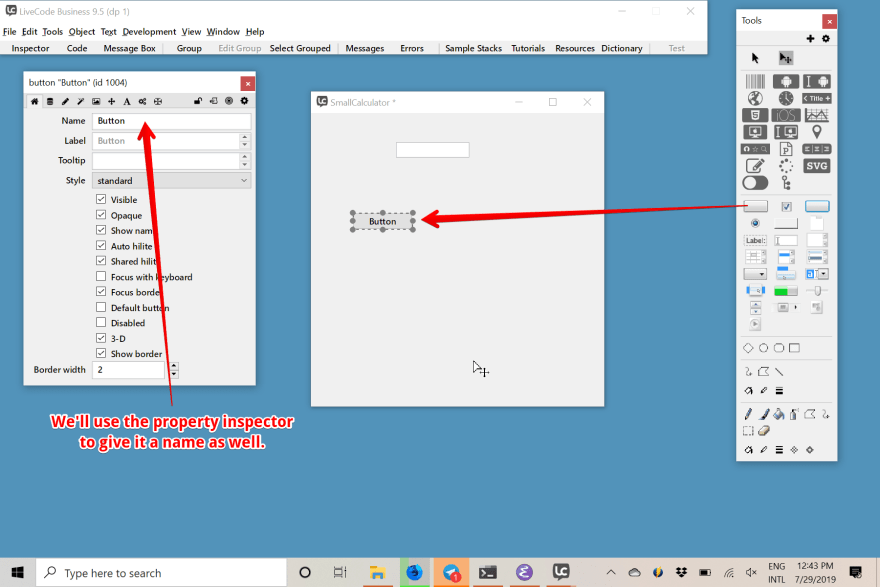
To create the buttons we also drag & drop from the tools palette.
Creating and a button
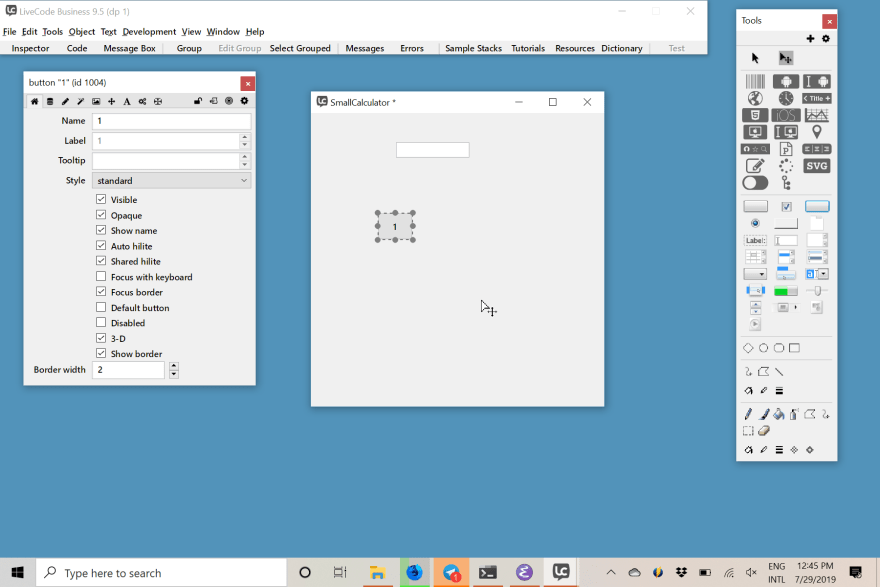
Lets name it and use the drag handlers to resize it (much like you’d do on a graphics design program).
Resizing and naming the button
After that it is time to edit the script for the button. There are multiple ways to access the script of an object. The most discoverable one is using the menus.
Accessing the object script
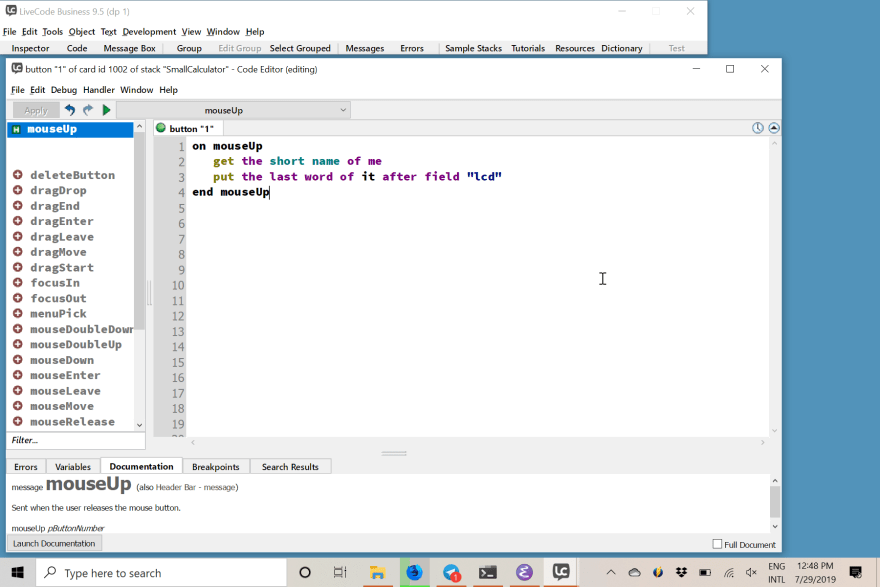
I’m going to try to mimic the script of the original post as much as possible. Be aware that LiveCode language has many more commands and expressions available for it than HyperCard did and the way I am building this demo is not the optimal way.
Editing the script for the button
Observe that just like HyperCard, you don’t need to compile a project to use it. On the top of the tools palette there are two different arrows. One is design mode and the other is interact mode. You can switch modes at any time you want. If you switch now and click the button three times, you’ll see the number 111 in the LCD field.
Now, we’re going to copy and paste enough buttons to build the number pad of the calculator. We’ll simply use CTRL+C and CTRL+V (or their CMD equivalents on a mac) to copy and paste them. I also took some time to move the objects around.
The number pad of the calculator
The next step is creating the operations buttons and the equal button. I just used copy and paste on the number buttons and gave them a name to match the math operation. The equal button was built by dragging and droping a new button from the tools palette into the stack.
Calculator with operations and equal button
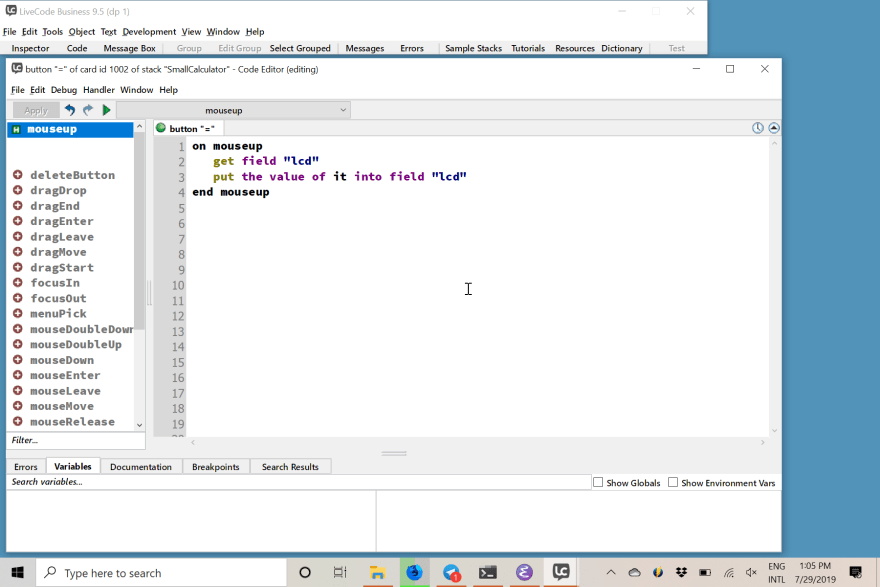
Now, it is time to write the script for the equal button.
Script Editor showing the script for the equal button
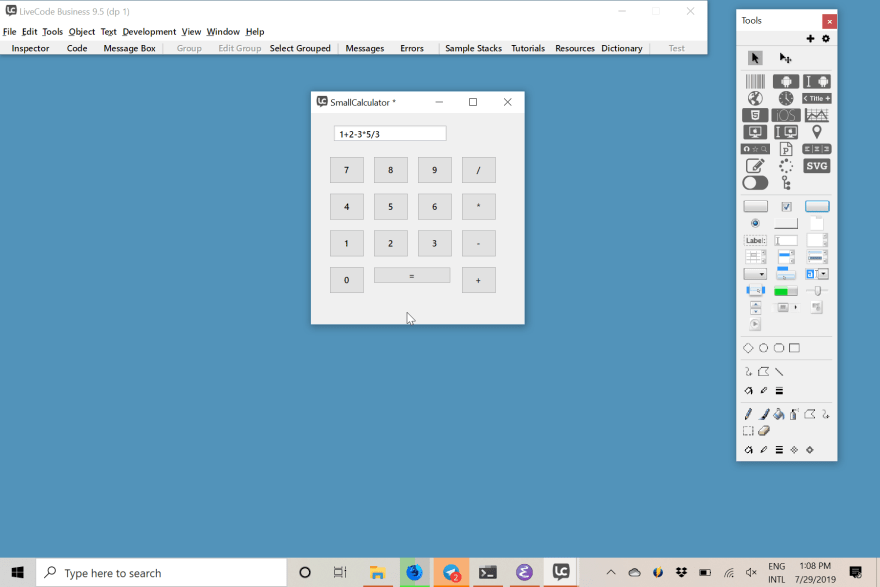
Lets take our calculator for a spin.
The same math expression as the demo
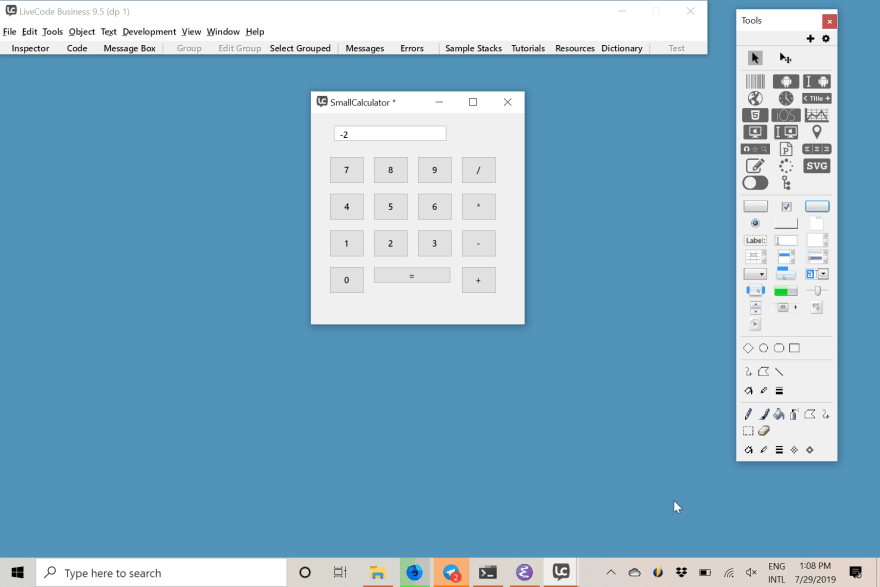
And the result after pressing equal.
The same result
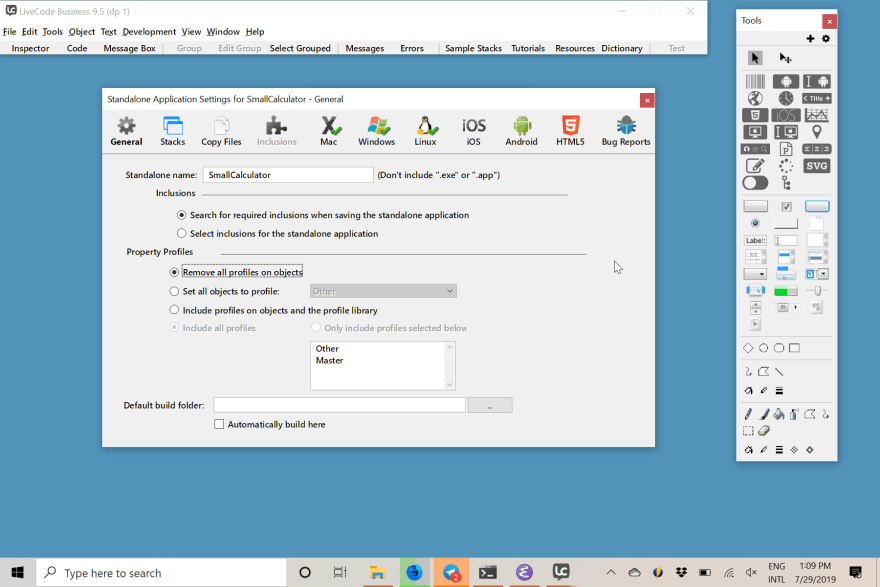
Now, lets deviate a bit from the demo and show something HyperCard never had. From the File menu I’ve accessed the Standalone Application Settings to configure how this stack will be deployed. I can from my windows machine deploy to macOS, Windows, Linux and Android. I can’t deploy for iOS for obvious (Apple argh) reasons. I will build only for Windows at this time.
Standalone Application Settings
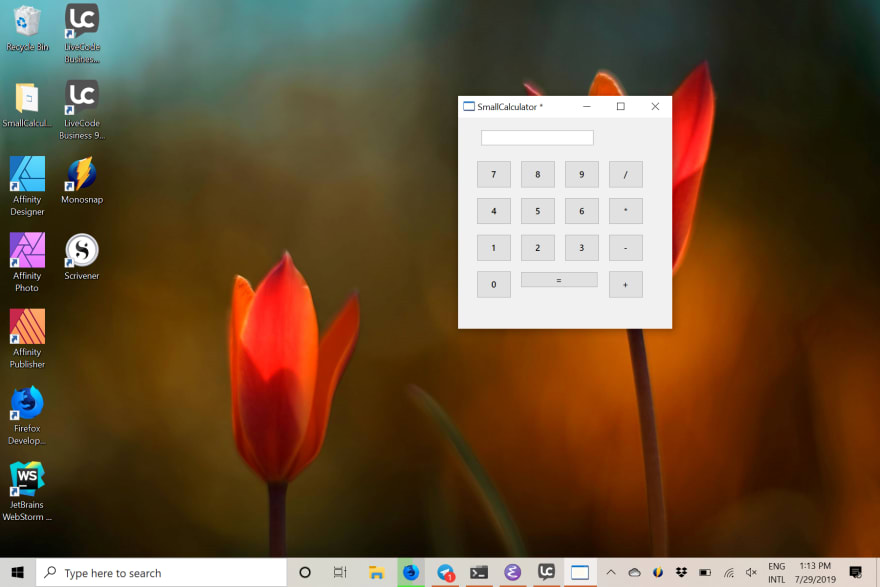
And this is the Small Calulator running on windows as a standalone.
SmallCaltulator.exe
I hope you did enjoy this post and are curious to take LiveCode for a ride. Every couple months some post appears on HN or lobste.rs about HyperCard and I see a ton of people longing for it. I wonder how many of them are aware of LiveCode. I suspect many will love it as much as I do.

Posted on September 23, 2019
Join Our Newsletter. No Spam, Only the good stuff.
Sign up to receive the latest update from our blog.

