ASP.NET Core in Azure App Services' Docker Images - Part 3

Shawn Wildermuth
Posted on March 24, 2020
 In this last post in the series, i'll show you how to use GitHub Actions to automate when you want to push a new version of your container to your Azure App Service.
While you could do the same automation in a lot of other tools, the important idea here is that you want to automate it all.
The Series
This will be a three part series:
Getting an ASP.NET Core project running on Docker Desktop (here)
Deploying Docker Images to Azure App Services (here)
Automating Docker Image Deployment with GitHub Actions (this post)
Automating Deployments
In order to automate the process, I'm going to use GitHub Actions. GitHub Actions is a system for running scripts based on triggers in your GitHub projects. There are other systems that do this (including VSTS, Jenkins, etc.) but I'm going to show you how to do it with GitHub Actions, but it's likely to be similar with any of these other tools.
In this article, i'll be showing how to use Actions to rebuild your container so that it's updated and redeployed on changes. If you want a quick example of how to also use Actions for CI/CD, I have this video I created a while back:
Using Actions
I'll start by opening the GitHub repository and clicking on the Actions tab of the project:
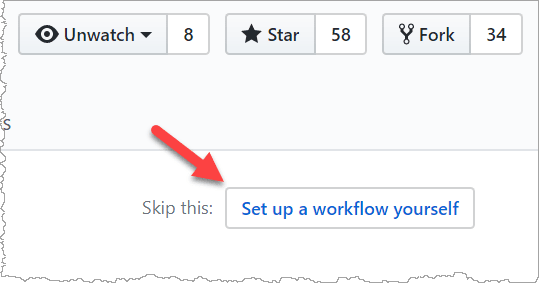
This page will help you out with some standard boilerplate, but for deploying a new container, let's just click on the “Set up a workflow yourself” as seen here:
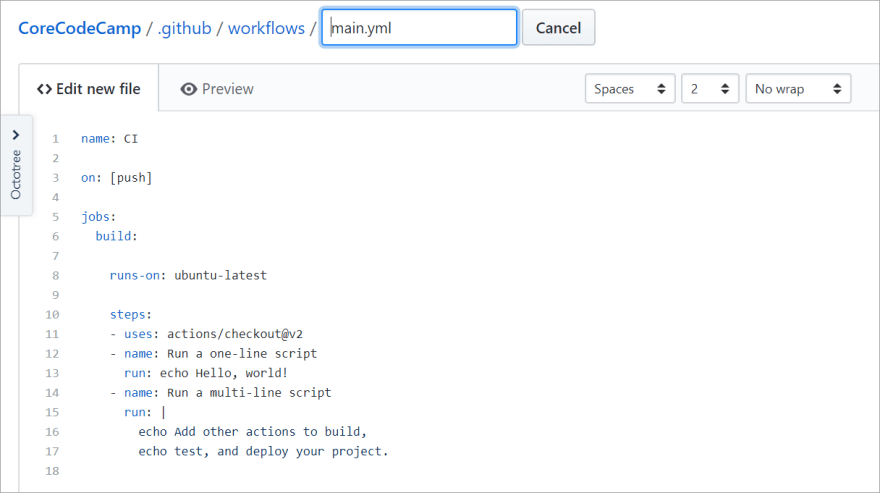
Once you do that, it'll start a new .yml file for you. This file is the instructions for doing whatever action want. In our case we want to build a docker file and update in the Azure Container Registry:
Notice how this new file will be put in a subdirectory in your project (e.g. .github/workflows). This file will become part of the registry. I usual change the name of the file to something descriptive (e.g. deploy.yml).
Now let's go through the file and make changes.
First, on the first line of the file, change the name to something you can recognize (this will be viewable in the dashboard):
name: CodeCamp-Deploy
Next the ‘on:’ line is all about what kind of trigger to use. For me since this will be a live site, I don't want to deploy a new container on every push to the repository (as the default is shown). Instead I want to create a new container whenever I tag a build. One technique I like is:
on:
  push:
    tags:
      - 'v*'
This effectively says, if there is a push to the server that is tagged with a new version, then I want a new container built. If you're deploying to a test site, doing it on every push is fine, but I wanted a more granular basis.
The next section is just setting how the jobs. In our case there will be one and only one job and we'll call it ‘build’. Lastly, the new build needs to pick what OS to run the job on. In this case I'm just using ubuntu:
jobs:
  build:

    runs-on: ubuntu-latest
Next, we'll add the steps to the job (this is usually in the template by default):
    steps:
      - uses: actions/checkout@v2
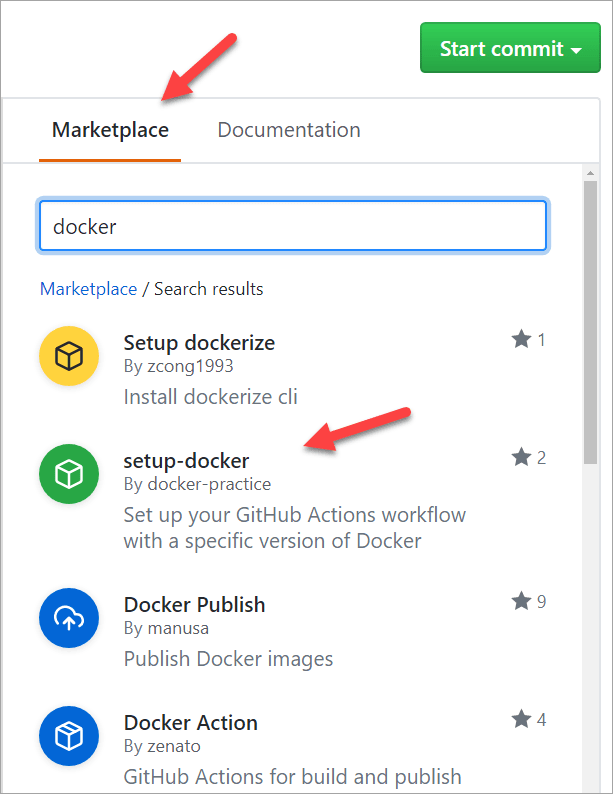
This first step is to make sure that the checkout actions are supported (e.g. that I can checkout a build from GitHub). These ‘uses’ statements are reusable blocks that we can specify to do common tasks. If you look at the right panel, you'll see a list of these task blocks:
These can be useful in building a script of specific tasks. For our needs, let's walk through of those tasks. The next thing we'll want to do is clear the rest of the script so it looks like this:
name: CodeCamp-Deploy

on:
  push:
    tags:
      - 'v*'

jobs:
  build:

    runs-on: ubuntu-latest

    steps:
    - uses: actions/checkout@v2
Next search in the Marketplace for ‘docker-login’ and pick the “Docker Login” since we'll need to login to docker for the push to Azure:
When you click on “Docker Login” it will open the documentation and example. If you just click on the copy button:
Then copy it to your yml file, you'll see that it needs to line up with the other blocks. The yml file is using indention to specify structure, so make sure the structure is wrong. Also notice that the editor here is trying to help you with intellisense and error marks:
Now it needs three pieces of information to login. The first two are the username and password. Don't put them here (especially in a public repo as you'll be leaking your credentials). Instead let's save this file by clicking on the “Start commit” button to save our place:
This will take you to the file as committed in the project. Click on the settings for the project to specify the credentials securely:
Click on the “Secrets” section to create your secrets:
Now create two secrets, one for your Username and one for the Password. Once you create a secret, it's not visible or editable. You'd have to remove it and re-create it:
Remember these keys and return to the Code Tab and navigate to the .yml file (.github/workflows). Click the pencil icon to edit the file:
This will take you back to the same editor. You can edit this on your own machine, but I like the help the editor is giving me with the file type.
You're going to want to use a replacement so that Github injects your secret like so:
      with:
        # Container registry username
        username: ${{ secrets.DOCKER_USER_NAME }}
        # Container registry password
        password: ${{ secrets.DOCKER_PASSWORD }}
In this way, you'll get the secret without leaking it. Lastly, we need to login into a specify registry. Since we stored it in the Azure Container Registry, we can get it from the Azure portal:
Then you can copy that to the ‘login-server’ line:
      with:
        # Container registry username
        username: ${{ secrets.DOCKER_USER_NAME }}
        # Container registry password
        password: ${{ secrets.DOCKER_PASSWORD }}
        # Container registry server url
        login-server: https://atlantacodecampregistry.azurecr.io
Now we're logged into the registry and we're ready to build the image. We won't need anymore tasks, we can just write the rest of the code. First we need to build our image using the docker commands we used to build it and deploying from part 2 of this series:
      - name: Building Docker Image
        working-directory: ./src/CoreCodeCamp
        run: docker build .. -f ./Dockerfile -t atlantacodecampregistry.azurecr.io/atlcc:latest
The name is self-evident (and will show up as you're debugging the step). The working directory should be root of your project. Depending how your project is setup, I usually recommend building the docker image from teh root of the .sln file and using -f to point at where the docker file exits. Don't forget to tag the build with teh complete registry name and tag.
Note the ‘run’ command will let you just execute CLI commands which is why we're using it to build the image.
Lastly, we'll want to push the image to the registry (so that our container will be pulled by App Services):
      - name: Push the Image
        working-directory: ./src/WilderBlog
        run: docker push atlantacodecampregistry.azurecr.io/atlcc:latest
Now your entire file should look like this one:
name: CodeCamp-Deploy

on:
  push:
    tags:
      - 'v*'

jobs:
  build:

    runs-on: ubuntu-latest

    steps:
    - uses: actions/checkout@v2

    - name: Docker Login
      uses: Azure/docker-login@v1
      with:
        # Container registry username
        username: ${{ secrets.DOCKER_USER_NAME }}
        # Container registry password
        password: ${{ secrets.DOCKER_PASSWORD }}
        # Container registry server url
        login-server: https://atlantacodecampregistry.azurecr.io

    - name: Building Docker Image
      working-directory: ./src/CoreCodeCamp
      run: docker build .. -f ./Dockerfile -t atlantacodecampregistry.azurecr.io/atlcc:latest

    - name: Push the Image
      working-directory: ./src/CoreCodeCamp
      run: docker push atlantacodecampregistry.azurecr.io/atlcc:latest
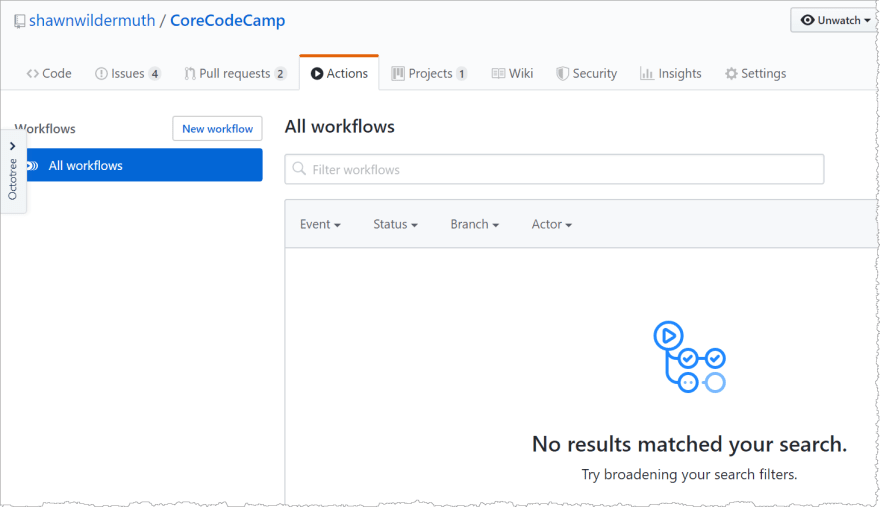
Commit the changes and return to the Actions Tab of the repository. You'll notice your action is there but there are no results. That is because we haven't triggered it yet:
Next, let's go back to Visual Studio and push a tag to make the deployment happen. Open the Team Explorer (I'm using the Git support in Team Explorer. If you want to add tags with the CLI, feel free):
You'll want to create a new tag and start it with a ‘v’ since we're triggering on any push that is tagged with "v*":
Create the tag then push all the tags to the server. Go back to actions and you'll see the action triggered and you can either watch it happen or debug it if it fails:
Make sense? If you run into trouble, just comment on this post and I'll try to get you unstuck. The first one is always the hardest action to create.
      This work by [Shawn Wildermuth](http://wildermuth.com) is licensed under a [Creative Commons Attribution-NonCommercial-NoDerivs 3.0 Unported License](http://creativecommons.org/licenses/by-nc-nd/3.0/).
      Based on a work at [wildermuth.com](http://wildermuth.com).
If you liked this article, see Shawn's courses on Pluralsight.

Posted on March 24, 2020
Join Our Newsletter. No Spam, Only the good stuff.
Sign up to receive the latest update from our blog.


