How to Copy Text to Clipboard using JavaScript?

Shameer Chagani
Posted on September 7, 2022

Hello my dear friends,
Today we are going to see how we can copy any text or link to clipboard using JavaScript.
I decided to share this in of the projects the clients requirement was visitor should be able to copy the generated link to the clipboard. Its not something new you may have came across many websites like Dropbox or Google Drive to mention the popular ones, when you click on get link/ share it creates a link and next to it you get a button copy and then it copies the link to your clipboard.
Let me tell you this, it is much more easier than you think.
so let's get started.
Am going to create a folder on my desktop copyTextJS and create 3 files inside this folder:
- index.html
- style.css
- script.js
am going to open the folder in VScode you can use your favorite editor which you are comfortable with.
open index.html and paste the following code.
<!DOCTYPE html>
<html lang="en">
  <head>
    <meta charset="UTF-8" />
    <meta http-equiv="X-UA-Compatible" content="IE=edge" />
    <meta name="viewport" content="width=device-width, initial-scale=1.0" />
    <title>Copy Text To Clipboard</title>
    <link rel="stylesheet" href="style.css" />
  </head>
  <body>
    <main class="container">
      <div class="wrapper">
        <form>
          <input
            type="text"
            name="text"
            id="text"
            placeholder="Type any text and click copy"
            autocomplete="no"
          />
          <button id="btn" class="btn">Click to Copy</button>
          <br /><br />
          <textarea cols="30" rows="5"> </textarea>
        </form>
      </div>
    </main>

    <script src="script.js"></script>
  </body>
</html>
In the above HTML file we have:
- Linked our style.css
- Linked the script.js
- Created a form with input box(for the user to type the text to be copied), a button which will execute our function on click, textarea (not needed though) I will use this to paste the copied text so as to show you!
lets style the above compnents;
Open style.css and paste the following code
* {
  margin: 0;
  padding: 0;
  box-sizing: border-box;
}
main {
  height: 100vh;
  width: 100%;
  background-color: #eee;
  display: flex;
  justify-content: center;
  align-items: center;
}
.wrapper {
  background: #fff;
  width: 400px;
  height: 200px;
  box-shadow: 5px 5px 15px 10px rgba(0, 0, 0, 0.2),
    5px 5px 15px 10px rgba(255, 255, 255, 0.5);
  border-radius: 8px;
  display: flex;
  justify-content: center;
  align-items: center;
}
input#text {
  padding: 5px 10px;
  font-size: 18px;
}
button#btn {
  padding: 5px;
  font-size: 18px;
  border-radius: 6px;
  border: none;
  outline: none;
  cursor: pointer;
  background: transparent;
  color: #4b4949;
  box-shadow: 1px 1px 2px 2px rgba(0, 0, 0, 0.2);
  transition: all 0.3s ease-in-out;
}
button#btn:hover {
  background-color: #76daf6;
  box-shadow: 5px 5px 2px 3px rgba(0, 0, 0, 0.3);
}
I will not go deep into the styles above.
You can style yours the way you like.
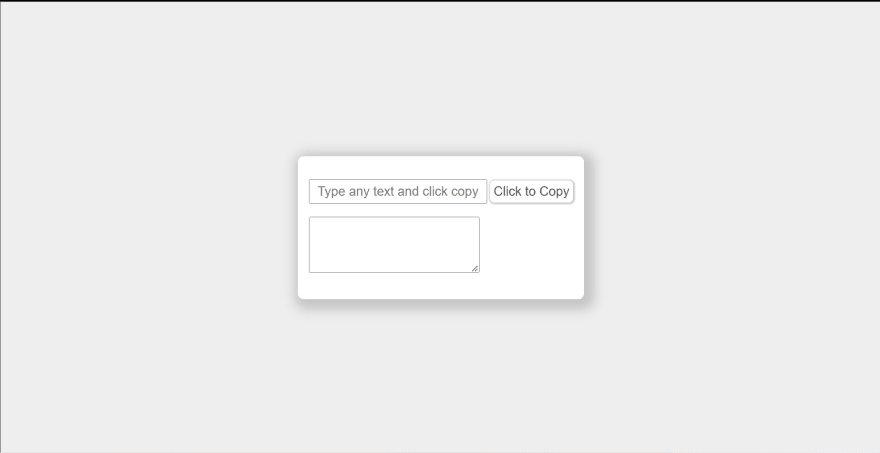
Our webpage should look something like below:
Now lets begin to code our javascript
open script.js and copy the following code:
const btn = document.getElementById("btn");
btn.addEventListener("click", copyText);

function copyText(e) {
  e.preventDefault();
  const text = document.getElementById("text");
  text.select();
  document.execCommand("copy");
}
lets understand our code:
Line 1 we have grabbed our button
Line 2 we add click event to the button which will trigger a function copyText
lets understand our function now.
we have used e.preventDefault() to prevent the default behaviour of the form.
We grab our textbox, and used javascript method select() to select the text typed inside the textbox
Now we come to the magical line of code
document.execCommand("copy");
When an HTML document has been switched to designMode, its document object exposes an execCommand method to run commands that manipulate the current editable region, such as form inputs or contentEditable elements.
copy
Copies the current selection to the clipboard.
The above line of code, copies the selected text to the clipboard.
So we have reached end of the mini tutorial. Hope you have enjoyed it.
If you have liked the post or it was something new that you have learned today please do not forget to give a like. And if you have not already please give a follow to receive notifications whenever there is a new post.
Here are the links to my previous post please have a look:
How to create a responsive navbar with toggler button animation using flexbox?
https://bit.ly/3qk9QQ4
How To Create Help Section for Your Website Using HTML & CSS?
https://bit.ly/3ewA7Ys
How to Create Simple Animations using HTML & CSS...(Text Slide and Fade)
https://bit.ly/3TOktrM
Have a great day.

Posted on September 7, 2022
Join Our Newsletter. No Spam, Only the good stuff.
Sign up to receive the latest update from our blog.
Related

October 25, 2024
October 6, 2024


