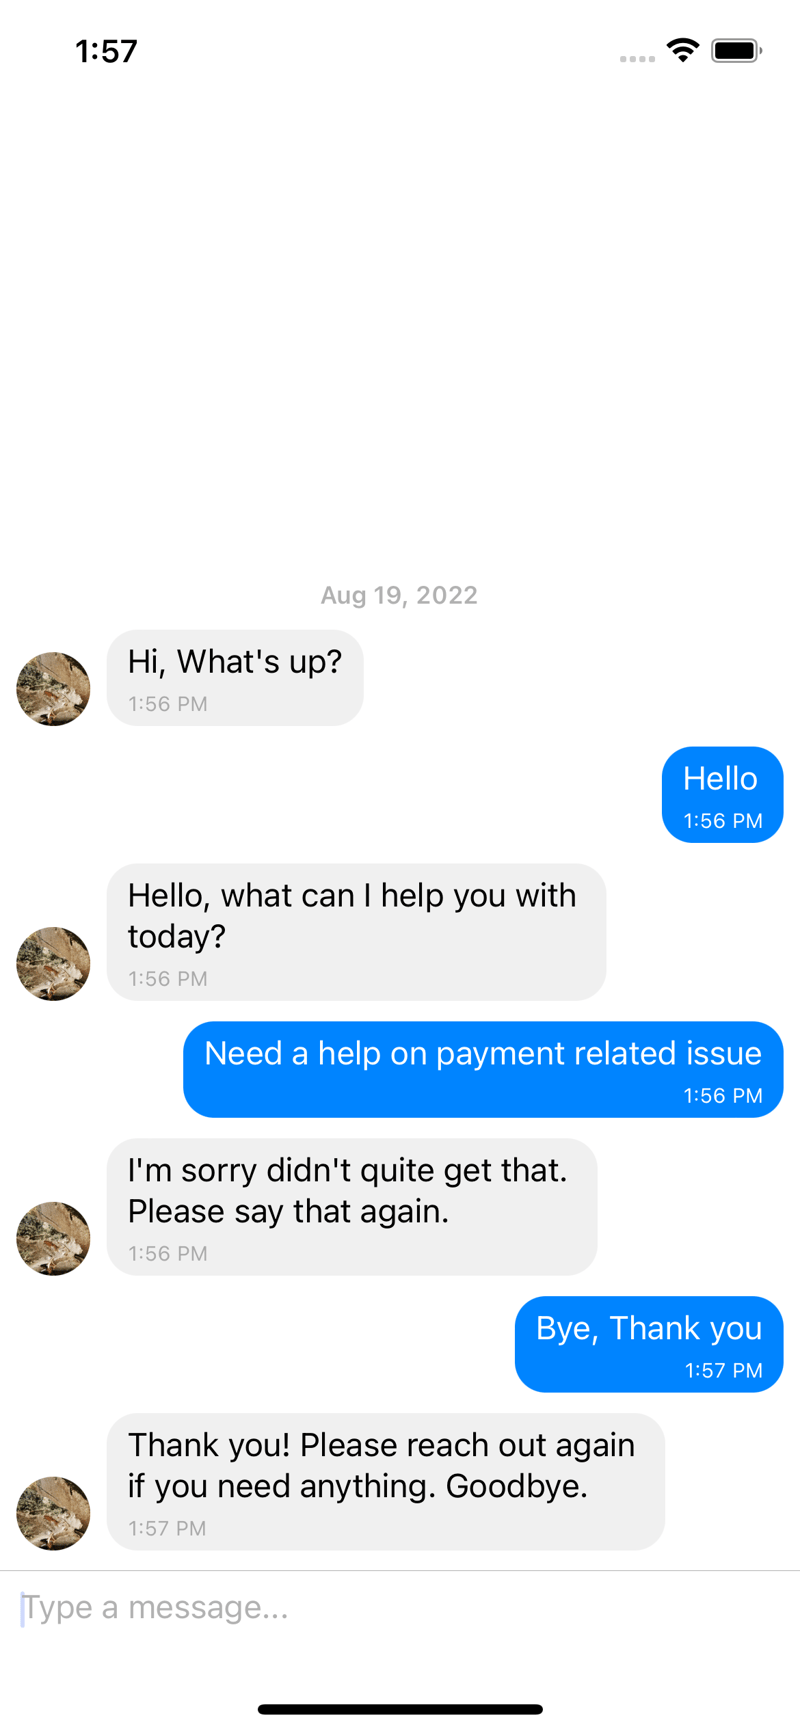
React native Twilio Chatbot Integration

Shanmukha Sai Korlakunta
Posted on February 27, 2024
Twilio offers multiple services such as SMS, voice & video calling, Chat, Email, Live streaming, chatbot, etc. We can integrate these services with backend and frontend technologies, and also we can host our services on Twilio instead of external servers.
Now we are going to build a chatbot app in React Native using “Twilio Autopilot”.
Prerequisites:
Integration steps:
1) Create a React Native application.
2) Install dependencies: axios and react-native-gifted-chat.
3) Setting up Autopilot:
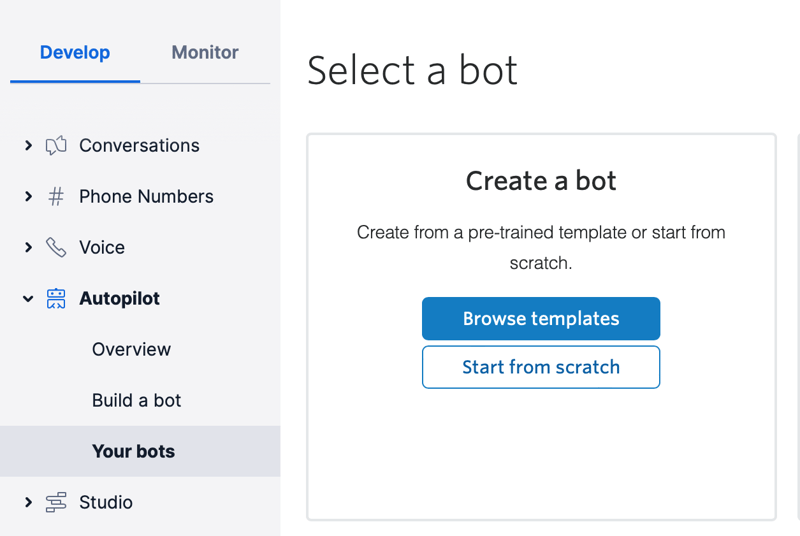
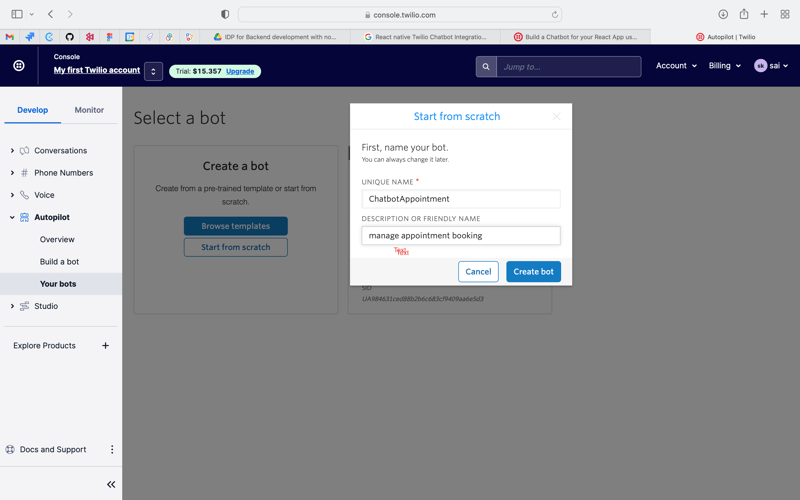
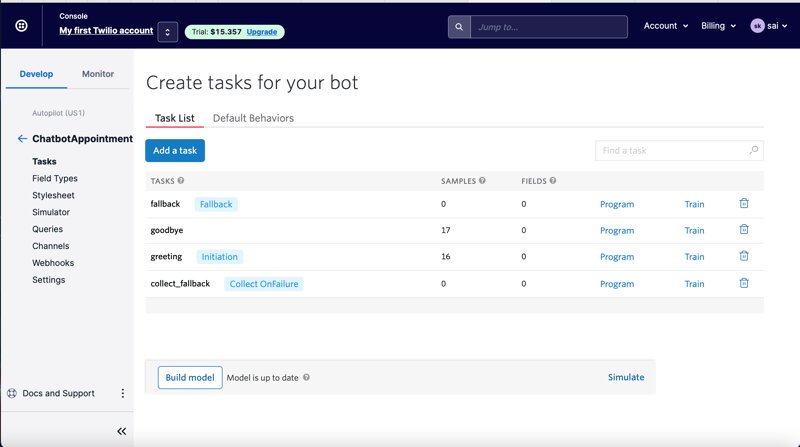
- From your Twilio Autopilot Dashboard in the Twilio console, create a new bot using the “Appointment Scheduling” template and give it a name of your choosing.
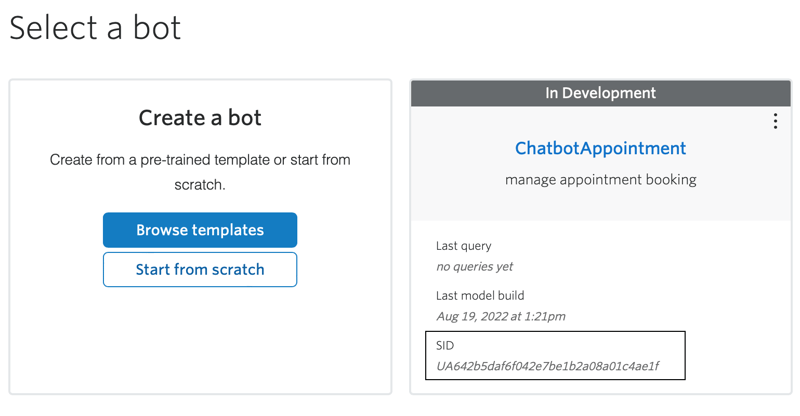
- Copy SID from the newly created bot. We will need it in the next step.
4) Setting up Twilio Functions:
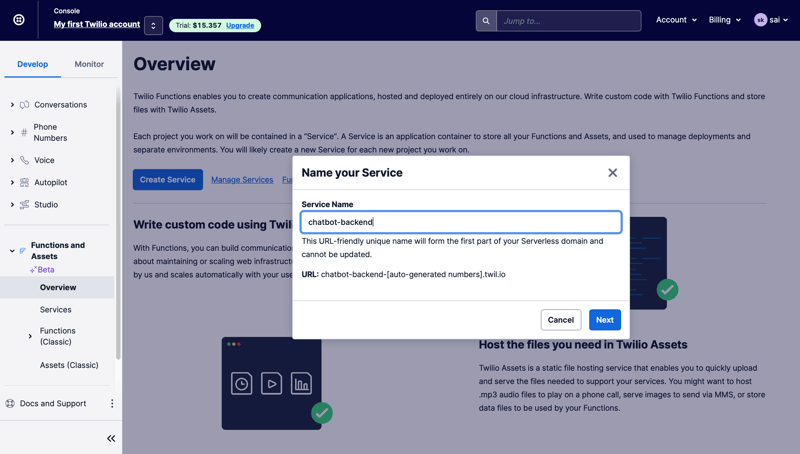
- From your Twilio Functions Dashboard in the Console, create a new service and give it a name of your choosing.
-
After the service is created, navigate to Environment Variables under the settings section on the bottom left and add the following environment variable:
ASSISTANT_SID
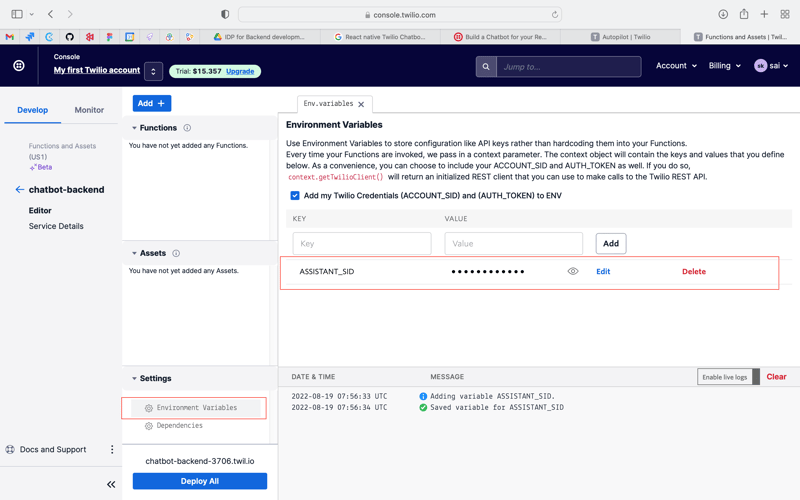
Make sure to give it the value of the SID we got earlier when we created a new bot.
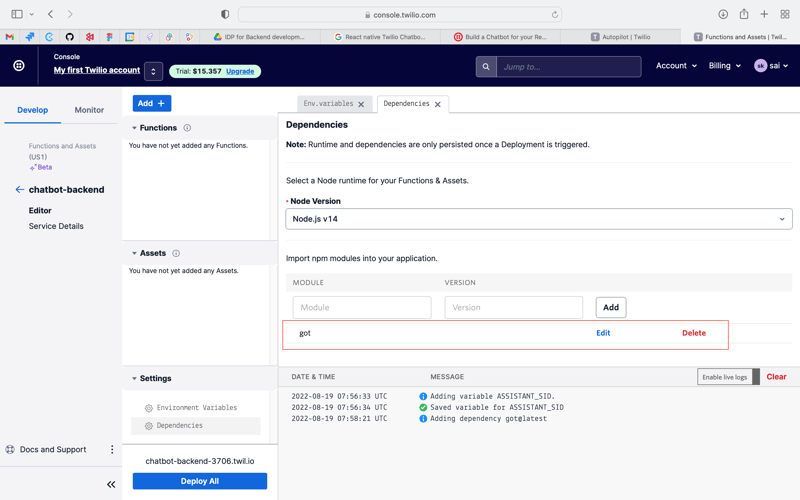
- Click on Dependencies and add the
gotdependency.gotis an HTTP client.
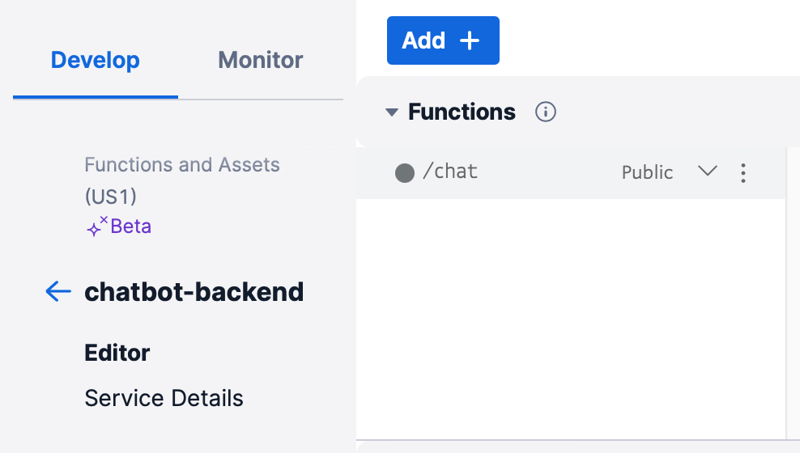
- Now that we have updated our dependencies and environment variables, navigate to the Functions section. Click the Add + button to create a new function and give it the
/chatpath. Change the function to public.
-
In the editor, replace the code with the following:
We will start by importing our dependency and getting the environment variables from the context object. Then we get the request body from the event object.
exports.handler = async function(context, event, callback) {
 const got = (await import("got")).default;
 const { ACCOUNT_SID, AUTH_TOKEN, ASSISTANT_SID } = context;
 const { message, id } = event
};
-
Next, we create a payload for the autopilot custom channel endpoint as detailed in the documentation.
This function serves as our backend. When a user enters a message in the chatbot, we make an
http POSTrequest to our Twilio Function. The function then makes anotherPOSTrequest to the autopilot custom channel endpoint. The user’s message is passed to Autopilot. Autopilot processes the message and gives the appropriate response. The response is then sent back to the user.
exports.handler = async function(context, event, callback) {
 const got = (await import("got")).default;
 const { ACCOUNT_SID, AUTH_TOKEN, ASSISTANT_SID } = context;
 const { message, id } = event;
 let requestPayload = `UserId=user${id}&Language=en-US&Text=${message}`;
  got
 .post(
`https://channels.autopilot.twilio.com/v2/${ACCOUNT_SID}/${ASSISTANT_SID}
/custom/chat`,
   {
headers: {
"content-type": "application/x-www-form-urlencoded",
       accept: "application/json",
       authorization:
`Basic ` + new
Buffer.from(`${ACCOUNT_SID}:${AUTH_TOKEN}`).toString("base64"),
     },
     body: requestPayload,
   }
 )
 .then((resp) => {
   const headers = {
       "Access-Control-Allow-Origin": "http://localhost:3000",
       "Content-Type": "application/json"
}
   const response = new Twilio.Response();
   response.setHeaders(headers);
   response.setBody(JSON.parse(resp.body));
   callback(null, response);
 })
 .catch((error) => {
   callback(error);
}); };
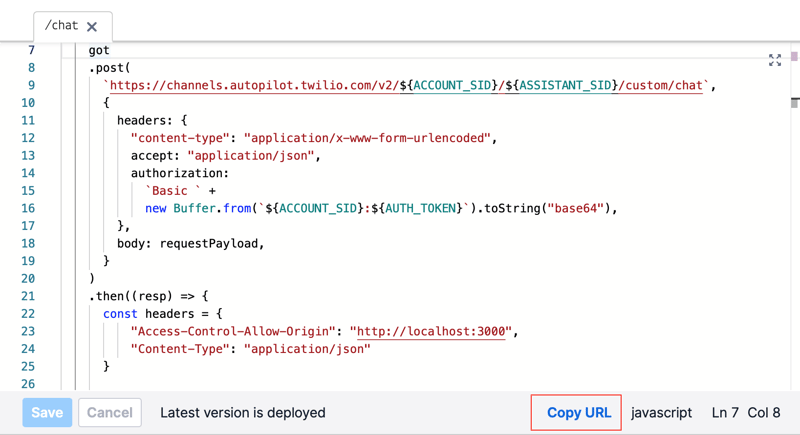
Next, save the function then click Deploy All.
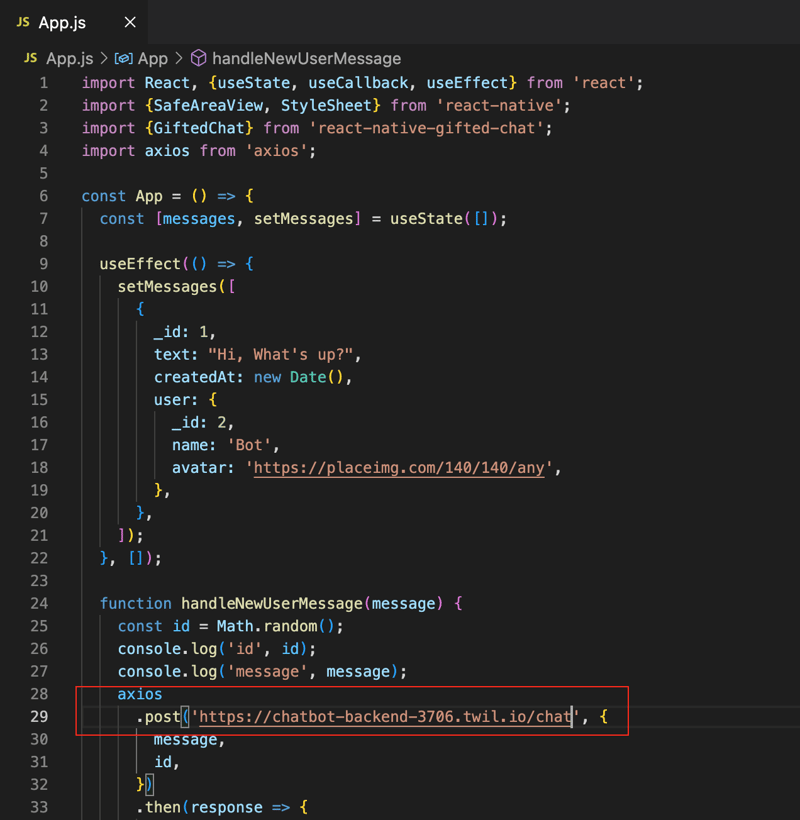
- click Copy URL and paste it in App.js.
- Reload and From the chat input, type in a message and see the response.
Full Code:
import React, {useState, useCallback, useEffect} from 'react';
import {SafeAreaView, StyleSheet} from 'react-native';
import {GiftedChat} from 'react-native-gifted-chat';
import axios from 'axios';

const App = () => {
 const [messages, setMessages] = useState([]);

 const selfUser = {
   _id: 1,
   name: 'Sai',
   avatar: 'https://placeimg.com/140/140/any',
 };

 const botUser = {
   _id: 2,
   name: 'Bot',
   avatar: 'https://placeimg.com/140/140/any',
 };

 const welcomeMessage = {
   _id: 1,
   text: "Hi, What's up?",
   createdAt: new Date(),
   user: botUser,
};

 useEffect(() => {
   setMessages([welcomeMessage]);
}, []);

 function handleNewUserMessage(message) {

    const id = Math.random();
  axios
    .post('https://mentor-chatbot-backend-5421.twil.io/chat', {
      message,
      id,
    })
    .then(response => {
      response.data.response.says.forEach(say => {
        const botMessage = {
          _id: id,
          createdAt: new Date(),
          text: say.text,
          user: botUser,
        };
        addMessages([botMessage]);
      });
    })
    .catch(err => console.log('err', err));
}

const onSend = useCallback((messages = []) => {
  handleNewUserMessage(messages[0].text);
  addMessages(messages);
}, []);

function addMessages(messages) {
  setMessages(previousMessages =>
    GiftedChat.append(previousMessages, messages),
  );
}

return (
   <SafeAreaView style={styles.fullFlex}>
     <GiftedChat
       messages={messages}
       onSend={messages => onSend(messages)}
       user={selfUser}
     />
   </SafeAreaView>
); };

const styles = StyleSheet.create({
 fullFlex: {
   flex: 1,
 },
});

export default App;
Conclusion
We have successfully built a chatbot app in React Native using Twilio Autopilot. By integrating Twilio services, specifically Autopilot and Twilio Functions, we have created a functional chatbot that can communicate with users, process messages, and provide appropriate responses. The integration involves setting up Autopilot with a specific template, configuring Twilio Functions, and connecting the frontend React Native application with the Autopilot custom channel endpoint.
This example demonstrates the seamless integration of Twilio services into a React Native application, showcasing the versatility and ease of use of Twilio tools for building interactive and intelligent conversational interfaces. Developers can leverage this foundation to create more sophisticated chatbot applications tailored to specific use cases and industries. The provided full code and step-by-step instructions serve as a practical guide for developers looking to implement similar solutions and explore the capabilities of Twilio in the realm of mobile app development.

Posted on February 27, 2024
Join Our Newsletter. No Spam, Only the good stuff.
Sign up to receive the latest update from our blog.
