How To Install And Use Git On Windows End to End

Sahil Tiwari
Posted on June 27, 2020

By the end of this article, you will be able to install and setup GIT SCM with your repository (GIT/Bitbucket) and will be able to Commit and Push the changes from local.
GIT:
Git is a distributed version control system for tracking changes in source code during software development. It is designed for coordinating work among programmers, but it can be used to track changes in any set of files. Its goals include speed, data integrity, and support for distributed, non-linear workflows.
GITHUB Installation
Install GIT SCM from here: https://git-scm.com/download/
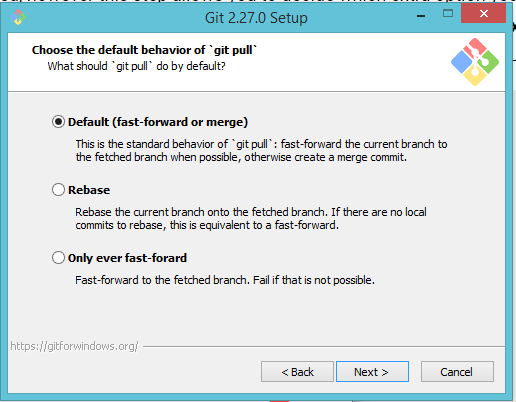
Select all defaults until this point
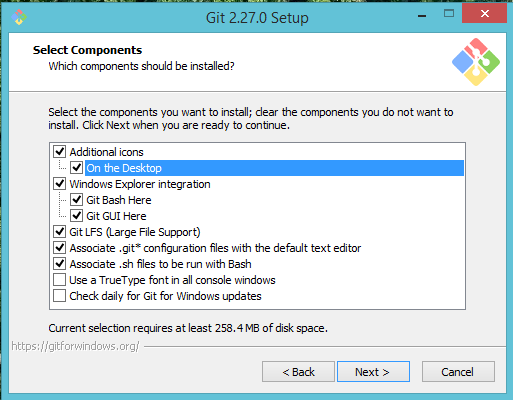
Click Next and Select Start Folder, again Click Next. On Next Window select Git’s default window:
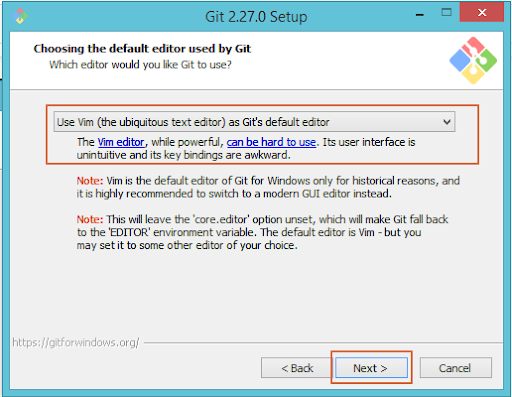
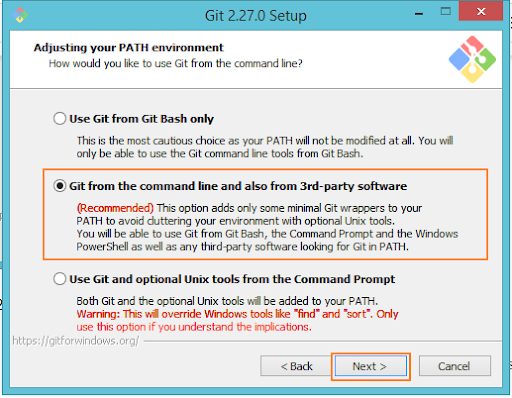
The next window allows you to change the PATH environment. The PATH is the default set of directories included when you run a command from the command line select Recommended settings and click Next
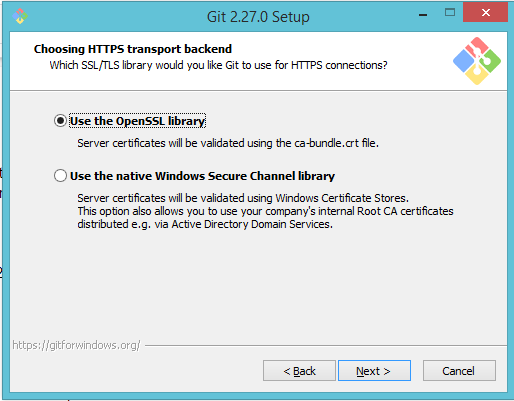
Most users should use the default. But if you’re working in an Active Directory environment, you may need to switch to Windows Store certificates. Click Next.
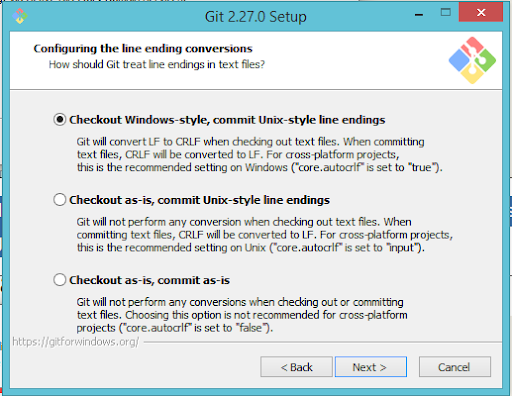
This step is for data formatting, leave it as default and click Next
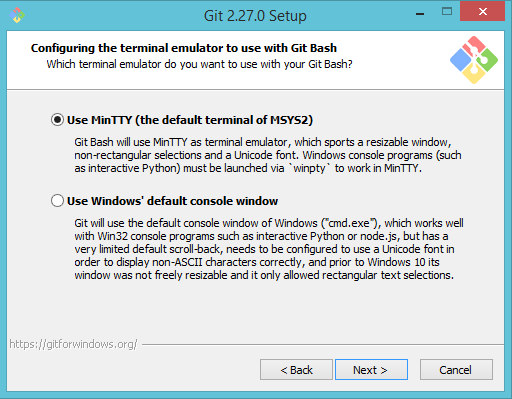
Choose the Terminal you want to use, the default MinTTY is recommended for its features. Click Next.
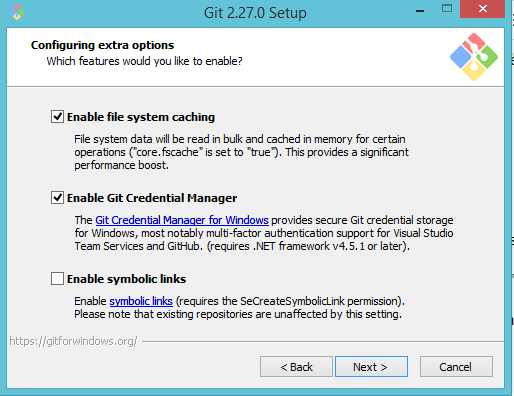
This step allows you to decide which extra option you would like to enable. If you use symbolic links, which are like shortcuts for the command line, tick the box. Default is recommended then Click Next.
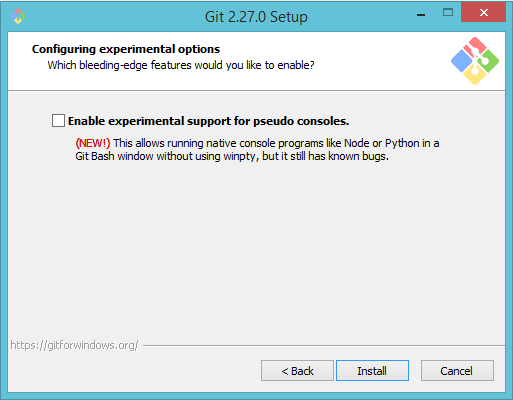
Depending on the version of Git you’re installing, it may offer to install experimental features. At the time this article was written, the option to include running native console programs like Node or Python in a GitBash window without using winpty was offered but it still had some bugs. Unless you are feeling adventurous, leave them unchecked and click Install.
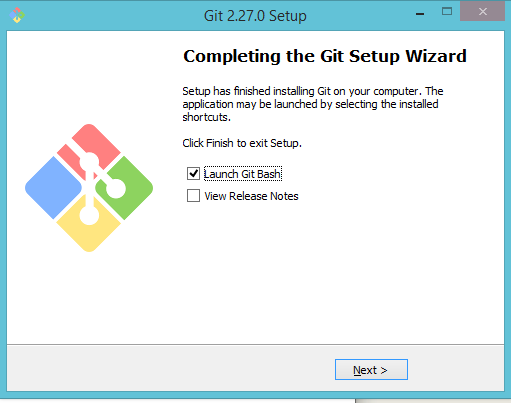
After Installation, Launch GIT Bash
Git has two modes -
A Bash Scripting Shell (or command line) and a Graphical User Interface (GUI). To launch either of those you can search in the Windows start menu or you can right-click anywhere on the screen to see below options.
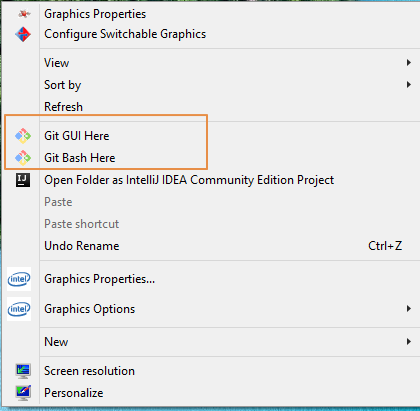
GIT Setup:
If you are in an organization, you have to install below trust certificates (if you setting up on personal machine you skip this part and can Jump to commands)
Download and double click to install — curlt-ca-bundle.crt in the path where GIT is installed.
For eg: C:\Users\sahil.tiwari\AppData\Local\Programs\Git\mingw64\ssl\certs
And the cacerts file into the Java folder For eg: \ProgramFiles(x86)\Java\jre1.8.0_121\lib\seccurity
with the admin’s permission.
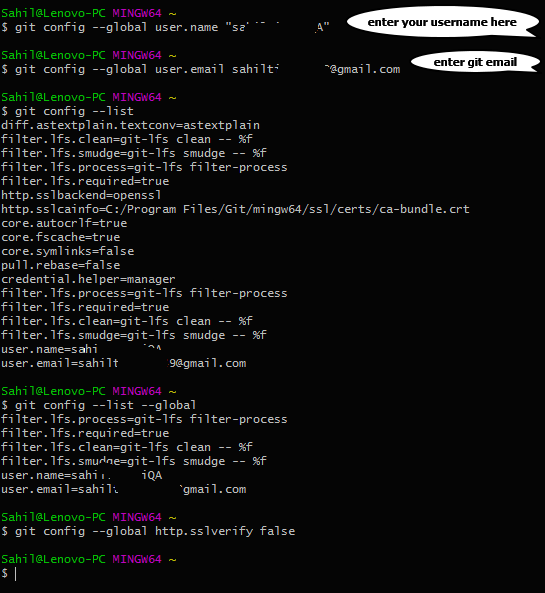
Then open GIT Bash and run following commands, commands to be given in GIT Bash for initial configuration.
git config — global user.name “sahil.tiwari”
git config — gloabal user.email sahil@example.com
git config — global http.sslCAInfo C:\Users\sahil.tiwari
git config — list
git config — list — global
git config — global http.sslverify false
After the configurations open Git GUI and select Clone Existing Repository
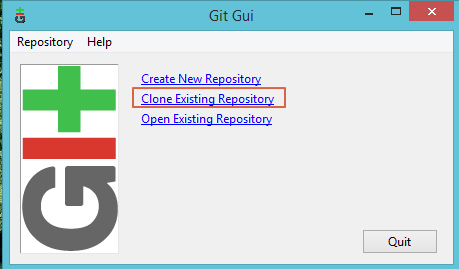
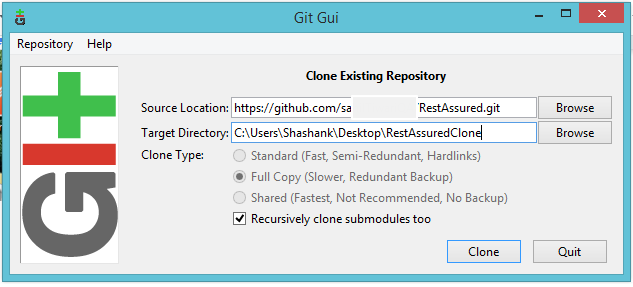
Now give the Bitbucket/GIT path for your project in the source repository.
For example: https://bitbucket….
or
https://github.com/sahil…..
You can get source repository URL from bitbucket-> clone (Remove the username and @ from the URL) or if you are using GIT you can go to GIT and click on Clone and copy the path.

In GIT GUI, target repository is the local repository where you want the local copy (it will create a new folder where you select the path)
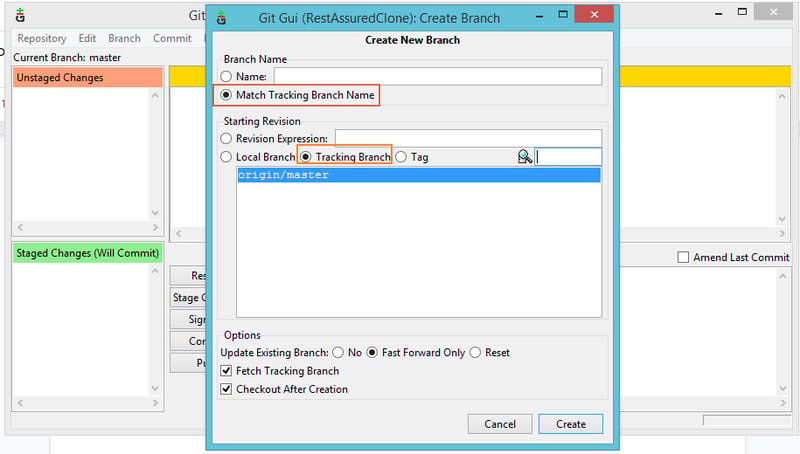
Now go to Branch and click on Create.
Now select the Branch Name as “Match Tracking Branch Name”
Then select the Starting Revision as “Tracking Branch” and select the branch in which you want to push the code and click on Create
After you create local repository all the files present in the cloud repository will come in the local folder

Then paste the files in the local repository that you want to add to the Global Repository.
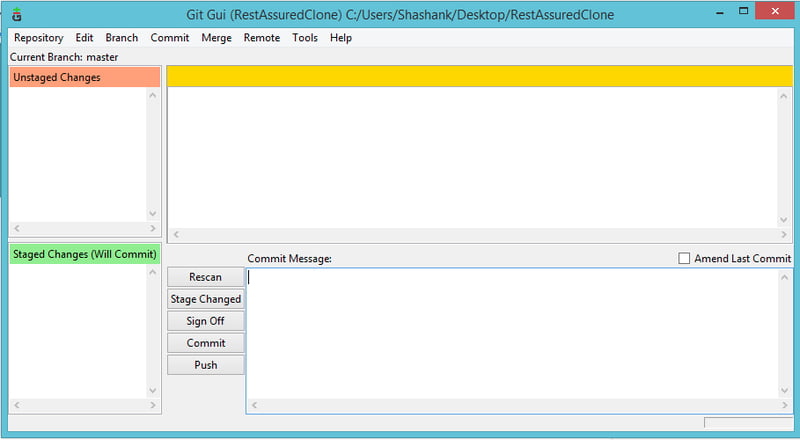
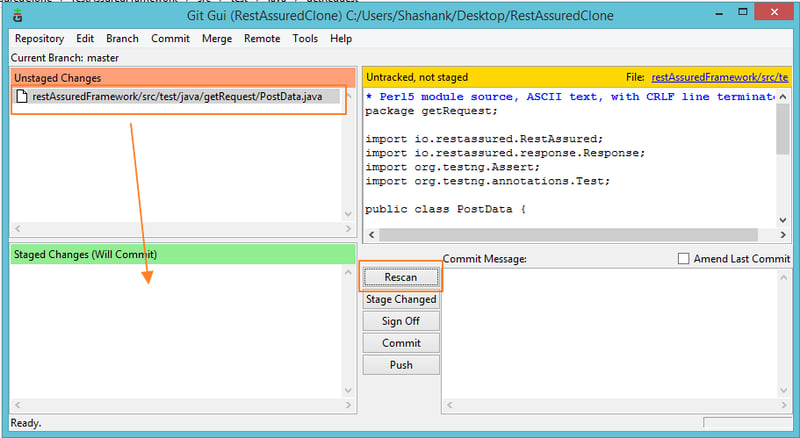
Come back to GIT GUI and click on Rescan
You will find that the new files are present in the “Unstaged Changes” area. Click on the files to move them to “Staged Area”
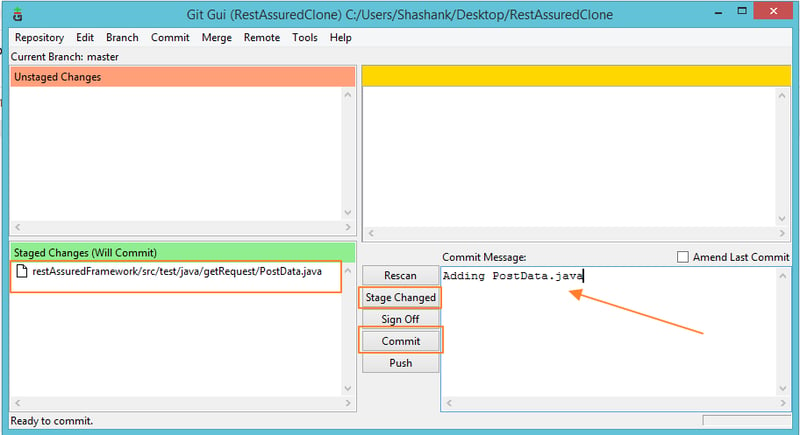
Now give the Commit Message and click on Commit
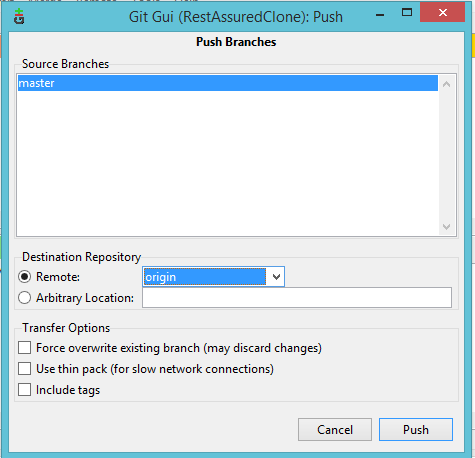
Then click on PUSH to push the code to the global repository (it may ask GIT username and password for authentication)
Now go to your Bitbucket/GIT repository to check pushed changes are reflected or not.


Posted on June 27, 2020
Join Our Newsletter. No Spam, Only the good stuff.
Sign up to receive the latest update from our blog.
Related

November 30, 2024
