Using ESLint to help find bugs in your JavaScript Projects

Sahil Nare
Posted on June 28, 2022

Ever had problems formatting your JS code? Of course you did, a lot of developers do. It is often difficult to keep a consistent style of code throughout an entire project. Well, ESLint is a tool that you can use to make the task of formatting code realy smooth.
I'm a web developer so JavaScript is the most common language I use. Hence, I'm gonna show you how to use ESLint in your JS project (ESLint can only be used with JS). But if you are using any other language then you should search for its own static analysis tools.
Before we start, make sure that you have the package.json file set up. If not then you can run the npm init command in your project directory.
Installing ESLint in your project
You can install ESLint via the npm package manager.
Just run: npm install --save-dev eslint
npm install --save-dev eslint
ESLint will be installed as a 'dev dependency'. This will be reflected in your package.json file.
Setting up ESLint
Once you have successfully installed the package, you will have to initialize ESLint in your project.
For that, you have run the command: npm init @eslint/config
npm init @eslint/config
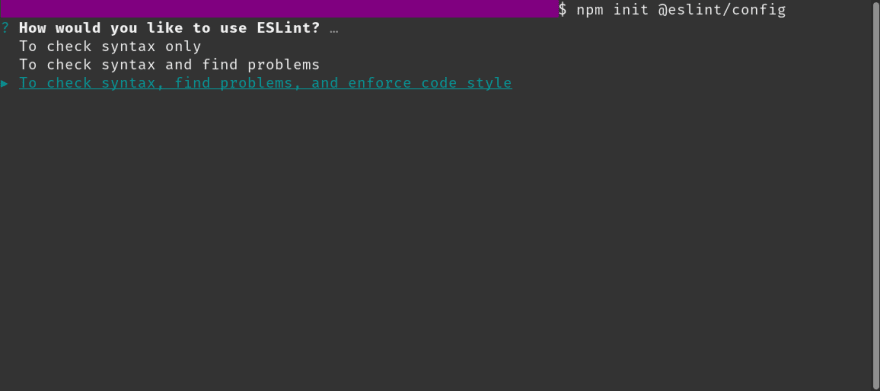
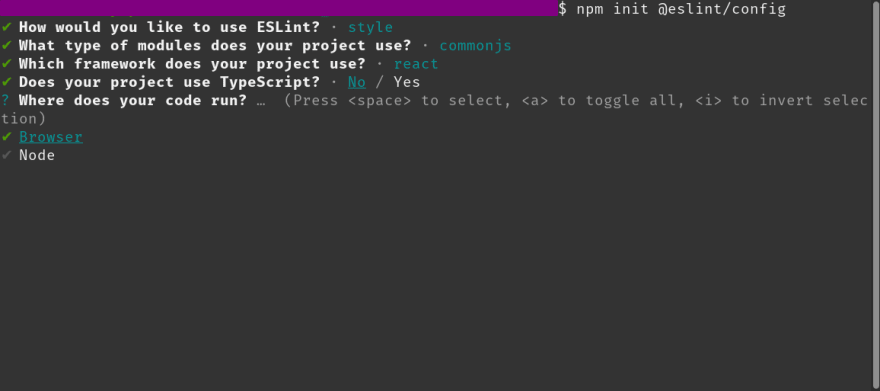
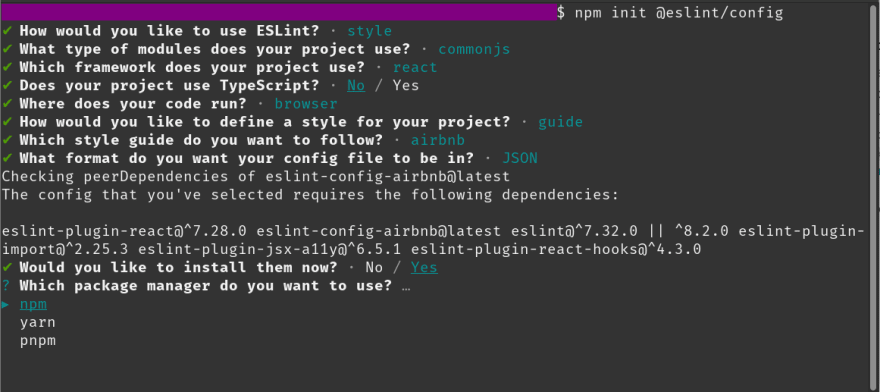
The program will then ask you about your preferences, i.e. what options that you want to use or how you want to use the ESLint package. You just have to select the desired option using arrow keys and the program will automatically do the ESLint configuration for you.
For the first option, I would suggest to select enforcing code style.
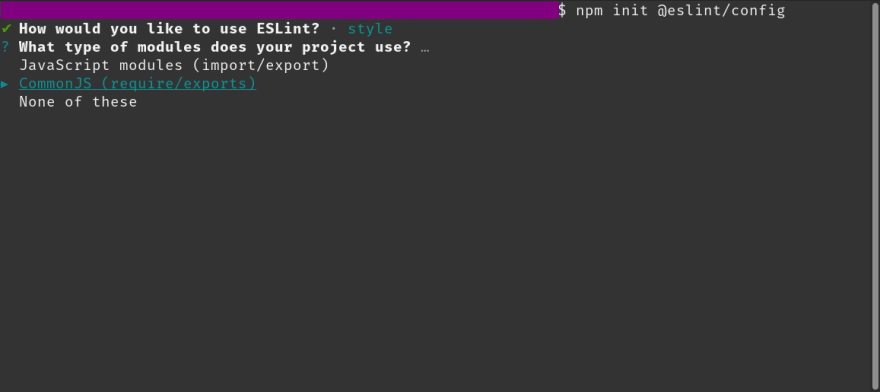
Next, select the type of module. Select the option depending upon whether you are going to use import/export or require/exports.
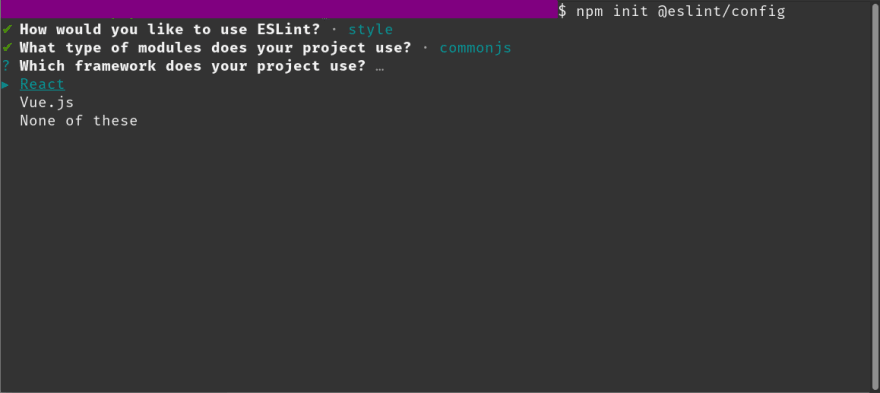
Then, select the framework that you are using (if any).
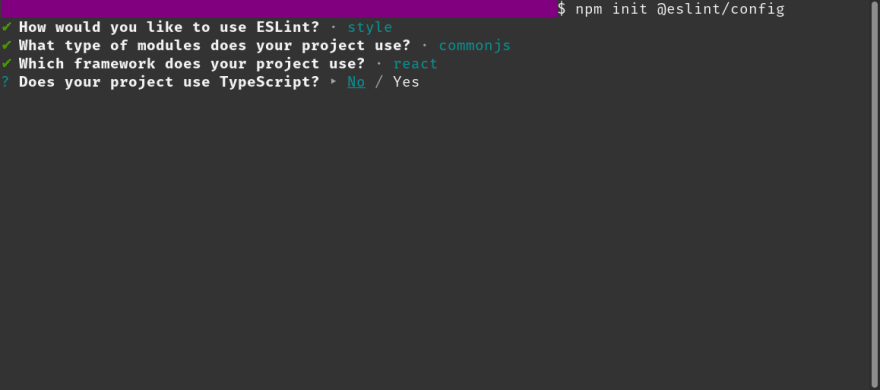
Select whether you are using Typescript in your project.
Then, select whether you are going to the run the project on the Browser or in NodeJS.
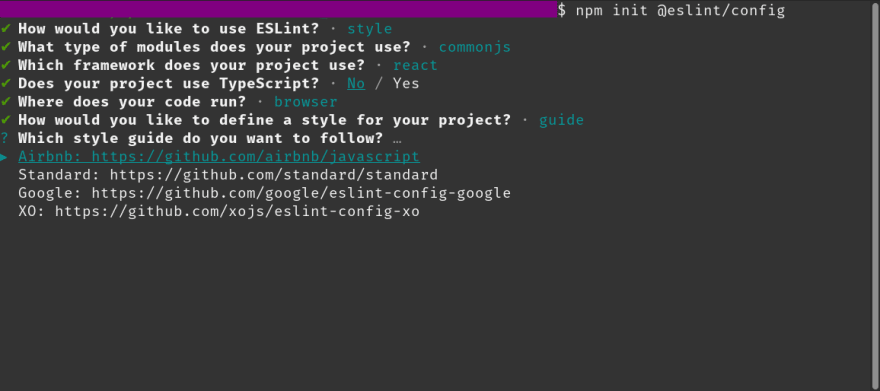
After that, you can select a popular style guide. Either that or you can answer questions about your own style and ESLint will configure the project accordingly. Here, I'm going to select a popular style guide. (I often use the AirBnB style guide in my projects.)
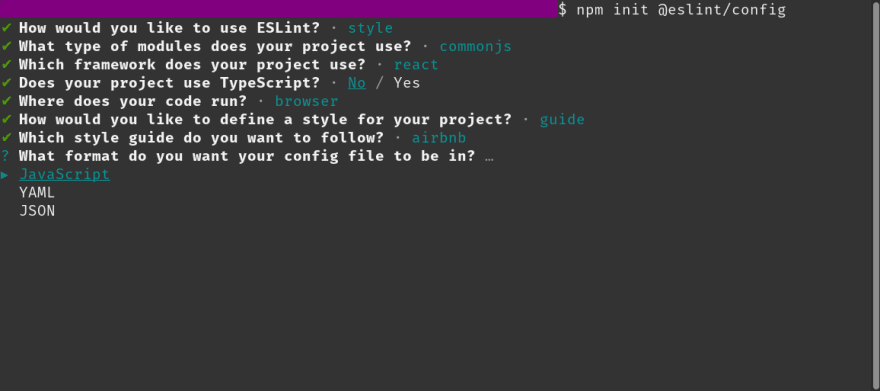
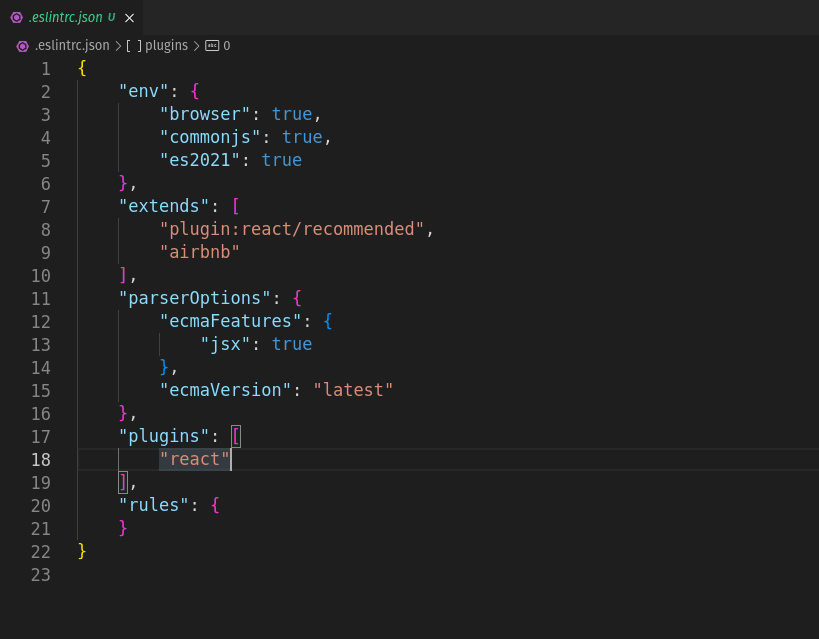
Now, ESLint will create a configuration file in the project, in which all the options like rules, environment, etc will be stored. You can manually edit this file according to your preferences.
First you will have to select the format of the file: JavaScript, YAML or JSON. I prefer the JSON format.
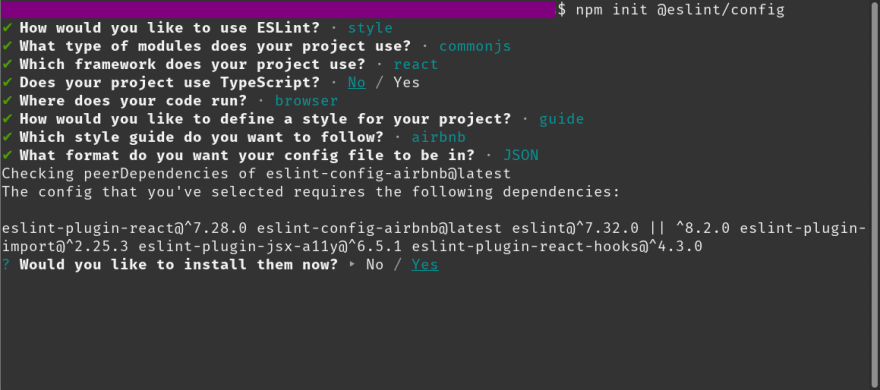
After this, the program will ask your permission to install the required dependencies. Select Yes.
Select your package manager and the required dependencies will be installed.
ESLint Configuration File
Once ESLint has been initialized, the configuration file will appear your in your project. You can now edit this file and set up the code style that you require.
If you have selected the JSON format, then the file will be named as: .eslintrc.json
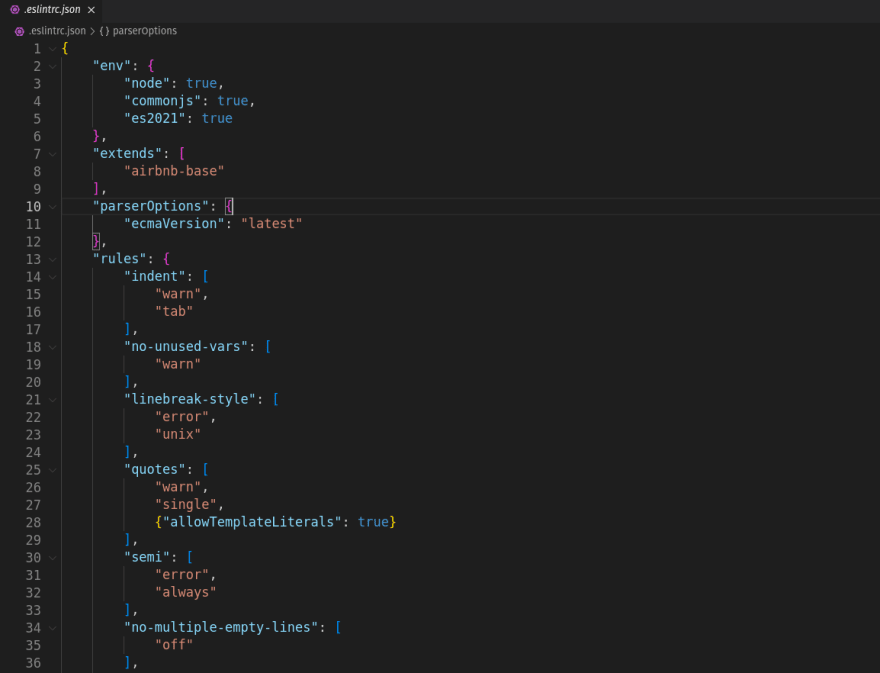
You can set up the rules in the rules block. All the ESLint rules are available here: https://eslint.org/docs/latest/rules/
Here's an example of the config file in one of my projects:
ESLint rules have three settings: error, warn or off. You can learn more about configuring rules here: https://eslint.org/docs/latest/user-guide/configuring/rules
Running ESLint
You can run ESLint on individual files. For eg, if I want to run it on index.js, I will use the command npx eslint index.js
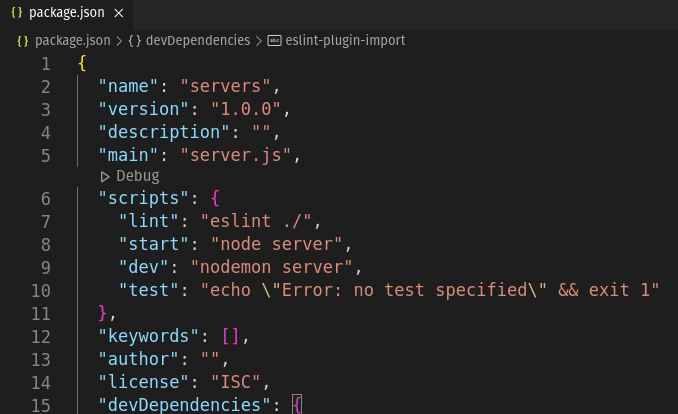
But typically, ESLint is run on the entire project. So what I would suggest is adding this line in the scripts block of your package.json file:
"lint": "eslint ./"
Here's an example of a package.json file:
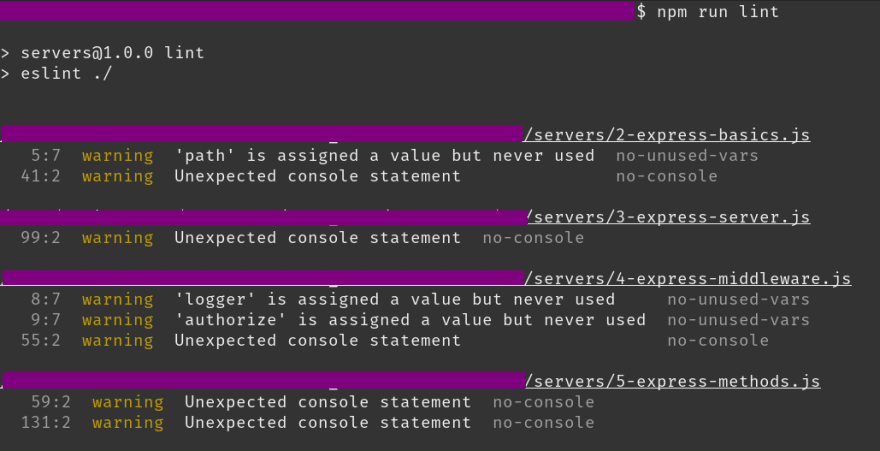
Then you can run npm run lint and it will run on your entire project.
Here's an example output:
ESLint Extension for VS Code
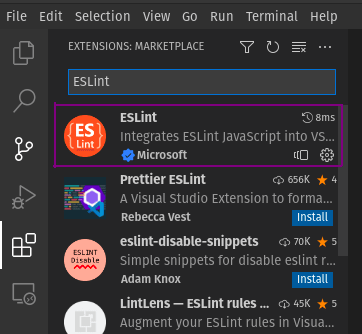
If you are using VS Code for your project then ESLint has a very handy extension that you can use. It will highlight the errors in your editor which makes formatting the code way more easier.
You can install the extension in VS Code by going to the Extensions tab in the Activity bar and searching for ESLint:
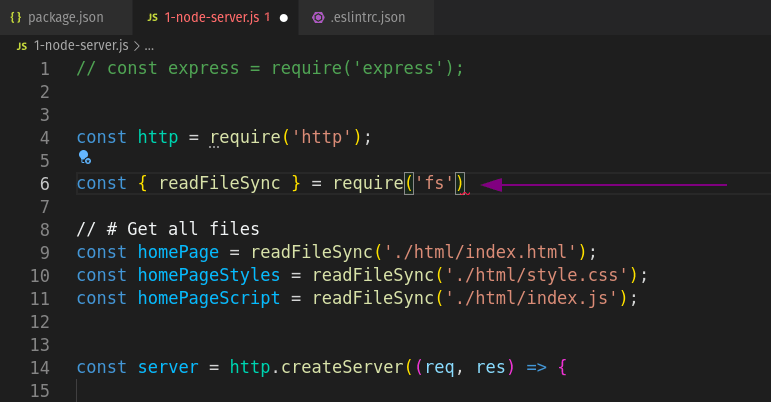
It will show an error in the editor itself if your code does not follow the configured format. Here's an example in which the semi-colon is missing from the line and I've added the "semi" rule in .eslintrc.json file.
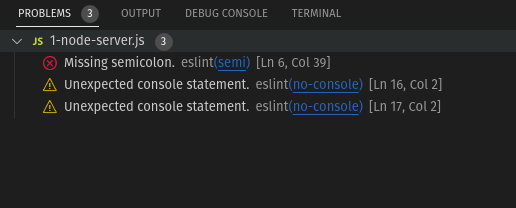
The errors and warnings will also show up in the VS Code Panel.
For more reference, you can read the documentation for ESLint here: https://eslint.org/docs/latest/

Posted on June 28, 2022
Join Our Newsletter. No Spam, Only the good stuff.
Sign up to receive the latest update from our blog.
Related

July 17, 2024
February 20, 2023
