Getting Started with Blazor Web Development

Sabah Shariq
Posted on March 26, 2022
Introduction
In this blog post we will look into how one can get started web development using Blazor. This blog post is especially focusing on newcomers and anyone new wants to learn Blazor. This is a series of blog post so please look into other for more information.
What is Blazor?
Blazor is a free and open-source .NET web framework released by Microsoft to build web apps using C# along with HTML and CSS that run in a web browser. Yes, you read it right C# in web browser? This article illustrates a way to let user understand how Blazor web framework works.
Why one should choose Blazor?
Before we dive into Blazor, let's first look into how web application development done in general. Web development consists two part:
Client-side development
Where,
- Server-side development development are done using programming language like C#, Java, PHP, Node.js etc.
- Client-side development are done using JavaScript frameworks like Angular, React, Bootstrap etc.
As you can see web development requires knowledge of two different sets of programming languages and frameworks. But what if there is a way you can use a single programming language for development and that's where C# comes in Blazor web framework. With the introduction of Blazor, instead of using JavaScript for client-side development now C# is used. So, C# code can be executed both on the server as well as in the client browser.
Development Setup
Before we dive into details first we will look into how one can create a sample Blazor application. For our demo purpose we will use following setup enviroment.
- Visual Studio 2019
- .NET5
Create a Sample Project
For creating a sample Blazor application, follow the following steps in visual studio
Step 01:
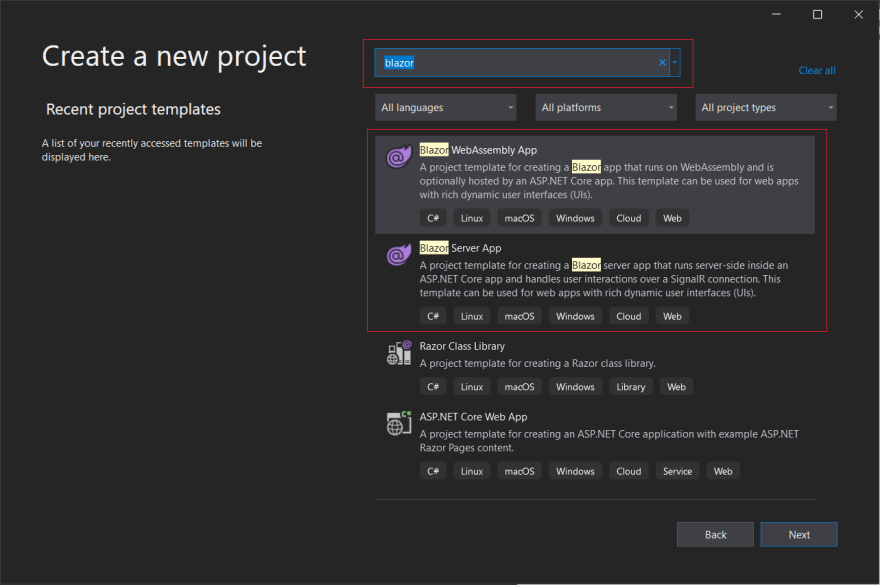
- Open Visual Studio 2019 and select create a new project.
- Search Blazor and you will see two project template
- Blazor Web Assembly App
- Blazor Server App
For now we will use Blazor Server App template to get familiarize ourself with Blazor development environment. But later we will look into more details difference between Blazor Web Assembly App and Blazor Server App.
Step 02:
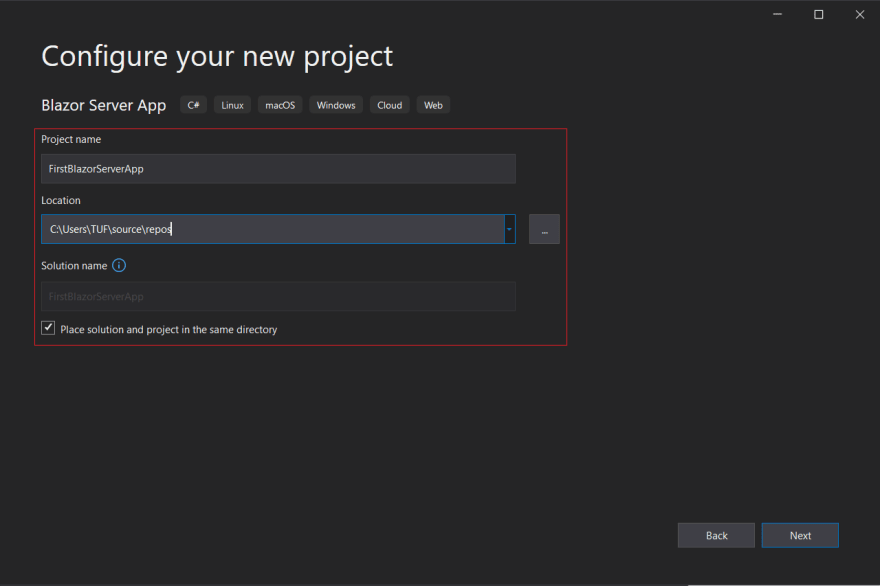
Provide a project name and choose either you want to keep both solution and project in the same directory. For now we will keep both solution and project in the same directory.
Step 03:
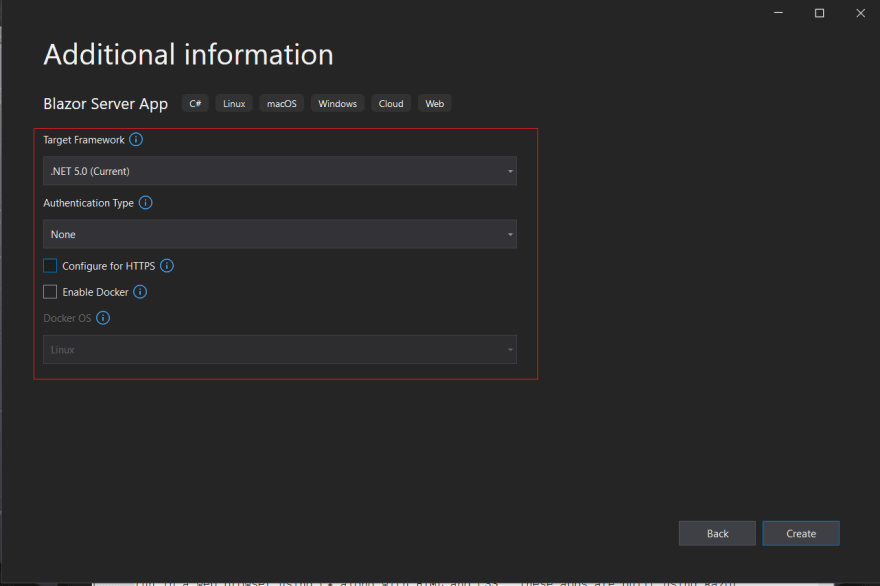
Select target framework to .NET5 and uncheck the Configure for HTTPS and keep rest of the settings as it is.
Step 04:
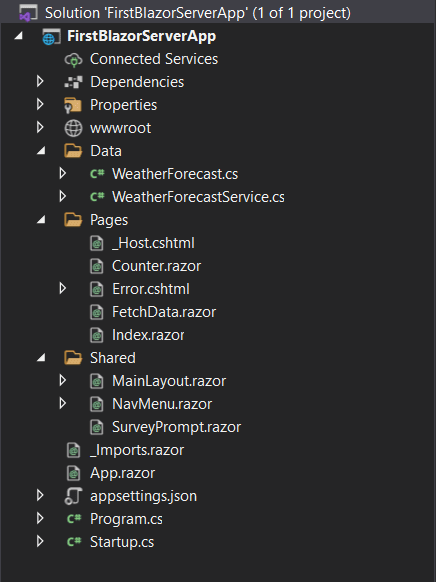
Selecting the create button you will see the following with project file structure in right hand side solution explorer. We will look into more details about the files and folder structure later.
Step 05:
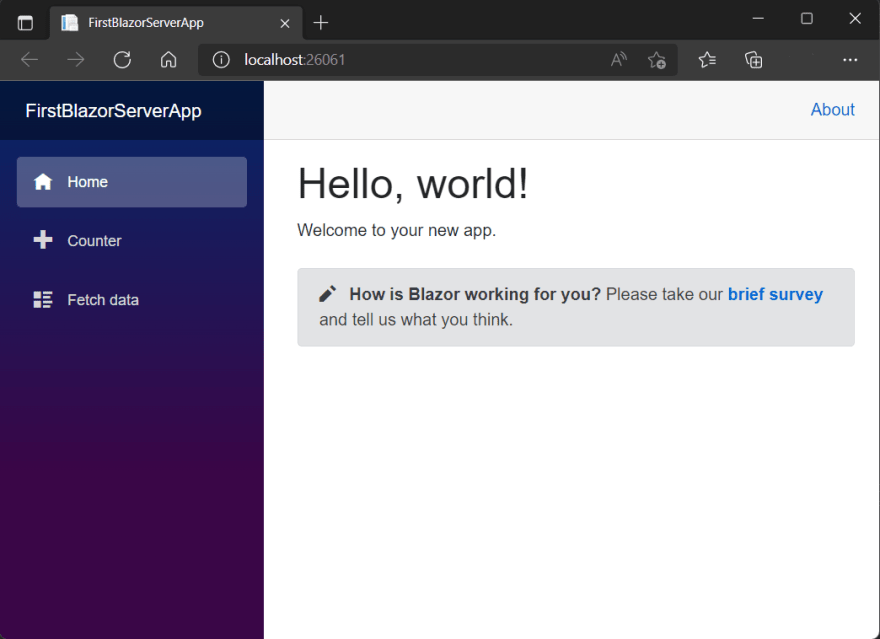
After running the project a browser will show the following page. A home page with static message. A counter page with a button which increment count at every button click and fetch data page which will show you weather forecast which were by default set in the project.
Conclusion
So, you have just created your first Blazor web application. The objective of this blog post was to give you a idea regarding Blazor web development. In the later blog post we will look into more details about Blazor and some it's features. Next we will into WebAssembly how Blazor leverage it to compile C# code here.

Posted on March 26, 2022
Join Our Newsletter. No Spam, Only the good stuff.
Sign up to receive the latest update from our blog.
