rinku1511
Posted on April 9, 2024

In today's "oh where is my mobile phone" age, having an online presence is like having ice-cream in summers. Whether you're a blogger, entrepreneur, or small business owner, creating a website can help you reach a wider audience and establish your brand. Hence, comes in Wordpress, being the easiest and most accessible tool for the matter. Now, development aside, the question comes in about hosting the website. Where to host it so that it remain the safest yet accessible plus easy to manage, plus cheap, plus all-in-one management. There comes AWS in picture. With the power of AWS Lightsail, launching a WordPress site has never been easier. AWS Lightsail is a simplified cloud service that offers virtual private servers (VPS) with a user-friendly interface and predictable pricing.
First thing: Why choose lightsail above other hosting?
Simplicity: Lightsail offers a simplified user interface and easy-to-use tools that make it straightforward to deploy and manage virtual private servers (VPS) and applications.
Predictable Pricing: One of the standout features of Lightsail is its predictable pricing model. Unlike some other cloud services that charge based on usage or complex pricing structures, Lightsail offers flat-rate pricing with transparent billing. Plus there is always AWS pricing calculator for that. Visit this Link to see the pricing. Also, Lightsail offers a free tier for around first 3 months, allowing you to explore the platform without incurring any charges.
Scalability: While Lightsail is designed to be simple and easy to use, it still offers scalability for growing websites and applications. Users can easily upgrade their instances to larger sizes or add additional resources such as storage, RAM, or CPU as needed, ensuring that their hosting environment can scale with their business.
Integration with AWS Services: Lightsail is part of the larger AWS ecosystem, which means it integrates seamlessly with other AWS services such as Route 53 for DNS management, S3 for storage, and CloudWatch for monitoring. This makes it easy to leverage additional AWS services to enhance the functionality and performance of your website or application.
Security: As a service provided by AWS, Lightsail benefits from the security of the AWS infrastructure. AWS data centers are highly secure and adhere to industry-leading standards for data protection and compliance.
Reliability: Lightsail includes features such as automated backups and snapshots to help users protect their data and recover from any potential disasters.
Overall, AWS Lightsail offers a compelling combination of various metrics making it a top choice.
Lauching Virtual Server with Wordpress(Instance)
Go to the lightsail dashboard and from the left hand side navigation, choose "Instances". Click on create instance. This will open a screen with various choices. First is to select the region where you wish to launch the instance and the availability zone as well. Choose the region nearest to your customer base so as to decrease latency.
Now, choose the "WordPress" blueprint, which is a pre-configured image optimized for running WordPress sites. Choose linux/unix as operating system. If you are not comfortable with linux, you can choose windows OS as well.
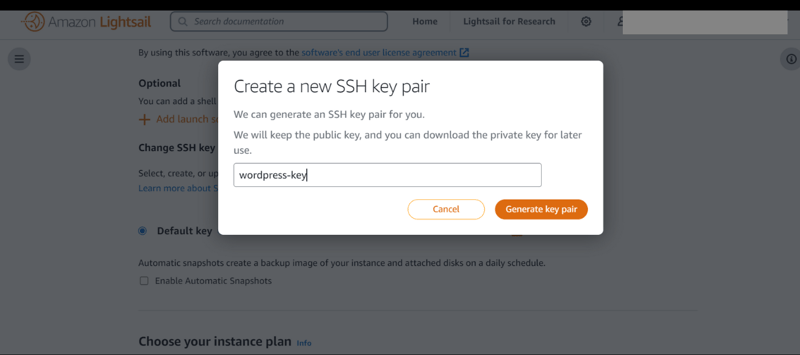
Now, for additional security, create a new SSH key-pair. Note: you'll need this to connect to the instance. Before that, there is option to enable automated snapshots. If you enable this, LightSail will take automatic snapshots of your instance everyday. The snapshots for the last 7 days will retain and the older snapshots will be deleted.
Next is to select the size of the instance. Select the instance plan that best suits your needs – the smallest plan should be sufficient for most personal or small business websites.
Give name to your instance. Add necessary tags as per your requirement. Click on "create instance."
Now, once the instance is created, open the instance. TO access the Wordpress Admin Panel, click on the "Access WordPress Admin" on the top right corner. You will get the link with the IP on the pop-up. Click on that and you will be redirected to the access page.
The default username of the login is"user". For password, go back to your instance and select "retrieve default password" option. Now, this will give you steps to retrieve the default password. Copy that and you can access the wordpress admin panel.
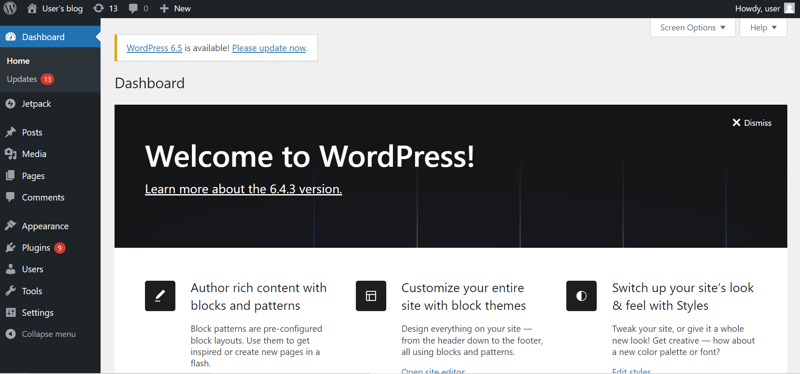
The screen for password will look something like this.
Finally, you are in officially in business. Now, apply all the knowledge you have of wordpress and build a website like never before.
Connecting to DNS
Now, go to the instance. You will see the public IP for you instance. Copy that. Go to your DNS provider and add A record pointing to that IP. Now, anyone going to the URL will see the amazing wordpress website you created.
SSL
Now comes the important part. How to add SSL to the website. Don't worry, I got you covered (I mean AWS got you covered).
For this, open the instance page. Select the connect tab and scroll down till you see "connect using SSH" option.
Now, we will use the bncert tool to request an SSL/TLS certificate from Let's Encrypt. Note that using this toll will make the process simpler but is valid only for the domains and subdomains you mention while creating the SSL certificate. Enter the command:
sudo /opt/bitnami/bncert-tool
After this, you may be asked to whether you want to download update. Proceed as per your preference. Next is to insert the domain list that you want the certificate to be valid for. Enter those.
The next options depend on the domains you add. If you are adding www domain, you will be asked a few preferences for redirections. If not, you will be warned you for the absence of www domain. Then the action steps will be displayed and your consent to proceed will be asked.
Now, enter a valid email address to associate the certificate with.
Once the process is completed, your site will have SSL certificate attached and your site will be redirected for http to hppts.
Launching a WordPress site on AWS Lightsail is a straightforward process that can be completed in just a few easy steps. By following this guide, you can quickly deploy your site to the cloud and start reaching your audience online. With the power and flexibility of AWS Lightsail, the possibilities for your website are endless. Happy Wordpressing or AWSing or LightSailing ... Whatever you like!

Posted on April 9, 2024
Join Our Newsletter. No Spam, Only the good stuff.
Sign up to receive the latest update from our blog.


