Cloudflare Workers: Deploying Shopify Hydrogen

Rafael Corrêa Gomes
Posted on March 11, 2022

A practical guide to configuring your Shopify Hydrogen to deploy on Cloudflare Workers
With just a few adjustments, you will be ready to deploy your Shopify headless theme to one of the best serverless providers in the market, Cloudflare Workers.
In case you prefer a course about it, I covered this topic and many others in my Shopify Hydrogen Course.
Cloudflare Workers
The new Workers allow you to set up serverless applications easily, including deploying Shopify Hydrogen headless in a very cost-effective manner. I was very impressed by how easy it's to deploy and maintain a headless project using it. But before going to the details, we need to make sure you have the initial steps done.
Shopify Hydrogen to Serverless
Let's prepare your app to run specifically on Cloudflare serverless. The initial step is to create your Hydrogen app locally, in case you don't have it.
yarn create hydrogen-app
Make sure to connect it to your Shopify store via Storefront API. You need to update yours shopify.config.js with your new API key. Follow this link to generate your Storefront API access token.
Storefront API access token
To make sure it's working, access the directory of your new Shopify Hydrogen theme and run:
yarn install && yarn dev
Hydrogen adjustments
Let's create the wrangler.toml file, it's a configuration file in the root folder. For more information about the configurable properties in the wrangler.toml file, refer to Cloudflare's configuration and compatibility dates documentation.
name = "PROJECT_NAME"
type = "javascript"
account_id = ""
workers_dev = true
route = ""
zone_id = ""
compatibility_date = "2022-01-28"
compatibility_flags = ["streams_enable_constructors"]

[site]
bucket = "dist/client"
entry-point = "dist/worker"

[build]
upload.format = "service-worker"
command = "yarn && yarn build"
Install the Cloudflare KV asset handler too.
npm install @cloudflare/kv-asset-handler
Create an entry file in the root folder of your project, I usually call it worker.js. The content must be the same as below.
// If the request path matches any of your assets, then use the `getAssetFromKV`
// function from `@cloudflare/kv-asset-handler` to serve it. Otherwise, call the
// `handleRequest` function, which is imported from your `App.server.jsx` file,
// to return a Hydrogen response.
import {getAssetFromKV} from '@cloudflare/kv-asset-handler';
import handleRequest from './src/App.server';
import indexTemplate from './dist/client/index.html?raw';

function isAsset(url) {
  // Update this RE to fit your assets
  return /\.(png|jpe?g|gif|css|js|svg|ico|map)$/i.test(url.pathname);
}

async function handleAsset(url, event) {
  const response = await getAssetFromKV(event, {});

  // Custom cache-control for assets
  if (response.status < 400) {
    const filename = url.pathname.split('/').pop();

    const maxAge =
      filename.split('.').length > 2
        ? 31536000 // hashed asset, will never be updated
        : 86400; // favicon and other public assets

    response.headers.append('cache-control', `public, max-age=${maxAge}`);
  }

  return response;
}

async function handleEvent(event) {
  try {
    const url = new URL(event.request.url);

    if (isAsset(url)) {
      return await handleAsset(url, event);
    }

    return await handleRequest(event.request, {
      indexTemplate,
      cache: caches.default,
      context: event,
    });
  } catch (error) {
    return new Response(error.message || error.toString(), {status: 500});
  }
}

addEventListener('fetch', (event) => event.respondWith(handleEvent(event)));
Update package.json to specify the new Worker entry point. If the entry point is in <root>/worker.js, then the changes look like the following:
// Remove this line
- "build:worker": "cross-env WORKER=true vite build --outDir dist/worker --ssr @shopify/hydrogen/platforms/worker-event",

// Add this line
+ "build:worker": "cross-env WORKER=true vite build --outDir dist/worker --ssr worker",
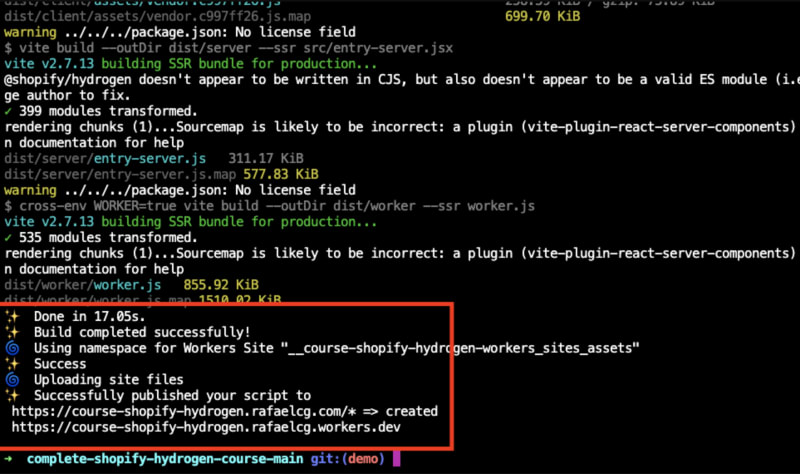
Finalize deploying it with Wrangler:
CF_ACCOUNT_ID=<YOUR_CLOUDFLARE_ACCOUNT_ID> wrangler publish
This is the link if you want to check the Shopify documentation.

Posted on March 11, 2022
Join Our Newsletter. No Spam, Only the good stuff.
Sign up to receive the latest update from our blog.


