Deploying a Static Website using CodePipeline,GitHub, and CloudFront

ProsperAgada
Posted on June 29, 2023

Overview:
For this project, we want to create a website that doesn't change much and store it on a service called S3. Instead of manually updating the website whenever we make changes, we will use a tool called CodePipeline to make it automatic. CodePipeline will watch our code stored on GitHub, where we keep our website's main file called index.html. Whenever we make changes to that file, CodePipeline will automatically update the website for us.
To make the website faster and more secure, we will use another tool called CloudFront. It acts like a special server that stores copies of our website in different locations. When someone tries to access our website using the insecure HTTP protocol, CloudFront will quickly redirect them to the secure HTTPS protocol, which is safer. This way, our website will be both faster and more secure for visitors.
Project Requirements:
Your team has asked you to create an easier way to deploy a website without manual work. Currently, the developers have to manually test each new update they make to the code. Your job is to make it simpler by giving the developers a website address they can use to see their changes right away. You also need to make a small change in the code stored on GitHub to check if everything is working correctly. This will save time and make it easier for the developers to update the website.
Steps
- Create a new repository in GitHub and load the static website content.
- Create and configure a S3 bucket to host your static website.
- Create a CloudFront distribution and restrict access to S3 bucket content with OAI
- Create a CI/CD pipeline using the *AWS Codepipeline service *.
- Set your repo as the Source Stage of the Codepipeline that is triggered when an update is made to a GitHub repo.
- For the deploy stage select your S3 bucket.
- Deploy the pipeline and verify that you can reach the static website.
- Make an update to the code in your github to verify that the codepipeline is triggered. This can be as simple as a change to the Readme file because any change to the files should trigger the workflow.
Step 1:
Create a new repository in GitHub and load the content of the static website.
https://github.com/ProsperAgada/deploy-static-website-using-AWS-Code-Pipeline-S3-and-GitHub-new.git you can clone this repo.

Step 2:
Create S3 Bucket
a. Navigate to S3 -> Create Bucket.
b. Uncheck
Block all Public Access
and acknowledge -> create
c. Upload static website content to the bucket created.
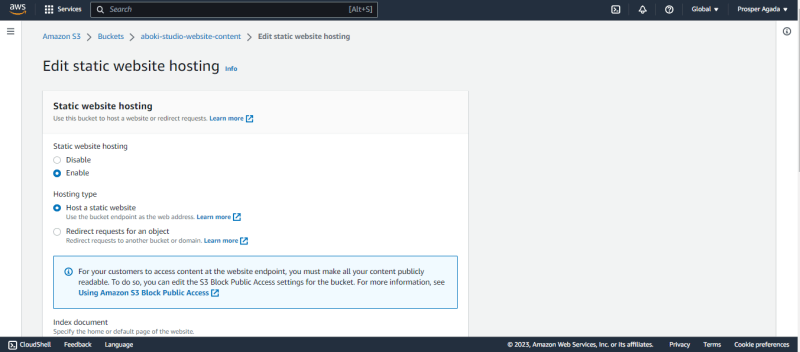
d. Navigate to your bucket -> Properties -> Edit Static website hosting
e. Enable Static website hosting and add your index document
Step 3:
Create a CloudFront distribution and restrict access to S3 bucket content with OAI
a. Navigate to Cloudfront -> Create
b. Add the details for Origin in the source of the distribution, so add the S3 path there.


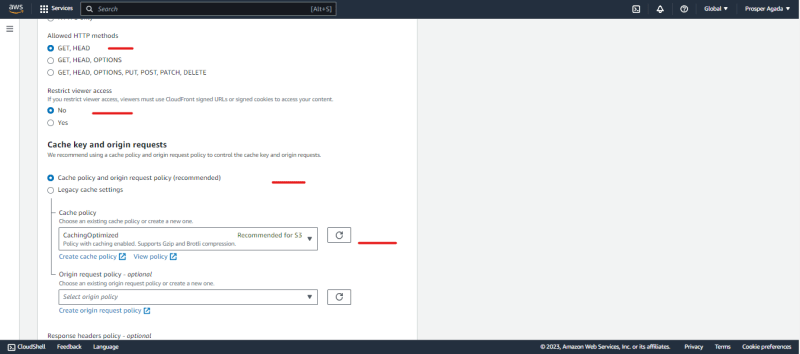

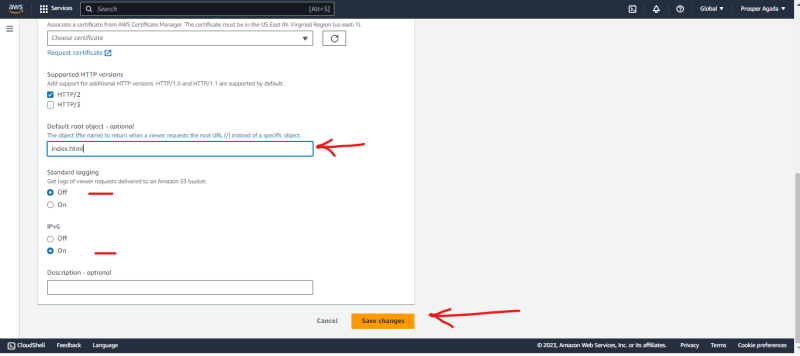
c. Include index.html as your default root object
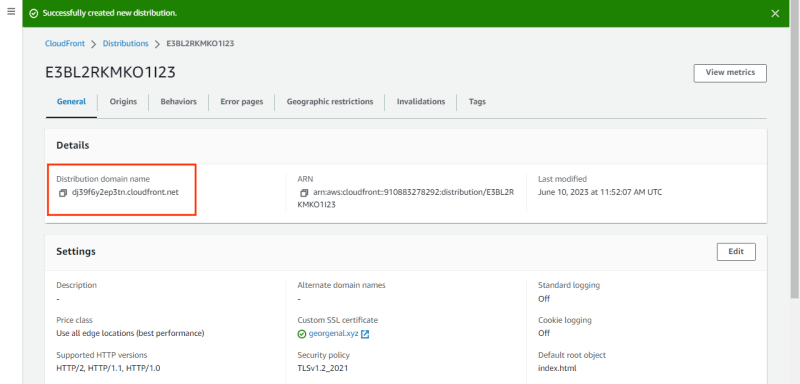
Your CloudFront Distribution is ready with this quick configuration guild.

d. Copy and paste the Cloudfront distribution domain name on a browser to access the website

Step 4:
** Implementing CI/CD through AWS CodePipeline**

Step 5:
Connect GitHub Account to CodePipeline
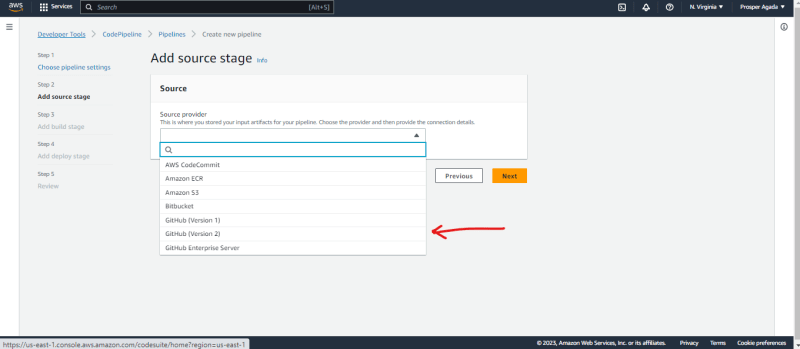
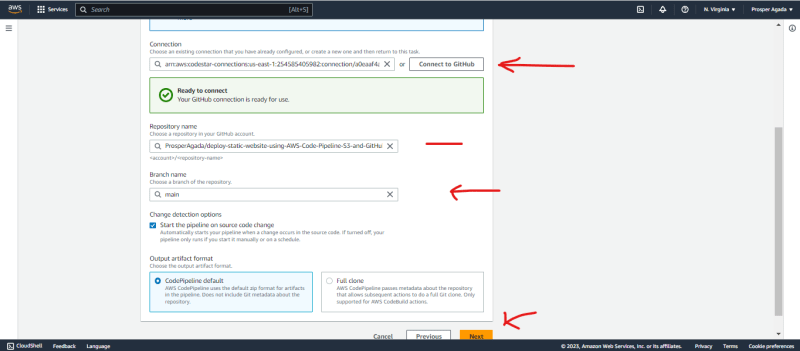
Step 6:
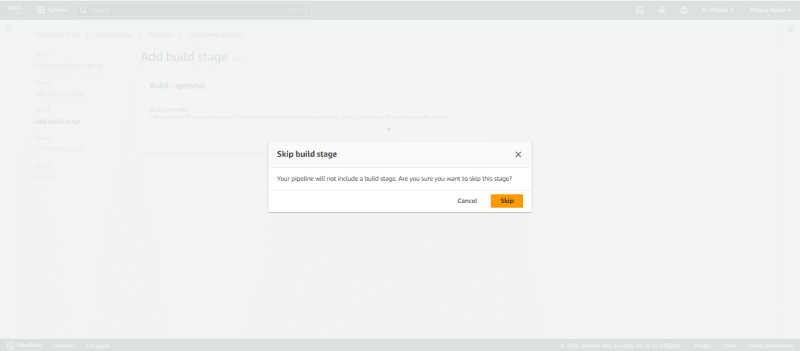
Configure CodePipeline and deploy CI/CD pipeline

a. You can skip the build stage -> create

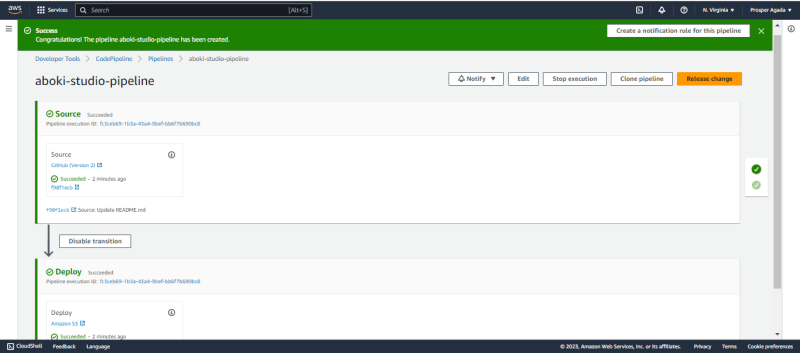
Step 7:
Amazing!!..the pipeline has been created, next we need to verify it.
Step 8:
Verify functionality of CI/CD Pipeline
Go to the github repo and edit any file, in my case i will edit the Readme file
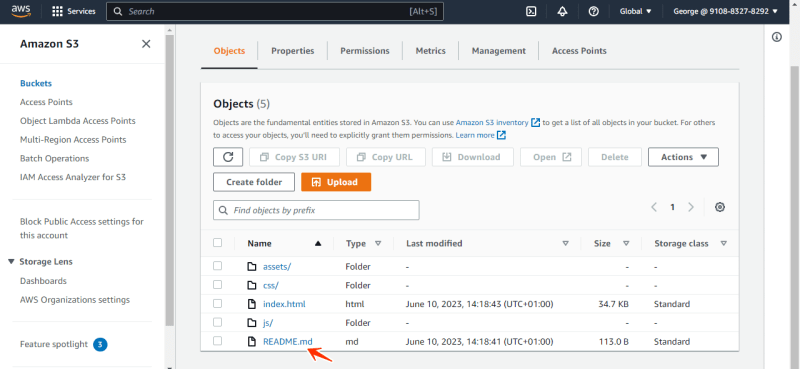
Once that is done, you will notice the pipeline is triggered,
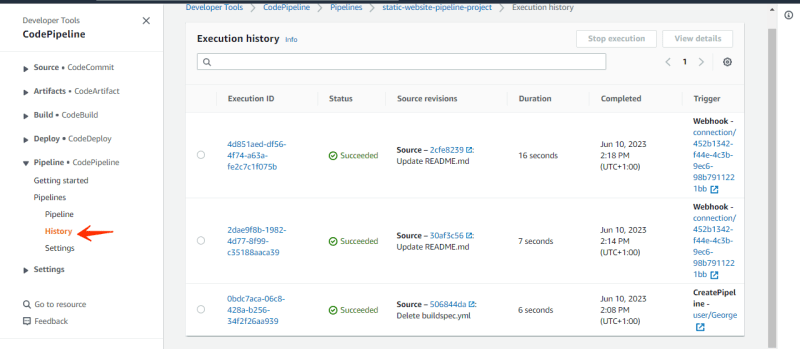
Finally, paste the domain name of the cloudfront distribution on a browser to access the website

Yes the website can still be acessed, click on the "tell me more" button to see more.
Conclusion
In conclusion, if you follow all the steps mentioned above, you will succeed in deploying a any static website with AWS Codepipeline using Github and S3 bucket.

Posted on June 29, 2023
Join Our Newsletter. No Spam, Only the good stuff.
Sign up to receive the latest update from our blog.

