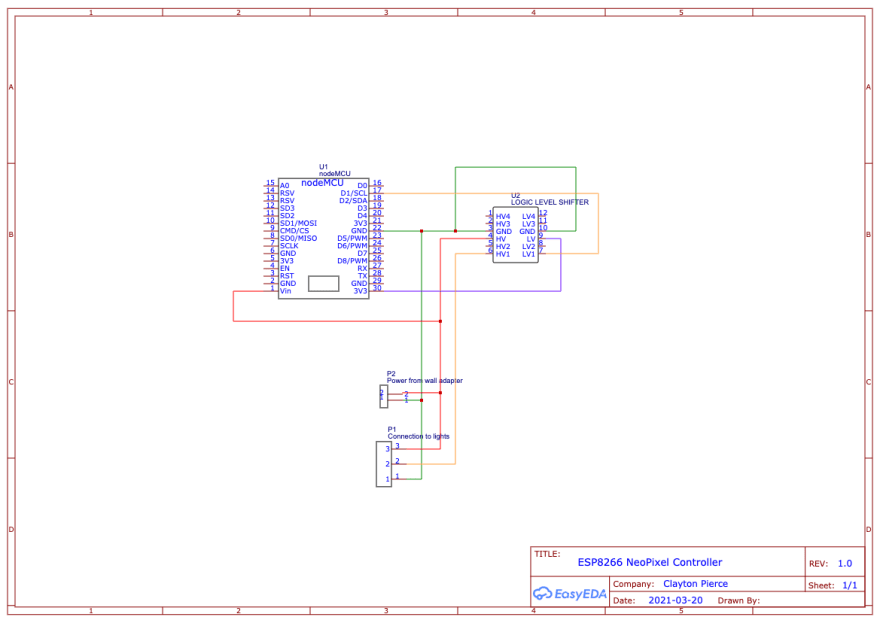
How to control addressable RGB lights with a ESP8266. Part 2 of 3.

x
Posted on March 21, 2021
Please see my previous blog here to get up to speed. You should have serial access to the micropython prompt at this point. Connect to your board and run the following code in the REPL to setup our string of lights. For this example, I'm using a 1 meter long string with 144 lights.
from machine import Pin
from neopixel import NeoPixel
lights = NeoPixel(Pin(5), 144)
Now we have an instance of NeoPixel we can manipulate. Run the following to make sure your lights work. Warning. If you have too many lights connected, this is where you will start to have problems. Turning all the lights on at full brightness will draw the most current. Be careful
lights[0] = (50,50,50)
lights.write()
This turns the first light on and you should see a white light. The syntax is the same for the rest of the lights. lights[index of the light you want] = (red, green, blue) intensity
Now, let's light all the lights in the string. The max value for each color is 256, but the color intensity is inverse to the intensity. Numbers less than 50 will give good results most of the time.
for i in range(144):
    lights[i] = (20,20,20) # not too bright
    lights.write()
This will draw each light as the loop progresses and you can watch the string of lights fill in, or you can wait until the loop is done and then call lights.write() to draw the string all at once. The latter is much faster.
Time to get some random color involved. Try this.
from random import getrandbits
for i in range(144):
    lights[i] = (getrandbits(3), getrandbits(3), getrandbits(3)) # numbers higher than 4 lead to lots of white lights
    lights.write()
Similar to before, but every light should be a random color now.
Sticking with the random color theme this will assign a random color to the string and update the entire row 10 times a second. Simple and easy effect.
from utime import sleep
try:
    while 1:
        for i in range(144):
            lights[i] = (getrandbits(3), getrandbits(3), getrandbits(3))
        lights.write()
        sleep(.1)
except KeyboardInterrupt:
    print('Done')
You can also move the lights.write() command into the loop for a slightly different effect.
try:
    while 1:
        for i in range(144):
            lights[i] = (getrandbits(3), getrandbits(3), getrandbits(3))
            lights.write()
        sleep(.1)
except KeyboardInterrupt:
    print('Done')
This will sweep new colors down the string for an interesting effect. Moving the sleep(.1) method and changing its duration will have interesting effects as well.
What to expect in part 3
In the final chapter, we are going to make a simple web application to control the lights from anywhere. The WiFi stack on the ESP8266 will make this pretty easy. We will also be making custom firmware with the environment we set up in the first chapter. Once it's complete, the ESP8266 will allow control of the lights over WiFi. Stay Tuned.

Posted on March 21, 2021
Join Our Newsletter. No Spam, Only the good stuff.
Sign up to receive the latest update from our blog.
