Migrating a React project from AWS Appsync to Fauna

Akuagwu Philemon
Posted on December 5, 2020
Introduction
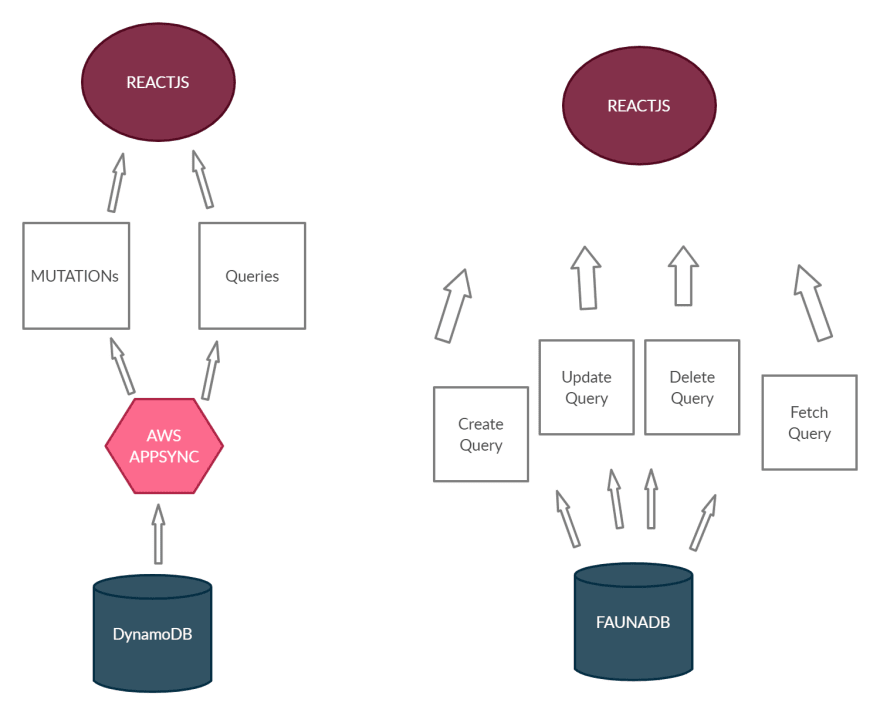
In 2020, there is a variety of technology stack that can be utilized to create a website, and sometimes a developer may require to migrate an already existing project from one tech stack to another. In this article we are going to migrate an AWS Serverless (Appsync)
Graphql application to a Fauna Graphql Application.
The application we are Migrating
The application is a “todo application” that uses AWS DynamoDB as its Database and AWS Appsync service currently. We are going to convert the current application to a Fauna application.
Why Fauna
Fauna is a serverless database that provides you with CRUD capabilities and abstract a lot of “Under the hood” processes You might want to use Fauna because:
- Fauna is fast and scales well
- Fauna is relatively easy for beginners to get started with
- The current project rely on two AWS services (Appsync and DynamoDB) but with Fauna it will rely on one
- Fauna currently uses the Calvin protocol to maintain several full and consistent copies of the data, these data are called replicas, with the ability to both read and write on every node.
- The learning curve for Fauna is relatively less than learning AWS appsync
Prerequisite for the Article
- Basic Knowledge of React
- Basic Graphql knowledge
- Using Apollo with React
- NodeJS Installed on your PC
- Knowledge of Redux will be a plus (as we will be using redux for state management)
- Git & GitHub knowledge
Getting Started
To Get Started and follow along do the following :
Clone the repo from GitHub by running the following command in your git bash terminal
$ git clone https://github.com/PhilzAce1/FaunaDB-Todo-app.git
Git checkout to branch “ready-amplify”
$ git checkout ready-amplify
Install all dependencies required to make the application work
$ yarn install
Lastly for your application to work You will have to setup the Appsync service using Amplify or on the Amazon console
Overview of the Current application
The Current Application makes use of the “Aws-amplify” package as the GraphQL client, we are going to be making mutations and queries using the Aws Appsync package
Graphql Client setup
Schema
# Todo -> GraphQL type

type Todo {

name: String! #title of the task

completed: Boolean #task completed

}

# Graphql query type -> Specify Queries you want to make available

type Query {

allTodos: [Todo!] #return all Tasks created

# fetch tasks by the value of their "completed property

todosByCompletedFlag(completed: Boolean!): \[Todo!\]

}
Setting up Fauna
Setting up Fauna is very easy and I am going to walk you through from scratch :
Step 1: Go to the Fauna website Fauna
if you have an account, you can log in, if you do not have an account, simply create one
Creating an account is really easy and straightforward.
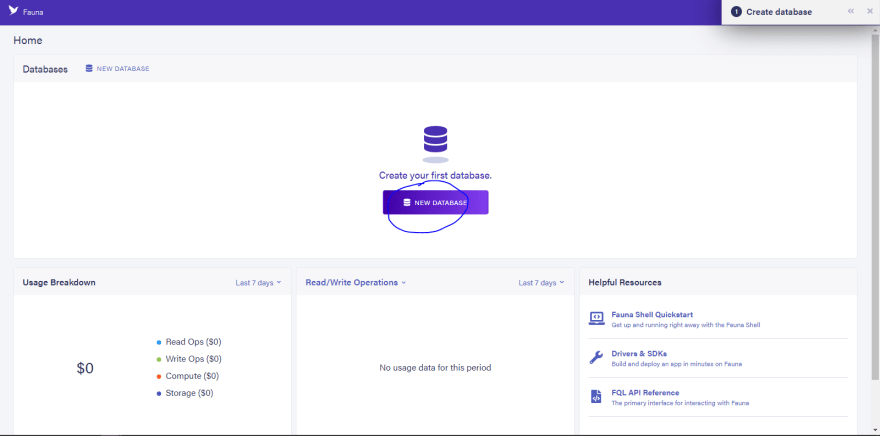
Step 2:
Create a new Database
Step 3:
Step 4:
In this Step, I will compare an AWS Appsync Graphql Schema with a Fauna Schema
On the right-hand side we have the AWS Appsync schema, the “@model” directive will create a CRUD resolver for the “Todo” Graphql Type,
Similarly on the Left Fauna will automatically Create Resolvers based on the schema, you need not provide “directives”
Step 5:
Import the GraphQL schema that you created
After importing the Graphql schema, you will be routed to a Graphql playground where you can test and create queries and mutations. Click on the “Docs” tab in the sidebar to check out the available queries and mutations.
Provisioning a New Database Key
After you create and configure your database you need a way for client applications to access it.
The key generated will be used to specify and authenticate our Fauna database. It will also help us access the database to perform, create, read, update, and delete activities from the Client (React) application. Note that authentication and authorization are topics on their own .
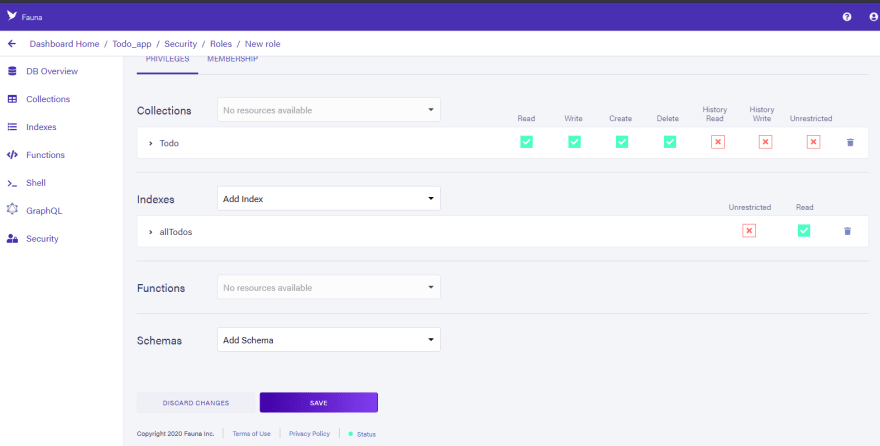
The application key generated has a set of permissions that are grouped together in a “role”.
We begin by defining the role that has the necessary CRUD operations on tasks
Step 1:
Click on the “Security” tab and then the “New key” button
By default, there are two roles, “admin” and “server”. We could use these roles for our key, but it is not a good idea because they provide authorization for “Database level operations” such as creating a new collection or even deleting the database itself.
In that case, create a “Custom role”.
Then you click on the “New Custom role” button
Step 2:
Select permissions and then save
Step 3:
After you save the new Role. You will be able to access it when you want to create a new Key
Simply create a new Key.
This is the access key that will be used to authenticate your connection with the Fauna database you created.
For security reasons, we are going to load the Key from a “.env.local" file which is in the root level of your react application.
In this file, add an entry for the generated key:
REACT_APP_FAUNA_SECRET=**fnAD7S71UlACBcBWehe5q06JQeDRNgJUiNTbvUoN**
NOTE:
- The name of the file should be
.env.localand not just.env - Environment Variables that should be used by a react application should start with “REACT_APP_”…
- make sure that you also have a
.gitignorefile in your project’s root directory that contains.env.localso that your secrets won’t be added to your git repo and shared with others. - You’ll have to explicitly stop and restart your application with
yarn startin order to see these changes take place.
Connecting React to Fauna
With AWS Appsync we simply made use of the “aws-amplify” package to interact with the graphql api. But with Fauna we are going to be making use of Apollo client.
To install the relevant Apollo packages we’ll need, run:
yarn add @apollo/client graphql @apollo/react-hooks
Now in your src directory of your application, add a new file named client.js with the following content:
import { ApolloClient, InMemoryCache } from "@apollo/client";

export const client = new ApolloClient({

uri: "https://graphql.fauna.com/graphql",

headers: {

authorization: `Bearer ${process.env.REACT_APP_FAUNA_SECRET}`,

},

cache: new InMemoryCache(),

});
What the code is doing here is simply configuring Apollo to make requests to our Fauna database. Specifically, the uri makes the request to Fauna itself, then the authorization header indicates that we’re connecting to the specific database instance for the provided key that we generated earlier.
Note: The authorization header contains the key with the “CustomRole” role (the role we created earlier), and is currently hardcoded to use the same header regardless of which user is looking at our application. The tasks created by a user will not be specific to that user.
After that, We will replace the code in the index.js with
import React from 'react';

import ReactDOM from 'react-dom';

import { ApolloProvider } from '@apollo/client';

import './index.css';

import App from './App';

import { client } from './client';

ReactDOM.render(

<React.StrictMode>

<ApolloProvider  client={client}>
<App />

<ApolloProvider \>

<React.StrictMode \>,

document.getElementById('root')

);
Let’s compare the AWS Appsync configuration with the Apollo configuration in the index.js
On the left, you can see the configuration for the AWS Appsync and on the right, we have the configuration for Apollo.
You can test your app by running Yarn start if everything still works
Congratulations You are a rock star
Migrating CRUD operations
The next thing you have to do is to Migrate the CRUD operations. Since it is a Todo application, we are going to be creating tasks, marking them as completed, getting already created tasks and finally deleting them Using Fauna and React-Apollo client. We will Compare Appsync and Fauna Mutations and queries
Adding tasks to the Todo App
Explanation:
On the Left hand (Appsync) , Notice the structure of the mutation. The API and graphqlOperation functions are imported from aws-amplify package.
On the Right-hand (Apollo),
-
useMutation- is imported from @apollo/react-hooks and is used to execute graphql mutations -
gql- is imported from “graphql-tag” package that we installed initially and it’s needed when making graphql api calls with Apollo -
createItem- useMutation hook returns an array of functions and objects, the first element of the array is a function used to make mutations. The arguments passed to the mutation is the variable of the graphql mutation -
loading- the second element of the array returned from the “useMutation” hook is an object. loading becomes “true” after the mutation has been executed successfully -
createTodo- is a const that contains the graphql mutation. You can test and structure a mutation using the graphql playground
Getting all Tasks
Explanation :
The useQuery hook is similar to the useMutation hook. useQuery gook is used to make graphql query request. It returns an Object. “data” property contains the response data of the query, while the “loading” property is the status of the request’s completion
Deleting Tasks
Explanation:
The onComplete callback function is called when a mutation is resolved. deleteTask is a function used to perform a delete mutation. The arguments passed are the variables in the graphql mutation.
Marking task as Complete (Update)
Note:
updateTask function is similar to the previous mutations, but the first property of the variable object is the “id” property. The data property will contain all Fields in the database that you wish to update.
Conclusion
If you made it this far congratulation In this article we migrated an AWS Appsync application to a Fauna application by creating a new database, connecting the fauna database to our react application and then we compared the structure of queries and mutations in Appsync and Fauna. Fauna is a really cool innovation and it is something I will advise every developer to start using. You should also check out their official documentation for more information.

Posted on December 5, 2020
Join Our Newsletter. No Spam, Only the good stuff.
Sign up to receive the latest update from our blog.


