Javier Viola
Posted on July 19, 2021
Welcome back! this time our goal is adding the front-end to interact with our api and allow the users to list, create, update and delete dinos.
Meet Tera
Tera is a templating engine, inspired by Jinja2 and Django. There are other options like handlerbars and askama, but in this case I prefer to use tera because I'm familiarized with the syntax.
Adding the rendering machinery
First we need to add the deps we need, in this case we will using tera and tide-tera, the last one exposes an extension trait that adds two functions tera:
- render_response
- render_body
[dependencies]
...
tera = "1.5.0"
tide-tera = "0.2.2"
Then we need to create a directory to store our templates, in our case at top level of the app directory ( next to the src directory )
mkdir templates
Let's now add our basic templates, we will use a base layout and extend it for each page.
// layout.html
<!DOCTYPE html>
<html lang="en">

<head>
  <title>{% block title %}{% endblock title %}</title>
  <meta charset="utf-8">
  <meta name="description" content="Tide basic CRUD">
  <meta name="author" content="">
  <meta name="viewport" content="width=device-width, initial-scale=1">
  <meta name="apple-mobile-web-app-capable" content="yes" />
  <meta property="og:title" content="Tide basic CRUD" />

  {% block additional_head %}
  {% endblock additional_head %}
</head>

<body>
  {% block content %}
  {% endblock content %}
</body>

</html>
And now our index page
//index.html
{% extends "layout.html" %}

{% block title %}
 {{title}}
{% endblock title %}

{% block content %}
<h2> Hi there!</div>
{% endblock content %}
So, we just created out first page ( at least the template ). If you are not familiarized with the tera syntax you can check the docs, but in a nutshell:
-
{{and}}for expressions -
{%or{%-and%}or-%}for statements -
{#and#}for comments
And block / endblock allow to extends.
Great! we need now to go back to our tide server and implement the serve ( and rendering ) logic.
First we need to add the declarations for the new deps
...
use tera::Tera;
use tide_tera::prelude::*;
And update our State struct to hold an instance of tera.
#[derive(Clone, Debug)]
struct State {
    db_pool: PgPool,
    tera: Tera
}
Then we need to modify our server fn to add the instantiation of tera and modify the endpoint to render the index.html template
async fn server(db_pool: PgPool) -> Server<State> {
    let mut tera = Tera::new("templates/**/*").expect("Error parsing templates directory");
    tera.autoescape_on(vec!["html"]);

    let state = State { db_pool, tera };

    let mut app = tide::with_state(state);

    // index page
    app.at("/").get( |req: tide::Request<State> | async move {
        let tera = req.state().tera.clone();
        tera.render_response("index.html", &context! { "title" => String::from("Tide basic CRUD") })
    } );
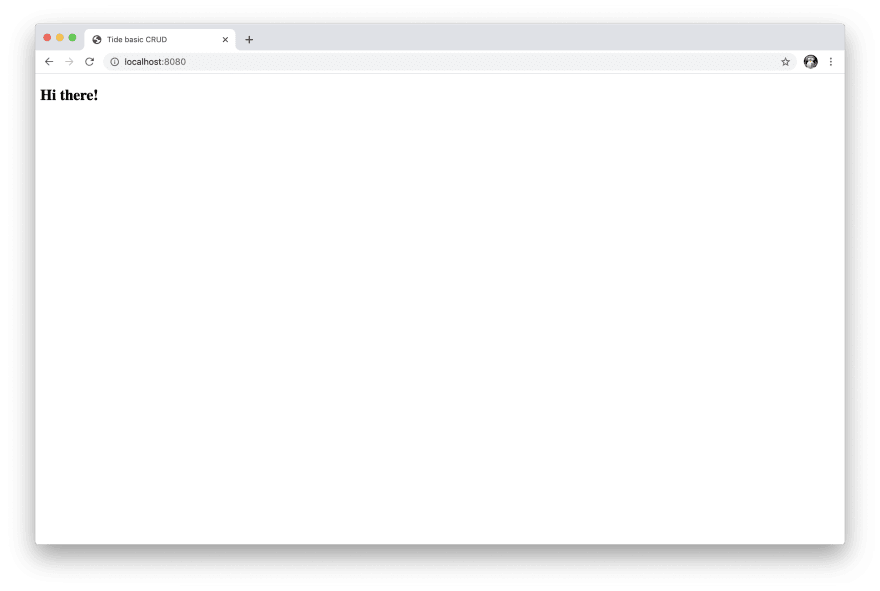
Great! we can now run the server and check our first page!
Awesome! It's doesn't do much but the machinery is in place now :-)
Let's start working on the index, we want to list the dinos we have and allow users to create, update and delete.
List our dinos
The index of our app will produce a list of the dinos stored in our database, so the first thing we need to do is get that list to then inject in the context of our template
    // index page
    app.at("/").get( |req: tide::Request<State> | async move {
        let tera = req.state().tera.clone();
        let db_pool = req.state().db_pool.clone();
        let rows = query_as!(
            Dino,
            r#"
            SELECT id, name, weight, diet from dinos
            "#
        )
        .fetch_all(&db_pool)
        .await?;
        tera.render_response("index.html", &context! {
            "title" => String::from("Tide basic CRUD"),
            "dinos" => rows
         })
    } );
And in our template
{% block content %}
{% if dinos %}
    <table class="u-full-width">
        <thead>
            <tr>
                <th>Id</th>
                <th>Name</th>
                <th>Weight</th>
                <th>Diet</th>
                <th></th>
                <th></th>
            </tr>
        </thead>
        <tbody>
            {%for dino in dinos%}
            <tr>
                <td>{{dino.id}}</td>
                <td>{{dino.name}}</td>
                <td>{{dino.weight}}</td>
                <td>{{dino.diet}}</td>
                <td><a href="/dinos/{{dino.id}}/edit"> Edit </a></td>
                <td><a href="/dinos/{{dino.id}}/delete"> Delete </a></td>
            </tr>
            {% endfor %}
        </tbody>
    </table>
{% endif %}

<a href="/dinos/new">Create new Dino</a>
{% endblock content %}
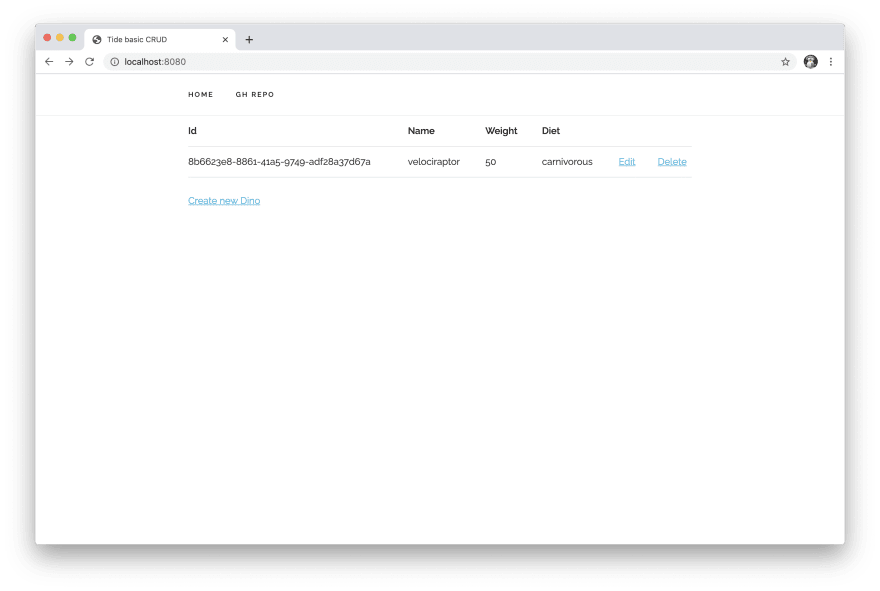
Awesome! but doesn't looks good yet, let's add some styles to make it looks good.
The front-end of this app is inspired on this example app that use skeleton css and we will use that framework too. So we will need to serve some static files.
Serve static files
Tide have a handy way to serve static files, you can define the path and the directory you want to serve and those files are server statically from disk.
app.at("/public").serve_dir("./public/").expect("Invalid static file directory");
In our case we will serve the public directory, so we need to create that directory and place the static assets we want to serve there.
mkdir -p public/{js,css,images}
And update our base template to include those files
Now look much better! Let's now add the form to create a new dino.
Create and edit
Both create and edit pages will be using the same template, but in the case of edit will be pre-populated with the dino information and each action will have it's own route
/dinos/new/dinos/{id}/edit
Let's start with the form template
{% extends "layout.html" %}

{% block content %}
<form>
  <input id="id" name="id" type="hidden" value="{% if dino %} dino.id {% endif %}">
  <div class="row">
    <div class="ten columns">
      <label for="name">Name</label>
      <input class="u-full-width" id="name" name="name" type="text" placeholder="T-Rex" value="{% if dino %} dino.name {% endif %}">
    </div>
  </div>
  <div class="row">
    <div class="ten columns">
      <label for="weight">Weight</label>
      <input class="u-full-width" name="weight" id="weight" type="text" placeholder="" value="{% if dino %} dino.weight {% endif %}">
    </div>
  </div>
  <div class="row">
    <div class="ten columns">
      <label for="diet">Diet</label>
      <input class="u-full-width" name="diet" id="diet" type="text" placeholder="" value="{% if dino %} dino.diet {% endif %}">
    </div>
  </div>

  <input class="button-primary" type="submit" value="Submit"> <a class="button" href="/">Cancel</a>
</form>
{% endblock %}
Nothing fancy, just extended our base template and add some inputs with the value pre-populated only if the dino info is present in the context. We could use some macros to generate the fields but works ok for now.
And in the backend we need to add the two endpoints
    // new dino
    app.at("/dinos/new").get( |req: tide::Request<State> | async move {
        let tera = req.state().tera.clone();

        tera.render_response("form.html", &context! {
            "title" => String::from("Create new dino")
         })
    } );
    // edit dino
    app.at("/dinos/:id/edit").get( |req: tide::Request<State> | async move {
        let tera = req.state().tera.clone();
        let db_pool = req.state().db_pool.clone();
        let id: Uuid = Uuid::parse_str(req.param("id")?).unwrap();
        let row = query_as!(
            Dino,
            r#"
            SELECT  id, name, weight, diet from dinos
            WHERE id = $1
            "#,
            id
        )
        .fetch_optional(&db_pool)
        .await?;

        let res = match row {
            None => Response::new(404),
            Some(row) => {
                let mut r = Response::new(200);
                let b = tera.render_body("form.html", &context! {
                        "title" => String::from("Edit dino"),
                        "dino" => row
                    })?;
                r.set_body(b);
                r
            }
        };

        Ok(res)
    } );
Nice!, but we are starting to have some duplicate code between the endpoints for the rest api and the endpoint for this pages. For the moment let's focus in the functionality and we will refactor this in the
next post.
Now we need a way to consume our api for persists the dinos, in this case we will create a minimal api client with javascript fetch since we are focused now in how to integrate tera and tide and not in the front-end.
You can check the minimal client api in the PR.
Now we can start adding dinos :)
That's all for today, we have a minimal working CRUD with both api and front-end. In the next post we will be refactoring some of the dup code and adding a new abstraction layer.
As always, I write this as a learning journal and there could be another more elegant and correct way to do it and any feedback is welcome.
Thanks!

Posted on July 19, 2021
Join Our Newsletter. No Spam, Only the good stuff.
Sign up to receive the latest update from our blog.


