Rely on JavaScript's Intersection Observer to Execute Code When in View (or Not)

Paige Niedringhaus
Posted on October 24, 2022
It's the small things that matter
When dealing with the business of building websites on a daily basis, I can't help but start to notice that what separates the good sites from the great ones, is that the great ones pay close attention to the small details.
Little page animations, a button that disables after form submission, or when elements on the page only reveal themselves when the user scrolls to that portion of the page. You might not immediately recognize that this sort of nicety is there to improve the user experience, but it becomes more obvious when it's missing: a video that won't stop playing even after you've scrolled away, an error message that you can't see until you scroll up the page from the submit button that failed, there's a million little annoyances like this.
Recently, I was building a new About Us page for my company's marketing site, and in the mockup the designer gave me, there were some cool animations that showed a series of cards toward the bottom of the page that slid into view only when the user had scrolled far enough down the page to see them. It looked really slick, and it turns out that nowadays just a little CSS and JavaScript was all that was needed to make this possible, and a host of other handy interactions.
Today, I'll show you how the JavaScript Intersection Observer API can easily control how elements react based on their visibility in the viewport.
Below is a video showing how the cards at the bottom of this page don't animate and slide into view until the viewer has reached them: that's one example of Intersection Observer at work.
Intersection Observer
The Intersection Observer API, if you're not familiar with it, provides a way to asynchronously observe changes in the intersection of a target element with an ancestor element or a top-level document's viewport.
Put simply: it can tell if an element is in view or not, and cause things to act accordingly.
Before Intersection Observer existed this type of intersection detection was clunky with lots of event handlers and loops in the main thread, potentially causing performance problems as well as cluttered code.
An intersectionObserver, on the other hand, is created and assigned a callback function that runs whenever a threshold is crossed in one direction or the other for a particular element in the DOM that it is assigned to "observe."
It can also be given an optional series of options that tell it when to invoke the callback function:
- The
root- the element used as the viewport for checking visibility of the target. - The
rootMargin- a set of values around the root element's bounding box to grow or shrink before computing intersections. - The
threshold- a number that indicates at what percentage of the target's visibility the observer's callback function should be executed. (For example, the default 0 means as soon as even one pixel is visible the callback will run, and 1.0 means the threshold isn't considered passed until every pixel of an element is visible).
There's plenty more nuance to how the intersection observer can be fine tuned and leveraged to cool effect, but what I've covered above should be enough to help you follow the examples I'll be demoing. If you'd like to learn more, I'd recommend reading the docs from Mozilla, which include some great code examples to play with.
All of this writing may not make perfect sense yet, so let's look at some code examples where you can see intersection observers in action.
Intersection Observer code examples
There's a couple of different scenarios where intersection observer is being used on the marketing site in unique ways, and I'm going to show both of them to you to help demonstrate how flexible it can be.
Run animations only when the user will see the result
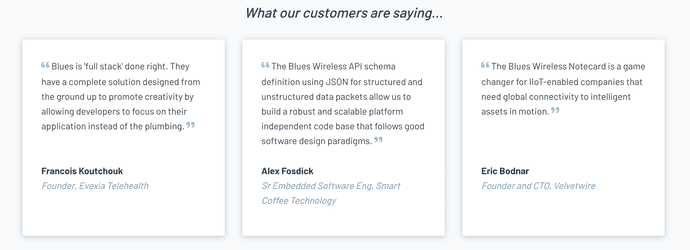
These cards slide into view once the user can see them on screen with the help of intersection observer.
The first example I'll show you is the one I described in the introduction to this blog: it animates a series of cards on-screen, but only when the user has scrolled down the page far enough to view the cards.
Note:
The site code I'm referencing is written in Hugo, a popular, open source, static site generator written in Go. Like many SSGs, it relies on templates to render the majority of the site's HTML, and for the purposes of clarity in this article, I've replaced Go variables injected into the template with the generated HTML.
Let's look first at the HTML and JavaScript for the three cards being rendered in the page. This code snippet shows just one of the cards, but it's the same for all of them.
quote-cards.html
<div class="row">
    <div class="col-lg-4 card-group customer-quote-card">
      <div class="card">
        <div class="card-body">
          <p class="customer-quote-text">
            <img
              class="customer-quote-img"
              src="/images/about/quote-left-solid.svg"
              alt="decorative left quotation mark"
            />
            "This is a quote here."
            <img
              class="customer-quote-img"
              src="/images/about/quote-right-solid.svg"
              alt="decorative right quotation mark"
            />
          </p>
          <p class="customer-quote-source">
            Source of the quote
          </p>
          <p class="customer-quote-source-role">
            Role and company the source works for
          </p>
        </div>
      </div>
    </div>
  <script type="text/javascript">
    /* this code keeps the cards from animating into view until a user's scrolled down far enough to see them */
    var quoteCard = document.querySelectorAll(".customer-quote-card");

    var observerOptions = {
      threshold: 0.7,
    };

    var callback = (entries) => {
      entries.forEach((entry) => {
        if (entry.isIntersecting) {
          entry.target.classList.add("animated");
        }
      });
    };

    var quoteCardObserver = new IntersectionObserver(callback, observerOptions);

   // loop through each card available and add this observer to it
    quoteCard.forEach((card) => {
      quoteCardObserver.observe(card);
    });
  </script>
</div>
The HTML in the snippet outlines the card element and the details contained within that card: the quote, the name, and the company and role of the person being quoted.
The JavaScript at the bottom of the snippet is where intersection observer comes into play. First, a variable named quoteCard is created to target the customer-quote-card CSS class on the div that surrounds each card.
Then, the observerOptions variable is declared with a threshold of 0.7 - this will be passed to the IntersectionObserver object shortly, and will require that at least 70% of the card be visible before animating it into view.
A callback() function is defined, which loops through a list of items and for each item, if the item isIntersecting (a boolean value which is true if the target element intersects with the intersection observer's root), the animated class is added to that item's CSS classes. Essentially, this function will add the CSS class to each card necessary to trigger the animation and bring them into view on the page when the isIntersecting threshold is reached.
Next, a new IntersectionObserver instance is instantiated as quoteCardObserver and the callback() and observerOptions are passed in.
Finally, for each quoteCard object, the quoteCardObserver function is attached to the card.
With the HTML and JavaScript is set up, it's time to add the CSS (remember that animated CSS class mentioned earlier?) to animate the cards on screen when the intersection observer's callback() function fires.
about.scss
.card-group {
  opacity: 0;
}

.animated {
  animation: slideLeft 1.5s;
  animation-delay: 0s;
  animation-fill-mode: backwards;
  opacity: 1;
}

@keyframes slideLeft {
  0% {
    transform: translateX(100%);
    opacity: 0;
  }

  100% {
    transform: translateX(0);
    opacity: 1;
  }
}
In the SCSS code, the card-group class starts out with an opacity of 0 to keep the cards hidden from view.
The animated class is created with an animation property designating the slideLeft keyframe with a duration of 1.5 seconds.
In addition to the animation property, the animation-delay, animation-fill-mode and opacity are also defined on this class.
-
animation-delay: 0;ensures the animation will play immediately, -
animation-fill-mode: backwards;means the element will apply the values defined in the0%keyframe as soon as it is applied to the target (i.e. the card will stay hidden with an opacity of 0 as soon as it's rendered in the DOM). -
opacity: 1;once theslideLeftkeyframe animation has ended, the card will have 100% visibility on-screen.
And last but not least, the @keyframes animation sequence is defined. There are only two keyframes defined (0% and 100%) to indicate the cards start with no opacity (opacity: 0;) and 100% off the screen to the right (transform: translateX(100%);, and when it ends they'll be completely visible (opacity: 1;) and on screen (transform: translateX(0);).
In the end, it produces this effect:
Note:
CSS animations are beyond the scope of this tutorial, but if want to study them in more depth, I'd recommend starting here - they're very cool!
Great! That's one example of how intersection observer can be used to control animation timing so a user will see it. Now let's consider another option.
Play a video only when the user can see it
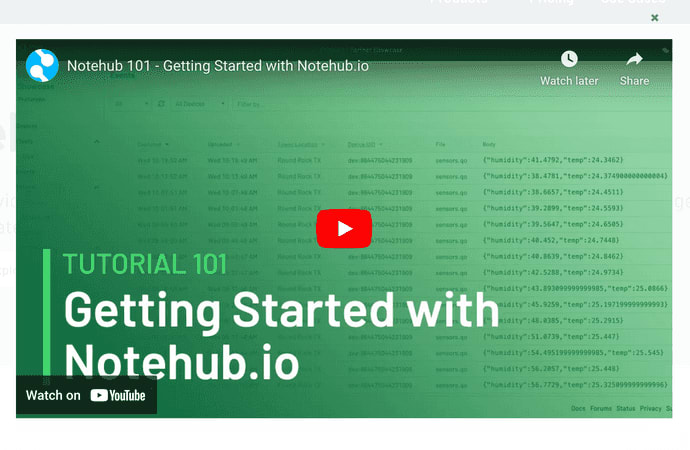
This video will only play when it is visible to the user and they click the play button. If user dismisses the modal by clicking somewhere else on the page, the modal will hide and video stop playing.
The second example I will share concerns a video modal that stops playing when the modal is not visible. When a button is clicked, the modal does a full page takeover where the video player sits at the center of the viewport. If the user clicks somewhere besides the video while it's playing, the modal is dismissed and hidden from view and the video will stop playing. This is possible because of intersection observer.
Let's take a look at the code that makes this happen.
video_modal.html
<div class="modal">
<div class="modal-dialog">
<div class="modal-content">
<div class="modal-header">
<button
type="button"
class="close"
data-dismiss="modal"
aria-label="Close"
>
<span aria-hidden="true">×</span>
</button>
</div>
<div class="modal-body embed-responsive-16by9">
<iframe
width="560"
height="315"
src="https://www.youtube.com/embed/4q1qqzDzJeQ"
title="YouTube video player"
frameborder="0"
allowfullscreen
></iframe>
</div>
</div>
</div>
<script type="text/javascript">
var iframe = document.querySelector("iframe");
var ytsrc = iframe.src;
var observer = new IntersectionObserver(
function (entries) {
// isIntersecting is true when element and viewport are overlapping
// isIntersecting is false when element and viewport don't overlap
if (entries[0].isIntersecting === false) iframe.src = "";
else iframe.src = ytsrc;
}
);
observer.observe(iframe);
</script>
</div>
In the code above, a video modal and an iframe video embed from YouTube are created in the HTML.
In the JavaScript directly below it, an iframe variable is defined focused on the <iframe> HTML element, and a ytsrc variable is defined to keep track of the the iframe's video source - this will be used inside the intersection observer's callback.
Next, a new intersection observer is initialized (observer), and this one's callback function iterates through the list of entries it receives, and if the first entry in the list is not intersecting (i.e. the video iframe and the viewport aren't overlapping, or rather, the modal's not visible to the viewer), the iframe's src is set to an empty string so no video URL is available to play. If the entry is intersecting (i.e. the video modal is visible in the viewport), the iframe's src is set to the ytsrc variable: the actual YouTube video URL.
Finally, the new observer object is told to observe the iframe variable, so whenever the iframe is in the viewport (e.g. when a user clicks a button to open the modal), its video source is the YouTube video. Whenever that changes (and the modal is hidden from view), the video URL is set to an empty string.
And this results in no video continuing to play when the video modal is dismissed.
To see how it works, watch this video with the sound on to hear how the audio ceases when the modal is dismissed and hidden from view.
Pretty useful, huh?
Conclusion
Small details can make for great user experiences, whether it's a video that stops playing once a user's scrolled past it or an animation that only happens when the elements are in view for a user.
While these little interactions once required a good deal of extra code and awareness of how long the main thread might be blocked, the introduction of the Intersection Observer API simplified things dramatically. Now, a single object allows a developer to specify an element to observe, a callback function to do something, and even fine tuned the function to only fire when certain conditions are met. It's quite useful in many scenarios, actually.
Check back in a few weeks — I’ll be writing more about JavaScript, React, IoT, or something else related to web development.
If you’d like to make sure you never miss an article I write, sign up for my newsletter here: https://paigeniedringhaus.substack.com
Thanks for reading. I hope this demo of how to use the Intersection Observer API helps you out in your future endeavors. I know I really appreciate great website experiences, and it's always good to have another tool in the arsenal to make them possible.
References & Further Resources

Posted on October 24, 2022
Join Our Newsletter. No Spam, Only the good stuff.
Sign up to receive the latest update from our blog.


